The "Other" Project
- Thread starter mikester
- Start date
You are using an out of date browser. It may not display this or other websites correctly.
You should upgrade or use an alternative browser.
You should upgrade or use an alternative browser.
- Status
- Not open for further replies.
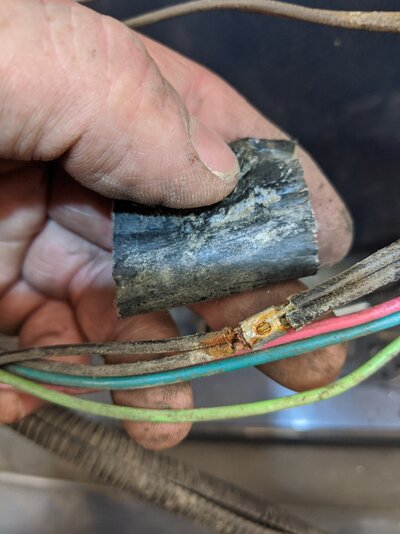
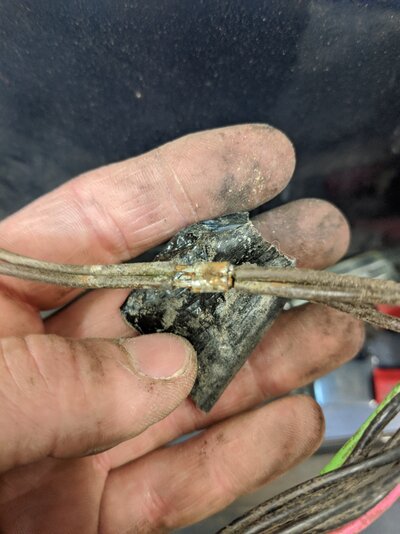
Mine were corroded in my headlight harness
I remade the ground wire splices for the light harness in my wagon. I used uninsulated butt connectors that I crimped and soldered. Then covered with adhesive shrink tubing.
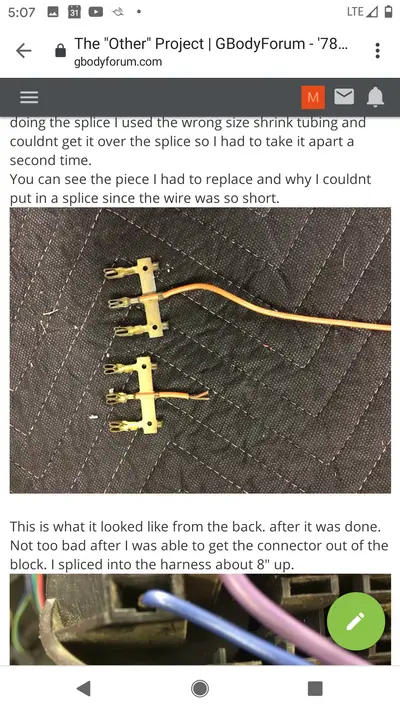
If you mean the triple buss that came out of a Monte at the junkyard. That goes into the back of the fuse box and each terminal is one half of a fuse spade. The other one in the photo with the short piece of wire is what I had to repair. Wasnt enough wire left to fix with a splice.Where did you get those connectors for the fuse panel? I dug into my taillight harness and need to replace at least one wire all the way back to the connector. Do you have a part number? Thanks in advance
This is why I don't like the crimped and taped splices the wires were so corroded 6 in away from the splice that I had to replace the wire all the way back to the terminal
The wiring in both of my cars is actually in really good condition. The repair done in the 81 was minor all things considered.
The dash wiring in my wagon was also in great shape. I added aftermarket gauges so they have their own wiring. The light harness was good but I couldnt get one front directional to work so I tore into the harness thinking there might be a ground problem. Turned out to be the plug on the column. Wasnt snapped in all the way. At least I know the light harness will be good for a long time. LOL
The engine harness was new from the bulkhead out. That took a little time.
Got some more pictures to post up. I tried to get as much done as I could before I went in for the valve job.
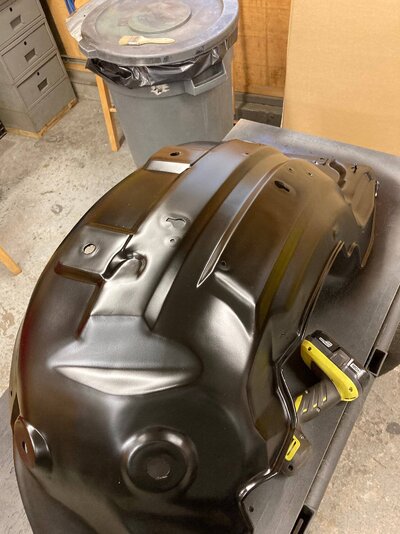
Resprayed the inner fender with a fresh qt of Hot Rod black. This time it came out the right color.
Not a perfect place for the box but hopefully it wont crap out right away. Its an old box but brand new. I bought it when I first started working on the car.
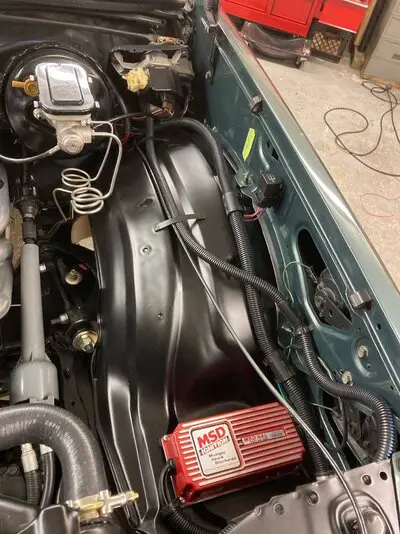
Its runs so Im leaving it alone. LOL
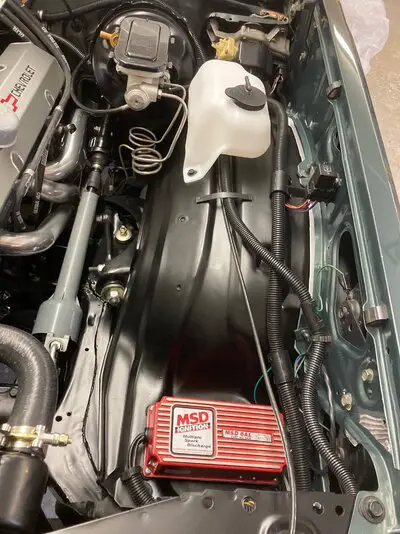
Cleaned up the TH400 and put in a couple of new gaskets and rear seal. Hit it with some aluminum paint while I had it out.

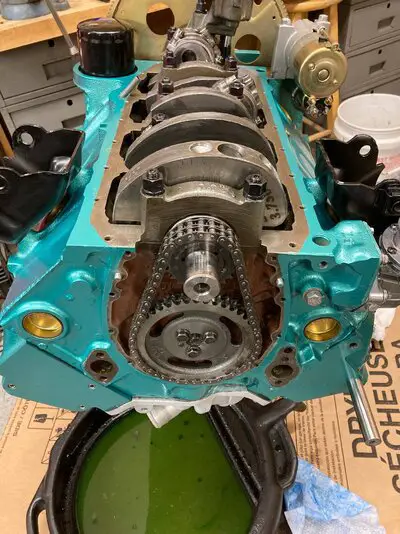
Replaced the tweaked timing cover. Started it the other day and no leaks anywhere. Made me happy. Hmmm, I guess I do timing chain covers differently than certain people. Notice theres no broken bolts and a ton of sealer. LOL
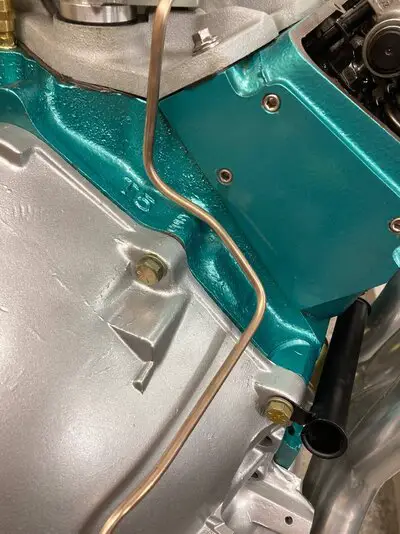
Also bent up some solid tubing for the vacuum line to the trans. Nic copper since it was easier to bend than steel. Hopefully it wont break down the road.
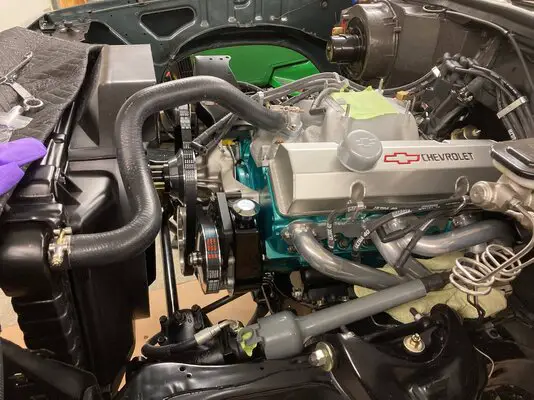
All thats left is an alignment, exhaust and putting the hood back on. I cant lift anything until I go back to the cardiologist for a follow up in a month. At least I'll finally be able to drive both cars this year !!
Resprayed the inner fender with a fresh qt of Hot Rod black. This time it came out the right color.

Not a perfect place for the box but hopefully it wont crap out right away. Its an old box but brand new. I bought it when I first started working on the car.

Its runs so Im leaving it alone. LOL

Cleaned up the TH400 and put in a couple of new gaskets and rear seal. Hit it with some aluminum paint while I had it out.

Replaced the tweaked timing cover. Started it the other day and no leaks anywhere. Made me happy. Hmmm, I guess I do timing chain covers differently than certain people. Notice theres no broken bolts and a ton of sealer. LOL

Also bent up some solid tubing for the vacuum line to the trans. Nic copper since it was easier to bend than steel. Hopefully it wont break down the road.


All thats left is an alignment, exhaust and putting the hood back on. I cant lift anything until I go back to the cardiologist for a follow up in a month. At least I'll finally be able to drive both cars this year !!
Thanks ! They were scuffed after cleaning, a light coat of Bulldog adhesion promoter sprayed through a 1.0 nozzle in a detail gun and two coats of SEM Hot Rod Black sprayed through a 1.3 nozzle in an HVLP gun. No primers.Those inner fenders look great! Would you mind sharing the steps and products you used?
- Status
- Not open for further replies.
Similar threads
- Replies
- 25
- Views
- 814
- Replies
- 14
- Views
- 706
- Replies
- 10
- Views
- 459
GBodyForum is a participant in the Amazon Services LLC Associates Program, an affiliate advertising program designed to provide a means for sites to earn advertising fees by advertising and linking to amazon.com. Amazon, the Amazon logo, AmazonSupply, and the AmazonSupply logo are trademarks of Amazon.com, Inc. or its affiliates.


