Generally speaking, Ford offered two interior packages for the 1967 Mustang:
When it came to the radio:
My Mustang has the Deluxe interior, including the speakers in the doors. After the car’s restoration nearly 10 years ago I bought a Retrosound radio and had it professionally installed as I didn’t yet have the experience & confidence to deal with all the dissimilar connectors aka ‘60s Ford vs Modern Aftermarket.
My big project this year was installing power windows & power locks in the car (“power windows” was the initial project but the scope expanded as I was going to be working in the doors anyway) and when I found the door speakers interfered with the window motors, the door speakers had to go … so the project scope expanded again – “get some speakers!” – but I wasn’t too worried as I knew about the center mount and the kick panel speakers, my preference is the center mount.
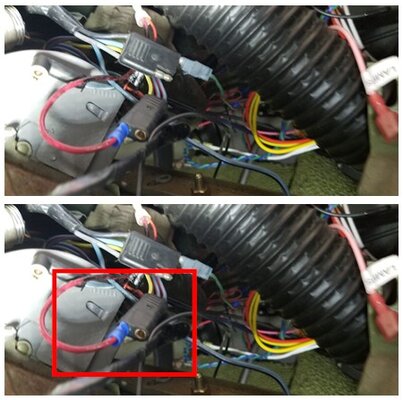
I pulled the radio to check the space for the center mount – looks good! – but the wiring looked terrible:
When preparing to do the actual work I bought two 2x3 sheets of foamboard, taped them together to make a 4x3 workspace, used Scotch tape to arrange/organize/tape-down everything on the workspace, and on the foamboard labeled everything; this worked-out very well in keeping things organized … original idea was posterboard but both Target & Walmart were out-of-stock while foamboard at Walmart was $1 / sheet, I think the foamboard worked-out better as the Scotch tape released from it fairly easily
From other sometimes-unrelated posts some of you are partly responsible for the ideas that went into this (so my thanks) and for some disclaimers:
(thumbnails are attached first, then the full-size images)
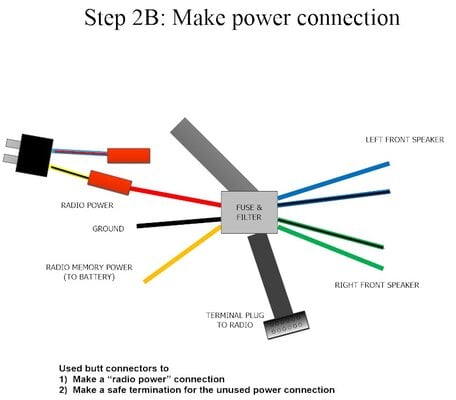
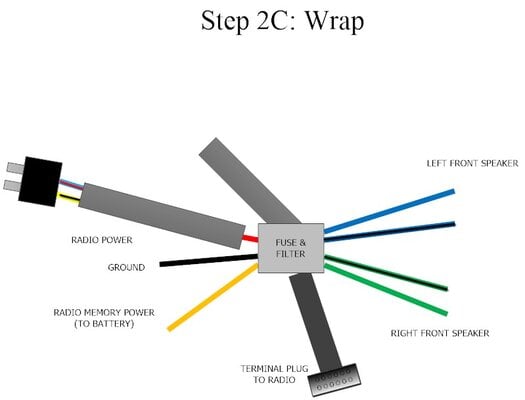
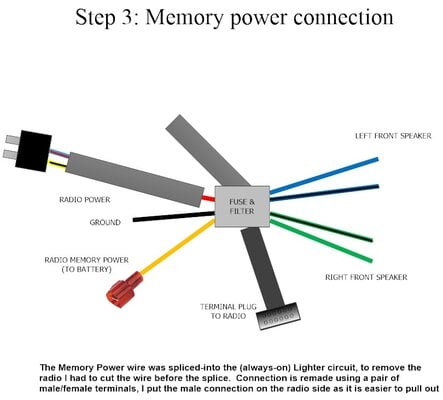
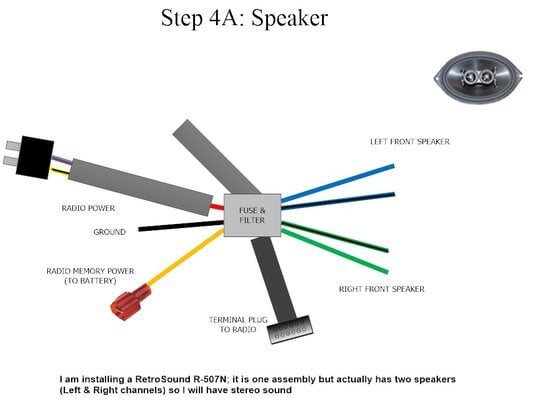


- Standard
- Deluxe
When it came to the radio:
- The Standard interior used one speaker mounted underneath the center of the dashboard
- The Deluxe interior featured a speaker in each door
My Mustang has the Deluxe interior, including the speakers in the doors. After the car’s restoration nearly 10 years ago I bought a Retrosound radio and had it professionally installed as I didn’t yet have the experience & confidence to deal with all the dissimilar connectors aka ‘60s Ford vs Modern Aftermarket.
My big project this year was installing power windows & power locks in the car (“power windows” was the initial project but the scope expanded as I was going to be working in the doors anyway) and when I found the door speakers interfered with the window motors, the door speakers had to go … so the project scope expanded again – “get some speakers!” – but I wasn’t too worried as I knew about the center mount and the kick panel speakers, my preference is the center mount.
I pulled the radio to check the space for the center mount – looks good! – but the wiring looked terrible:
- The installer wired power to the right place – a certain port in a two-socket plug – but it looked kinda amateurish (see the first picture)
- Except for the power & ground wires all the connections were twisted together or used butt connectors so to hook-up any new speaker I’d have to cut some wires
- The installer used a lot of electrical tape to secure/insulate connections and to bundle related wires so everything was coated with that sticky tar-ish residue electrical tape leaves
When preparing to do the actual work I bought two 2x3 sheets of foamboard, taped them together to make a 4x3 workspace, used Scotch tape to arrange/organize/tape-down everything on the workspace, and on the foamboard labeled everything; this worked-out very well in keeping things organized … original idea was posterboard but both Target & Walmart were out-of-stock while foamboard at Walmart was $1 / sheet, I think the foamboard worked-out better as the Scotch tape released from it fairly easily
From other sometimes-unrelated posts some of you are partly responsible for the ideas that went into this (so my thanks) and for some disclaimers:
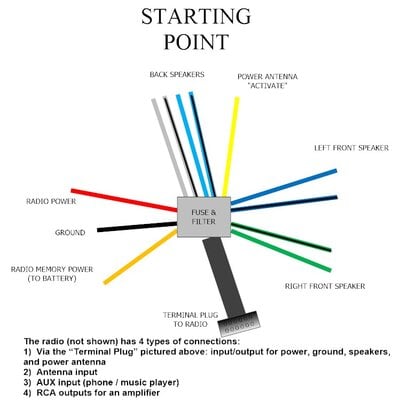
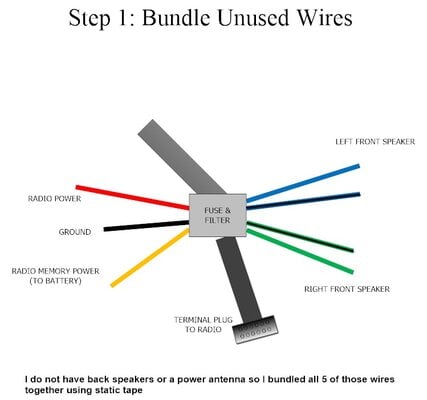
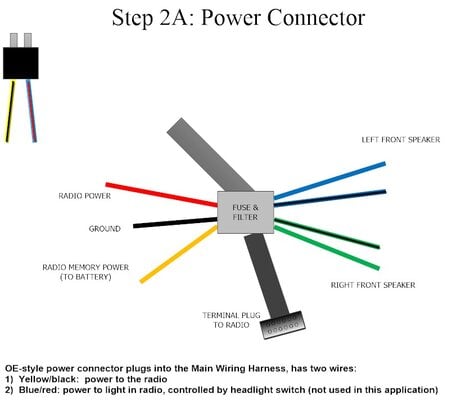
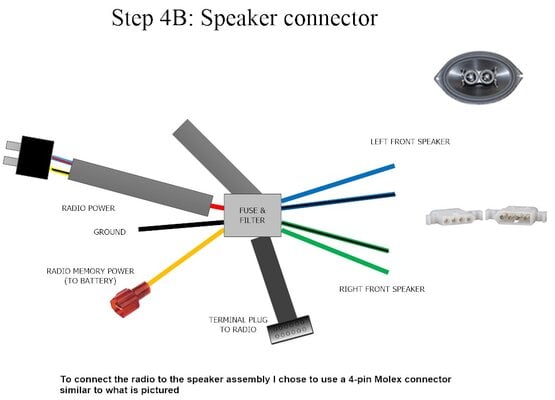
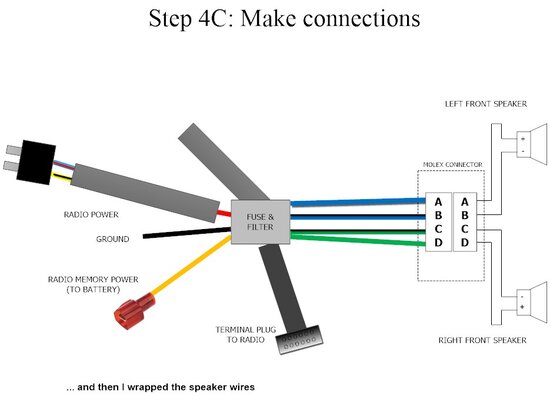
- This is the Retrosound wiring-color scheme from nearly 10 years ago & doesn’t match what they currently use
- Drawings are not to scale
- The wires enter the "Fuse & Filter" box through one of two points, not via every side as shown for simplicity
(thumbnails are attached first, then the full-size images)


