1980 Pontiac LeMans Station Wagon - G-T-faux (stuck with it, and can't shake it... like a bad case of herpes)

Status
Not open for further replies.
Thanks for explaining that, Mike. I was just curious as to what it entails to change out to aftermarket gauges wiring wise.
There's a lot of spaghetti lurking behind that dash... :lol: thank goodness for color coded wiring.
 
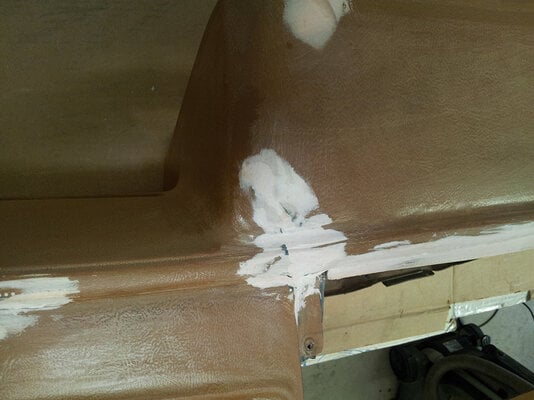
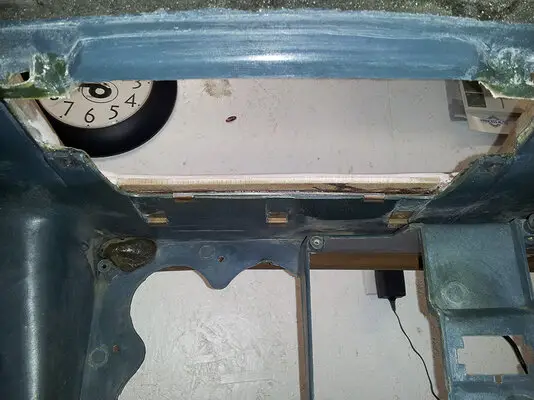
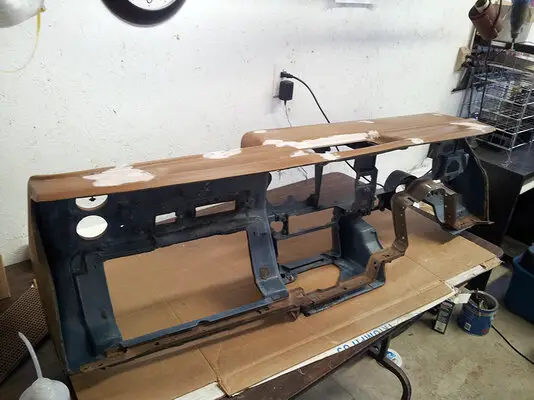
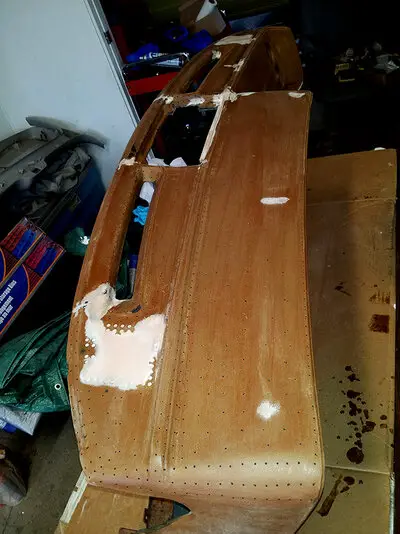
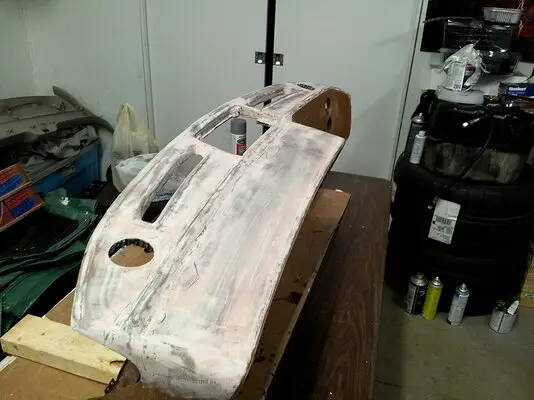
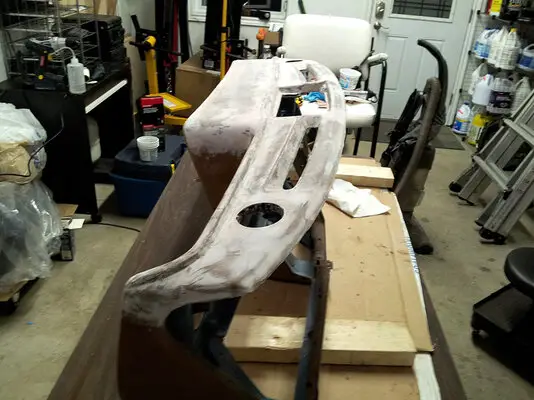
Rather than spend $400+ dollars on another used dash, and since there are no aftermarket dash caps available, I dove head first into a shallow pond and decided to repair ours. If you are familiar with these dashes you'll notice how much expanding foam has been removed from the backside of the dash, and the whole dash has been trimmed back to make room for any repairs and for general clean up (again very dirty/dusty back there).

The gashes and warps were ground down, picked and beveled out, small holes drilled out around the perimeter of the gash to make for fingers to allow the fibreglass/filler (50/50 mix of short strand and plastic body filler) to hold it together, and finally a coat of straight filler. There is also a small piece of MDF added to strengthen a very well shrunken/swollen section of the middle dash.

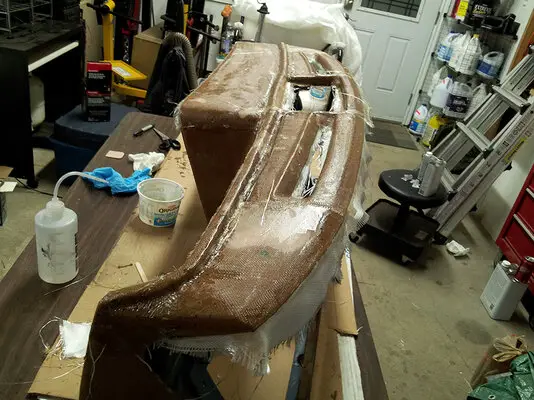
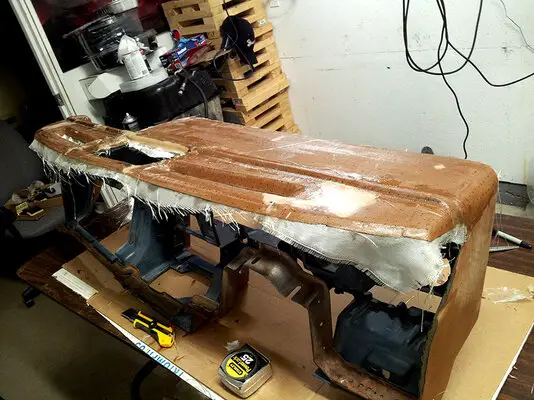
The speaker holes are filled to be drilled out with a hole saw to fit the new taller coaxial Polk 3.5" speakers; there are some screens on order from China to hide them. This will be done after the top of the dash is done being capped with fibreglass sheet (currently curing) to prevent future splitting.

And then more filler... I hate doing body work.

It will be finished with Duplicolor Truckbed coating and some Duplicolor black vinyl paint.
 

Attachments

  • 2.jpg
    2.jpg
    430.1 KB · Views: 615
  • 3.jpg
    3.jpg
    495.1 KB · Views: 625
  • 4.jpg
    4.jpg
    474.3 KB · Views: 654
  • Like
Reactions: Injectedcutty
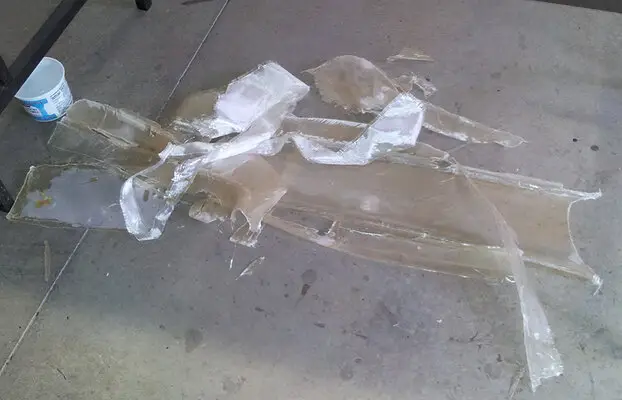
Yeah... so... about all that work you did yesterday? You need to start over.

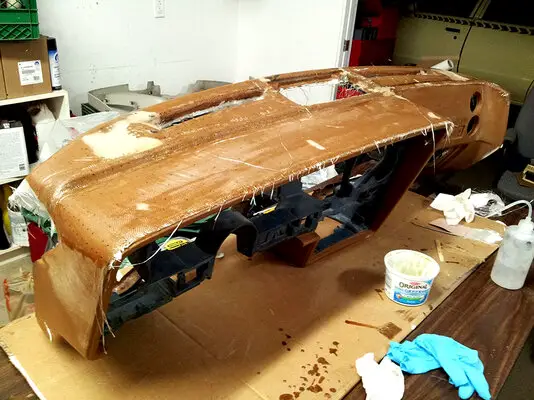
So I peeled it all off, which is alarming how easy it was to do; but, in retrospect it was a blessing.


Then I drilled a billion 1/16" holes to promote mechanical adhesion so that the cap shouldn't lift, shift, and/or warp. Also, failure of the first attempt can also be attributed to trying to do it with a single sheet of fibreglass sheet, this time it was put together with about a dozen pieces; and I reduced the amount of activator/hardener I used in the epoxy to increase my working time from 15 minutes to about 30 minutes (a big stress reducer).

Let's hope it works out tomorrow upon review.
 

Attachments

  • fml.jpg
    fml.jpg
    364.7 KB · Views: 604
  • 5.jpg
    5.jpg
    582 KB · Views: 597
  • 6.jpg
    6.jpg
    571.9 KB · Views: 596
  • 7.jpg
    7.jpg
    601.5 KB · Views: 591
  • 8.jpg
    8.jpg
    579.7 KB · Views: 597
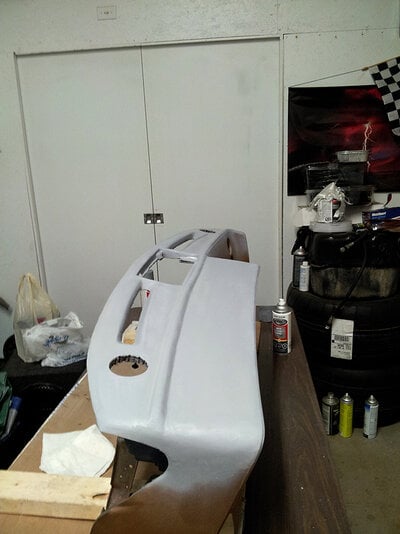
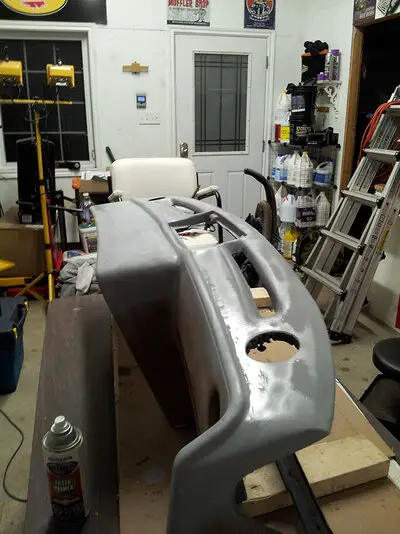
A couple of thin coats of body filler, a lot of sanding, a little hole saw action, and some filler primer. More sanding and primer tomorrow... oh joy.
 

Attachments

  • 9.jpg
    9.jpg
    474 KB · Views: 535
  • 10.jpg
    10.jpg
    485.4 KB · Views: 537
  • 11.jpg
    11.jpg
    407.8 KB · Views: 541
  • 12.jpg
    12.jpg
    477.9 KB · Views: 515
The dash is lookin' good, Mike.
I was about to ask you about the corner speakers, but I see you drilled holes for them. So you'll add your own grilles then.
 
Longroof79 said:
The dash is lookin' good, Mike.
I was about to ask you about the corner speakers, but I see you drilled holes for them. So you'll add your own grilles then.

Thanks!

Here is what I ordered off of evilBay: http://www.ebay.com/itm/2-3-INCH-SUBWOO ... 1514&rt=nc

...and luckily my little girl walked into the garage holding them last night - perfect timing. The seller even included the screws.
 
Nice grilles... good choice. They should look good on the dash and provide a little extra clearance for the center cones. These dashes don't allow hardly any room for protruding cones.
Btw, if I'm not mistaken, you positioned the speaker openings more inboard (toward the center of the dash) than the outer corners.
 
Longroof79 said:
Nice grilles... good choice. They should look good on the dash and provide a little extra clearance for the center cones. These dashes don't allow hardly any room for protruding cones.
Btw, if I'm not mistaken, you positioned the speaker openings more inboard (toward the center of the dash) than the outer corners.

Jack, I just centred the speakers over the mounting screws/holes on the backside of the dash, traced the speaker housing and found the centre, and drilled a centering hole from the bottom. Best I can tell this is the mid-point of the factory mount, so I don't believe I moved anything much at all.

I am currently waiting for another skim coat of filler to dry on the low spots that appear after priming and sanding. Hopefully I am reaching the end of this job...
 
Mike,
I don't know what I was thinking... 😳 I was looking at my dash earlier, and it occured to me that the position the speakers are in cannot be deviated in any way.
Sorry about that...I was experiencing a senior moment. :?


I think your dash is going to look good when it's done. You're certainly putting a lot of time and effort into it. As you mentioned, there is no dash caps being produced for G-body Pontiacs. Keep up the good work!
 
No worries.

I am high as a kite from the primer right now. Time to go mow my lawn - what can possibly go wrong?
 
Status
Not open for further replies.

GBodyForum is a participant in the Amazon Services LLC Associates Program, an affiliate advertising program designed to provide a means for sites to earn advertising fees by advertising and linking to amazon.com. Amazon, the Amazon logo, AmazonSupply, and the AmazonSupply logo are trademarks of Amazon.com, Inc. or its affiliates.

Please support GBodyForum Sponsors

Classic Truck Consoles Dixie Restoration Depot UMI Performance

Contact [email protected] for info on becoming a sponsor