

X2....I second that. 🙂Never seen those links before, but I am a fan of the modified bumper.
1980 Pontiac LeMans Station Wagon - G-T-faux (stuck with it, and can't shake it... like a bad case of herpes)
- Thread starter motorheadmike
- Start date
You are using an out of date browser. It may not display this or other websites correctly.
You should upgrade or use an alternative browser.
You should upgrade or use an alternative browser.
- Status
- Not open for further replies.
Yeah, the problem with the modified bumper option keeps the project snowballing. I really don't want to have to do any significant work to the wagon after it is completed either, thus allowing me to move onto other project cars over future Winters. But, then again I still have to rig this wagon up for a Class 3 hitch receiver - and I am certain the bumper is going to get in the way.
Sigh.
In other news...
I got the front shocks in last night; and it took an hour. The shocks were very stiff in every way imaginable and fought me the whole time - regardless they are in and they are very yellow. The droop on the suspension is about 4" from the frame rail to the bump stop, and the effective total travel of the shocks are 4.75"; so compressing the shock about 3/4" to bolt it up leaves a net travel of about 4" - how about that?
I also pulled the K-member to frame rail braces off and cleaned them up because they were very crusty and rusty. They are also pretty beat up (road rash) from the car being excessively lowered, but still functional. I do have spares in the parts cars... but, it was raining and I didn't feel like pulling them off laying on the wet ground in the dark. I may just weld on a GP-style cross-brace if I have the right size tubing on the shelf.
As well, the special self-tapping bolts are going to have to have new heads welded on to them since they are pretty much ground flat; or maybe I can replace them?
The steering box is painted and should be going in tonight. When it looks like something worth sharing I will post a picture or two.
Last edited:
Well here is an update: brakes and stuff.
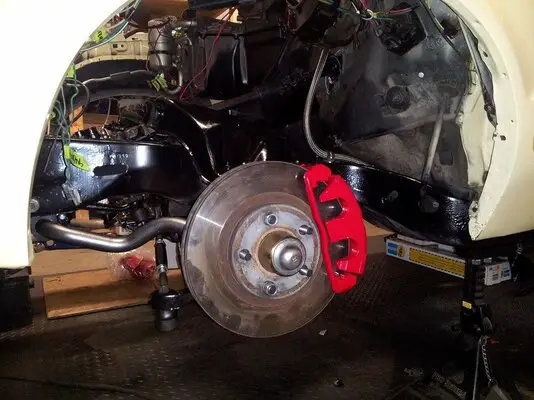
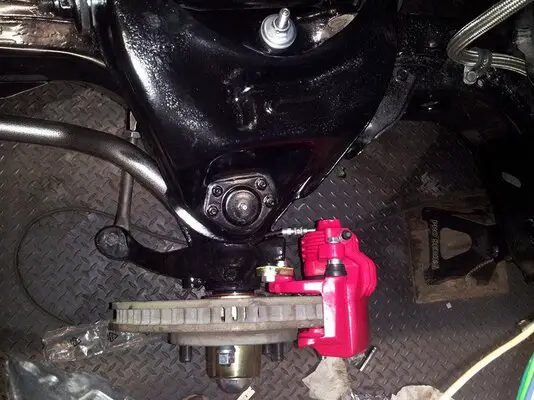
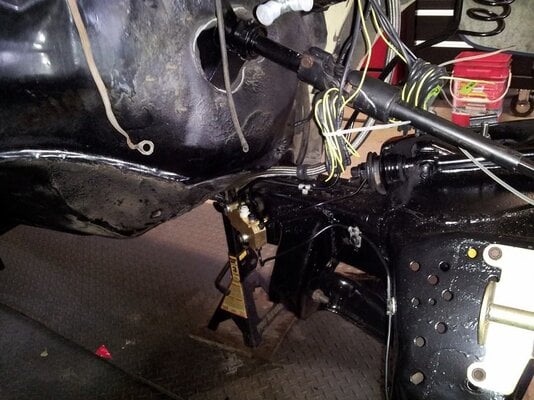
Started fitting the new LS1 brakes to the car, not a complete bolt-on - but very little work was required to get it all on. The biggest issue was opening up the wheel stud (1/2" studs) and centre bore holes in the mock-up rotor. The whole thing came apart about 5 times trying to get the caliper bracket centred. I settled with a .078' outside to .090" inside offset, using a .053" shim (I had a .066" shim as well) between the adapter bracket and spindle mount. The adapter bracket was torqued down to 70ft/lbs using #271 red Loctite. I do imagine the rotor will get drawn in a bit more when the wheel is mounted and torqued down. I have to pull the pads and rotors off of the donor Camaro for the final install. But it is a start.
I also went through a huge ordeal trying to get my hands on quality steel caged wheel bearings (A34 outer, A6 inner); note to self Timken uses plastic cages in their Set/A 34 outers. Booo. At least Timken's seals went in nicely. The dust caps came from Dorman.
You can also see the Hellwig bar, UMI tie rod adjusters, XH steering box, shocks and springs are all in. None of which is torqued to spec yet.
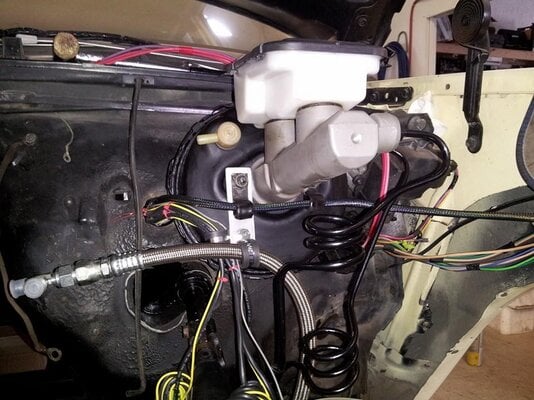
The most annoying thing happened tonight when I was trying to install the master cylinder I stole from my MCSS; I learned that not all dual diaphragm brake booster are alike. No, in fact the early ones (like my wagon) have a 1.5" bore, and the later ones (like my MCSS) have a 1.75" bore. So now I may have to re&re the dash in the wagon to switch out the booster. FML.
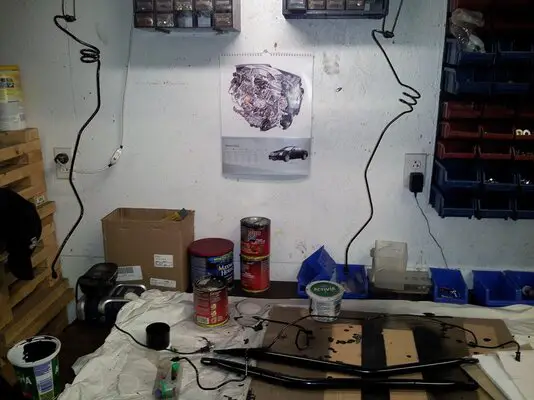
Oh I cleaned and painted the brake lines too.
Started fitting the new LS1 brakes to the car, not a complete bolt-on - but very little work was required to get it all on. The biggest issue was opening up the wheel stud (1/2" studs) and centre bore holes in the mock-up rotor. The whole thing came apart about 5 times trying to get the caliper bracket centred. I settled with a .078' outside to .090" inside offset, using a .053" shim (I had a .066" shim as well) between the adapter bracket and spindle mount. The adapter bracket was torqued down to 70ft/lbs using #271 red Loctite. I do imagine the rotor will get drawn in a bit more when the wheel is mounted and torqued down. I have to pull the pads and rotors off of the donor Camaro for the final install. But it is a start.
I also went through a huge ordeal trying to get my hands on quality steel caged wheel bearings (A34 outer, A6 inner); note to self Timken uses plastic cages in their Set/A 34 outers. Booo. At least Timken's seals went in nicely. The dust caps came from Dorman.
You can also see the Hellwig bar, UMI tie rod adjusters, XH steering box, shocks and springs are all in. None of which is torqued to spec yet.
The most annoying thing happened tonight when I was trying to install the master cylinder I stole from my MCSS; I learned that not all dual diaphragm brake booster are alike. No, in fact the early ones (like my wagon) have a 1.5" bore, and the later ones (like my MCSS) have a 1.75" bore. So now I may have to re&re the dash in the wagon to switch out the booster. FML.
Oh I cleaned and painted the brake lines too.
Attachments
I don't know if you saw the exchange between Jim and Jack on the trailer hitch, but here is a link to the dimensions I took from mine:
https://gbodyforum.com/threads/g-body-wagon-class-iii-trailer-hitch-plans.56222/
If you want a higher-resolution pdf or jpg, PM me.
I'm going through the same pain shimming the rear backing plates on my brake conversion. I ended up with 0.90" on the passenger side and 0.150" on the driver's side to make the abutments center on the rotors. Yes, fifth time was the charm. I would have parted with some cash to have had pack of pre-made shims for this project. I used 2-1/2" Moroso studs to fix the insufficient threads problem. Probably could have beaten the Camaro studs out of the axles, but I'd probably have boogered at least one of them.
Three quarts of POR-15? Man, you are dedicated. I just stocked up on a six-pack of half-pints. One can did all accessible areas of the radiator support, 2 coats, with a third coat of Top Coat semi-gloss. I discovered that some of the small margarine tubs exactly fit around the top of the quart cans. I cut the bottom out at an angle, and use it to transfer to another tub for application. Use the brush to wipe off the extra and the POR-15 can stays clean.
Last edited:
I am trying to decide if I want to modify the bumper or just get replacement fillers. Any thoughts/experience with these?
http://www.dixierestorationdepot.com/Product/Detail.aspx?s=DM20477&d=987&p=1
Oh, you have to modify the bumper!!!
Love the project!!!
Oh, you have to modify the bumper!!!
Love the project!!!
Hey Brian,Oh, you have to modify the bumper!!!
Love the project!!!
Where ya been, buddy? Do you still have the wagon?
Hey Jack! Your wagon is looking great! I still have mine too, its been in mothballs for a while.
I was asked to bring it to a 4th of july/veterans parade so it's back on the rack for a few things.
I was asked to bring it to a 4th of july/veterans parade so it's back on the rack for a few things.
I don't know if you saw the exchange between Jim and Jack on the trailer hitch, but here is a link to the dimensions I took from mine:
https://gbodyforum.com/threads/g-body-wagon-class-iii-trailer-hitch-plans.56222/
If you want a higher-resolution pdf or jpg, PM me.
I'm going through the same pain shimming the rear backing plates on my brake conversion. I ended up with 0.90" on the passenger side and 0.150" on the driver's side to make the abutments center on the rotors. Yes, fifth time was the charm. I would have parted with some cash to have had pack of pre-made shims for this project. I used 2-1/2" Moroso studs to fix the insufficient threads problem. Probably could have beaten the Camaro studs out of the axles, but I'd probably have boogered at least one of them.
Three quarts of POR-15? Man, you are dedicated. I just stocked up on a six-pack of half-pints. One can did all accessible areas of the radiator support, 2 coats, with a third coat of Top Coat semi-gloss. I discovered that some of the small margarine tubs exactly fit around the top of the quart cans. I cut the bottom out at an angle, and use it to transfer to another tub for application. Use the brush to wipe off the extra and the POR-15 can stays clean.
I am not looking for a load-ready Class III, just something that can hold about 750lbs of tongue weight for carry a hitch basket that needs a Class III sized receiver... but, then again towing a trailer could be beneficial on Drag Week. Hmmm...
Both the front hubs and rear axles are loaded with 2.5" long 1/2" screw in studs; I bought a variety of open ended acorn lugs to suit different wheel styles (more on this in a moment).
As for the POR-15, I just buy what is cheapest/best value from Eastwood... and having the bigger cans means that I can be sloppy, which is normal.
I have been kicking around wheel options for a while, and I think I have settled on these (as a style - very 1980s):

http://www.hawksthirdgenparts.com/gta-mesh-wheel-set-of-4-17-x-9-black-reproduction/
These would have been nice too, but it seems that they are discontinued: http://www.thirdgen.org/forums/wheels-tires/685094-my-new-wheels-17x9-3.html Oh well.
Anyway, if I get the Hawk's wheels two will need to be widened to 11" or 12" wide to fit the 345s I bought for the car. A bit of a PITA... but, manageable.
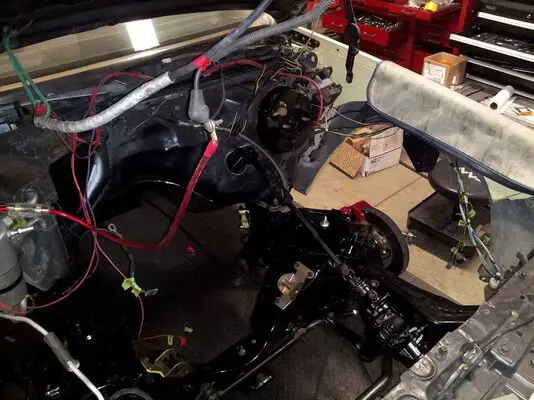
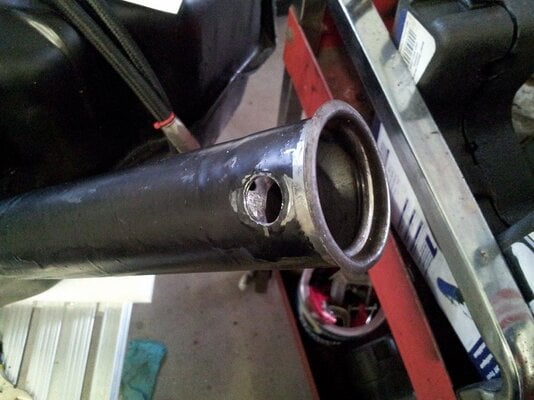
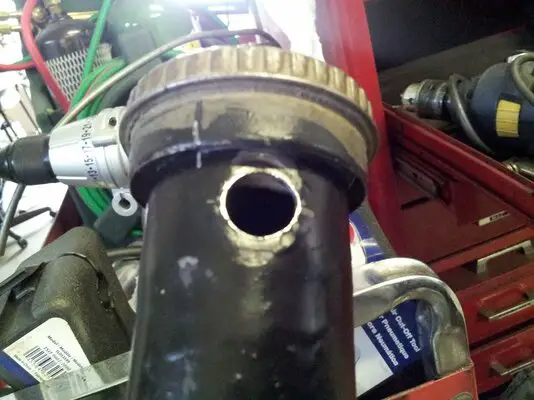
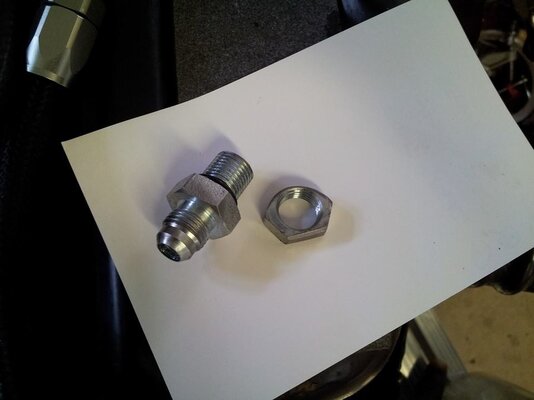
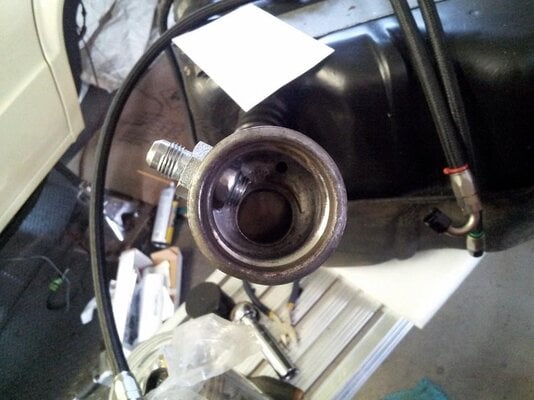
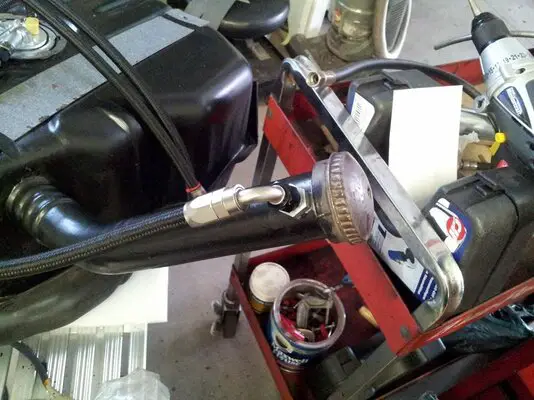
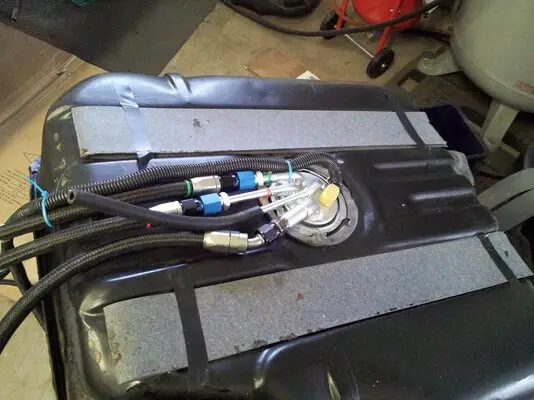
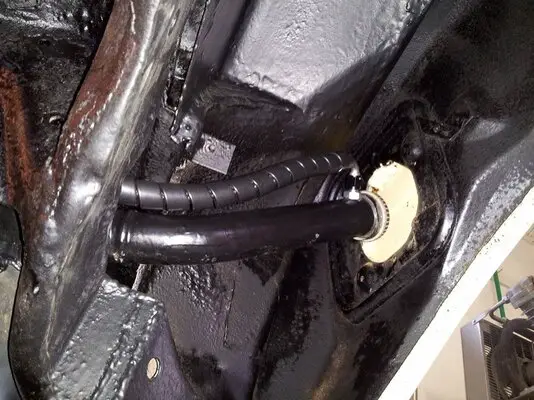
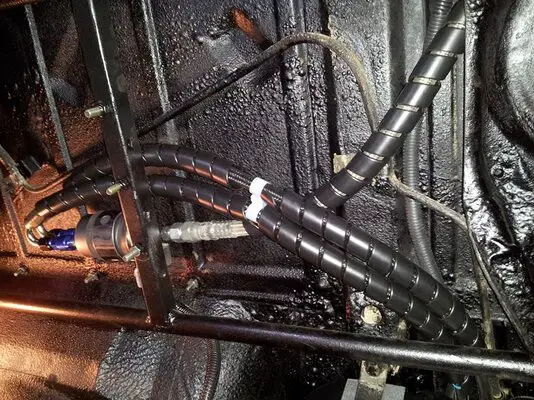
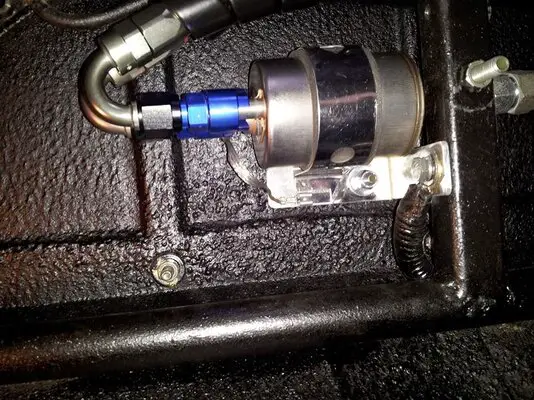
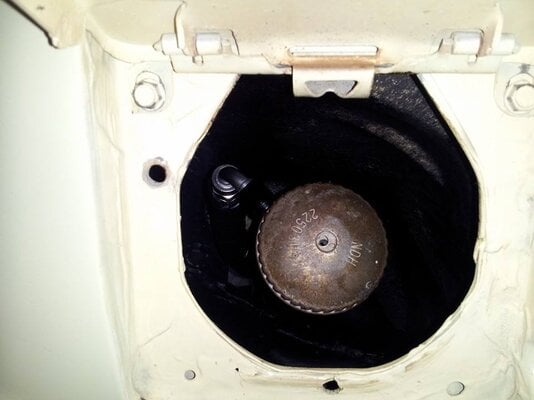
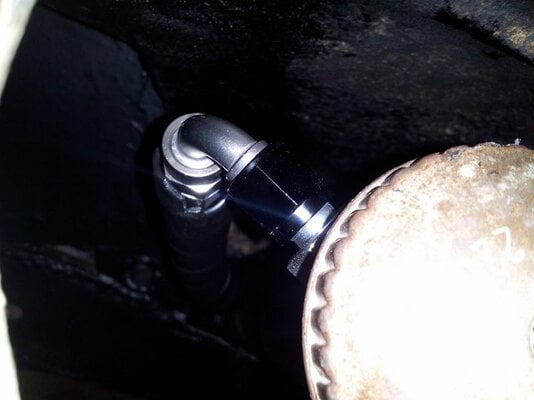
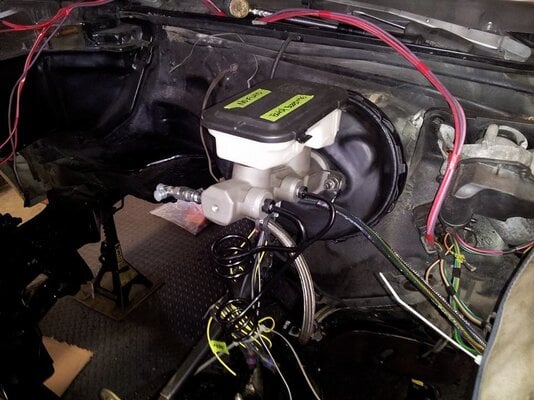
MCSS master and booster in. Cleaned up brake lines and a new disc brake prop valve. Added a bracket to do a little fuel line and wiring organization. Out back the tank is all plumbed in with -6 AN lines, including the burp line from the Astro hanger. You'll notice I chose to not reuse the old fuel lines from the '91 Z28, it feels better using new parts. The filter/regulator is hung on another quickie bracket, and all the lines are wrapped in hydraulic hose shielding because I have had some bad experiences with braided lines rubbing through.
Attachments
Last edited:
- Status
- Not open for further replies.
Similar threads
- Replies
- 2
- Views
- 878
- Replies
- 3
- Views
- 172
GBodyForum is a participant in the Amazon Services LLC Associates Program, an affiliate advertising program designed to provide a means for sites to earn advertising fees by advertising and linking to amazon.com. Amazon, the Amazon logo, AmazonSupply, and the AmazonSupply logo are trademarks of Amazon.com, Inc. or its affiliates.