Re: 1987 Olds Pro-touring project build *LONG*
Okay, here's a few pictures of the in process of fixing my hood mounting points.
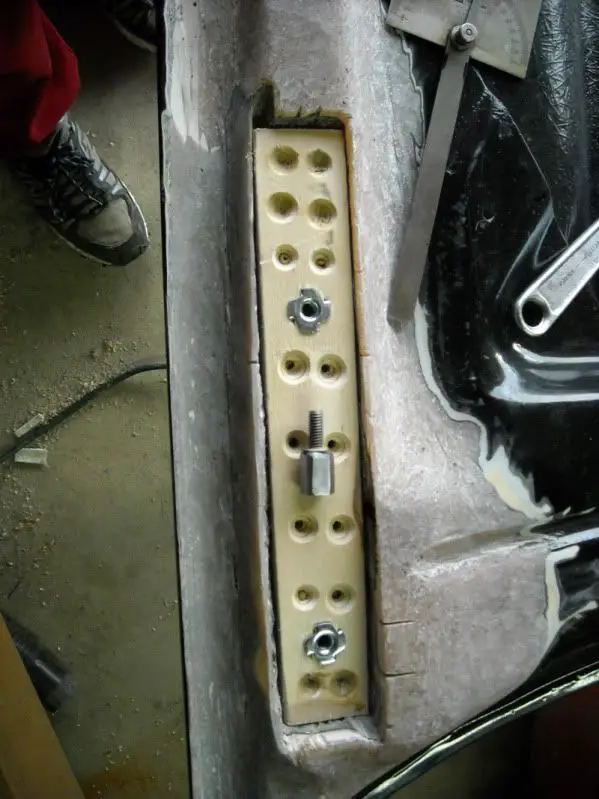
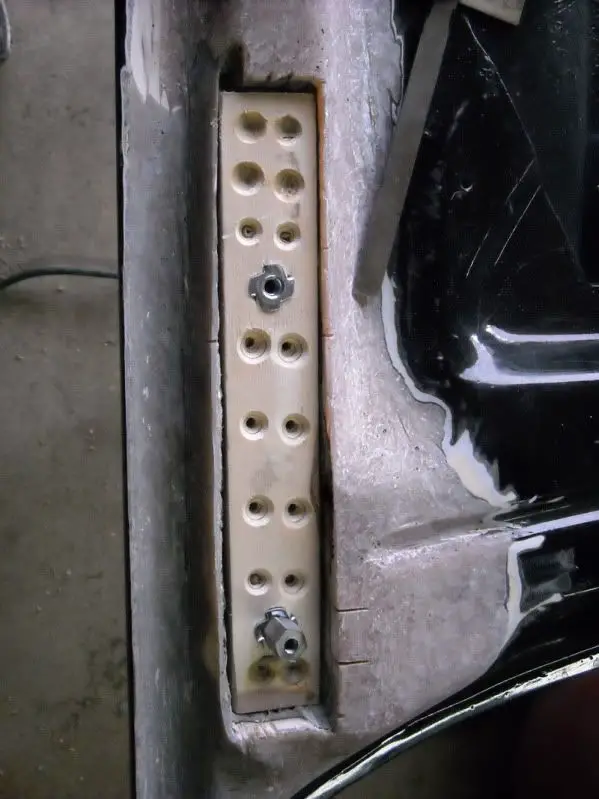
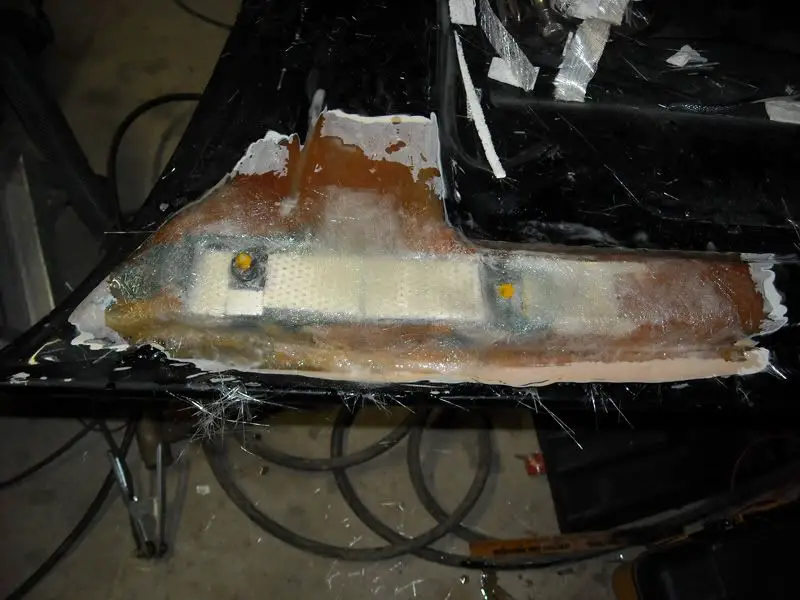
I took a piece of 3/4" cabinet grade plywood and cut them to fit the hood. Installed threaded Tee nuts for the bolt locations. Then I drilled all the holes you see to give more surface area for the adhesive to grab onto.
I took my die grinder with a cut off wheel and made a bunch of small grooves in the fiberglass hood to give it some "tooth" for the adhesive.
I looked at a ton of different adhesives out there on the market and was told which were the best to use. Of course those all come with a heft price. I then found a new tube of Liquid nails contruction adhesive and did a small test. Turns out that stuff works perfectly! I put down a decent amount on the hood and then press the wood pieces into it and clamped everything down. My holes in the wood worked great as the adhesive oozed up through them.
Let that set up for roughly a week and then today came out to work on it a bit more.
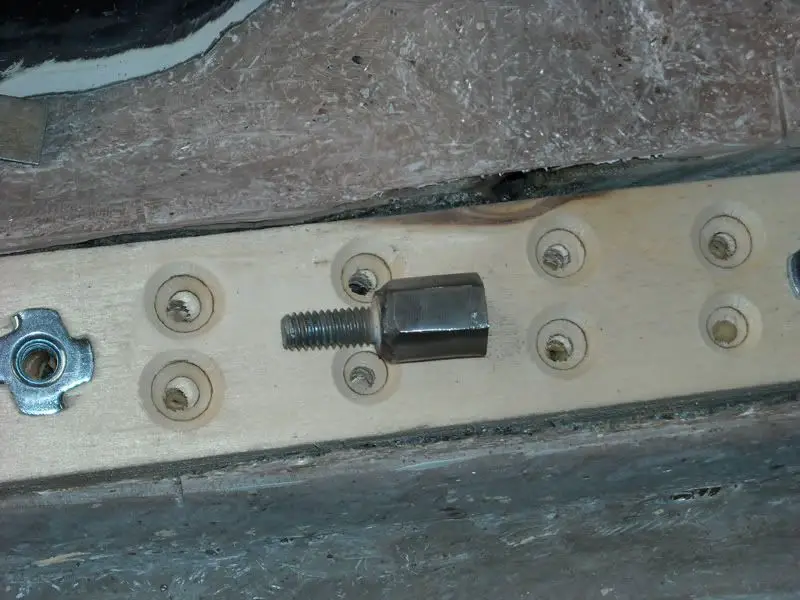
Since the rear most Tee nuts were going to sit a little far down into the fiberglass I came up with something else for them. I went to Ace Hardware and bought some threaded hex spacers. Then took a 5/16-18 bolt and welded it to the end of the spacer. Threaded them down into the Tee nuts and then tacked everything together.
You can see the spacer in the picture above. And a close up here:
And one of it installed:
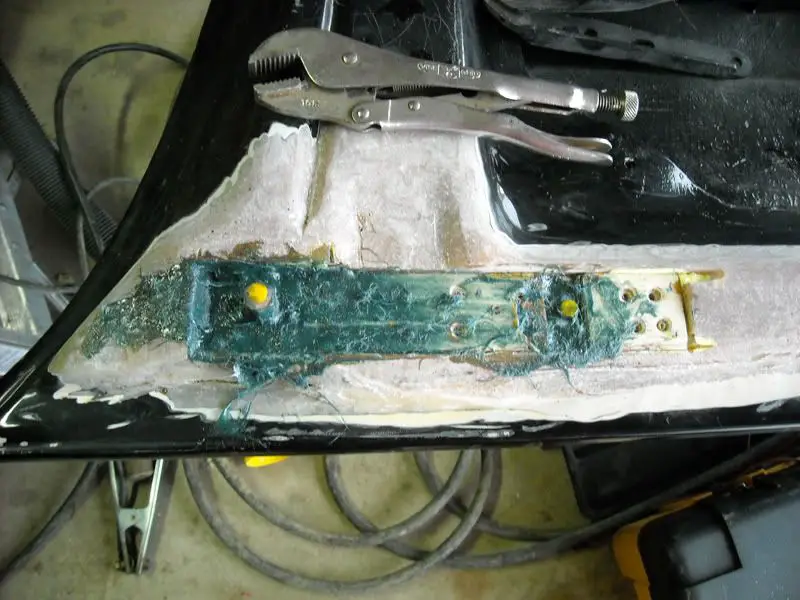
The Tee nuts though aren't the greatest as they like to back out of the wood easily. So the next step was to mix up some Evercoat Kitty Hair. It's essentially body filler with fiberglass mixed in. Looks like a cat threw up a hairball when your mixing it together.
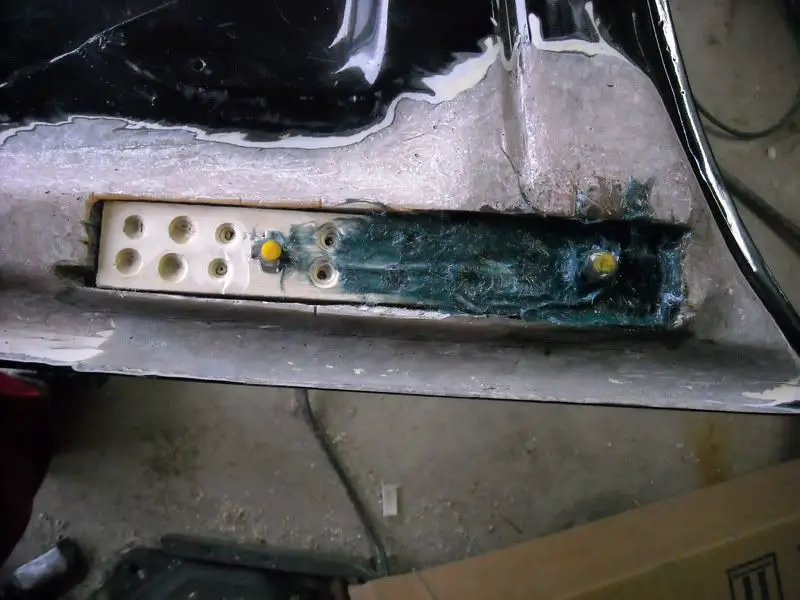
I spread it around the nuts to help lock them into place. Seemed to work perfectly because once it was dry I couldn't move them at all.
After the Kitty Hair set up I sanded it down real quick and began laying down some fiberglass mat with Epoxy resin.
I'll probably do a few more layers after this one and then finish filling in the larger voids with the Kitty Hair, sanding it down and then a few layers of body filler to get everything smooth and it should be ready for paint then.
🙂


