1evilregal's build thread

Status
Not open for further replies.

1evilregal

Comic Book Super Hero
Apr 23, 2009
3,056
4,357
113
Greensboro, NC
a.k.a. HOW NOT TO BUILD A REGAL :rofl:

this thread has been a long time coming, and admittedly won't be as flashy or as technical as some of the nicer looking builds (yeah, I don't possess alot of the skills to build a nicer build... :wink: ), but this car has taken a place in my family, and like 85 cutlass brougham stated in his lengthy thread, this is kinda more for reference, and for some people who just want to get a good laugh (if you can't laugh at yourself, you take life waaaay to seriously.... LIGHTEN UP!

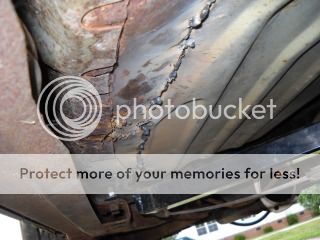
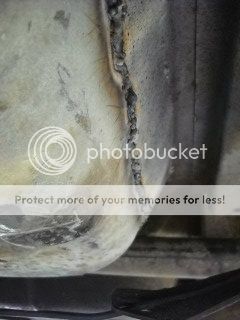
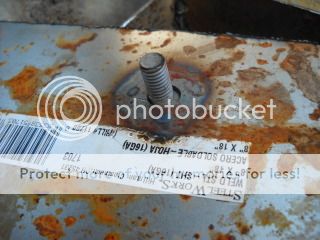
this build has been going for a few years now, since I don't have a garage to work in, I have to depend on nice weather/part readiness/correct tool availability/pure laziness on my part to get anything done. I also started this build thinking of when hot rodding first started, and you used what you had,was given, raided from the junkyard, bought cheap, etc..., . It has kind of taken on a life of it's own, and I have noticed that some of the skills I had very little of, has started to get better (i.e. this first part- floorboard repair/replacement and welding... :cry: )

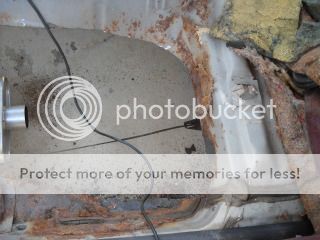
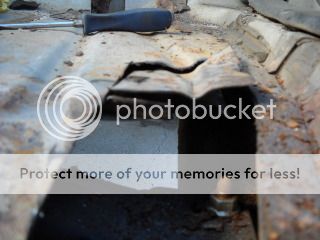
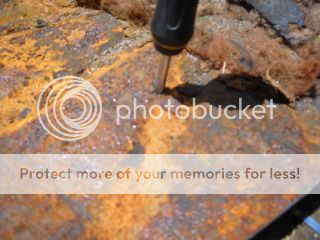
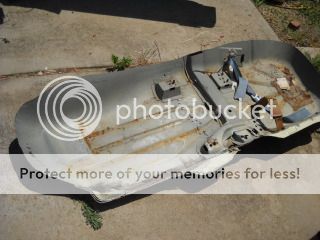
first off, lets start off where I first knew I was in trouble...:
022.jpg

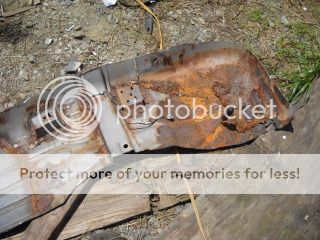
I always knew that I had a little rust in the driver's side floorboard, but never knew exactly how much, so I got a wild hair up my rear, and decided to finally bite the bullet, and start the interior phase of the build.... that was last year..... :blam:
023.jpg
 

1evilregal

Comic Book Super Hero
Apr 23, 2009
3,056
4,357
113
Greensboro, NC
I started off by cutting out the below and in front of the pedals, and cutting a good section from a wrecked cutlass at the local junkyard (there was some rust out in a different area, so I couldn't utilize all of the floor) and proceeded to attempt a patch... after burning more holes than I fixed, I knew I was in deep trouble.... I did manage to fix a few other areas without creating more carnage, and realized my cheap build was about to get expensive and quicker than my wife could max out her mastercard........

now, the beauty of being a gearhead, and having a wife who knows and understands that youre a gearhead, she puts up with my many trips out to the salvage yards, just to "see what they have"... this has wasted my time, and has also brought great rewards, like a virtually rust free driver's floorpan from a wrecked 79 regal... :shock:

I was back in buisness, and for a measley $45, the 79 parted with half it's floorpan. I would have grabbed the passenger's side, but it looked like someone had tried cutting it open with a can opener, then fiberglassed a patch... :wtf:

so this is what came out:
6-20-12012.jpg
6-20-12013.jpg

and this is what went in:
6-20-12016.jpg


side note- I told my brother that I now have new found respect for bodymen like him and sent him this photo:
6-20-12014.jpg
all he said was: "isn't it easier to just jack the car up to replace the muffler? :|
 

1evilregal

Comic Book Super Hero
Apr 23, 2009
3,056
4,357
113
Greensboro, NC
now that the floor was out, I mounted up the cable for the floor shifter that will be going in later (another day on this....) and cut the hole for the cable to come in.... looks like I drilled it to far foward, so I'll have to cut and weld things another day-right now the screwdriver through the eyelet on the shifter end of the cable works just fine.... :wink:

I started fitting in the floors, and they seem to fit in pretty well.... of course a little rigging never hurt anyone either :roll: 
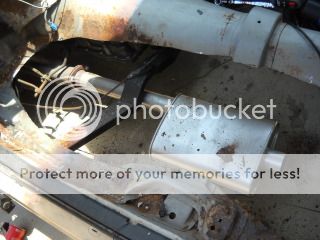
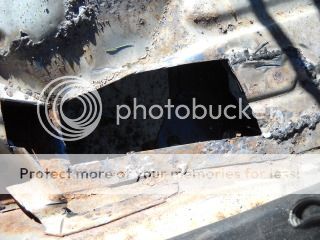
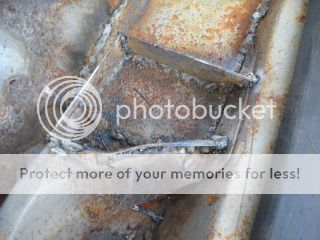
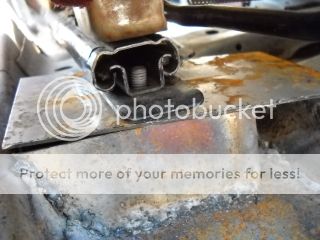
. (after just setting these in and making a few adjustments, I could "hop" on the floor and didn't get the slightest movement from it)
6-20-12015.jpg

6-20-12019.jpg


the latest portion of the floors are really putting my skills to the test.... the driver's floorboard is welded up on the inside, and I am now welding up on the bottom:
Picture091_zps649dc354.jpg

Picture092_zps9ef525a3.jpg

(good thing it'll never be judged in a concours event! :mrgreen: )
 

1evilregal

Comic Book Super Hero
Apr 23, 2009
3,056
4,357
113
Greensboro, NC
the next piece to try my patience, was the seat mount on the passenger's side, next to the door,which also had some rust out on the floor in front of it.... let the games begin! :lol:
before:
Picture077.jpg

Picture078.jpg

out with the old, along with the half the seat bracket...:
Picture081.jpg

just below, is the bolts for the trans x-member (for reference)
Picture080.jpg

rebuilding...
Picture083.jpg

I tend to use the "guesstimate" method when making this kind of stuff.... remember, I won't be taking this to Barret-Jackson any time soon! :roll:
Picture085_zps1ea5c32b.jpg

Picture084_zps4ca9f0f6.jpg

drilled,like sized bolt selected and welded to plate:
Picture086_zps3ef3befb.jpg

seat set in place and plate positioned:
Picture087_zpsf0ee7a2d.jpg


Picture088_zps80e1d8d9.jpg

and welded/somewhat ground down (i'm not too picky, this'll be covered by carpet anyway...
Picture090_zps8da45517.jpg

stay tuned for more... :wink:
 

1evilregal

Comic Book Super Hero
Apr 23, 2009
3,056
4,357
113
Greensboro, NC
wow, I had forgotten I'd started a thread on this. thanks to GP403 for starting this section, and the moderators for bringing this one over!

update: the interior is still pretty much apart, but side progress has been made... I installed the power window setup that I purchased from 81regal a few years ago, and have most of the pre-liminary wiring run. I did a small thread on this a while back: viewtopic.php?f=16&t=44911 , and yes, they work, and didn't burn the car to the ground.(the wife was amazed at that! :rofl: )


I picked up another headliner at a pick and pull for about $15, but was the wrong color, and I didn't really want to spray it, so went to a fabric store and picked up 3 yards of close colored material with the 1/4" foam already attached, and it sat for quite awhile before I had the guts to finally tackle the project.
removing the old fabric and foam


the color in the pic is off slightly, as it is pretty close to claret.
 

307 Regal

Royal Smart Person
Oct 21, 2009
1,667
915
113
Northern Indiana
Man, that old foam was in excellent shape compared to how mine was. Mine was basically dirt! Did you put the new fabric on yet or did you just lay it out? Make sure you use a good adhesive. I made the mistake of using heavy fabric and weak glue the first time I did mine and it was sagging again within 48 hours. :blam:
 

1evilregal

Comic Book Super Hero
Apr 23, 2009
3,056
4,357
113
Greensboro, NC
307 Regal said:
Man, that old foam was in excellent shape compared to how mine was. Mine was basically dirt! Did you put the new fabric on yet or did you just lay it out? Make sure you use a good adhesive. I made the mistake of using heavy fabric and weak glue the first time I did mine and it was sagging again within 48 hours. :blam:
307- I used this stuff here. I actually did this over a year ago, and it sat in my back room for a good long while, and I had it mounted for a few days before I remembered I had to make a quick modification, and it is still in my back room right now...


modification I had to make:


mounts for the blazer overhead console :p
 

mac61891

Greasemonkey
Jun 20, 2013
107
1
18
West Central IL
I am so thankful I don't have the rust to fix in my Cutlass. I am suprised mine is in the shape it is being from west central Il. I like your progress. I will keep checking in on this as you progress. I am in the market for a regal to start a prject with once my Olds is running and painted.
 

1evilregal

Comic Book Super Hero
Apr 23, 2009
3,056
4,357
113
Greensboro, NC
thanks for the kind words mac, I'm just glad that the welds will be covered by the carpet :mrgreen: I picked up a cutlass this spring, and thankfully the floors are immaculate, just outside cosmetics are needed, along with re-building the engine(already finished it), and a few new touches on the inside... I actually like the regals better than the cutty's, I just couldn't pass the deal up, and would love to have a GP in the stable next...


the never ending project continues..... I keep meaning to add to this, but not enough progress is made as far as leaps and bounds, or any straight direction it seems. :blam:

I'm catchiing up on a few items that I've done and posted in the "what did you do to your G-body today?" thread, and other things that I'm working on at the moment...

First on the list is the steering column:
I actually found this one at a junkyard that i don't normally travel to, but coming back from a un-sucessful yard run to one 30 miles away, I decided to stop at one I hadn't been to in awhile (i.e. higher prices, and I'm cheap!), and happened across a monte ss that had def seen it's better days, but somehow the column was about the only thing left behind, and was able to score for $45 without the wheel and a busted lock. I combined it with the turn signal switch in my old column, changed the lock over, and painted the column, and had myself a nice console column :mrgreen:


sem primer, duplicolor burgandy basecoat, sem burgandy main coat, sem clear

you can see the color difference between the SEM and the Duplicolor... :puke:


1evilregal

Comic Book Super Hero
Apr 23, 2009
3,056
4,357
113
Greensboro, NC
something else I've been tinkering with... kind of a personal touch to the car... wife says I may be getting a bit anal retentive about personalization, but I figure that if it doesn't turn out, I'm in for nothing but my time....

the inserts in the panels just below the sail/quarter glass was warped-faded-separating from the old board, and with the work I'm doing on the interior, I didn't want old fabric in place. I picked up some toe-kick panel veneer on the idea of one of my customers, and cut/glued a couple pieces to make the backing

I still had some fabric left over from the headliner that I thought I could put to good use, and tried my hand at a craft I hadn't done... I think I may have to spring for a custom job down the line a bit, but for now, I think it came out alright for the first time... what do you guys think?

I still need to cut and glue on the board, and do the other side, but that can wait for tonight :|
 
Status
Not open for further replies.

GBodyForum is a participant in the Amazon Services LLC Associates Program, an affiliate advertising program designed to provide a means for sites to earn advertising fees by advertising and linking to amazon.com. Amazon, the Amazon logo, AmazonSupply, and the AmazonSupply logo are trademarks of Amazon.com, Inc. or its affiliates.

Please support GBodyForum Sponsors

Classic Truck Consoles Dixie Restoration Depot UMI Performance

Contact [email protected] for info on becoming a sponsor