

been there, done that... several times! actually found a set of aftermarket fiberglass front bumper fillers on an 86 t-type one day at a yard 30 miles from home, while scouting for trim pieces for a buddies cadillac, hit the closest parts store for a cheap-o socket set!liquidh8 said:Looking good. I found my blazer brakes looking for something else. Then I had to go back home and get the tools to get them. 😀
1evilregal's build thread
- Thread starter 1evilregal
- Start date
You are using an out of date browser. It may not display this or other websites correctly.
You should upgrade or use an alternative browser.
You should upgrade or use an alternative browser.
- Status
- Not open for further replies.
liquidh8
Comic Book Super Hero
1evilregal said:been there, done that... several times! actually found a set of aftermarket fiberglass front bumper fillers on an 86 t-type one day at a yard 30 miles from home, while scouting for trim pieces for a buddies cadillac, hit the closest parts store for a cheap-o socket set!liquidh8 said:Looking good. I found my blazer brakes looking for something else. Then I had to go back home and get the tools to get them. 😀
Damn, when I go to far away yards I take everything I could possibly need, and just leave it in the car. It's the two close yards I never seem to take the right tools too. I have a tool bag I always keep with me for roadside repairs, but it always seems like 5 need a bigger hammer, or some stinking torx socket or something.
that day, I was passing through the area, and didn't plan on stopping there. more of a "let's just see if they have the trim, and only had a couple tools in the truck...
just gave me an excuse to buy more tools!
just gave me an excuse to buy more tools!
haven't accomplished much lately- prior obligations, work schedule changing, second job, weather,etc...
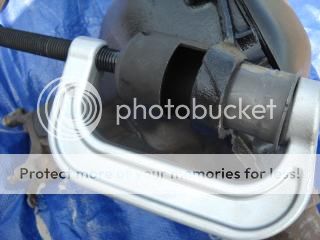
I did manage to finally get the axle out of the back of the truck and start cleaning it up for paint, and new bushings... got it partially de-gunked when my portable sandblaster pooped out, so I knocked out the uca bushings with a 3 lb mini-sledge, and borrowed a control arm bushing tool from work (found out once I opened it, that it's for front control arm bushings, but hell, that never stopped me before! :lol: ), painted the area around the mouse ear area, and pressed in the new bushings... hopefully will have the axle and lca's completley ready to go in a couple days...
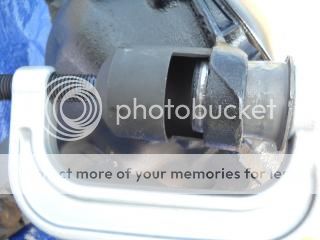
painted and cleaned, after I had one already in, I remembered I wanted to take some pics....
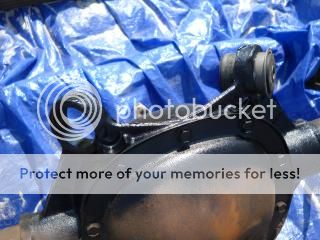
just the trick for pressing your bushing into those tight holes!
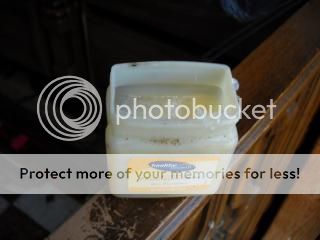

a little ingenuity goes a loong way!
I did manage to finally get the axle out of the back of the truck and start cleaning it up for paint, and new bushings... got it partially de-gunked when my portable sandblaster pooped out, so I knocked out the uca bushings with a 3 lb mini-sledge, and borrowed a control arm bushing tool from work (found out once I opened it, that it's for front control arm bushings, but hell, that never stopped me before! :lol: ), painted the area around the mouse ear area, and pressed in the new bushings... hopefully will have the axle and lca's completley ready to go in a couple days...
painted and cleaned, after I had one already in, I remembered I wanted to take some pics....

just the trick for pressing your bushing into those tight holes!


a little ingenuity goes a loong way!


still slow going, and only 1 mod to post, but I think is a significant part of the entire picture.
to start off, curiosity finally got the better of me, and I had to find out what ratio I had in the axle... 3:42! I started to clean it up to paint, and thought that before I put it in the car, why not go ahead and do the disc upgrade? I had thought I'd heard someone use a b-body disc brake setup in theirs before, and that the rotors from an f-body would slide right in place, well I found out that that was wrong.... so back to the drawing board and I went ahead and sourced the brakes off a 2000 camaro v-6 car and dove right in.
to keep from boring you to death on the build, I used this as direction: http://www.youtube.com/watch?v=0z79D14fyQk IIRC, he's a member here, and this vid is great! (thanks a million dude!)
few pics from the buildup
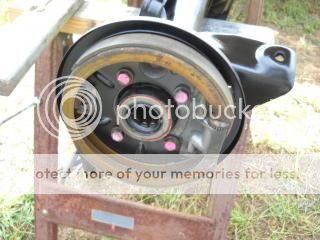
drum and backing plate removed:
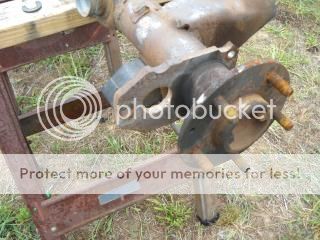
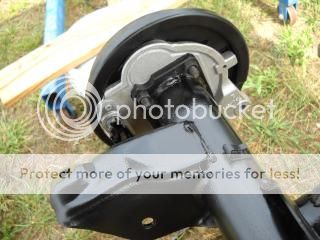
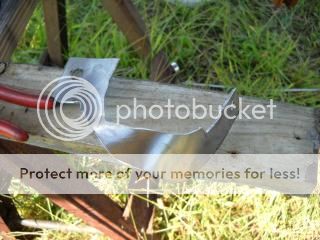
axle removed and scoring for cut to remove "cathedral" section
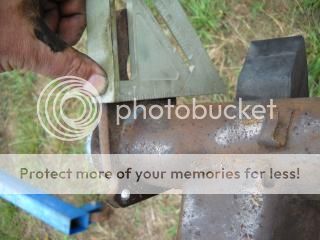
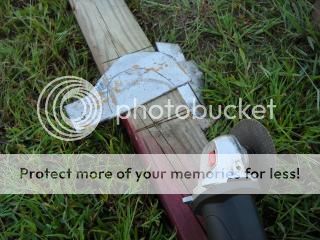
after cut, ready to drill mount holes (gtsdesigns, I owe you an apology... I didn't clean mine up as nice as you did!)
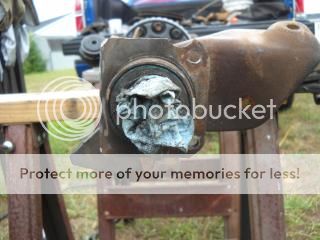
don't forget to protect the bearings from metal shavings while drilling the holes!
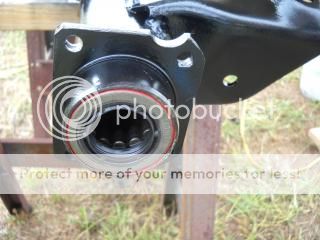
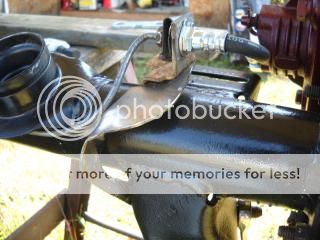
drilled/axle painted/ new seal installed
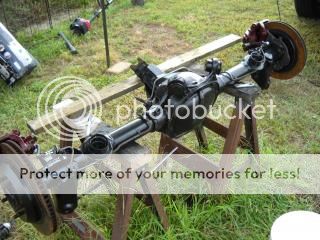
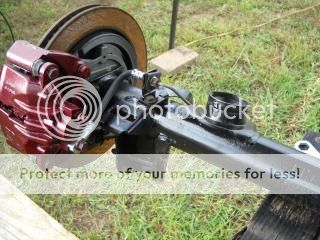
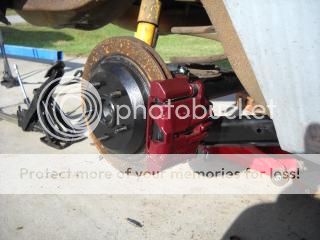
I chose to mount my calipers foward, like on the camaro, I've seen some mounted rearward (you'll have to make a shock relocation mount for that)
ready to install!
to start off, curiosity finally got the better of me, and I had to find out what ratio I had in the axle... 3:42! I started to clean it up to paint, and thought that before I put it in the car, why not go ahead and do the disc upgrade? I had thought I'd heard someone use a b-body disc brake setup in theirs before, and that the rotors from an f-body would slide right in place, well I found out that that was wrong.... so back to the drawing board and I went ahead and sourced the brakes off a 2000 camaro v-6 car and dove right in.
to keep from boring you to death on the build, I used this as direction: http://www.youtube.com/watch?v=0z79D14fyQk IIRC, he's a member here, and this vid is great! (thanks a million dude!)
few pics from the buildup
drum and backing plate removed:

axle removed and scoring for cut to remove "cathedral" section

after cut, ready to drill mount holes (gtsdesigns, I owe you an apology... I didn't clean mine up as nice as you did!)
don't forget to protect the bearings from metal shavings while drilling the holes!

drilled/axle painted/ new seal installed

I chose to mount my calipers foward, like on the camaro, I've seen some mounted rearward (you'll have to make a shock relocation mount for that)


ready to install!

I should note here, that in his video, gtsdesign said he installed longer wheel studs, but I had never really thought much about it... I had also kept telling myself that I needed to fit the tires before I installed the axle in the car.... I forgot about it until I was bolting up the last control arm as it was starting to get dark... more on that in a bit...
I tried to use the original brake lines for fitting( and I hate to bend line ), and had to create a ISO (bubble flare) to go into the caliper hose, and also ended up with a floppy connection at the junction... I broke out the cardboard and made up a crude design to mount the junction to...
fitting it up
in the car
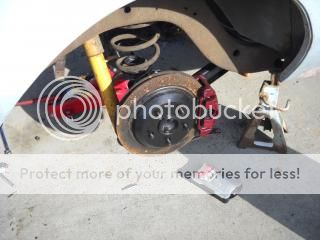
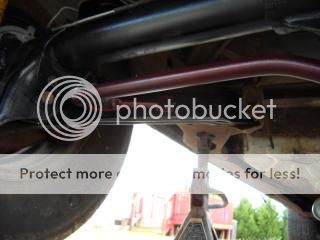
can't forget the LCA's and sway bar!
on the note of the wheel studs, and fitting the wheel: you wil need to fit a spacer around a 1/4" as the wheel (if you're running a 15" like I have at the moment) or the caliper will hit the wheel at the center "dip" and face... I however opted to grind down the "window frame" on the face of the caliper (the arch that shows the backside of the outboard pad) as that is what was hitting the rim.
bleed brakes and enjoy!
I haven't had this on the road yet to try out, and I do have a b-body proportioning valve to install if the bias is off too badly...
I tried to use the original brake lines for fitting( and I hate to bend line ), and had to create a ISO (bubble flare) to go into the caliper hose, and also ended up with a floppy connection at the junction... I broke out the cardboard and made up a crude design to mount the junction to...


fitting it up


in the car


can't forget the LCA's and sway bar!

on the note of the wheel studs, and fitting the wheel: you wil need to fit a spacer around a 1/4" as the wheel (if you're running a 15" like I have at the moment) or the caliper will hit the wheel at the center "dip" and face... I however opted to grind down the "window frame" on the face of the caliper (the arch that shows the backside of the outboard pad) as that is what was hitting the rim.
bleed brakes and enjoy!
I haven't had this on the road yet to try out, and I do have a b-body proportioning valve to install if the bias is off too badly...
Life always seems to have a way of shaking things up... New job,another project car, and relegating the cutlass to live on a farm 30 miles away for awhile seem to have a way of taking your eye off the objective....
The wife actually is the one who nudged me back in the direction I needed to go, and not her usual negative way... so a couple additions to add in.
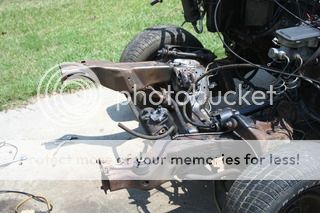
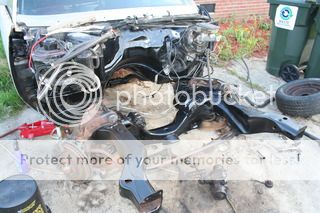
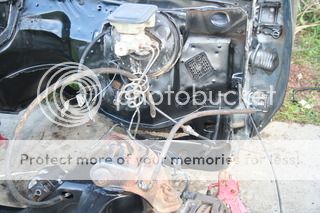
ever since I got the engine back in for what seems like the 20th time, it still had an oil leak that I could never seem to locate, and I had never gotten a chance to clean the frame and engine compartment the way I wanted to, so last fall I started to get everything ready to come out and do it right, including pulling off the front clip so I could pull the engine with the trans...
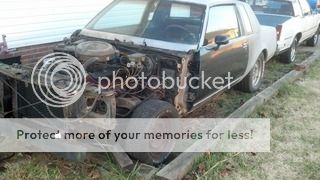
then life happens, and it sat pretty much this way until this weekend...
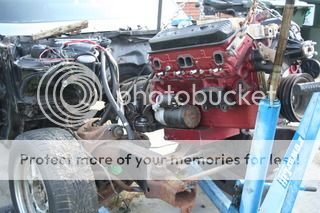
friday and saturday I managed to get the core support out, the engine and trans out, and the engine compartment out, the leak confirmed at the rear corner of the oil pan (guess i didn't get quite enough of a bead of silicone at the corner of the rear main crossover), and wirewheeled the front frame rails and most of the firewall, and paint on the cleaned areas.
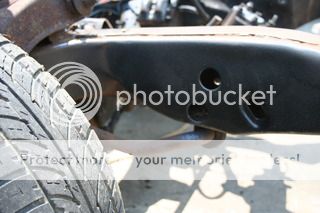
quick note: I used VHT's black chassis epoxy paint on a spot back in the fall as a test spot. I had taken the wirewheel to a small area and painted it to see how it would look, and when I went back over it yesterday, the paint didn't come off... this stuff is really durable!
The wife actually is the one who nudged me back in the direction I needed to go, and not her usual negative way... so a couple additions to add in.
ever since I got the engine back in for what seems like the 20th time, it still had an oil leak that I could never seem to locate, and I had never gotten a chance to clean the frame and engine compartment the way I wanted to, so last fall I started to get everything ready to come out and do it right, including pulling off the front clip so I could pull the engine with the trans...

then life happens, and it sat pretty much this way until this weekend...
friday and saturday I managed to get the core support out, the engine and trans out, and the engine compartment out, the leak confirmed at the rear corner of the oil pan (guess i didn't get quite enough of a bead of silicone at the corner of the rear main crossover), and wirewheeled the front frame rails and most of the firewall, and paint on the cleaned areas.


quick note: I used VHT's black chassis epoxy paint on a spot back in the fall as a test spot. I had taken the wirewheel to a small area and painted it to see how it would look, and when I went back over it yesterday, the paint didn't come off... this stuff is really durable!

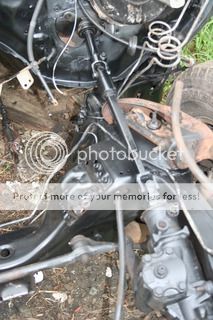
I also was able to get a quick clean on the steering box (I plan on replacing it down the road with an f41 box, so I didn't dedicate too much time to it) and dropped it and the idler arm so I could clean/paint behind them.
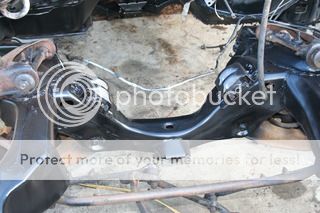
excuse the rusty control arms, as I plan to pull those in the future to replace the balljoints and bushings, and I'll clean/paint those then...
I also was finally able to install my jeep steering shaft upgrade that I picked up over a year ago...
well, the coffee is empty, the sun is out, and the oil leak isn't going to fix itself, and motor has to be back in tonight so I can have the truck for work tomorrow... will update tonight.
stay tuned!😵


excuse the rusty control arms, as I plan to pull those in the future to replace the balljoints and bushings, and I'll clean/paint those then...
I also was finally able to install my jeep steering shaft upgrade that I picked up over a year ago...

well, the coffee is empty, the sun is out, and the oil leak isn't going to fix itself, and motor has to be back in tonight so I can have the truck for work tomorrow... will update tonight.
stay tuned!😵
liquidh8
Comic Book Super Hero
- Status
- Not open for further replies.
Similar threads
- Replies
- 3
- Views
- 165
- Replies
- 0
- Views
- 95
- Replies
- 0
- Views
- 157
- Replies
- 8
- Views
- 545
GBodyForum is a participant in the Amazon Services LLC Associates Program, an affiliate advertising program designed to provide a means for sites to earn advertising fees by advertising and linking to amazon.com. Amazon, the Amazon logo, AmazonSupply, and the AmazonSupply logo are trademarks of Amazon.com, Inc. or its affiliates.