8.5 in rearend

Your argument is solid, though I think rust on a casting this thick is no big deal. I believe the spring perches are solid enough to use as is, although the corrosion has reduced their thickness noticeably. I'll get a couple opinions on that and maybe have new ones welded on.

$300 Axels
$600 QP posi and bearings kit
$20 Rattle can black
$100 seals, gear oil, etc.
$300 tools

That's $2600.

If I need help, add $500 labor.

That's $3100.

I've seen a bolt-in 12-bolt for $3300 no brakes on clearance from a shop in Ohio (attached). Customer didn't take receipt. No brakes.

I'll probably spend $500 on brakes and hose.

So, it IS pretty close to a wash, but my decision was based on belief I would spend $4k on new 12-bolt. I think the 8.5" will be rebuilt and installed for $3000.

I've been looking in to this for a while. I don't have buyer's remorse (yet). It'll work out.
In my eyes all that matters is you're happy with what you got, and, you're able to do your build your way. Sounds like it's two for two.

Congrats on the purchase.
 
Currie and some other manufacturers have new housings and complete rear setups. Google it. You'll find what you're looking for.
 
  • Like
Reactions: doood
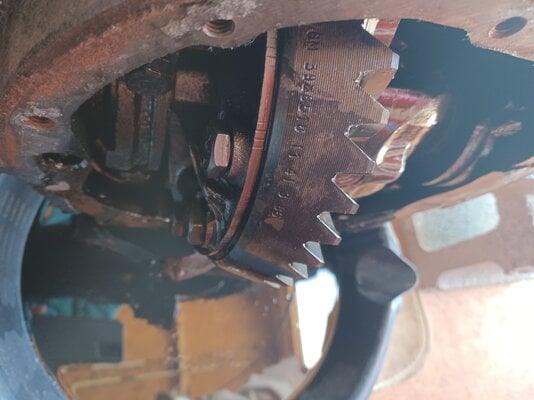
Ooooh-oooh that smell! Can't you smell that smell? Gear oil looks and smells 38 years old.

41/11 = 3.73 gears makes it a H/O or 442 rear I guess.... matches the axel stamp.

That's about as much surprise as when my brother found our Eyetalian pedigree was half Greek on Ancestry dot com (i.e. not surprising).
 

Attachments

  • 20230426_150934.jpg
    20230426_150934.jpg
    1.2 MB · Views: 95
I picked up an 8.5" this past weekend for my El Camino. I've read that I have to shorten the driveshaft by an inch, but what about the rear yoke? Are they the same between the El Camino and the GN?
 
Yes, the yokes should be the same. But in case someone has swapped the GN yoke, then you can use a combination UJ.

Regarding length - measure. The length will vary if you lower the car a bunch if use aftermarket parts.
 
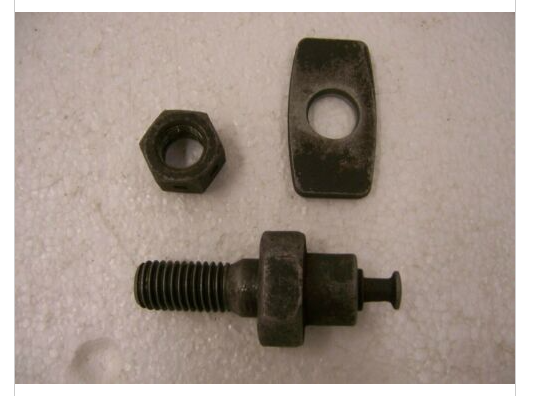
So, I am cleaning/stripping/etching the old rear in preparation for painting.... I made the call to replace everything that comes off so I used all the ugga duggas and a cheater bar to remove the brake shoe pins (anchor pin/post). This was a bad call because deez nuts appear to have been swaged at the factory (permanent) - never saw such a thing. I figured I'd take it down to the flanges, and I did, but I don't think I'll be able to cinch new anchor post like factory did and the anchor pin/post might rotate. The post has flats to grab with a wrench, but I'll need a fixture to really torque it until I see spots in my eyes. I'm not sure that a bit of rotational play is a problem since it is a point mount for springs (no torque), but the factory decided to swage the nuts, so maybe the best path is the disk brake conversion. The disk brake conversion supplier is telling me: "When Installing Rear Disc Brake Kit a Disc/Disc Proportioning Valve w/ a 1 1/8 in. Bore Master Cylinder Will Be Needed". Ok - as far as I can tell the Blazer had a 1" master cylinder bore. Project is snowballing into rear and brakes unless I put drums back on the 8.5.

Q. Am I going to have trouble getting these anchor pin/posts installed tight enough?
Q. If I go disks, what OEM master cylinder should I use? I would rather not change master cylinder.

Of course the wilwood master cylinder is available for $250 instead of a $60 factory unit.


Attachments

  • Capture.PNG
    Capture.PNG
    312.7 KB · Views: 74
Yes, the yokes should be the same. But in case someone has swapped the GN yoke, then you can use a combination UJ.

Regarding length - measure. The length will vary if you lower the car a bunch if use aftermarket parts.
Thanks for the info and the suggestion to measure instead of just going with the 1" shortening. I do have 2" drop UMI springs all around.
 
Thanks for the info and the suggestion to measure instead of just going with the 1" shortening. I do have 2" drop UMI springs all around.
It’s way easier to measure than have it be shortened too much or not enough. It would a good time to make sure your driveline angles are correct before getting drivhaft cut as well (in case you move the rear to adjust).
 
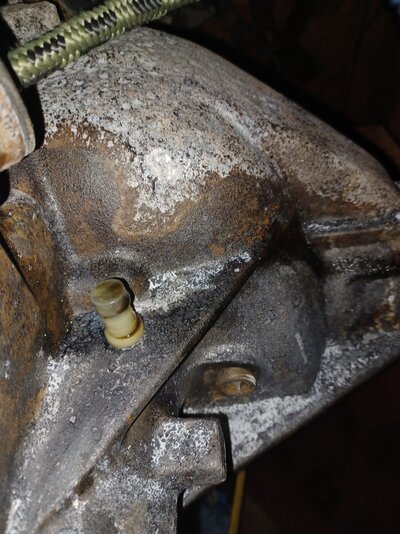
Stupid question. What is this plastic piece on the gusset? Looks like a vent, but odd spot for a vent .


Various etch, degreaser, stripper making it look worse than it is. Put paint on a test spot; looks like it sticking. Broke 2 10mm [head] bolts stuck in flanges; other 2 came out. Gonna have to drill them out or have friend weld nut on what sticks out. Decided the spring perches are fine.
 

Attachments

  • 20230502_224659.jpg
    20230502_224659.jpg
    2.1 MB · Views: 92

GBodyForum is a participant in the Amazon Services LLC Associates Program, an affiliate advertising program designed to provide a means for sites to earn advertising fees by advertising and linking to amazon.com. Amazon, the Amazon logo, AmazonSupply, and the AmazonSupply logo are trademarks of Amazon.com, Inc. or its affiliates.

Please support GBodyForum Sponsors

Classic Truck Consoles Dixie Restoration Depot UMI Performance

Contact [email protected] for info on becoming a sponsor