BUILD THREAD 81 Buick/Olds Turbo Wagon 02/15/2024 More Parts!

Re: 81 Century/GN Wagon build-up 56K beware! update 7/31/13

I too want mine blacked out. I figured I would try the plasti dip on an old messed up one, then leave out in the weather for a while and see what happens. That stuff you can just peal off real quick I am told.

If you get to make the window runs before me of any of us other wagon guys, be sure to document it, lol. Or, buy enough to make a bunch and sell them!
 
Re: 81 Century/GN Wagon build-up 56K beware! update 7/31/13

Jim,
Spraying the piece with Plasti-dip and putting it out in the weather is a good trial method for longevity. I've actually painted my battery tray with it...and have done it to one of my former cars. It seems to work pretty well.

You can bet that I'll document my findings with the window channel and share the info with my fellow wagon guys. :wink:
 
Re: 81 Century/GN Wagon build-up 56K beware! update 7/31/13

So you have used it for something? Cool idea on the battery tray, that never occurred to me and is a good idea!
 
Re: 81 Century/GN Wagon build-up 56K beware! update 7/31/13

It's worth a try on the trim work. I'd curious as to how it would hold up and look.

The battery tray painted with Plasti-Dip is not an original idea. I kind of adopted it. :wink:
 
Re: 81 Century/GN Wagon build-up 56K beware! update 7/31/13

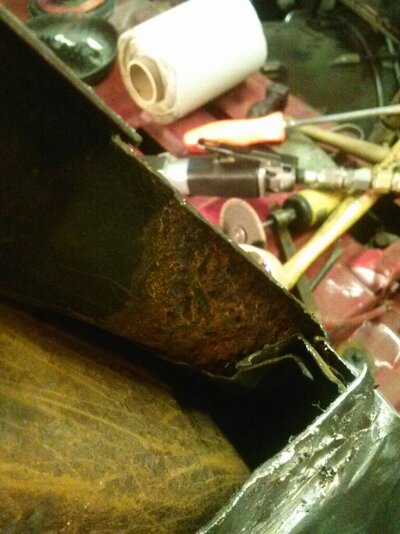
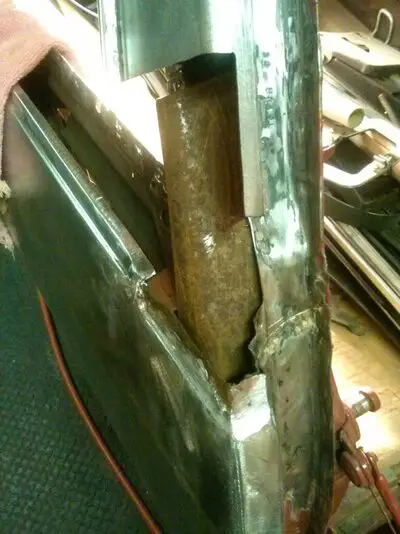
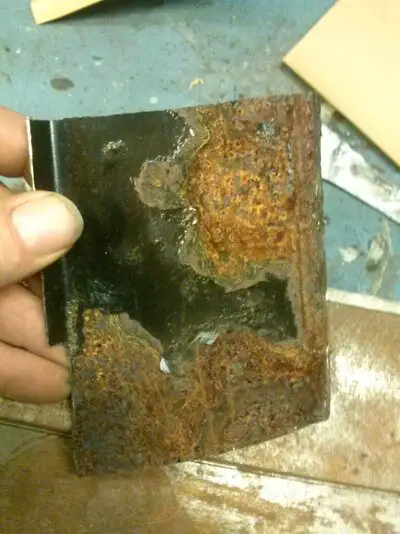
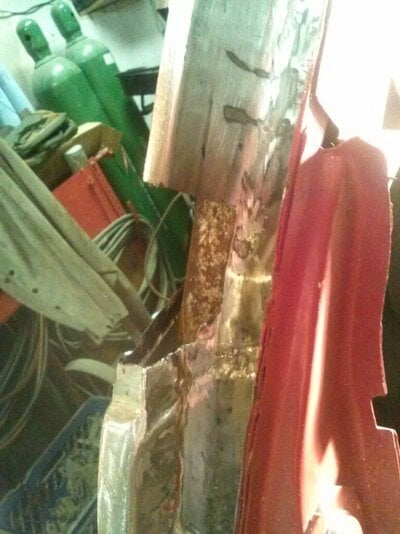
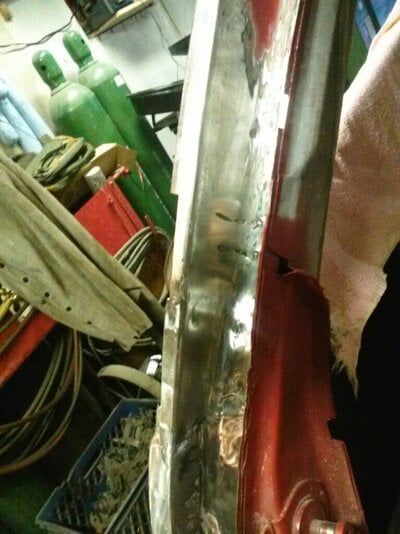
Managed to get out there last night and do a bit more cutting. I melted all the lead out of the factory joint so I can cut the pillar out where is was rotted. There were pin holes coming thru the outer surface. It looked fine at first, but it was really pitted and rotted on the backside. I tried to capture it with the pics.

Hear is the inside of the window frame, it was rotted and the drip rail was all pitted, this would come back so cut cut...

ybutuqyd.jpg


Most of the lead removed

rutu7ujy.jpg


With the lead removed and the outer skin cut away, you can see the pitted rot spot on the inside, this will get cut out too.

hary2eny.jpg


Just a pic from the back


Another, just closer to try and see the rot spot at the factory seam.
 

Attachments

  • uploadfromtaptalk1375449203536.jpg
    uploadfromtaptalk1375449203536.jpg
    86.3 KB · Views: 685
  • uploadfromtaptalk1375449282831.jpg
    uploadfromtaptalk1375449282831.jpg
    93.4 KB · Views: 680
Re: 81 Century/GN Wagon build-up 56K beware! update 7/31/13

Here is a picture close up of the backside. Wouldn't have taken long for this to come completely thru.

uploadfromtaptalk1375449633092.jpg

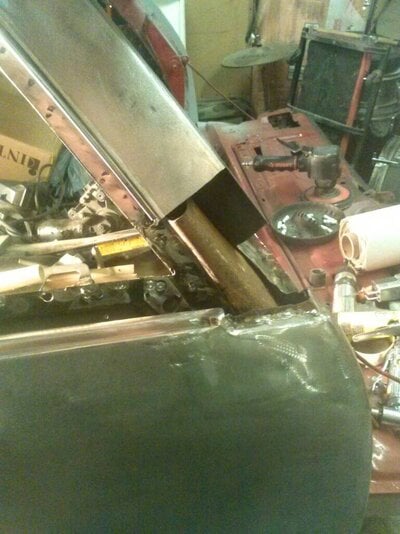
All Cut out and cleaned up.

uploadfromtaptalk1375449618399.jpg

And the Jamb area.

uploadfromtaptalk1375449605720.jpg

I will rebuild this are in 2 or 3 pieces, since I have numerous bends to make. I'll cut, bend, shrink/stretch, then TIG it together.
 
Last edited:
Re: 81 Century/GN Wagon build-up 56K beware! update 7/31/13

Jim,
I've never seen the outer rear pillar rotted thru like that. The inner channel where the weatherstrip goes is a common rust area. I had to patch mine on both sides. I think the old hatch glass weatherstrip was a nasty water trap that also harbored leaves and junk.
Your doing a great job, man. I commend you on that. Using TIG makes for nice clean welds.
 
Re: 81 Century/GN Wagon build-up 56K beware! update 7/31/13

Jack, My brown Malibu wagon had all the pillars rotting from the inside out! That is what prompted me to look at this one. Once I started poking around the factory seam area with a sharp awe, it was just pushing clean thru :shock:

Thanks for the kind words. After I make the patches, I have to practice a few beads before I jump back into it. I don't TIG everyday, lol. Should only take a scrap piece or 2 to make sure the settings are good and all, my girls like to play around with my stuff in the shop.
 
Last edited:
Re: 81 Century/GN Wagon build-up 56K beware! update 7/31/13

Jim, knowing you buddy, it will come out great. 😀
How's that for encouragement? :lol:
 
Re: 81 Century/GN Wagon build-up 56K beware! update 7/31/13

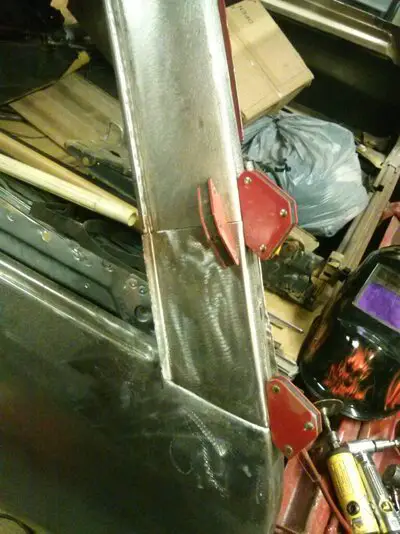
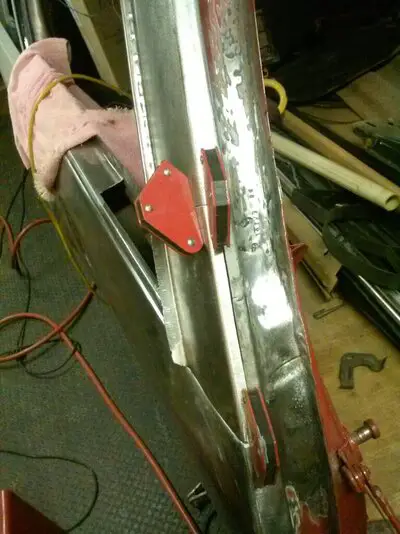
A little metal fab last night.

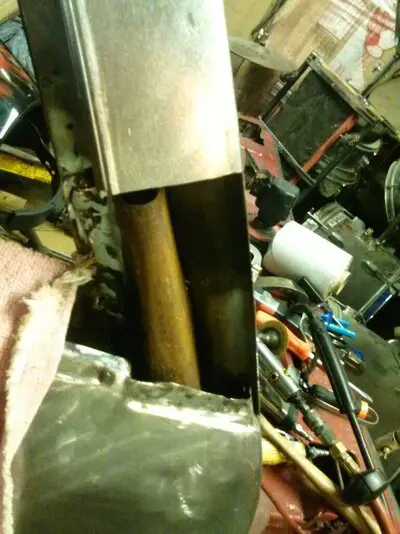
Bent and welded the inner piece, mig welding here. There are allot of low spots, that are dark, they were just filled over with seam sealer.

uploadfromtaptalk1375541511056.jpg
uploadfromtaptalk1375541556926.jpg

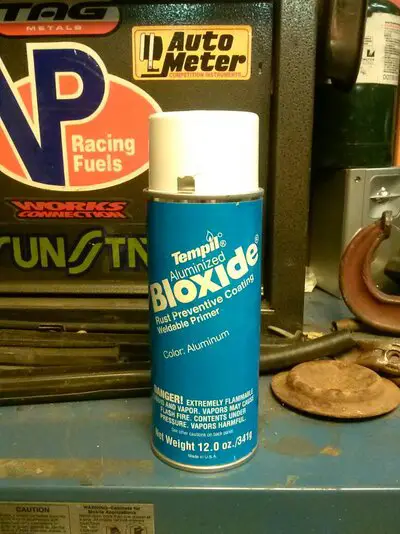
Gotta use this stuff, expensive, but needed.

uploadfromtaptalk1375541576234.jpg

Test fitting this piece. Some more fitting to do, but getting close.

uploadfromtaptalk1375541618393.jpg

uploadfromtaptalk1375541662946.jpg
 
Last edited:

GBodyForum is a participant in the Amazon Services LLC Associates Program, an affiliate advertising program designed to provide a means for sites to earn advertising fees by advertising and linking to amazon.com. Amazon, the Amazon logo, AmazonSupply, and the AmazonSupply logo are trademarks of Amazon.com, Inc. or its affiliates.

Please support GBodyForum Sponsors

Classic Truck Consoles Dixie Restoration Depot UMI Performance

Contact [email protected] for info on becoming a sponsor