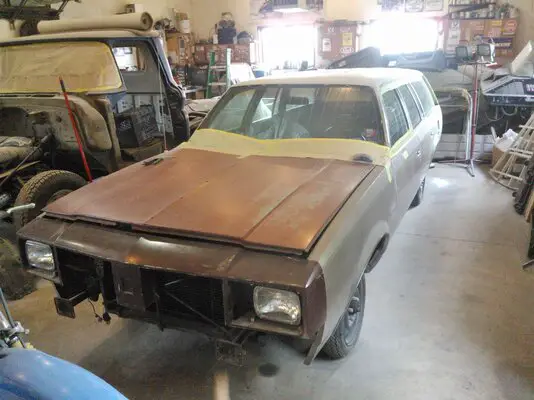
'83 Cutlass Cruiser Build Thread

Been debating adding the vinyl woodgrain trim around the car once it's painted. Should I do it?

  • Yes, that wagon needs woodgrain

    Votes: 12 35.3%
  • No, leave that wagon smooth and simple.

    Votes: 22 64.7%

  • Total voters
    34
  • Poll closed .
Slow and steady I guess you could call it lol...
Been beating myself up over the roof and took a week off to head up north to a friends cabin.
Luckily Jim dialed it back with the updates on his wagon so it's not so glaringly obvious how lazy I am... :lol:

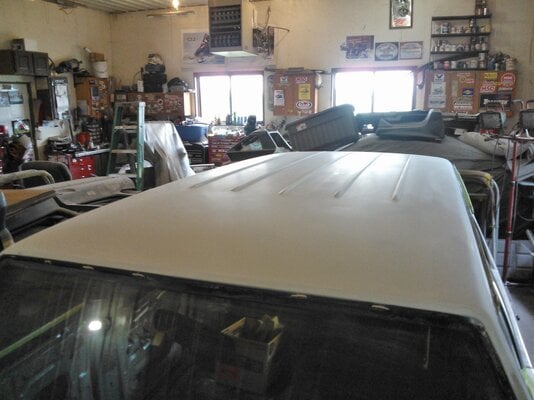
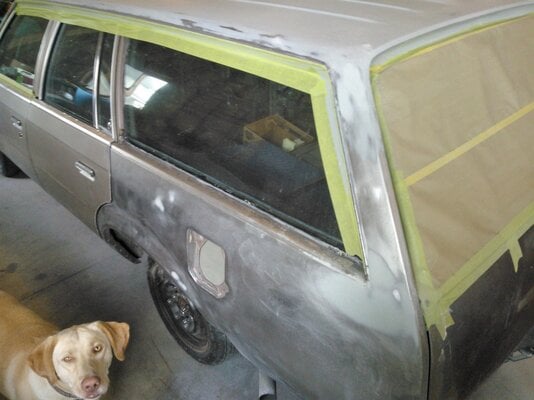
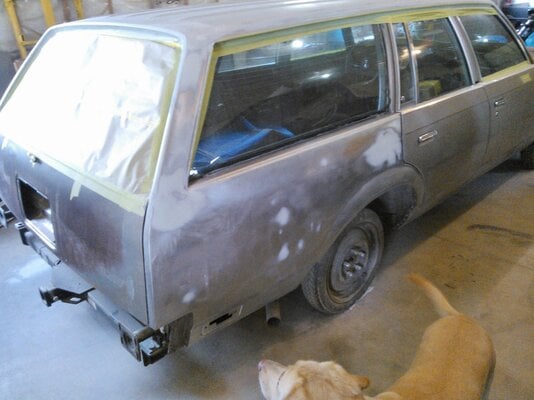
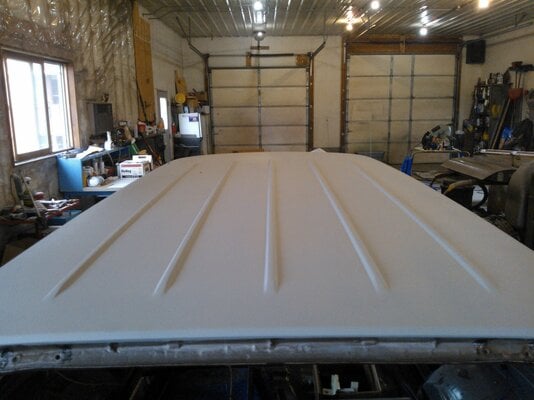
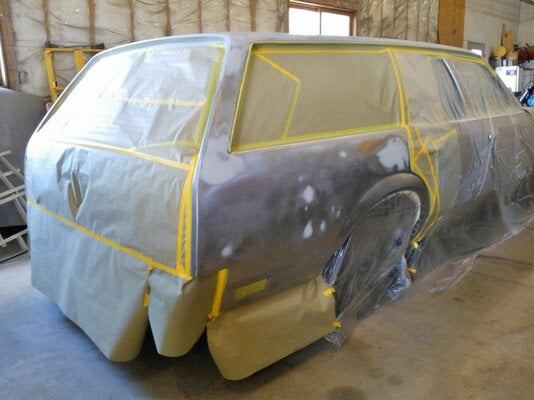
Roof is now 100% sanded and the filler work is done for both 1/4 panels. I'll prime them both in one shot.
There's still a few spots on the roof that need attention, but I'm so sick of it that I'm just going to bury it in primer and work on something else for a while.
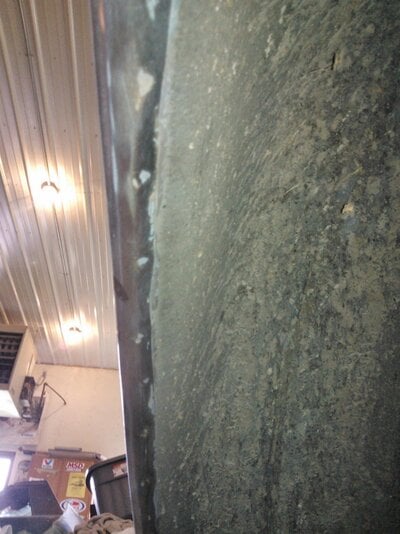
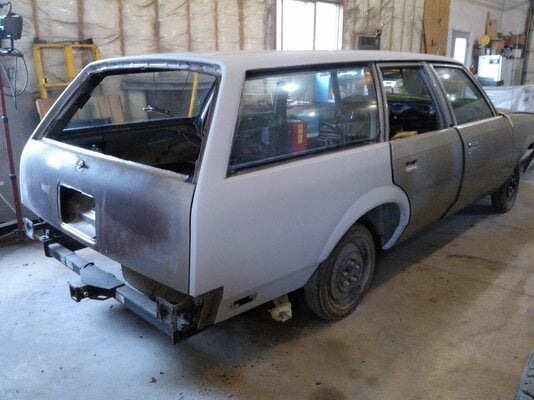
Before I spray I'm going to trim the rear wheel well opening lip where I had previously rolled it over and will cut the molding to match as well.
Since running a smaller tire obviously isn't an option, this should take care of it once and for all. :lol:
Then it's just a matter of cleaning up some edges, blowing it off and masking it back up and it'll be ready to shoot.

Once that's all out of the way I'm going to start on the doors and tailgate and work my way forward.
I've got to replace the pins and bushings in the drivers door hinges and other than that there's just a few holes in each door from the side molding to weld up and a handful of dings to fill.
I have one corner to fix on my header panel and I figured out a great way to fit the metal mount brackets for the corners to remedy the stripped out glass problem.
After everything with the roof, my interest in fixing my latest aluminum hood is dwindling rapidly so I will do that last in case I stumble upon a nicer example...

Roof sanded, mostly straight...


1/4's stripped and straight.
That's my buddies dog, Ziggy... He's basically a 70 lb. spring lol...


Wheel opening... You can see what finesse I used the last time I was down there... 😳 :lol:


Why isn't it done yet??? 😢
 

Attachments

  • WP_000767.jpg
    WP_000767.jpg
    385.3 KB · Views: 833
  • WP_000768.jpg
    WP_000768.jpg
    354.7 KB · Views: 840
  • WP_000769.jpg
    WP_000769.jpg
    415.9 KB · Views: 821
  • WP_000772.jpg
    WP_000772.jpg
    413.2 KB · Views: 838
  • WP_000773.jpg
    WP_000773.jpg
    493 KB · Views: 833
Looking good Blake! I have to admit I am not a big fan of green unless we are talking about $ but I have to admit it is growing on me a very little bit (my wife's Rav 4 is a nice dark green). I will be interested in seeing how your car turns out.
 
It's coming along nicely, Blake.
Don't ever say you're lazy...on the contrary my friend. Sometimes you don't always have the time to devote to the project. I can fully appreciate that. The body looks good, man. Keep up the good work..
 
Friday I got the car all masked up and yesterday I pounded 5 coats of primer on the roof and 1/4 panels.
Forgot my phone at home so no pictures this round...

Taking my annual trip up to BIR this weekend for some racing so I doubt I'll get anything done on the wagon till after Labor Day.
Once I'm back I'll start stripping and fixing the doors.
 
Well we got rained out at the drag strip Labor day weekend, and then on the 1st we got a new kitty so I stayed home and chased him around instead of getting anything done on the wagon.
I was able to get back to it this week, and made a little bit more progress...

Primer on the roof and 1/4's turned out fine.
I'm going to try a different brand of surfacer this next round that my buddy recommended.
Slick Sand does indeed sand nicely, but it sprays out shitty.


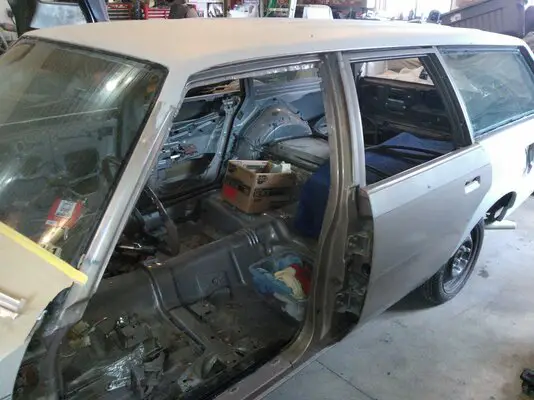
Pulled the rear doors apart to strip the paint and got started on rebuilding the hinges for the front.


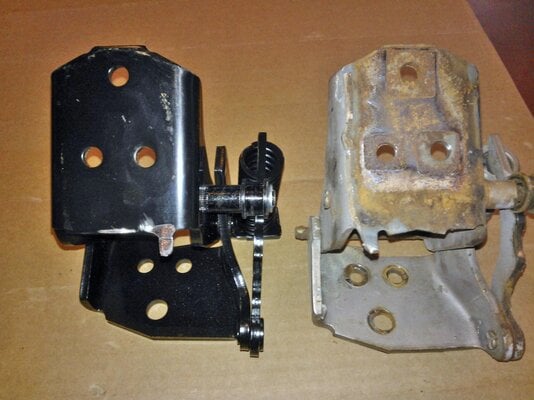
Got the first hinge taken apart only to find that the pins in the eBay rebuild kit I bought 12 years ago are wrong... :roll: :lol:
The length and diameter are ok, but the splines at the base are too long, enough to where they protrude past the door side half and carve into the bushing of the cowl side half.
I could probably grind down the splines, but to me It's not worth the time to try and modify them since a new kit is like $15 or so.
So once I get the right ones and get the hinges done I can make sure the doors line back up and then take it all back apart to strip the doors and prep the jambs.
The paint in the door jambs is all still really nice, no lacquer checking like the rest of the body... so I think I can get away with just sanding and sealing it instead of having to completely strip it off.
 

Attachments

  • WP_000843.jpg
    WP_000843.jpg
    373.6 KB · Views: 641
  • WP_000789.jpg
    WP_000789.jpg
    390.9 KB · Views: 656
  • WP_000841.jpg
    WP_000841.jpg
    455.9 KB · Views: 664
  • WP_000839.jpg
    WP_000839.jpg
    507 KB · Views: 646
Been dragging my feet as usual... :lol:

Stripped the tailgate while I was waiting for my pins to come in the mail. They finally showed up yesterday so I can get the lower hinge back together tomorrow...
However, the spring arm and roller on the upper hinge are pretty roached, so I said screw it and ordered up a new re-popper from gbodyparts.
The passenger side hinges are fine so I'm not going to mess with them.

Finally sat down and made a good thorough list yesterday to help keep me focused instead of keeping it all in my head.
Still need to order up another gallon of surfacer and some sealer too so I can get the door jambs all ready to go.

Next thing I'll probably tackle is the crack in the header panel and modifying the upper mounts... I want to make sure it all fits before I pull the front clip off.
 
Blake you will like those hibges. And they are so nice it will make you wanting both sides to match
 
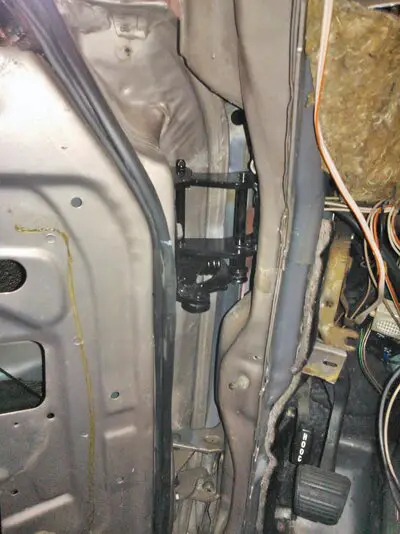
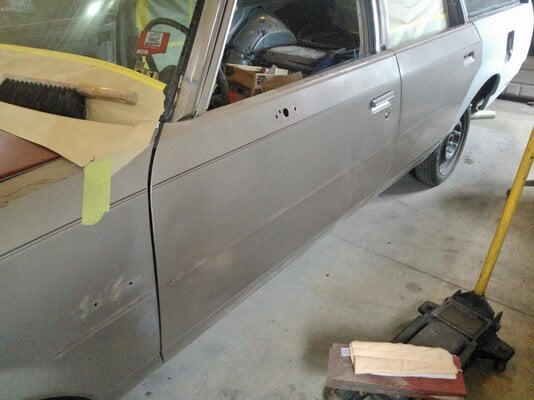
Got the hinges all back together and the door back on the car.
Still needs a tiny bit of tweeking to get it where I want it, but any way you slice it on these cars is a compromise when it comes to door gaps lol...

There was a bit of a quirk with the new hinge that I had to modify.
You can see that on the cowl side of the hinge there is a small curved tab on the edge... and there is a relief in the cowl to allow it clearance.
Well on the new hinge it's on the bottom, not the top. I had to grind the tab flat to allow the hinge to sit flush with the cowl.
 

Attachments

  • WP_000864.jpg
    WP_000864.jpg
    394.1 KB · Views: 501
  • WP_000866.jpg
    WP_000866.jpg
    472.6 KB · Views: 520
  • WP_000867.jpg
    WP_000867.jpg
    441.8 KB · Views: 511
Yesterday I got the door back to where it's supposed to be.
I'm content with the factory panel alignment and gaps everywhere else so I won't need to do any extra body work along the edges anywhere.
Don't get me wrong, it could certainly be improved... but this isn't going to be a show car, it's a driver. If the guys in Flint thought it was OK, then so do I.
I took some reference pictures, but nothing interesting enough to upload...

I thought if I was patient enough I could score some really nice, or even NOS wheel well moldings, but that hasn't been the case...
All the ones at Rohner's were just as beat up as mine, not to mention how slim my chances are of even getting the things off...
I found one NOS piece on eBay, but after buying it the seller never sent it and never responded... So it looks like I'll have to fix the ones I have, which I am NOT thrilled about. At least I got my $$ back.
I'll have to buy a polisher and all the supplies, but realistically the cost will be about the same as what I would end up paying for new moldings.
I used to fix a lot of these at my old job and it's super time consuming, but with some gear of my own I can do all my stuff and maybe even a little side work here and there...

Got my fiberglass supplies today so tomorrow I'll get started on fixing/modifying the header panel.
 
Blake442 said:
Slow and steady I guess you could call it lol...
Been beating myself up over the roof and took a week off to head up north to a friends cabin.
Luckily Jim dialed it back with the updates on his wagon so it's not so glaringly obvious how lazy I am... :lol:

Haha, I have been at Keesler AFB in Biloxi, just got back though and saw all the progress you made! Looking good! I did the same thing with my wheelwell lips, cut them back, hammered them over, and I filled the new valley created by hammering them over with seam sealer. This should keep mud and crap from laying in there and rotting it out.
 

GBodyForum is a participant in the Amazon Services LLC Associates Program, an affiliate advertising program designed to provide a means for sites to earn advertising fees by advertising and linking to amazon.com. Amazon, the Amazon logo, AmazonSupply, and the AmazonSupply logo are trademarks of Amazon.com, Inc. or its affiliates.

Please support GBodyForum Sponsors

Classic Truck Consoles Dixie Restoration Depot UMI Performance

Contact [email protected] for info on becoming a sponsor