Plastic insert in the hinge with a self tapping screw with floating washer and 7mm head. I"m sure I have both if you need them. Bill WVView attachment 113919
What goes in this slot that connects the hood sheet metal to the hinge? bolt and nut? self tapping screw? pastic or rubber isolator?
thanks for any help.
BUILD THREAD 84 Hurst Olds - TechG8
- Thread starter techg8
- Start date
You are using an out of date browser. It may not display this or other websites correctly.
You should upgrade or use an alternative browser.
You should upgrade or use an alternative browser.
- Status
- Not open for further replies.
Plastic insert in the hinge with a self tapping screw with floating washer and 7mm head. I"m sure I have both if you need them. Bill WV
Id love to see a pic.
I have two spare rectangular plastic inserts I haven't figured out where they came from....maybe this is it.
so what, the inserts go in the hinge, and the screw goes thru the hood metal, into the plastic insert, like a wall anchor?
Well, dang, went to the shop to take pics and someone already posted them before I got back inside. Well, not to waste my time, I'm posting them anyway. Interestingly enough, I cannot seem to find the GM part numbers to see if these were even replaceable. Wait....listed under "grommet" - what a stupid description. P/N 1264963. Clips and Fasteners sells them box of 25 as A12713. It's the same as Auveco p/n 12713. Best if you already have someone that has a pair of these ready to go. Unless you just want to spend 10.72 plus shipping. Oh, just found out old GM number was superseded with available part number 11588612. They list price from GM at $5.18 each. Way old number was 1259220.
Beware...there are other "grommets" out there that look similar to these but these are the correct part number.


Beware...there are other "grommets" out there that look similar to these but these are the correct part number.


Last edited:
Ah ok thanks fellas.
I have the two plastic "grommets". now I now what theyre for.
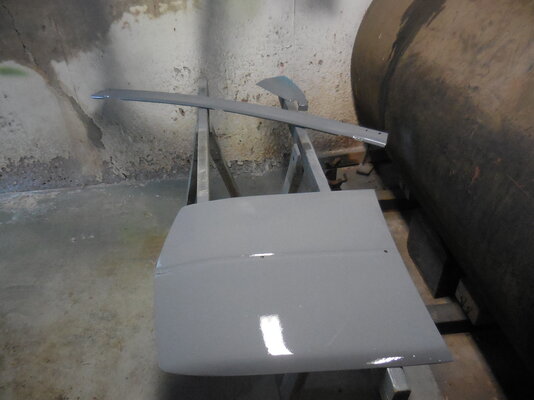
I took the hood off to reveal the hinge, and while I was at it I removed the scoop and sanded both down to prep for epoxy and paint.
sanded the whole top of the car from the upper hurst stripe skyward today. Making progress....
I have the two plastic "grommets". now I now what theyre for.
I took the hood off to reveal the hinge, and while I was at it I removed the scoop and sanded both down to prep for epoxy and paint.
sanded the whole top of the car from the upper hurst stripe skyward today. Making progress....
Those plastic doohickeys for the hood hinge make a HUGE difference in how well the hood closes up level with the top of the fenders. Glad I still had them.
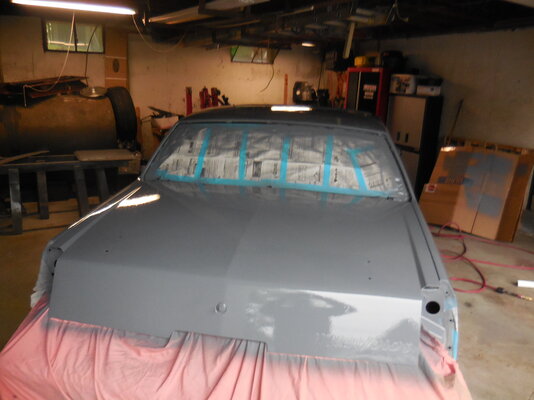
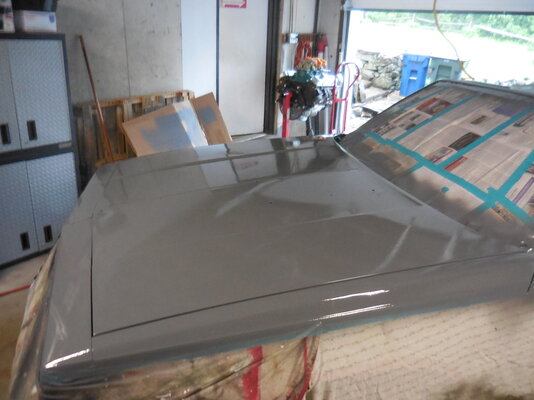
So I masked up the car and today (although it was cold and wet) I sprayed 2 coats of epoxy on everything but the wing (because I received the wrong wing tip from Gbodyparts and am in the process of returning it for the right one ). I am using my 60 gal craftsman pro compressor with Eastwood concourse HVLP gun. In line dessicant mini filter at the gun. Im no paint pro but its going well so far.


Tomorrow will be the primer surfacer, and maybe (definitely) a little bodywork/sanding.
The car looks so much better already its put a smile on my face. I will likely base color the top, then remask at the lower black paint, and clearcoat the top and sides. Still undecided there.
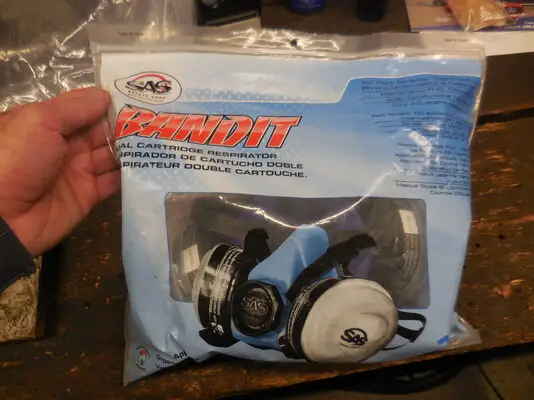
OH and ill share a pic of the disposable respirator I got from eastwood. This thing works GREAT! I used one when I painted my Buick GS a couple years back. These do an EXCELLENT job of filtering what you breathe. Cant even smell any fumes at all while painting in the garage. Money well spent.

So I masked up the car and today (although it was cold and wet) I sprayed 2 coats of epoxy on everything but the wing (because I received the wrong wing tip from Gbodyparts and am in the process of returning it for the right one ). I am using my 60 gal craftsman pro compressor with Eastwood concourse HVLP gun. In line dessicant mini filter at the gun. Im no paint pro but its going well so far.


Tomorrow will be the primer surfacer, and maybe (definitely) a little bodywork/sanding.
The car looks so much better already its put a smile on my face. I will likely base color the top, then remask at the lower black paint, and clearcoat the top and sides. Still undecided there.
OH and ill share a pic of the disposable respirator I got from eastwood. This thing works GREAT! I used one when I painted my Buick GS a couple years back. These do an EXCELLENT job of filtering what you breathe. Cant even smell any fumes at all while painting in the garage. Money well spent.

Last edited:
DO NOT CLEAR THE STRIPES OR YOU WILL CRY LATER. That is all...
wait.....that isn't all.
While you have to put the new tip on the spoiler, here's an OPTIONAL spoiler "tip" 🙂 :
You'll notice it has "fingers" or "teeth" on it. You know it's from South Carolina because it only has 3 teeth. 🙂 Note where these teeth go. You could do this once you glue the tip in place and seam sealer it, whatever. Anyway, on the bottom side, you could drill a hole for like a 1/4" or 3/8" plastic "cross pin" to go into the spoiler AND the tooth (don't drill too deep. Don't want it going out the top). This way you have a fighting chance of keeping your tips. Might want to do both sides. Cut pin flush with spoiler. Sand/fill/finish the hole as needed, sand and prep for paint as usual. Nobody will be able to tell once you're done. And you should be able to keep the tips from falling out again due to vibration/age.
Oh, and make sure you paint the fake "opening" of the back of the scoop satin black. It came with a black decal on it, but some people forget this part when repainting them and you can see that silver bar looking at you every time you drive it.
Gladly. I had a gray 85 442 that the original owner had re-painted with base/clear and didn't want to spend the bucks for the stripe kit. Didn't even take the 442 lettering off the doors! Anyway, they just sprayed the car, then cleared everything including all the decals. Luckily the trunk decal was the only one they removed so I just put a new one on. I got the car 3 years after they painted it and used it as a DD. It was a pretty nice paint job, but the gold striping was so mottled looking and by the time I sold it the clear was starting to crack on top of the decals. They used Dupont paint so it wasn't the dimestore version. But decals...don't clear them unless you're selling it next week. Because this will be what it looks like if you plan on keeping the car.So the decals will come up or wrinkle under clear? I don't want those issues.....please explain.
Note the stripes- above the wheel and behind the wheel on the quarter panel and the back bumper stripes. Yeesh. Overall, it wasn't a bad car. Only a tad of surface rust and never was wrecked. I had a butt ton of parts to restore it, including a new stripe kit, but figured I'd sell it and buy one that didn't need much of anything. I kind of miss it.


- Status
- Not open for further replies.
Similar threads
- Replies
- 11
- Views
- 275
- Replies
- 4
- Views
- 248
- Replies
- 2
- Views
- 370
- Replies
- 2
- Views
- 228
GBodyForum is a participant in the Amazon Services LLC Associates Program, an affiliate advertising program designed to provide a means for sites to earn advertising fees by advertising and linking to amazon.com. Amazon, the Amazon logo, AmazonSupply, and the AmazonSupply logo are trademarks of Amazon.com, Inc. or its affiliates.


