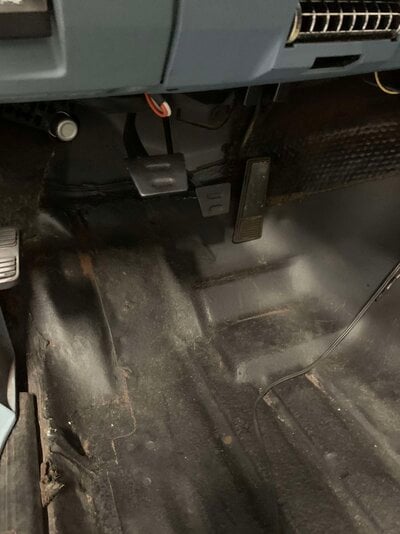
I'd suggest it as the used Z bars had grease in them when I got them.Oh yes, I put the spring in the groove.
Should the z bar be packed with grease?
Manual linkage install help
- Thread starter Baker7888
- Start date
You are using an out of date browser. It may not display this or other websites correctly.
You should upgrade or use an alternative browser.
You should upgrade or use an alternative browser.
- Status
- Not open for further replies.
Ok will do.I'd suggest it as the used Z bars had grease in them when I got them.
Then why don't you use the one in post #13 of this thread.Sorry all I have is a Corvette assy. manual with this info.
Ok I am slowly moving forward. I had everything mocked up and seems to fit well. Going to drop transmission and seal up the bolts, and clean up the tunnel some. Moving the grease fitting on the z bar to the top as well so it will be accessible from up top.
Once I am reassembled (hopefully this long weekend) what is the clutch adjustment procedure? I see an adjustment at the clutch fork rod. Do I want a little bit of clearance like a lifter pushrod?
Once I am reassembled (hopefully this long weekend) what is the clutch adjustment procedure? I see an adjustment at the clutch fork rod. Do I want a little bit of clearance like a lifter pushrod?
You need to adjust the linkage so that there is about an inch of free play at the pedal. That means that you can push the pedal down about an inch before the throwout bearing touches the pressure plate fingers. You can feel it touch by wiggling the linkage back and forth, or look through the access port at the bottom of the bell housing if there is one, or the clutch fork hole. You do not want the TOB ever touching the pressure plate in the relaxed position or it will wear very fast. Adjust this at the lower push rod. I like to add a spring so that the pedal is pulled all the way back up. That makes all the linkage follow along and pulls the TOB away from the fingers. Remember, inches at the pedal equals millimeters at the TOB. The factory geometry is such that you get the inch of free play while also getting total clutch disengagement.
Last edited:
Ok I will have to look when i get home. I want to say i may not be able to thread the linkage far enough in (shorten it up) to achieve the 1" of free play. When you say add a spring so the pedal is pushed all the way back up --- where are you mounting this spring?You need to adjust the linkage so that there is about an inch of free play at the pedal. That means that you can push the pedal down about an inch before the throwout bearing touches the pressure plate fingers. You can feel it touch by wiggling the linkage back and forth, or look through the access port at the bottom of the bell housing if there is one, or the clutch fork hole. You do not want the TOB ever touching the pressure plate in the relaxed position or it will wear very fast. Adjust this at the lower push rod. I like to add a spring so that the pedal is pulled all the way back up. That makes all the linkage follow along and pulls the TOB away from the fingers. Remember, inches at the pedal equals millimeters at the TOB. The factory geometry is such that you get the inch of free play while also getting total clutch disengagement.
Oh good call, no i do not (kit did not come with one)Do you have the clutch pedal stop installed? It stops the travel at the top of the clutch pedal movement.
View attachment 202572
Right now where it rests, it takes full force to push it down (no free play at all) Then it is basically fully engaged when it is even with the brake pedal (wont go any farther down)
Attachments
Dixie also has a discount code for Gbody Fourm members.Oh good call, no i do not (kit did not come with one)
Right now where it rests, it takes full force to push it down (no free play at all) Then it is basically fully engaged when it is even with the brake pedal (wont go any farther down)
78-88 4/5/6spd Clutch Pedal Stop | Dixie Restoration Depot
- Status
- Not open for further replies.
Similar threads
- Replies
- 38
- Views
- 2K
- Replies
- 1
- Views
- 86
- Replies
- 2
- Views
- 246
GBodyForum is a participant in the Amazon Services LLC Associates Program, an affiliate advertising program designed to provide a means for sites to earn advertising fees by advertising and linking to amazon.com. Amazon, the Amazon logo, AmazonSupply, and the AmazonSupply logo are trademarks of Amazon.com, Inc. or its affiliates.


