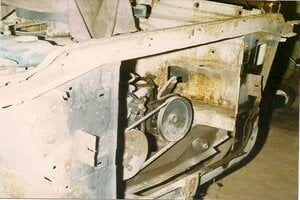
My 70 Plymouth Belvedere Resto

Status
Not open for further replies.
I so need to take a picture of my neighbors car for you in the early 90s it was his bracket car and was 8 in points E-town had him run it at Maple Grove for them that year now it's hidden from the town in his garage off the road sence the late 90s that's it I'm going across the street
I told you I would and I did because I thaught you would like to see it the first picture is way back when the car was a daily and a bracket car it was taken at Maple GroveView attachment 69525and the way it is nowView attachment 69526 View attachment 69527 View attachment 69528 just last night he helped me bead my brakes and he told me he wants to put it back on the road I shore hope so I'll have someone to race
Nice car. What is that........a 65 or 66?
It's my neighbors I mentioned earlier in your thred I thaught you might like to see it it's a 65. The R/T in the first picture is his friend Danny's that one you may remember from many Mopar magazines Danny is a writer for them he is going to help Steve get the 65 back on the road
 
  • Like
Reactions: Longroof79
It's my neighbors I mentioned earlier in your thred I thaught you might like to see it it's a 65. The R/T in the first picture is his friend Danny's that one you may remember from many Mopar magazines Danny is a writer for them he is going to help Steve get the 65 back on the road

I thought so. The other car that you call the R/T isn't that a 65 or 66 Dodge Coronet? There was some nice new styling that came out in those years from GM, Ford & Chrysler
 
The repairs to the front consisted of the windshield pillars where they meet the cowl air intake panel, the radiator core support and the fender aprons.

Here the repairs to the windshield pillar have been done. I should have taken before pix so you could see the difference but didn't. It was nothing big.....just a small rust hole at the bottom of each pillar where it meets the cowl. These were the result of water getting up under the vinyl top and just sitting there.

blob.jpg


blob.jpg


blob.jpg


blob.jpg


In this pic the core support has already been straightened. It was pushed in from a minor accident and I used a porta-power to push it back out. It came out straight which surprised me. I thought for sure that I would also have some minor bumping to do to get it straight. You get lucky sometimes. It also shows the condition of the left side fender apron which is why I replaced them too. The right side was the same.

blob.jpg


Here are pix of the RH fender apron removed. I used a piece of 1/2" electrical conduit, hammered the ends flat and drilled holes in both ends for bolts to make a support brace. I wanted the original distance between the cowl and radiator support maintained for correct positioning of the fenders when they are put back on.

blob.jpg


blob.jpg


blob.jpg
 

Attachments

  • blob.jpg
    blob.jpg
    61.8 KB · Views: 365
Here I have hung and clamped the new fender apron in place for welding. These are available as reproductions but these ones are NOS and weren't expensive at the time. I used the same technique here that I did with the front floors. I cut the welding holes with the pinch weld removal tool. Since what the fender apron is being welded to is thicker, I didn't want to burn the thinner piece before the thicker piece got hot.

blob.jpg


blob.jpg


blob.jpg


Here, the fender apron has been welded and the brace removed.

blob.jpg


blob.jpg


blob.jpg


And here the welds have been ground flush.

blob.jpg


blob.jpg


Although I didn't take pix of the left side, I installed a new fender apron there also and the repair was exactly the same. This wraps-up repairs to the front and at this point all the grunt work has been completed. My next post will be pix of where I'm at now. It's actually beginning to look respectable again. Thanks for watching.
 
Here's where I'm at right now. The left hand side of the roof has been sanded to bare metal and primed, the sailpanel seam has been filled and primed, the left quarter has been finished and primed, the left hand side of the filler panel between the rear window and the trunk opening has been finished and primed and the tailpanel has been finished and primed. I am actually a little bit farther than these pictures show since they are almost 2 weeks old now. I have also sanded the right hand side of the roof to bare metal and primed it and sanded to bare metal the right sailpanel, the right hand side of the filler panel and the top of the right quarter. Once I'm done with the right side I'll be pulling the engine and trans so I can sandblast the underside of the car, the floor and engine compartment. That's still a little while off though. Worth mentioning is that I "leaded" the seam between the new quarter and the old quarter. Lead is more flexible than bondo and preserves that true metal sound when you tap it with your finger. Of course a small amount of bondo over the lead is necessary to give that a smooth finish.. You may also notice that the garage looks different somehow from all the previous pix. You are right. All the previous work I did was in the garage of the house next to me. After I had the new garage built I moved the project over to me. The garage builders only built the basic structure and I did all of the inside which included insulating the ceiling and walls, the drywalling, installation of all the electric (110V/15A, 115V/20A and 220V/20A), lighting and heating. When I did all this I had only one goal in mind.... to make this a car guys garage. This is the inside of the same garage you saw in the pictures of my 86 GP. I also threw in a pic of my 63 Galaxie.


blob.jpg


blob.jpg


blob.jpg


blob.jpg


blob.jpg


Here's the 63 patiently waiting for its' turn.

blob.jpg
 
I admire your dedication. A four door with a straight six and you put that level of effort into it. It's going to be a cool car. Nice garage!
 
Status
Not open for further replies.

GBodyForum is a participant in the Amazon Services LLC Associates Program, an affiliate advertising program designed to provide a means for sites to earn advertising fees by advertising and linking to amazon.com. Amazon, the Amazon logo, AmazonSupply, and the AmazonSupply logo are trademarks of Amazon.com, Inc. or its affiliates.

Please support GBodyForum Sponsors

Classic Truck Consoles Dixie Restoration Depot UMI Performance

Contact [email protected] for info on becoming a sponsor