PROJECT " LAID BACK 2 " - 1978 SALON 2 DOOR AEROBACK

Status
Not open for further replies.

69hurstolds

Geezer
Supporting Member
Jan 2, 2006
8,185
17,567
113
Cut the new one in half. Save the other spring for when these wear out. Boom. Shortened spring, and now you have TWO!!! If you're going to drop it, drop it til it scrapes!!!! :)
Spring Cut.JPG
 
  • Haha
Reactions: 7 users

JAMCAR223

Royal Smart Person
Jun 6, 2014
1,853
5,507
113
Houston, TX.
  • Like
Reactions: 1 users

fleming442

Captain Tenneal
Dec 26, 2013
13,046
24,216
113
They don't do it in the video, but my buddy suggests clamping a pair of vise grips on the good side of the cut to act as a heatsink. Makes sense to me; can't see a reason not to. You want as little heat in the spring as possible.
 
  • Like
  • Informative
Reactions: 5 users

JAMCAR223

Royal Smart Person
Jun 6, 2014
1,853
5,507
113
Houston, TX.
Got the steering box primed, and painted today. I'm kinda worried about this piece. It was "painted" when I got it out of the box, but it was gummy, and thick. It reminded me of Plastidip... It was hard to clean, due to the shape (peaks & valleys) of the casting. I did the best I could without having it blasted. Hoping for the best.
IMG_1496.JPG

I also got the Blazer spindles cleaned, primed, and painted. Most of the people following this build know their way around cars, and almost certainly know this little trick about using a file to trim masking tape. I'll post it anyway, just in case someone new to the forum ( or young man ) has never used this process when taping off parts.

I polished all the "machined" surfaces on the spindles with the wire wheel, and then taped them off, so I would not get paint on them. I then used a flat file to score ( motion away from your body )the tape, so it easily removes the edges and leaves a perfect shape of the area you want to protect.
IMG_1499.JPG

IMG_1500.JPG

IMG_1501.JPG

IMG_1502.JPG

IMG_1503.JPG

A razor blade could work also, but this is easier & safer, in my opinion.
IMG_1506.JPG

IMG_1507.JPG

I'm waiting on my Black Oxide kit, so I can treat all the 200+ bolts I cleaned on the wire wheel. I'm ready to put some stuff together!! I'll have more painted tomorrow.
 
  • Like
  • Winner
Reactions: 11 users

Texas82GP

Just-a-worm
Apr 3, 2015
7,987
18,693
113
Spring, Texas
I've always used the ball end of a ball peen hammer instead of a file. Cool trick!
 
  • Like
Reactions: 3 users

JAMCAR223

Royal Smart Person
Jun 6, 2014
1,853
5,507
113
Houston, TX.
Well I thought I would have more stuff painted, but it has been damp, and VERY humid (80%). So not painting, it can wait ... I went through my stash again, and got these Monte Carlo bars ( cowl to core support ). I have had these stashed for 5+ years. I'll paint these soon.
IMG_1516.JPG

The only other thing I did yesterday was clean up the brake caliper, slide pins & hub bolts on the wire wheel.
IMG_1515.JPG

I have a few small parts on order, and the black oxide kit has finally shipped from New York ( understandable why I have not received it yet ).
 
  • Like
Reactions: 4 users

Texas82GP

Just-a-worm
Apr 3, 2015
7,987
18,693
113
Spring, Texas
James, try the VHT Chassis and Roll Bar paint. It is epoxy based and isn't sensitive to humidity, in my experience. It also doesn't require primer. It comes in a few different shines. I really like it for small parts.
 
  • Like
  • Agree
Reactions: 4 users

JAMCAR223

Royal Smart Person
Jun 6, 2014
1,853
5,507
113
Houston, TX.
Well Jared, if you, Donovan, and Scott like it, I may try it. I've been happy with the results of the NAPA chassis paint, I just don't want the paint to get that "grey" look when sprayed in humid conditions.
 
  • Like
Reactions: 1 users

Texas82GP

Just-a-worm
Apr 3, 2015
7,987
18,693
113
Spring, Texas
If you want to come get a partial can from me to try, feel more than welcome. Just bring your mask and gloves brother.🤣
 
  • Haha
  • Like
Reactions: 2 users

JAMCAR223

Royal Smart Person
Jun 6, 2014
1,853
5,507
113
Houston, TX.
I got the front backing plates cleaned and painted. They look better than new. I decided on silver to paint the backing plates, calipers, and rear drums. Just a little contrast against all the black suspension/steering components.
IMG_1526.JPG

You can see the part numbers!
IMG_1525.JPG

Very clean... and just for my Canadian friends !!
IMG_1527.JPG

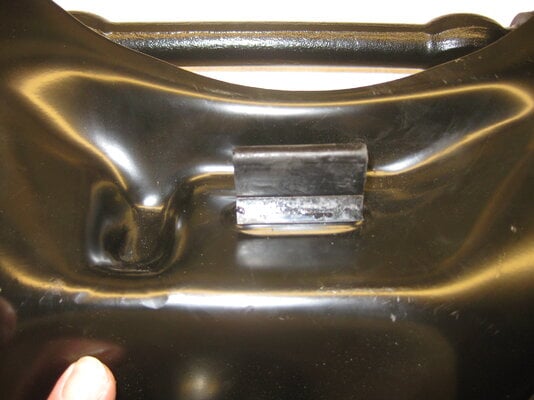
I got the new upper control arm bumpstops installed. I went with Energy poly on these, simply because they were cheaper than rubber. $9 at Rock Auto. BUT, they were a biotch to install. I had to have my buddy help me pull them through ( pliers required ) . It still took several attempts, but got em in. Pic of the underside.

IMG_1529.JPG

I also took advantage of the help, and had my buddy help me get the 8.5 axle off the rack, and onto the floor jack. I used a transmission pan adapter on the jack, and a block of wood to get it positioned correctly. I can now install it, but I still need springs. Excuse the dust... I'll take care of that today.
IMG_1530.JPG


I got the front coil springs marked, and ready to cut.
IMG_1531.JPG

I also got some new tie rod adjusters. I will paint these in the next couple days.
IMG_1532.JPG

I have a few parts coming this weekend...
 

Attachments

  • IMG_1528.JPG
    IMG_1528.JPG
    3.2 MB · Views: 94
  • Like
  • Winner
Reactions: 7 users
Status
Not open for further replies.

GBodyForum is a participant in the Amazon Services LLC Associates Program, an affiliate advertising program designed to provide a means for sites to earn advertising fees by advertising and linking to amazon.com. Amazon, the Amazon logo, AmazonSupply, and the AmazonSupply logo are trademarks of Amazon.com, Inc. or its affiliates.

Please support GBodyForum Sponsors

Classic Truck Consoles Dixie Restoration Depot UMI Performance

Contact [email protected] for info on becoming a sponsor