roof rot malibu

Status
Not open for further replies.
Sure do hope so. Had a few nice fellas on here offer some parts. Paid for this one in pic. Hopefully it will be arriving soon! Looks decent and looks to have a good amount of roof to work with. Good folks on here. Thanks and will try to do a little step by step photo of r/r. View attachment 63721
That looks like a good section of roof. That should get you moving along. I'll see if I have any old pics that show the amount of windshield studs/ clips.
 
  • Like
Reactions: Texas82GP
Here's an older pic of my car. Not a closeup, but it might give you a general idea of where the moulding clips are situated.
 
Got roof from jun_bug 125 today. Thanks jun_bug 125. Looks great. Thanks to the other folks on here that offered to. Ready for some cutting, grinding, fitting, etc.
Hey, that's good to hear. Good luck getting it done. Definitely post some pics of the work in progress. By all means...measure twice, cut once... :wax:
 
Trying to separate skin from inner structure. Was going to use spot weld cutter, but find it easier to grind down near where roof skin meets the drip edge then lightly cut with cutoff wheel and separate with sharp putty knife. Of course this piece is off car though.
 

Attachments

  • 20170415_104415.jpg
    20170415_104415.jpg
    1.7 MB · Views: 242
  • 20170415_104949.jpg
    20170415_104949.jpg
    1.9 MB · Views: 239
  • 20170415_110908.jpg
    20170415_110908.jpg
    1.5 MB · Views: 225
  • Like
Reactions: Texas82GP
So the piece you're working on is the replacement roof panel. You're trying to peal the skin off of the structure to ready it for the grafting process. I guess it will take some time and patience, but it will be worth it. Thanks for sharing the pics.
 
As for the clips that hold trim you need 5 for the top trim.
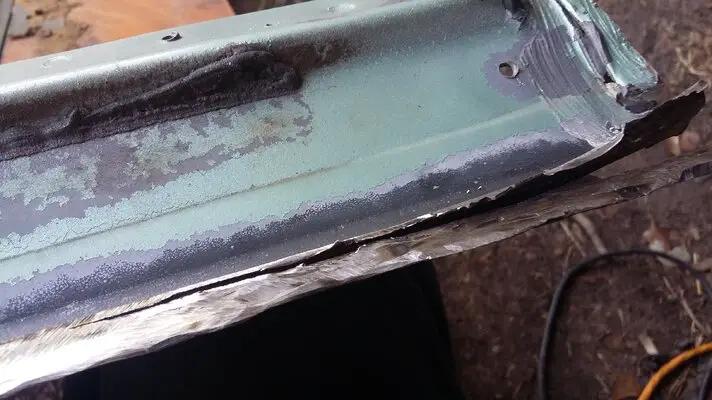
If your Dad was a welder then he might know how to shrink metal to get it straight again, a lot of body shops do it. Simple but takes hours, heat it with a torch then with a wet rag with ice cubes in it put it directly on the spot you just heated up, you do this after the seam is completely welded of course.
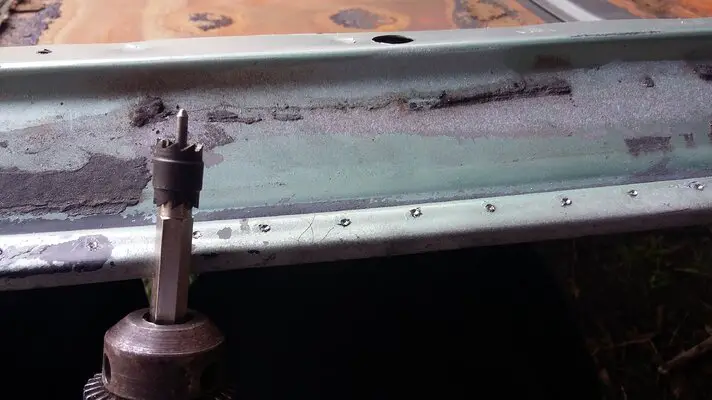
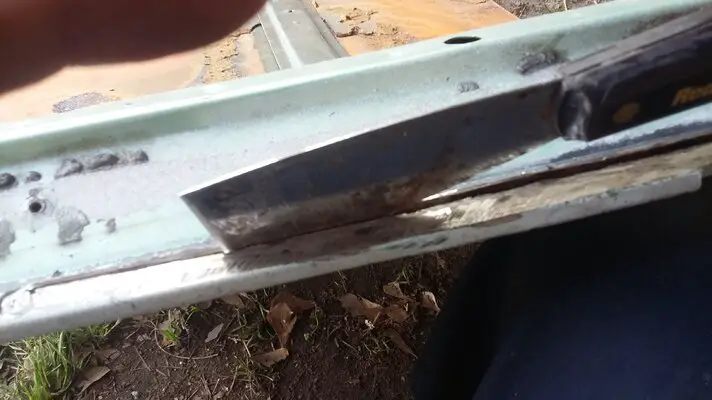
Also it will help if you put a lap joint in the new connecting metal to slide under the old existing roof, it will help with both the welding an to help keep it straight. There is a tool that goes on the end of a air hammer that makes the little channel, its cheap.
Once your done welding it together put a layer of Metal bondo(Aluminum grindings) stuff gets rock hard even against a grinder, so just a thin layer an then finish off with normal bondo if needed.
Just some ideas for you !
 
  • Like
Reactions: Texas82GP
Status
Not open for further replies.

GBodyForum is a participant in the Amazon Services LLC Associates Program, an affiliate advertising program designed to provide a means for sites to earn advertising fees by advertising and linking to amazon.com. Amazon, the Amazon logo, AmazonSupply, and the AmazonSupply logo are trademarks of Amazon.com, Inc. or its affiliates.

Please support GBodyForum Sponsors

Classic Truck Consoles Dixie Restoration Depot UMI Performance

Contact [email protected] for info on becoming a sponsor