

It has come a long way Jared! It's looking great! Will be watching for further updates...
Space City 1982 GP Build
- Thread starter Texas82GP
- Start date
You are using an out of date browser. It may not display this or other websites correctly.
You should upgrade or use an alternative browser.
You should upgrade or use an alternative browser.

Jared, you've done a heluva job getting that engine bay to look like it does now! The before/after pics really help to visualize the work you've done.
I'm gonna look into that harbor freight heat shrink, most places charge an arm and leg for it! If you like it, I'm sure it's good because you guys use quality stuff!!!
Merry Christmas to you and your family buddy!
I'm gonna look into that harbor freight heat shrink, most places charge an arm and leg for it! If you like it, I'm sure it's good because you guys use quality stuff!!!
Merry Christmas to you and your family buddy!
Looking great, Jared! I've dropped the ball a couple times about getting you a pic of the underhood light, I'll try to do it first thing if I get out there tomorrow or wednesday.
Darin
Darin
Looks great! If you have a whole week off I suspect there's going to be some impressive progress updates.
Jared,
I'm glad to see that you're making progress. It's coming together nicely. Keep up the good work, my friend.
I'm glad to see that you're making progress. It's coming together nicely. Keep up the good work, my friend.
Great work Jared! Great attention to detail. Keep the updates coming.
It has come a long way Jared! It's looking great! Will be watching for further updates...
Thanks Kevin. I'm glad to have you following along.
Jared, you've done a heluva job getting that engine bay to look like it does now! The before/after pics really help to visualize the work you've done.
I'm gonna look into that harbor freight heat shrink, most places charge an arm and leg for it! If you like it, I'm sure it's good because you guys use quality stuff!!!
Merry Christmas to you and your family buddy!
Thanks buddy. That HF heat shrink is both affordable and great quality. You won't be disappointed. When you get it hot, a clear substance oozes out that resembles hot glue.
Looking great, Jared! I've dropped the ball a couple times about getting you a pic of the underhood light, I'll try to do it first thing if I get out there tomorrow or wednesday.
Darin
Thanks Darin. If you get a chance to snap a pic I'd appreciate it, but no great hurry. I need to go back and bump that thread.
Looks great! If you have a whole week off I suspect there's going to be some impressive progress updates.
Thanks man. I'm pushing hard, though I feel like the Tortoise compared to what Danny (Hafrod) can get done in a day. I'm hoping to have significant progress by EOD next Monday.
Jared,
I'm glad to see that you're making progress. It's coming together nicely. Keep up the good work, my friend.
Thanks Jack! The progress has really helped the enthusiasm.
Great work Jared! Great attention to detail. Keep the updates coming.
Thanks Jeff. I appreciate the compliment. I'll keep the updates coming.
Progress has continued. I went over to the storage Christmas morning. It wasn't very popular with most of my family but I'm a bachelor for a reason. I like my freedom. I did breakfast and then the gift exchange with the family and then peeled off.
I started with putting in the lowest rear bolt in the driver's inner fender. I didn't put it in on Sunday because the undercoating was still wet on the toe board. That bolt is a little tough to get in. After I got it in, I tightened down all the bolts that secure the inner fender to the fender inner structure.
Next I put in my horns that I had cleaned up and repainted on Sunday.
Next I installed the brace that connects the inner fender to the core support.
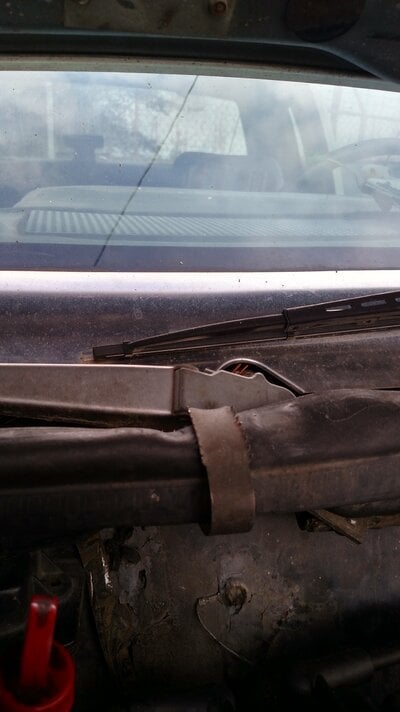
After that I installed my new windshield washer bottle. I thought I had a new cap for it but I couldn't find it in the parts room. I cleaned up the old cap and cleaned up the little strainer screen. I used new hose inside the bottle and to connect it to the wiper motor.
After that, I started cleaning the bottom of the floor boards and the passenger side toe boards in anticipation of undercoating them. They were greasy from the trans and engine leaking. I cleaned them up with micro-fiber cloths and mineral spirits.
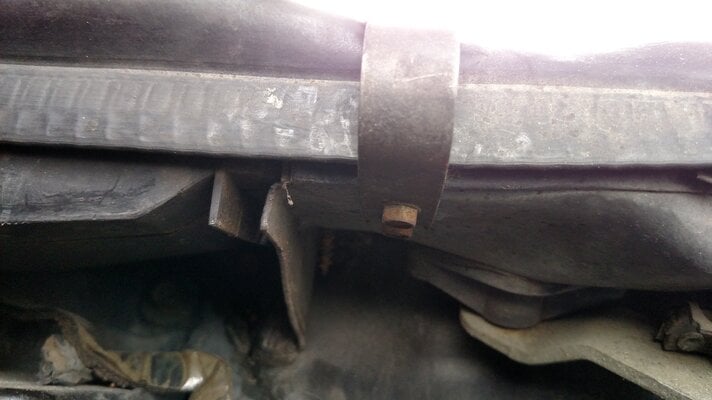
I got the car taped up and shot the toe boards, floor boards and the tunnel with undercoating back to pretty close to the "driveshaft loop"/floor brace.
At that point, I rolled up the shop and headed over to my Uncle's for our traditional family (Dad's side) get together.
Here are some pics from EOD Christmas....


I had a little too much good time at my Uncle's last night so I was moving pretty slow this morning. I didn't get over to the storage until 10. Sean came with me though and he was a big help.
We started with installing the driver's side inner fender extension. I was fortunate enough to find one NOS online sometime in the past year or two. Yesterday I had cleaned up and painted the bolts. I'm really pleased to have this part in....

Next we installed the upper cushions and nuts for the core support body mounts. I had pulled them to paint the core support under them. While they were out I wire brushed the nuts and the metal tops of the cushions and painted them.
Next we put the front tires back on and got the car down off the stands and onto the wheel dollies. We got the car pushed all the way to the passenger side. While I had Sean's help I wanted to get the hydroboost unit installed. It would have been impossible without him. We got it installed and Sean had to run for a little while. While he was gone I replaced the clutch rod from between the pedal and the equalizer with a new rod with spherical rod ends.

The storage looked alot different with the car down and pushed over....

Next, while Sean was gone, I reconfigured the storage and got the car shoved all the way to the driver's side. I had to move the compressor and pull the hose reel off the bench to make enough room. About that time, Sean showed back up. We got started on replacing the power antenna.
I'm going to try to document this pretty well for you Darin. I'll take pics tomorrow. We started by taking the lower rocker trim loose at the first clip under the door. It doesn't have any clips to fasten it under the fender. Of course, I broke the clip. I'll be posting a wanted thread in the next day or so. Getting the trim free of its first clip gave it enough movement without pulling the trim completely free.
Next we taped up the leading edge of the door and the trailing edge of the fender with blue tape. I had Sean hold the passenger door open as far as he could while I removed three bolts from the rear edge of the fender skin that secure the skin to the fender inner structure panel. The bottom of these three bolts secures the base of the antenna. Now the fender skin, behind the wheel well, at the bottom will pull outboard. The antenna is ready to drop out the bottom except that the nut on the top of the fender still has it. For that, I need a special wrench. I ordered it yesterday and should have it tomorrow by 8 PM. Here is what it looks like....

Tomorrow I'm going to press ahead and hope the wrench shows up sooner rather than later.
That's it for tonight gents. Thanks for tuning in.
I started with putting in the lowest rear bolt in the driver's inner fender. I didn't put it in on Sunday because the undercoating was still wet on the toe board. That bolt is a little tough to get in. After I got it in, I tightened down all the bolts that secure the inner fender to the fender inner structure.
Next I put in my horns that I had cleaned up and repainted on Sunday.
Next I installed the brace that connects the inner fender to the core support.
After that I installed my new windshield washer bottle. I thought I had a new cap for it but I couldn't find it in the parts room. I cleaned up the old cap and cleaned up the little strainer screen. I used new hose inside the bottle and to connect it to the wiper motor.
After that, I started cleaning the bottom of the floor boards and the passenger side toe boards in anticipation of undercoating them. They were greasy from the trans and engine leaking. I cleaned them up with micro-fiber cloths and mineral spirits.
I got the car taped up and shot the toe boards, floor boards and the tunnel with undercoating back to pretty close to the "driveshaft loop"/floor brace.
At that point, I rolled up the shop and headed over to my Uncle's for our traditional family (Dad's side) get together.
Here are some pics from EOD Christmas....
I had a little too much good time at my Uncle's last night so I was moving pretty slow this morning. I didn't get over to the storage until 10. Sean came with me though and he was a big help.
We started with installing the driver's side inner fender extension. I was fortunate enough to find one NOS online sometime in the past year or two. Yesterday I had cleaned up and painted the bolts. I'm really pleased to have this part in....
Next we installed the upper cushions and nuts for the core support body mounts. I had pulled them to paint the core support under them. While they were out I wire brushed the nuts and the metal tops of the cushions and painted them.
Next we put the front tires back on and got the car down off the stands and onto the wheel dollies. We got the car pushed all the way to the passenger side. While I had Sean's help I wanted to get the hydroboost unit installed. It would have been impossible without him. We got it installed and Sean had to run for a little while. While he was gone I replaced the clutch rod from between the pedal and the equalizer with a new rod with spherical rod ends.
The storage looked alot different with the car down and pushed over....
Next, while Sean was gone, I reconfigured the storage and got the car shoved all the way to the driver's side. I had to move the compressor and pull the hose reel off the bench to make enough room. About that time, Sean showed back up. We got started on replacing the power antenna.
I'm going to try to document this pretty well for you Darin. I'll take pics tomorrow. We started by taking the lower rocker trim loose at the first clip under the door. It doesn't have any clips to fasten it under the fender. Of course, I broke the clip. I'll be posting a wanted thread in the next day or so. Getting the trim free of its first clip gave it enough movement without pulling the trim completely free.
Next we taped up the leading edge of the door and the trailing edge of the fender with blue tape. I had Sean hold the passenger door open as far as he could while I removed three bolts from the rear edge of the fender skin that secure the skin to the fender inner structure panel. The bottom of these three bolts secures the base of the antenna. Now the fender skin, behind the wheel well, at the bottom will pull outboard. The antenna is ready to drop out the bottom except that the nut on the top of the fender still has it. For that, I need a special wrench. I ordered it yesterday and should have it tomorrow by 8 PM. Here is what it looks like....
Tomorrow I'm going to press ahead and hope the wrench shows up sooner rather than later.
That's it for tonight gents. Thanks for tuning in.
Last edited:
I do like that antenna wrench! I've always just mangled them off and on with needlenose.
Similar threads
- Replies
- 4
- Views
- 207
- Replies
- 9
- Views
- 643
GBodyForum is a participant in the Amazon Services LLC Associates Program, an affiliate advertising program designed to provide a means for sites to earn advertising fees by advertising and linking to amazon.com. Amazon, the Amazon logo, AmazonSupply, and the AmazonSupply logo are trademarks of Amazon.com, Inc. or its affiliates.