BUILD THREAD Sweet Johnny & Gina: A Love "Two Large" To Fail

I've probably been putting this off since things didn't go exactly as planned, but it's time that I finally gave a detailed account of how my car got back on the road after dying in the driveway a couple Sundays ago. So gather 'round, ye with time to kill, and I shall tell you a tale. A tale of a Cutlass and her camshaft: second draft.

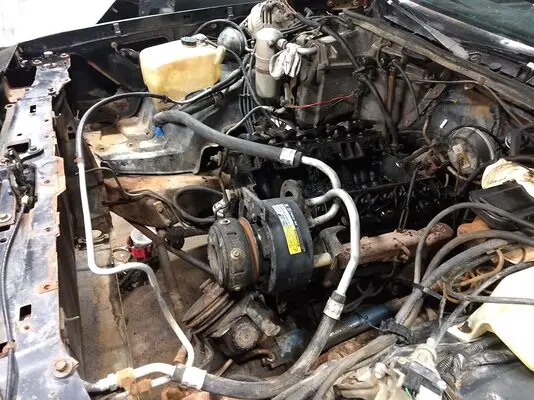
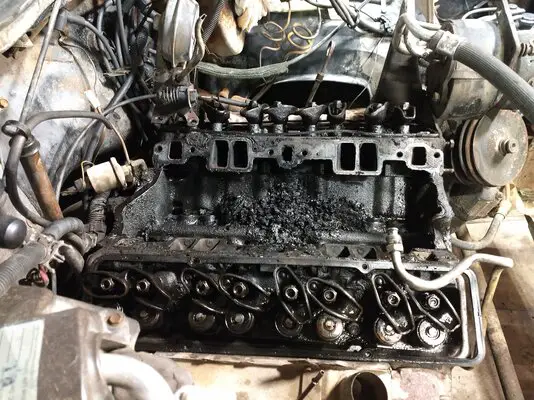
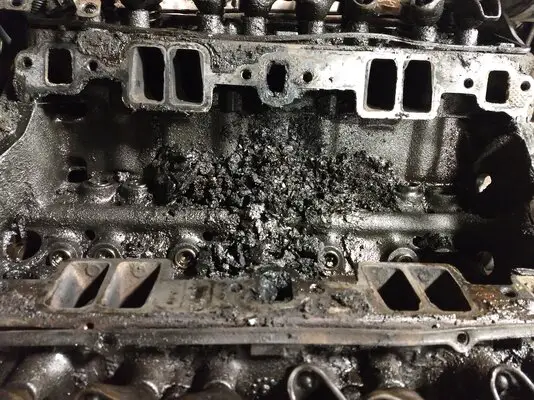
After pushing Gina into the secure confines of the metal outbuilding I once again elevated her to sit atop her throne of four 6 ton jack stands and left a jack supporting the differential. Naturally, I disconnected the battery but at this time left the fuel lines and oil filter in place, as well as the manifolds and rear exhaust pipe. Of course I removed the center Y pipe section, and aside from limited access due to ALL of the stock items being present things came off of this car relatively easily. Some fasteners required substantial cleaning before a tool could relieve them of their duty, and all but one released its grip without fail. We lost a thermostat housing bolt in the skirmish- some just can't let go. That basically got us to here which you've already seen since I previously posted a picture of the lifter valley and the contents, but it was rather blurry so here's a better view.
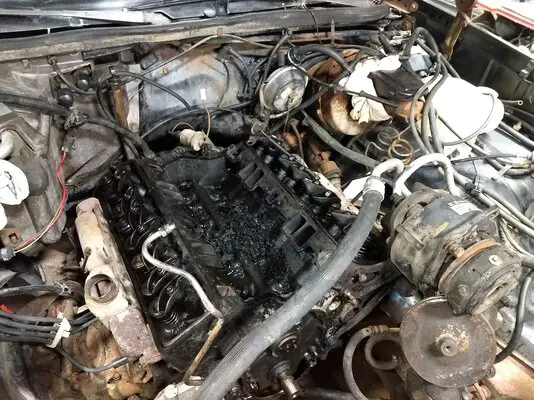
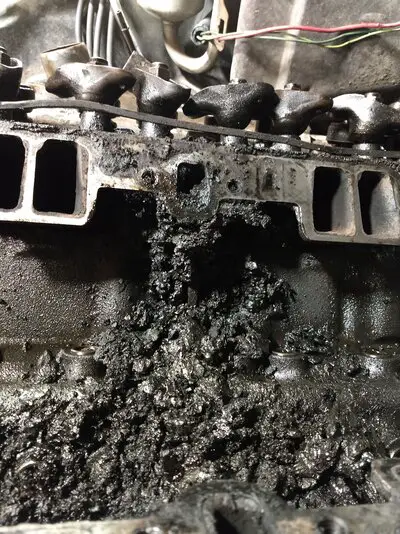
IMG_20240328_231107325.jpgIMG_20240328_231303537.jpgIMG_20240328_231223371.jpgIMG_20240328_231053931.jpgIMG_20240328_231045526.jpg

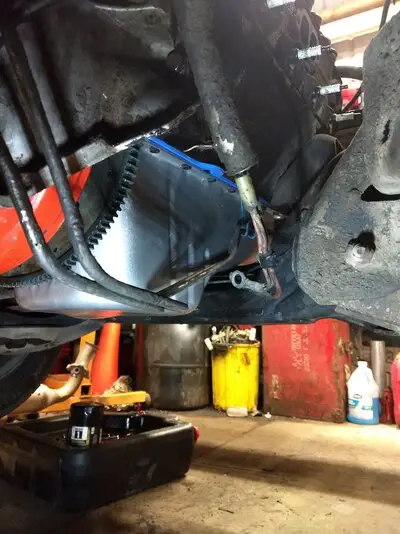
I wanted to get the oil pan completely out so I could clean the area well, paint the pan, and get new gaskets in without adding a bunch of grit and grime to my oil. I also planned to utilize a FelPro one-piece reusable pan gasket (34510T) because they're SO much easier to install- whether in the car or on a stand. These babies are gold at $42 and Amazon currently has a few on sale for $25- act now.
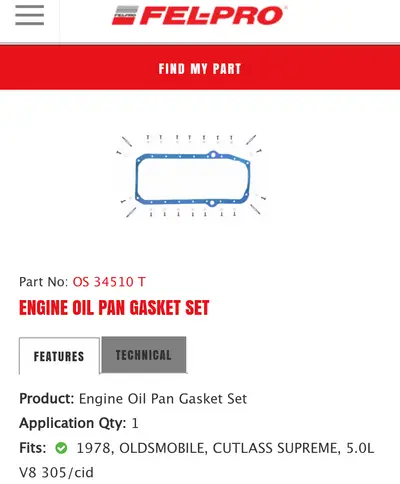
Screenshot_20240410-131942~2.png

To get the engine high enough required unbolting it from the frame, loosening the trans mount, and lifting with a transmission jack under the engine oil pan. I then set up 2 small jack stands with a 2x4 laid across them, added a t-shirt on top, and lowered the transmission pan onto it. I had to mess with this a little to get the required height but it worked out in the end and I was able to slither between things while the engine remained elevated. While not the best way it's not the worst: I've seen people place a board across the fenders and support the engine with long bolts protruding from the heads. It's much better if you can support the engine from above with a cherry picker or chain fall hoist.

I took this opportunity to paint the valve covers which had been soaking in heavy duty oven cleaner containing sodium hydroxide in hopes of dissolving the old paint a little bit. Today's brake cleaner helps to strip it too but not as well as the old brake cleaner used to. The idea was that I'd accomplish twice as much work while I waited on solvents and paint to do their "thing", so I also gave my old EGR valve a two-tone paint job since a new one (EGR1024) is $73 and to my knowledge the old one is good. While the fumes were flowing I opted to coat another intake manifold in VHT "Aluminum" as I didn't like the factory black finish and someone had already done a poor job of painting it silver once before anyway. My attempts at removing all the old paint weren't quite successful but it covered up well and I think the end result verges on pretty. Here's what I bought, you'll see the results later.
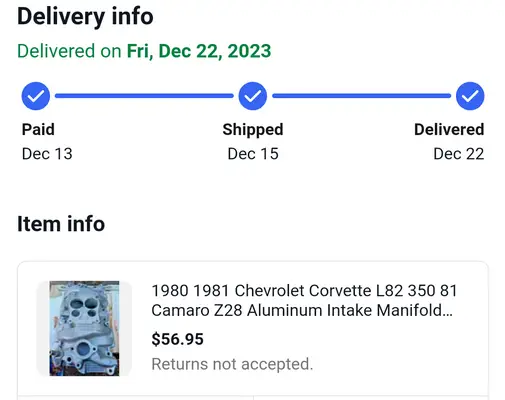
Screenshot_20240410-153321~2.png

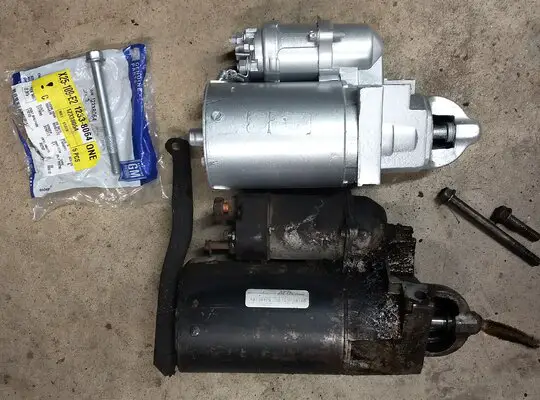
While the VHT was already shook up I also painted a starter that I'd previously shot in white to keep temps down. I had no intention of attaining show quality results but simply needed to cover the white. This is a 6416S model, which I've mentioned in another thread about GM factory "performance" starters. The proper long bolts with the correct stepped knurling are also on display in the upper left corner (12338064).

https://gbodyforum.com/threads/factory-starter-upgrade.89016/#post-956132
IMG_20240404_031943436~2.jpg

With wet paint sparkling under the setting sun I resumed my place in the garage with the giant speakers and proceeded to remove the oil pan and timing cover so they could also get cleaned. Words cannot describe how incredibly filthy these things were and I used multiple Scotch Brite pads, oven cleaner, brake cleaner, Gator Wipes, and about 6 pair of latex gloves getting them clean after scraping them. I tried to remain productive in other areas any time the parts were soaking or paint was drying.

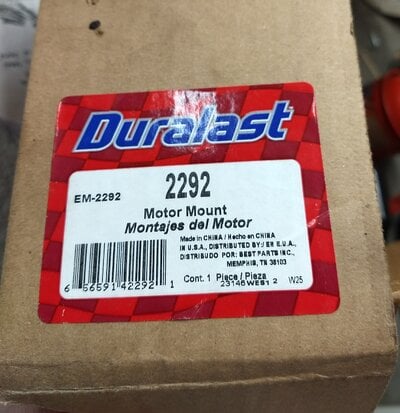
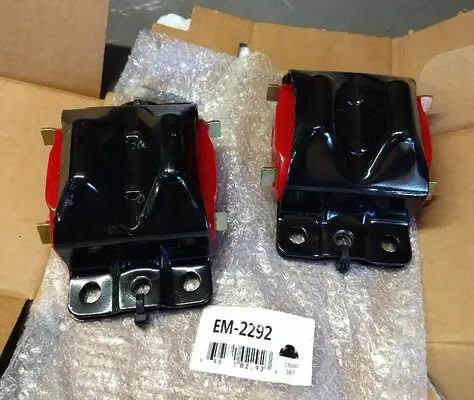
With the mounts undone you know damn good & well that I intend to upgrade to polyurethane: I bought a pair of Energy Suspension inserts (31116R, $36 ea.) to go inside some brand new Duralast clamshells (2292, $12 ea.) so they'd be clean and ready to go in at a moment's notice. I may end up powder coating new engine side brackets once I figure out the small differences between the multiple car versions (334970, 140278, 3993371, 3993372- last two are a matched set L/R) but could just as easily clean and paint the old ones. I've learned that it's very nice to have complete sets of spares on hand if you can though. Drilling and reassembly of the mounts was accomplished while the solvents worked their magic on the pan and timing cover.
IMG_20240410_135538484~2.jpgIMG_20240410_135625563~2.jpg

After setting those on the trunk I painted the pan, timing cover, t-stat housing, all bolts, and everything else I could think of that I planned to put back on. Now it was time to scrape the 1" thick gunk from the block and k-member as well as vacuum out the valley and every orifice the tip of the Shop Vac hose would fit into. Finally, things were starting to look good and organized again! Following that I removed the lifters with a pick and some Icon brand pliers which are quite nice, and relieved the header panel of a support bracket to make room for camshaft removal. The A/C condenser was gingerly swung out of the way, the cam was carefully removed, and I squeezed out the contents of 6 cans of brake cleaner while scrubbing every part of the engine that I could. This included hitting the lifter bores with Scotch Brite followed by lint free rags to ensure that things moved freely in the future. Eventually, my fingertips told me the engine was clean enough and I moved on to other things like stealing more parts from Karma, the El Camino.

Cue Paul Harvey again...
 
Last edited:
It seems as though every time I touch that El Camino I send it backwards in time as I remove things I upgraded on her years ago. This time I stole the aluminum radiator (plastic tanks) even though my stock one currently functions fine, and it comes with an attached aftermarket auxiliary transmission cooler that remains disconnected for now. I'm using the internal transmission cooler on this radiator for the first time ever, so contamination is completely avoided. Karma also donated her fan shroud as well as her lower front air deflector, both of which received fresh paint years ago that still looks decent. The shroud is cracked from when I totalled the Camino but it still holds the radiator in place.

I then stole the 12SI alternator that was doing nothing for a dormant engine with no battery and prepared to convert it from flat white to VHT Aluminum. I performed a final cleaning of the Cutlass engine bay and proceeded to spray Rust-Oleum Black Rust Converter on things that needed it, and emptied an old can of Satin Black onto the core support. Originally, I'd planned on giving everything a more proper paint job like I did with Karma but things were taking much longer than anticipated so this was an unwelcome compromise. There would be more of these. The frame, firewall, and core support look marginally better than they did before so we're gonna focus on the positive aspects of the compromise: In an environment with less rust and grease showing the new clean bits have a chance to pop instead of getting lost in the mix.

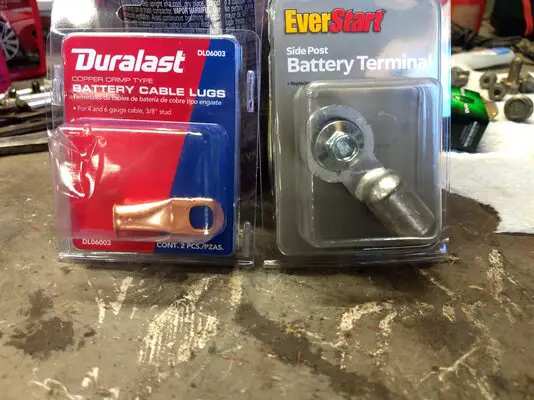
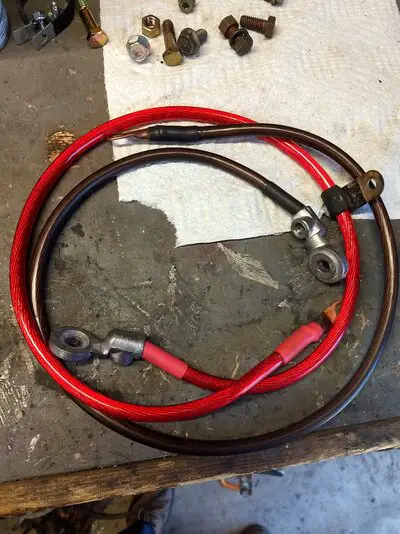
While the paint refused to dry due to the temperature I decided to make myself some battery cables. In years past I've used 0/00 welder ground cable from a local joint by the name of Lampton Welding Supply, and capped them with terminal ends and lugs available at most parts stores. This time around I used some new 4 gauge amplifier wiring, which isn't as good as 0/00 but is a major upgrade from the 4 gauge cables that came on the car. That's because the old ones are copper clad aluminum, have huge strands, and made crinkling noises when I moved them. The amp wiring is super fine strand oxygen free pure copper, and the PVC jacket is designed to withstand the oils and temperatures of your engine bay, but welder cable is superior in every way. Some heat shrink made things water-tight even though I moved as the solder was cooling and one of my cable lugs is crooked. It's ugly but it works. I tried to fix it at the time and only succeeded in starting to melt the PVC jacket so I moved on before causing bigger problems.

IMG_20240404_125924219.jpgIMG_20240404_132135106.jpg

After that, I moved on to stuffing a brand new Summit 1104 cam kit into the tired old 305. This kit came courtesy of 78Delta88 (a cool MF!) and is a MASSIVE upgrade from what I had access to. Thanks buddy, I really appreciate all of your help! I used Lucas Assembly Lube containing ZDDP as well as the goop provided with the cam on every single metal to metal contact point after thoroughly cleaning the old pushrods and returning them to their original rockers. Don't worry, I didn't forget to lube the rocker pivot balls and distributor gear during this process. Now I was able to start buttoning things up, which means the fun part is coming soon.

Once the oil pan and timing cover had sufficiently dried I installed a Cloyes Double Roller timing chain set that's been around so long it could legally buy booze. This of course was after I hunted the crank gear for an hour, which had moved numerous times over the years and gotten separated from its bigger brother. The oil pan was replaced with the bolts that FelPro provided because the stock ones that I'd cleaned and painted were now much too short.

IMG_20240404_032018891.jpg

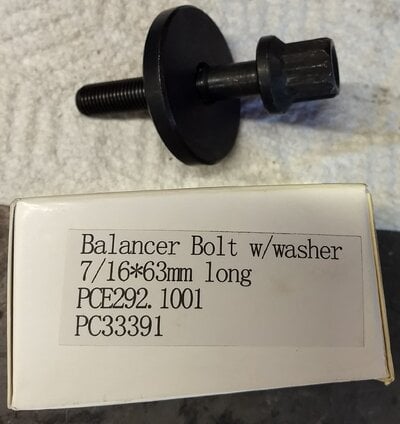
Now came time for the installation of the all important harmonic balancer. I've had bad luck reusing these in the past so I purchased a new Dorman 594-009 for $60 with far too much hassle. I then rented an installation tool from Auto Zone to pull it onto the crankshaft snout: Don't just tighten the bolt like a hack, you can strip the crank threads and then you're really screwed. Ask me how I know. The tool made installation a breeze, however I struggled to remove it and it left the adapter piece in my crankshaft. You see, someone else had damaged the threads of the main bolt of the tool, I saw it, and I elected to just go with it after making sure things tightened up and the balancer moved. I expected this problem and was prepared for it. I've got a selection of EZ Outs, a.k.a. bolt/screw extractors, and implemented the left-handed 7/16-20 extractor to fish the tooling from my crank. Problem solved. I proceeded to replace it with a new 12 point bolt that I added to my SpeedMaster cart to achieve free shipping on a purchase in '22.

IMG_20240404_132232240~2.jpg

ahem... Page Three
 
Last edited:
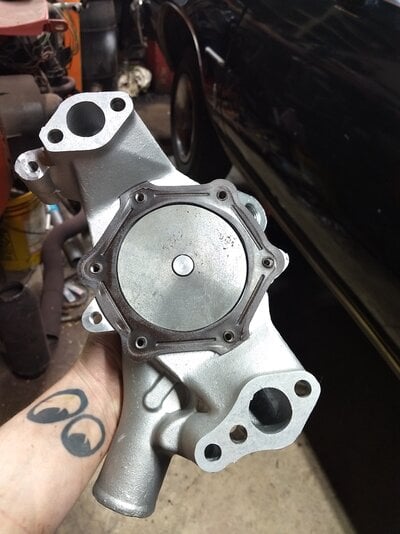
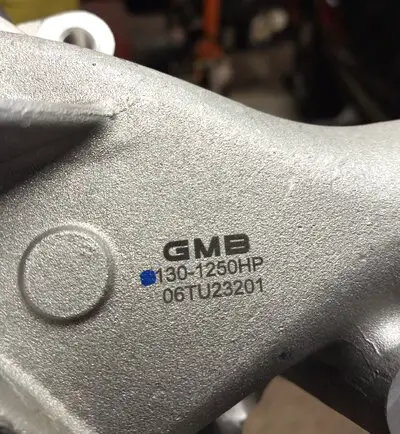
With those items bolted firmly in place I could now proceed to the easy stuff, starting with the fuel and water pump. I'm using the same Carter that I recently added but upgraded the water pump even though the old one looked good internally. I elected to continue on with my factory performance upgrades and chose a Heavy Duty Aluminum pump listed for an '85 TA, K5 Blazers, and other vehicles known to be abused. Heavy duty water pumps aren't really anything special since every engine with A/C had them, but this one is special since the impeller is way better than any other pump I've disassembled. Heavy Duty essentially means that they've employed better bearings and impellers, and might have cleaner flow paths free of casting flash and large irregularities. I chose a Duralast CWP520HDA ($70) but the same exact pump is sold as 1121HX and 20040HX as a stock replacement. It's also the same pump offered by Airtex (the maker), CVF Racing, DeMotor, Speedway, etc., some of which charge over $200. As long as you see the "X" or "A" alongside the number it's the same pump. Same. Freaking. Pump. This is proven by searching by the number stamped on the housing: GMB 130-1250HP.
IMG_20240328_232855329.jpgIMG_20240328_232915286~2.jpg

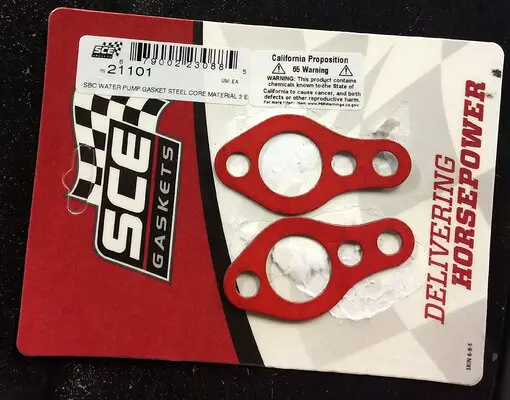
Now this water pump came with gaskets but they're a cork/rubber amalgam that I just know will be difficult to remove later so I planned on using the blue ones FelPro provided in their timing cover gasket kit. Too bad this one got packed with only 1 gasket. Since I always struggle to get the proper gaskets in kits, I had the forethought to have even better ones on hand. Say hello to reusable water pump gaskets from SCE, # 21101. I've employed them before and yes, you can absolutely use them multiple times without sealant of any kind.

IMG_20240404_041834855~2.jpg

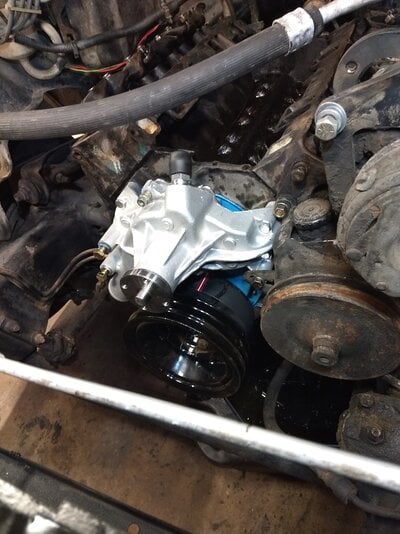
With those in place I was able to get you this picture:
IMG_20240404_130409793.jpg

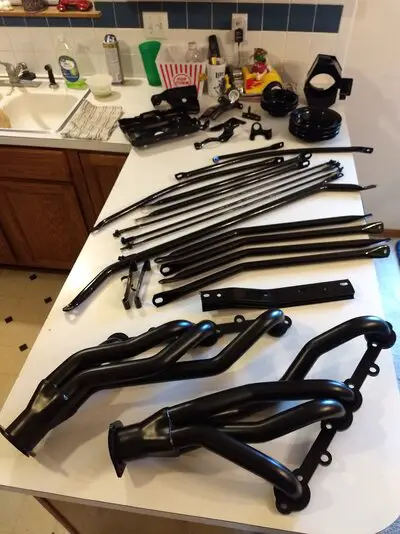
Note the shiny black balancer pulley. In case you missed what I do at work, I occasionally have the opportunity to powder coat personal items. This time the offer arose the day before the engine crapped out so I had 5 days to gather what needed to be burned, blasted, and coated. I found a few items.
IMG_20240330_191942960.jpg

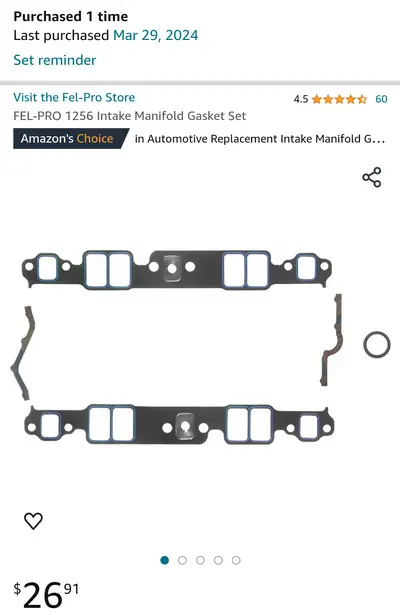
I then employed FelPro intake gaskets # 1256 because they have the raised sealing rings around the ports, the portholes are the exact perfect size for my factory heads and intake manifold, and they come with the restrictor plates installed as part of the gasket. There are multiple port sizes offered by the various manufacturers and having gaskets with overly large ports is a no-no, so choose carefully. If you're unsure of the port size or have irregular sealing surfaces you can try the 1245- it doesn't have the silicone rings, is 1/8" thick, and is intended to be trimmed to fit. The 1256s set me back a mere $27 but cost twice that locally even though they'd have to order them as well.

Screenshot_20240410-200534~2.png

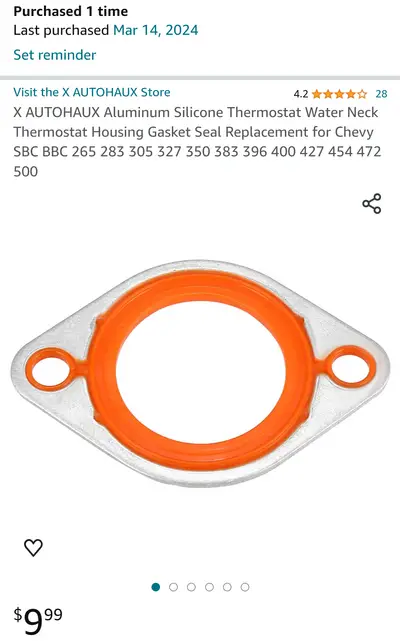
Since I was in the neighborhood I decided to add a new thermostat housing gasket- reusable of course. This one's easy to access so I cheaped out this time and selected a knockoff from Amazon- the AutoHaux AT28111 for $10.

Screenshot_20240410-200714~2.png

A stroll down the HELP! aisle at Auto Zone provided the valve cover grommets I needed for a stock setup- 42062 and 42055, as well as new heater hose fittings- 56356 and 56360. FelPro provided the EGR gasket, part # 70950 and I used a NOS carb base gasket from the rebuild kit I found earlier in this thread. The headers are sporting reusable Percy's Seal 4 Good gaskets accompanied by some RTV since they came from a different engine and the header flanges are filed nearly completely flat. Under the valve covers resides a pair of reusable FelPro VS12869T rubber gaskets with crush preventers.

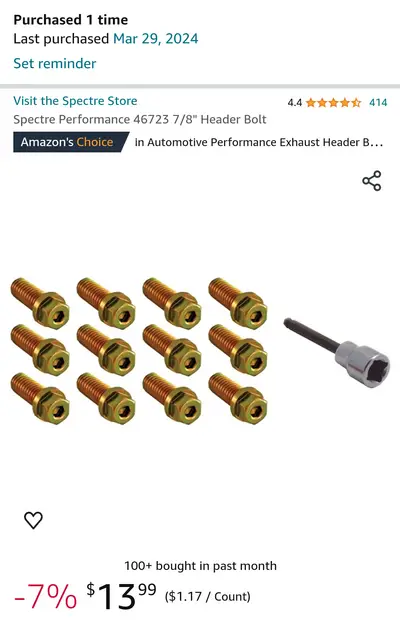
Remember those compromises I mentioned? One was the engine bay paint, one is the fact that my oil pan is "Aluminum" and not GM Blue, that lightweight starter is incompatible with my tiny flexplate, and I lack the tool required to remove the pulley on the alternator and I tried to force it- probably ruined it too even though I knew better. I also didn't have time to swap the engine mounts so I believe I'll be going back in there some time soon to get the closure I so desperately need. Things have to be right, ya know. If I go to the trouble of changing the mounts I may as well change the oil pump at the same time, and I'll be swapping the headers as well. The Hooker Comps I'm currently running were yet another compromise but I'm happy that I had something on hand that I could use. I installed them as well as the intake with these bolts from Spectre since I also removed a set from Karma, they work in tight places, and I like the gold cadmium plating.

Screenshot_20240410-200817~2.png

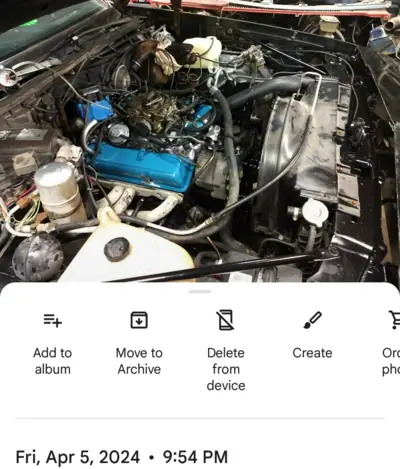
I guess that gets us to right about here, which is a pic I took after breaking in the camshaft.
Screenshot_20240408-124448~2.png

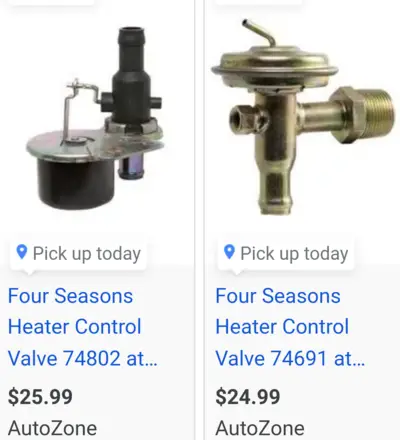
I've already readjusted the rockers and played with the timing quite a bit- she likes a lot of advance (16-18°). So much that I may need to bump up the base and change the vacuum advance can. I guess I should double check which vacuum port I'm connected to first. Those slightly longer R45TS plugs are causing a boot or two to contact the primary tubes, the spark plug wires need rerouted to avoid getting burned, and I think I'll buy the blue Accel 5041B wires since 3 of mine got burned already. I need to replace the sensor for my EGR valve, fix my heater, and I might change over to an inline heater control valve from an '87 Caprice instead of the correct one that resides on my intake manifold. I currently have none at all, and both are in the picture below.

Screenshot_20240329-140559~2.png

Im not terribly concerned with getting everything dialed in right away since so much is going to change soon, but trust that everything is at a safe setting. The headers and entire exhaust system will change multiple times, the plugs and carb will get swapped, and this current carb makes tuning slightly difficult. For instance, the spring for the secondary butterflies got stuck yesterday and kept the idle way too high. It took me a minute to find that one since the top of the carb said the secondaries were closed. Rochesters, whattya gun' do?
 
Last edited:
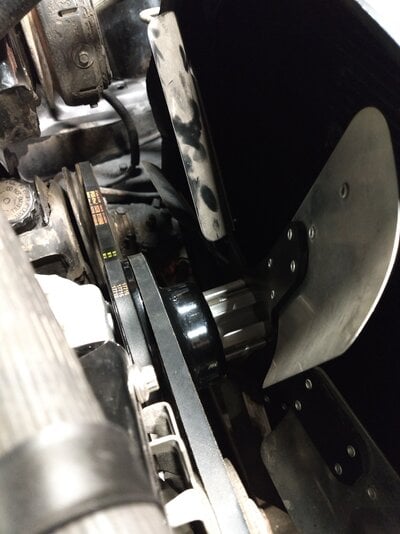
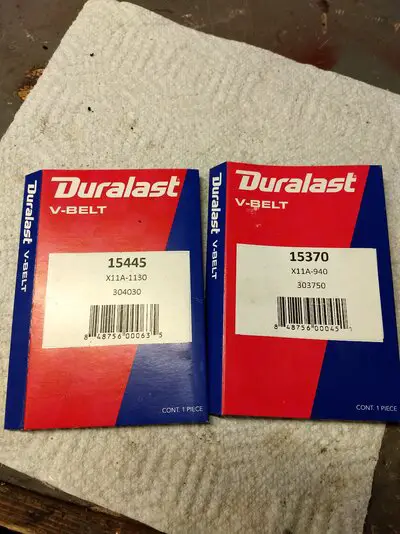
I forgot to add that I took the flex fan from the Camino and bought new belts.
IMG_20240410_230047893.jpgIMG_20240410_230021306.jpg

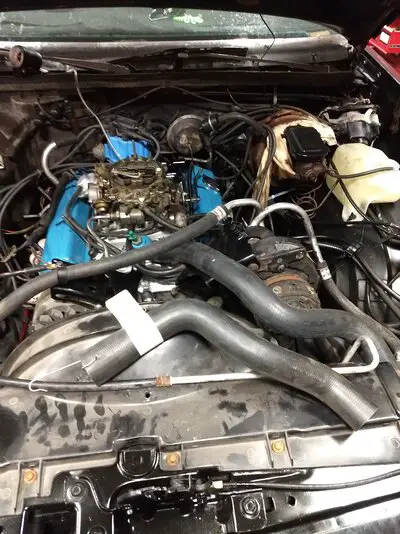
I also changed the upper radiator hose but couldn't do the bottom at the time because nobody had one in stock. I now have it and will replace it soon.
IMG_20240410_230146221.jpg

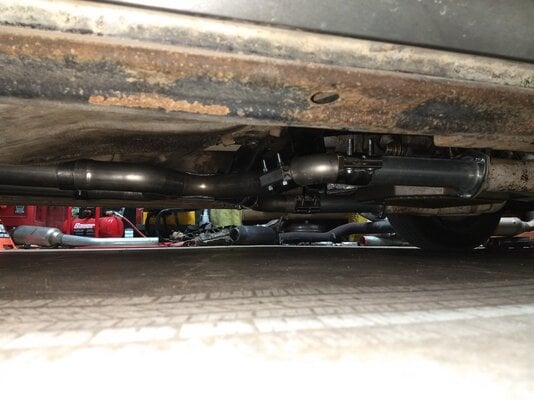
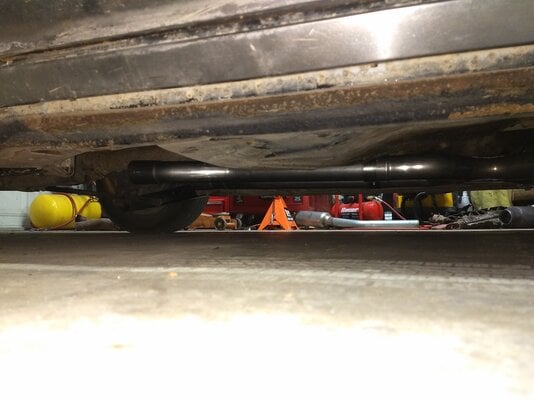
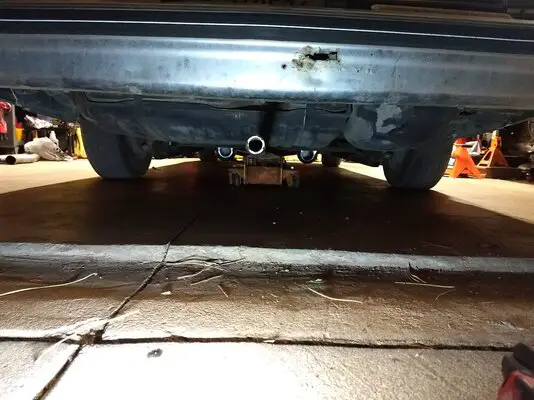
The first iteration of the exhaust isn't finished yet but here's a sneak peak at what I installed so I could drive into Wichita for a haircut. That's a modified Mustang X- pipe and Hooker offsets with no mufflers, all 2.5" 409 stainless except for the collector reducers. I mocked up my mufflers and they sound s-e-x-y...
IMG_20240410_230314975.jpgIMG_20240410_230359919.jpg


There's much more to come in the near future, and I just may get a real phone so I can start sharing videos.
 
Last edited:
Can't wait to hear what it sounds like. Should be pretty lumpy at idle. My brother has a [email protected] cam in the 350 in his chevelle and that has a really rowdy idle, though that's on a108* and not the 112 or 114 yours is.
 
Congrats on getting her back on the dancefloor!
Thanks man. It was killing me having to get driven around and though I haven't really hammered it yet she's a much better dance partner.
 
Can't wait to hear what it sounds like. Should be pretty lumpy at idle. My brother has a [email protected] cam in the 350 in his chevelle and that has a really rowdy idle, though that's on a108* and not the 112 or 114 yours is.
It's got a bit of lope but I still don't have the idle speed adjusted perfectly because the timing isn't quite right yet either. It does have the 114° spread and a few less cubes than your brother's ride but it sounds pretty good to me. Nothing at all like my El Camino did, but good nonetheless. This one pulls a solid 17-18 inches of vacuum at idle as well.

There's also the matter of a carb that's on its last legs making some tuning a moot point, but Eric sent me a solution for that too. I've had to retorque the intake bolts twice already and will probably do it another time before putting in longer bolts to avoid vacuum leaks, and I forgot to seal the center 4 with Teflon tape so they'll be leaking oil soon.

She runs, she drives, and boy does she turn heads.
 
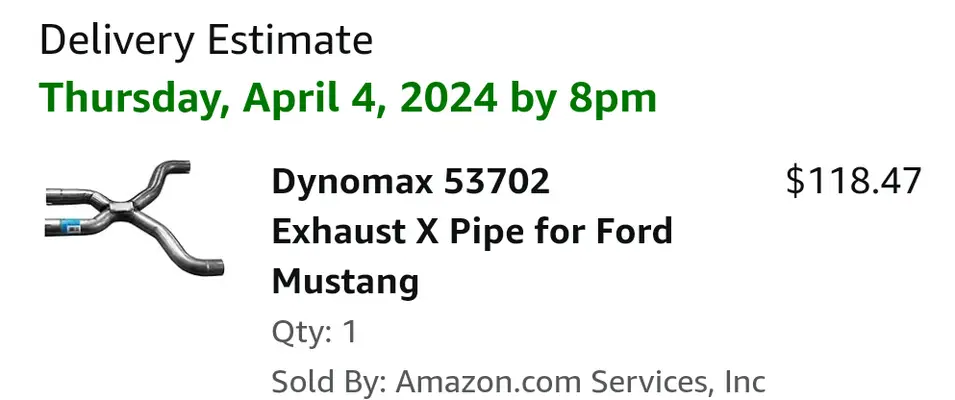
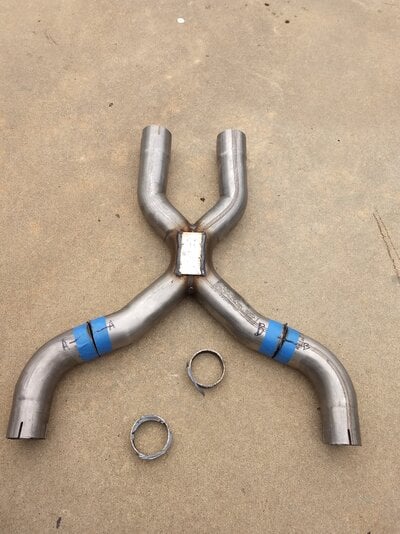
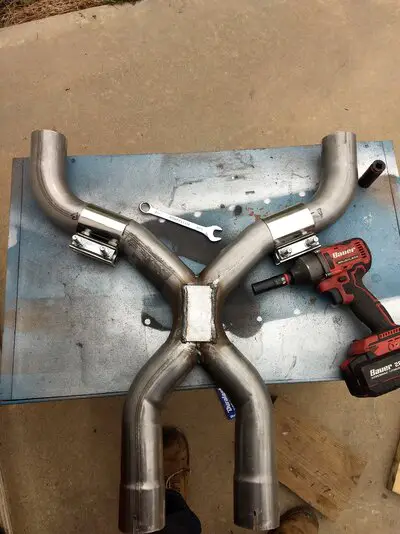
I should probably show you what X- pipe I'm currently running before we go any further. It's actually for a 2005-'10 Ford Mustang and has 2.25" inlets that quickly turn into 2.5" before they merge. I chose this one because I thought it was closer to the right width, it's 409 stainless, and it normally uses fewer clamps to execute than the universal setups. I intend to have 5 removable sections in front of the differential but will weld some of the joints seen in the upcoming photos. This piece is Dynomax part # 53702 and will run you about $106 from Parts Geek or Rock Auto before shipping but everywhere I checked had me at $135 after shipping, until I found one on Amazon that someone must have returned.

Screenshot_20240413-195249~2.png

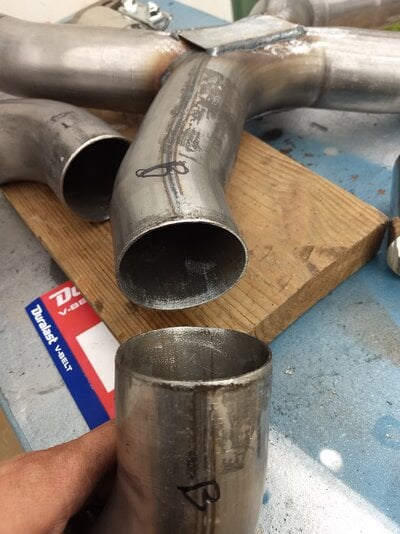
As stated, this one is a bit wider than the spacing of Hooker long tubes on an SBC by about 1 7/8" so I removed 1" from each of the first angled sections. This works out since it's at a slight angle and you won't really remove a full 2" of actual overall width. I simply marked it with tape to have a straight line I could stare at as I cut, and have dedicated that cutoff saw blade to stainless and won't use it for carbon steel.

IMG_20240409_144524814.jpg

Time for a little cleanup with a rotary grinder.

IMG_20240409_152323557.jpg

I reattached the pieces with stainless butt clamps for now and will absolutely be welding them back on later.

IMG_20240409_152605311.jpg

My current exhaust system as a whole is temporary: the 1 5/8" header primaries and 3" collectors are too large for my little 305 and twin 2.5" pipes are also too much. I'll be using shorty headers with 1.5" primaries and a 2.5" collector but we'll get to those when I cut them and swap to ball flanges... At any rate the first section of exhaust pipe will eventually be 2.25" and mate up with this Dynomax piece, although a full Warlock setup will make an appearance as well. Basically, I'm going to run a complete stainless setup as well as one comprised of standard aluminized steel for multiple reasons: I'll need 2 slightly different setups for Gina, I hope to learn from it, and maybe it will be beneficial to someone else. I also have no doubt that the "leftover" system will be put to good use on another project, quite possibly a G Body. I'll need the full 2.5" setup for a 350 (or bigger) when this 305 bites the dust, and it can be uncapped for maximum loudness.

Short version: I'm making a stainless setup with shorty headers, a 2.25" intro, x pipe, and 2.5" tailpipes out the back. I'm also making a carbon setup for long tubes that can be opened up, and it's 2.5" from head to toe. I have temporary hangers for now but will be upgrading those as well. So with that out of the way let's get to the latest changes.

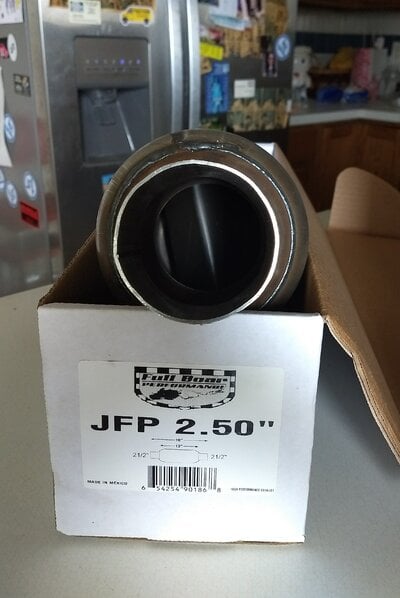
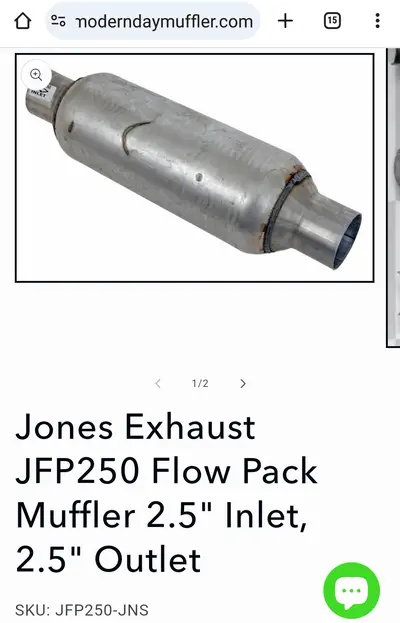
On Thursday afternoon I decided that I should probably throw some kind of mufflers on the car so I didn't completely enrage the neighbors when leaving for work at 5 a.m. every weekend. The ones I chose are a copy of the Thrush Rattler, utilize the part # of a Lawson Insynerator so that's what you get if you order a Lawson, and cost a mere $25.99 each on ModernDayMuffler.com -- the Jones Full Boar/ Flow Pack. They're a single chamber design with no packing, tubes, or holes- just a divider.

Screenshot_20240413-193445~2.png
IMG_20240409_134137365~2.jpg

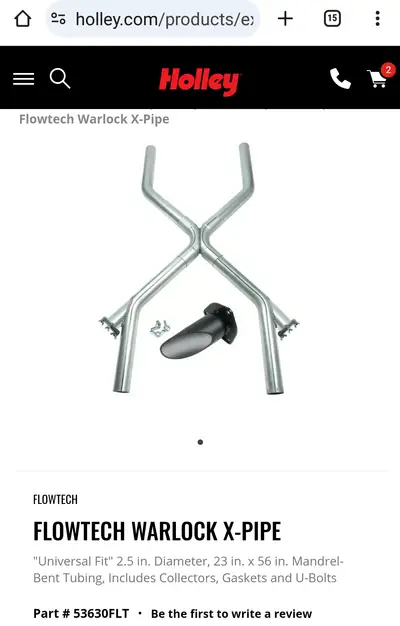
Before I added those I needed to see just where exactly I thought they'd be best suited. I went and picked up a pair of 45° elbows from Auto Zone in case I needed to cut or modify something- I didn't want to mess up my nice stainless pipes or the 45s that came in the Warlock X- Pipe kit.

Screenshot_20240413-193909~2.png

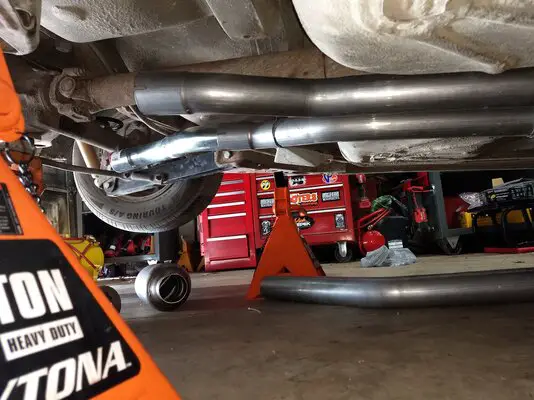
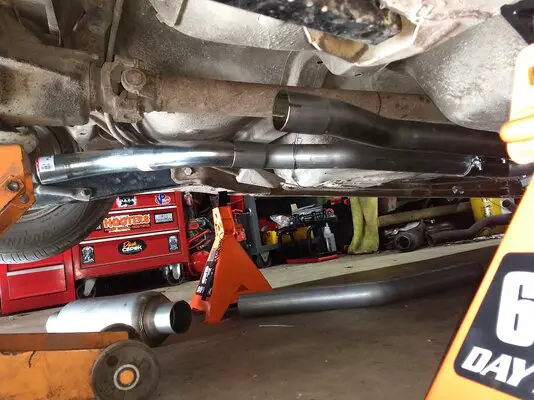
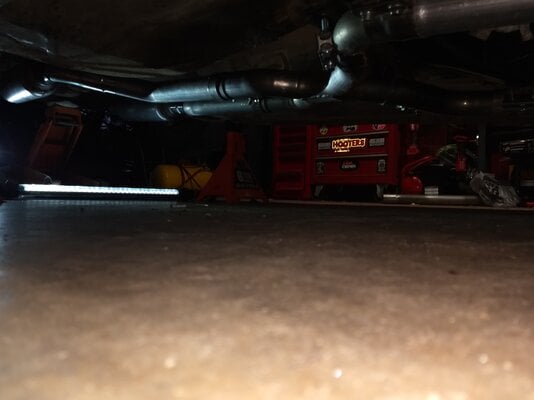
Both of these items can be seen in the background of various pictures like the following 3, where I've placed the cheap 45s on the end of one of the Hooker 20° offset "tailpipes". This showed me that I didn't want to run my pipes that way, and that was never the plan anyway. I bought the offsets to hang beside the gas tank and they fit there perfectly.

IMG_20240411_185627632.jpgIMG_20240411_185645296.jpgIMG_20240411_185712334.jpg

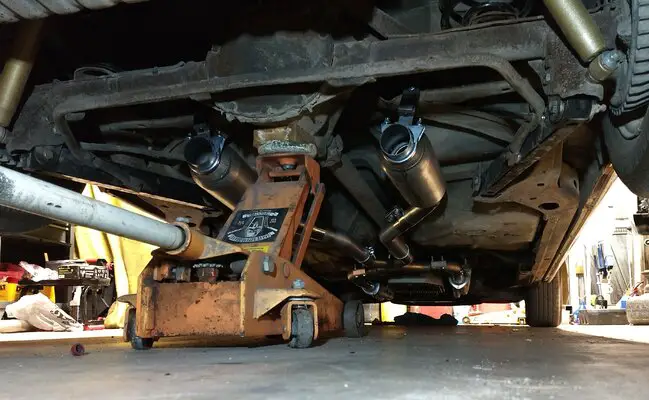
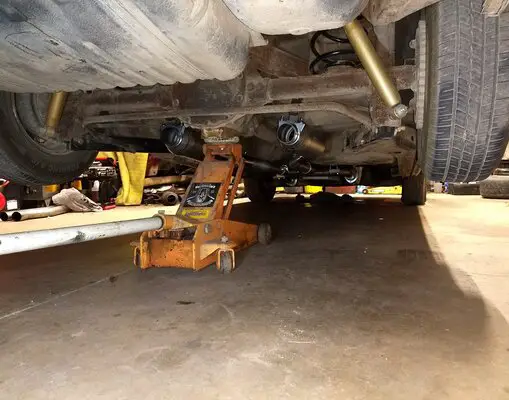
I then removed the offsets and put the 45° bends from the Warlock kit on. They're only aluminized -not stainless- and will serve temporarily until I map out exactly what I need in stainless. I cut 6" off the tail of each and added the cheap 45s from Auto Zone followed by the mufflers to achieve this:

IMG_20240411_202426210.jpgIMG_20240411_202524435.jpg

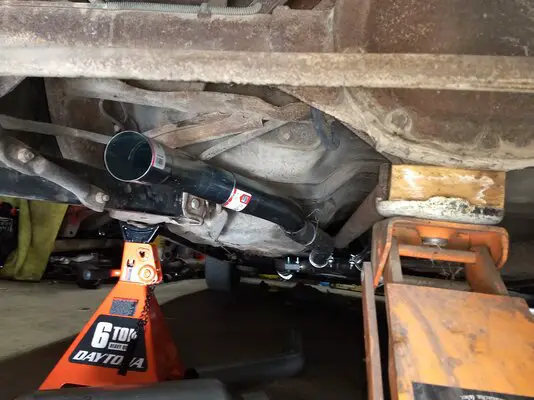
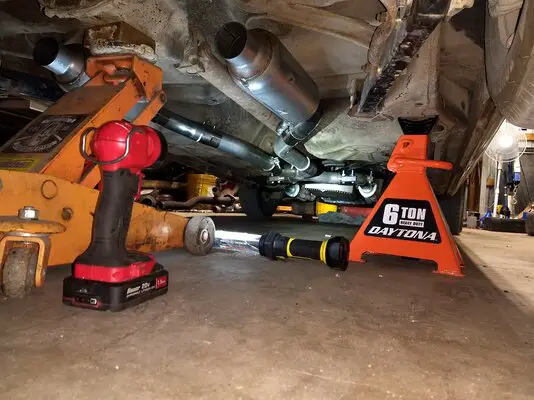
It was right about now that I grabbed the transmission jack to support the weight of the pipes. I should've done that sooner to avoid stressing things but caused no damage since I'd been using wire. Once everything was tucked up nice and tight I used the quick and dirty strap hangers available from parts stores to hang the mufflers. I just added a 90° bend right near the rubber, cut off the excess metal strapping from the end, and slightly enlarged a factory hole in the frame support to bolt them on top of. I just received my order of multiple other hangers to use at a later date but these are working great for now.

What you see below is about $300 worth of stuff and has mandrel bends. The Warlock kit, mufflers, two 45° bends, and clamps would be the same but isn't stainless nor is it already sized for both 2.25" and 2.5" pieces. I have the necessary tooling to swedge my own but that's not the point. Even a cheap "do it yourself" exhaust kit, mufflers, etc. will cost $300 altogether and typically has far too many junctions before you go changing sizes in the middle. The current slightly oversized setup is giving up some low end power and drones a bit at 20 mph but definitely breathes better than what I had before.

IMG_20240411_213908904~2.jpgIMG_20240411_213843340~2.jpgIMG_20240411_214044583.jpg

Between that and the new cam she's got a helluva rumble now!
 

GBodyForum is a participant in the Amazon Services LLC Associates Program, an affiliate advertising program designed to provide a means for sites to earn advertising fees by advertising and linking to amazon.com. Amazon, the Amazon logo, AmazonSupply, and the AmazonSupply logo are trademarks of Amazon.com, Inc. or its affiliates.

Please support GBodyForum Sponsors

Classic Truck Consoles Dixie Restoration Depot UMI Performance

Contact [email protected] for info on becoming a sponsor