Cutty78 said:
bigblockfrank said:
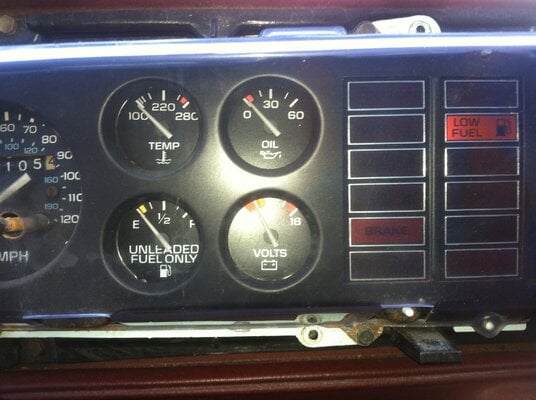
added low fuel light, also installed new fuel sending unit.
How did you change the plugs to get the Low Fuel light on? On my Cutlass the "wires" that go to that spot go to a plug that didn't come in my car,along with "Rear gate open" and some other bulbs.
http://www.ebay.com/itm/Buick-Grand-Nat ... 71&vxp=mtr
followor these steps, if you look, there is a "Low Fuel" indicator in the dash already. It was never an option from the factory, but you can make your Low Fuel light work. I did with mine. Here's what you'll need to hook one up to your Rallye Gauge cluster:
GM Part #6432974, Low Fuel circuit board from a Buick Rivera. About $35 from GM, cheaper from the junkyard, but sorry, I don't know what year of Buick it is. Mid 80's I'd guess. This is about a 1.5" square circuit board with a light socket on it.
Two 6" small gauge wires (18 or 20 gauge should be plenty) with small ring terminals crimped on the ends.
A soldering Iron
And your gauge cluster, removed from the car. Click here if you need to know how to remove yours.
Looking down on the bulb contained in the circuit board assembly, you'll see three terminals. One at 12:00, one at 6:00 and one at about 9:00.12:00 goes to +12v ignition switched. 6:00 goes to ground. 9:00 goes to the fuel sending unit. The hole in the back of the rallye gauge cluster already has the +12v supplied (the bottom of the socket), but the other end goes to a vacant pin. Follow the 6:00 and 9:00 terminals through to the bottom of the circuit board and note where they're soldered on. Solder your two 6" wires to these two points (one each).
Now, plug it into the open socket on the back of the gauge cluster, making sure the terminal that was at 12:00 looking down on the circuit board goes to the bottom of the socket. Now look at the terminals onthe lower right of the back of the gauge cluster. From the bottom right they're numbered starting at 1 and going around clockwise. Pin 2 is ground and pin 3 is the fuel sending unit. Find pin 2 and follow the circuit trace until you come to a nut. Attach the ring terminal you soldered to the 6:00 lead to this nut. Find pin 3 and follow the trace until you come to a nut. Attach the ring terminal you soldered to the 9:00 lead to this nut.
Reinstall the rallye pack and you're set to go! My light goes on when the needle is about mid-way in the orange part. The good part about this is that you're not doing any modifications to the gauge cluster itself. Pop the circuit board out of the socket and unscrew the two terminals and it's as good as new, and you're free to move it to another car.
if you need photos let me know b4 i bolt the cluster to the dash.


 fixed some minor wiring issues and replaced my power antenna. What a joy that job was.
  Sunday..........door hinge pins Oooooooo fun!