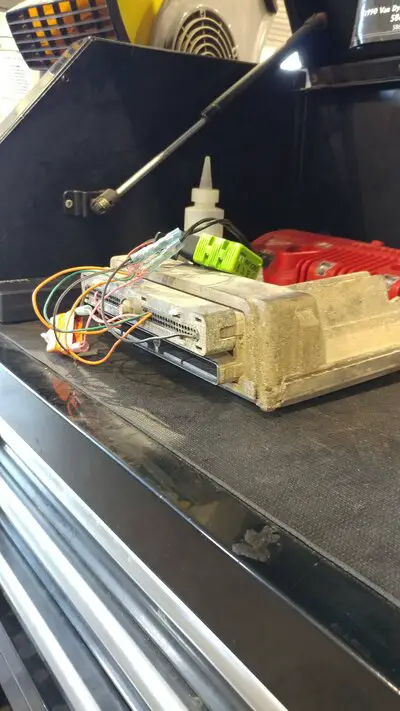
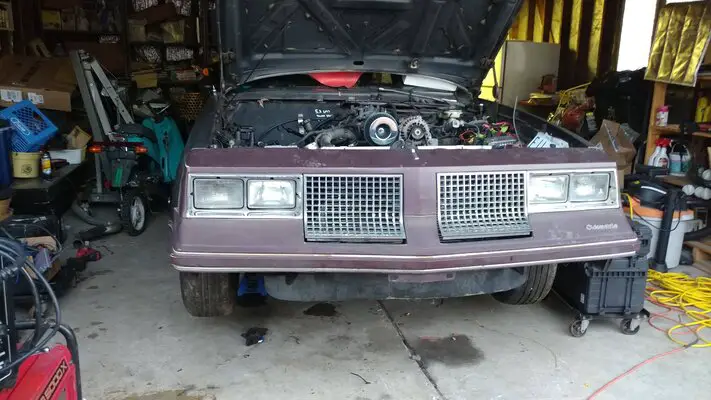
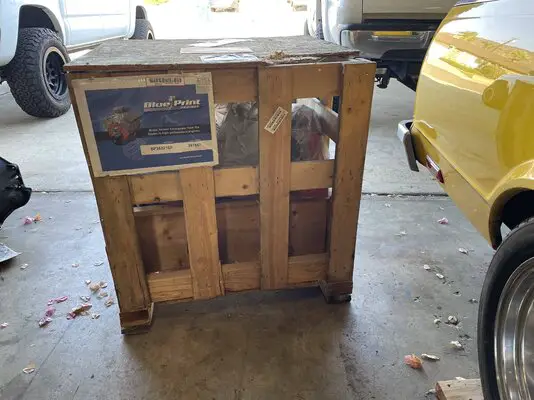
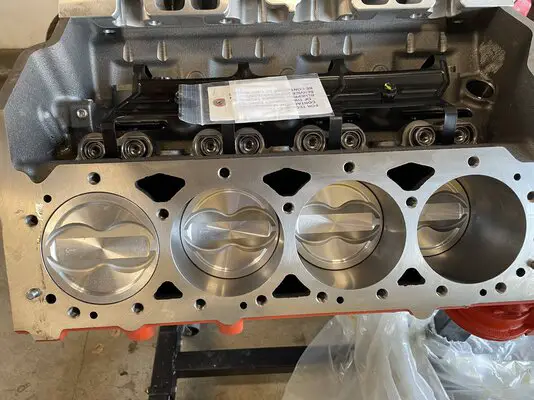
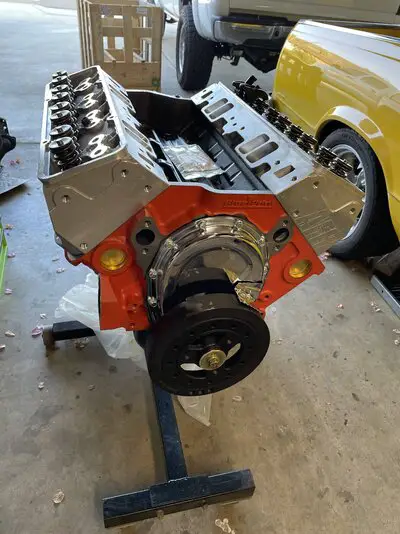
Today i reflashed my pcm to turn off vats and make little pre-start changes for the swap and got to hear the first start! Then i started mocking up the manifold back exhaust for the sake of the neighbors. 18 days until Autofest!
What Did You Do To Your G-Body Today? [2021]
- Thread starter CopperNick
- Start date
You are using an out of date browser. It may not display this or other websites correctly.
You should upgrade or use an alternative browser.
You should upgrade or use an alternative browser.
- Status
- Not open for further replies.
I bought a chair mount from Mikes Montes years back. Not sure if they are still available. The new one was identical to the broken one.Broken chair mounting tab means off to either the stash, the salvage yard, or the welder.
Nick
Last night I replaced the weather strip over the passenger window. Also repaired the mirror, both the mounting tabs broke off. One was stripped out when I purchased the car 7+ years ago. The other broke when I attempted to tighten it. I took two bolts of the same thread as the original post with some JB Weld on the tips and screwed them into the holes. When that was set took the Dremel and cut their heads off, new solid post ready to go. Mounted the mirror, adjusted the window, put the door together and went for a test drive. From a rushing wind noise to a small amount of wind noise. Driver side is next.
Got my driveshaft back and it looks way better. Was gonna test drive, but mother nature didn't play nice and it was a nasty afternoon here in KY. I'll try for a drive tomorrow.


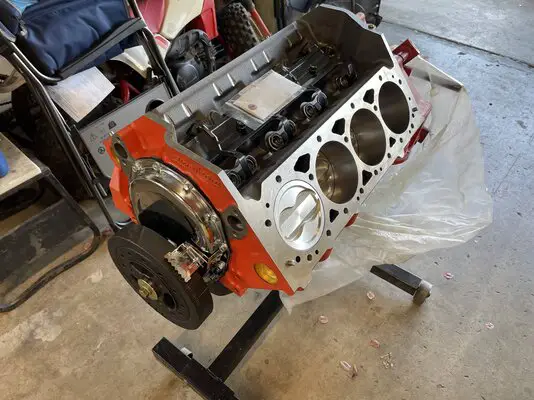
Sweet times two. Nice looking short block and a better looking prop shaft.
Lucky Stiff, You got rain. Not supposed to piss on our parade here until Saturday. Hate to say it but the local foliage sure could use some serious water input. About the only things enjoying the heat are the dandelions. And they have a date (That they do not know about until it happens) with my trowel which they will not survive..... Bwaa-HaHaHaHaHa.
Lucky Stiff, You got rain. Not supposed to piss on our parade here until Saturday. Hate to say it but the local foliage sure could use some serious water input. About the only things enjoying the heat are the dandelions. And they have a date (That they do not know about until it happens) with my trowel which they will not survive..... Bwaa-HaHaHaHaHa.
So after putting in some cleaning time on 5.3, I went digging for my ball joint pressing tool to see if I could figure out a way to get it to push out those metal sleeved bushings from the upper ears on the 10 bolt. No joy so on to plan B, that being drill them out. For this I was glad I have a serious compressor because that air drill needed every puff of air that unit could provide. Ended up coring the rubber grommet at four points around its perimeter and then following the pilot holes with the largest bit I had that would fit between the inner sleeve and the outer shell. STINK? Only like rubber can. Managed to persuade the one ear to give up its dead, but the second ear fought back and cost me a drill bit. Went one size larger and moved on. Even with most of the grommets cored out, it took a drift punch and short maul to persuade the rest of corpses to vacate the premises. Sorry, no pictures for this one; didn't even think of it. STill had to deal with the outer shells at that point and it took a heavy punch held solidly by a pair of vice grips and the maul again to get the shells to collapse enough to knock them out. Once upon a time I had thought of doing this with the rear end still installed in the car. Uh-Uh, nope, nix, nyet, nah. Even up on a lift, it would have been a case of having smoking rubber raining down on me and that would have flat sucked. Too old to get any enjoyment out of that sort of mechanical abuse.
The new inserts are still in the freezer where they have been guests for the last, what, 15 years??? Total cold soak. Have to Rube Gold berg up some kind of pushing tool to set them in place. Did warm up the air motor and wire wheel out the ear openings to get them as clean as possible. May also apply a miniscule amount of Never Seize to the shell surface and inner face of the ears to help things along.
Nick
I would say that you are much better off than I was three years ago when I did mine. I did mine with the rear still installed. I tried hammering with a small sledge, no swing room equaled no joy. Tried using a punch and collapsing them, again no joy. Ended up buying a propane torch and tried melting them out, not quite hot enough, but did melt/soften the rubber enough to gouge them out with a screwdriver. What a mess, and like your drilling experience, rubber STINK!!!So after putting in some cleaning time on 5.3, I went digging for my ball joint pressing tool to see if I could figure out a way to get it to push out those metal sleeved bushings from the upper ears on the 10 bolt. No joy so on to plan B, that being drill them out. For this I was glad I have a serious compressor because that air drill needed every puff of air that unit could provide. Ended up coring the rubber grommet at four points around its perimeter and then following the pilot holes with the largest bit I had that would fit between the inner sleeve and the outer shell. STINK? Only like rubber can. Managed to persuade the one ear to give up its dead, but the second ear fought back and cost me a drill bit. Went one size larger and moved on. Even with most of the grommets cored out, it took a drift punch and short maul to persuade the rest of corpses to vacate the premises. Sorry, no pictures for this one; didn't even think of it. STill had to deal with the outer shells at that point and it took a heavy punch held solidly by a pair of vice grips and the maul again to get the shells to collapse enough to knock them out. Once upon a time I had thought of doing this with the rear end still installed in the car. Uh-Uh, nope, nix, nyet, nah. Even up on a lift, it would have been a case of having smoking rubber raining down on me and that would have flat sucked. Too old to get any enjoyment out of that sort of mechanical abuse.
The new inserts are still in the freezer where they have been guests for the last, what, 15 years??? Total cold soak. Have to Rube Gold berg up some kind of pushing tool to set them in place. Did warm up the air motor and wire wheel out the ear openings to get them as clean as possible. May also apply a miniscule amount of Never Seize to the shell surface and inner face of the ears to help things along.
Nick
The new bushings were not very difficult to get in at ambient temperature, I hammered them in as carefully and evenly as I could. Must have been alright, I have not had any problems. With my driving habits, I guesstimate that I have driven 15k miles since then (I still have not hooked up the odometer since my engine swap 4yrs ago). If your bushings are in the freezer, I would think that they would install fine without too much trouble, so long as they are driven in straight.
Got done with work early, so I took the Cutlass out for some testing. Drove around for 30+ minutes and zero driveline vibrations. Different speeds, accel and decel rates, cruising on the highway and it feels great! Slowly but surely I'm getting the bugs worked out! Pic for proof....


Appreciate the positive vibes on the replacement bushing install. in a way I will be sad to see them leave the freezer. They have been resident in there for so long they also have their own address and zip code.
The original plan was to try and drive them home this pm but ended up over at the yard digging into a harness for the 5.3. Have one about half uncoupled but my throttle body is cable driven and this one looks to be an electronic item. Might be a problem unless the 2001 ECM unit will accept the plug ins on the harness and ignore the e-throttle because it is not coded or wired to operate it. Terra incognita at this point.
Tomorrow may be a bust on the install as welll due to having to go out and buy a new heat exchanger for my furnace. The old one suffered a rust attack and blew out. CO meter went nuts; maxxed the reading. More joy. Unit is on warrranty but will have to pay to get it installed, Bummer.
Nick
- Status
- Not open for further replies.
Similar threads
- Replies
- 979
- Views
- 59K
- Replies
- 281
- Views
- 22K
- Replies
- 1K
- Views
- 36K
GBodyForum is a participant in the Amazon Services LLC Associates Program, an affiliate advertising program designed to provide a means for sites to earn advertising fees by advertising and linking to amazon.com. Amazon, the Amazon logo, AmazonSupply, and the AmazonSupply logo are trademarks of Amazon.com, Inc. or its affiliates.


