Wagon quarter glass mouldings

Status
Not open for further replies.

GRIFF442

Not-quite-so-new-guy
Oct 9, 2012
36
3
8
Coral Springs, Florida
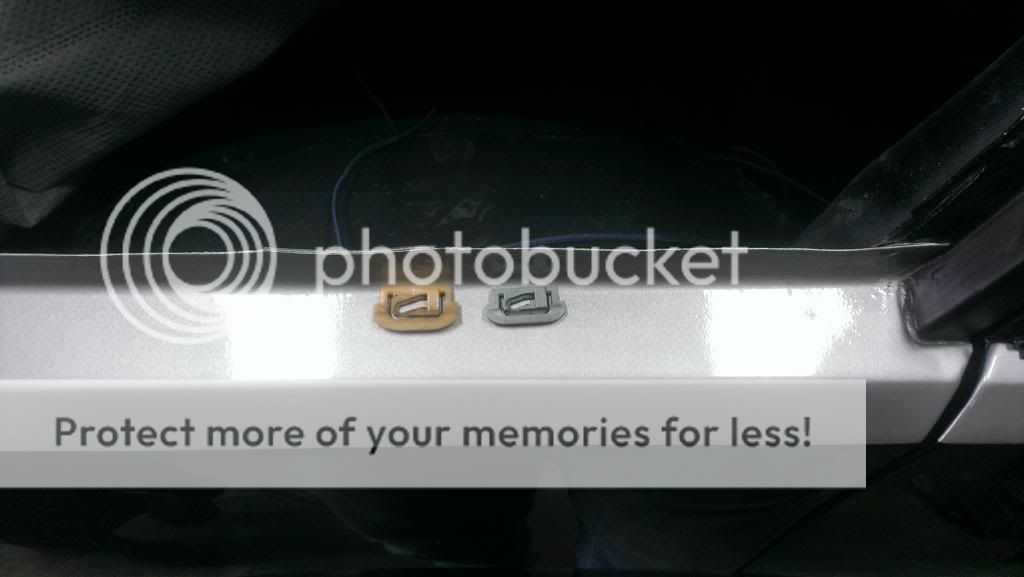
I got the screw in studs and clips offline at http://www.autofastco.net the studs are under the left side section titled "General Motors" and show up in the bottom right part #77-4446. Can't beat them for only $3.90 for 50, also great site for all other clips on our wagons and G-machines for reasonable prices. I have used these studs to install side conquista trim on an El and they work awesome. Only complaint is I wish they were made in stainless instead of zinc coated steel.
When I installed on the El, I lightly coated the threads in epoxy before installing and have not had any problems to date. They have been on the car about 2 years and it is kept outdoors and we get alot of rain here in south Florida so I think they will work OK for the wagon.

Longroof... if you can get me those pics when you have time, and an idea how far away from the sealing surface the studs are that would be awesome. I noticed you are not to far from me in Gainesville, I spent the best 4 year vacation of my life in that town, somehow even managed to get a degree too :rofl: GO GATORS!!

Here are a few pics of the wagon in its current form.........

83Wagon015_zpseba09cce.jpg


83Wagon014_zps275e1469.jpg


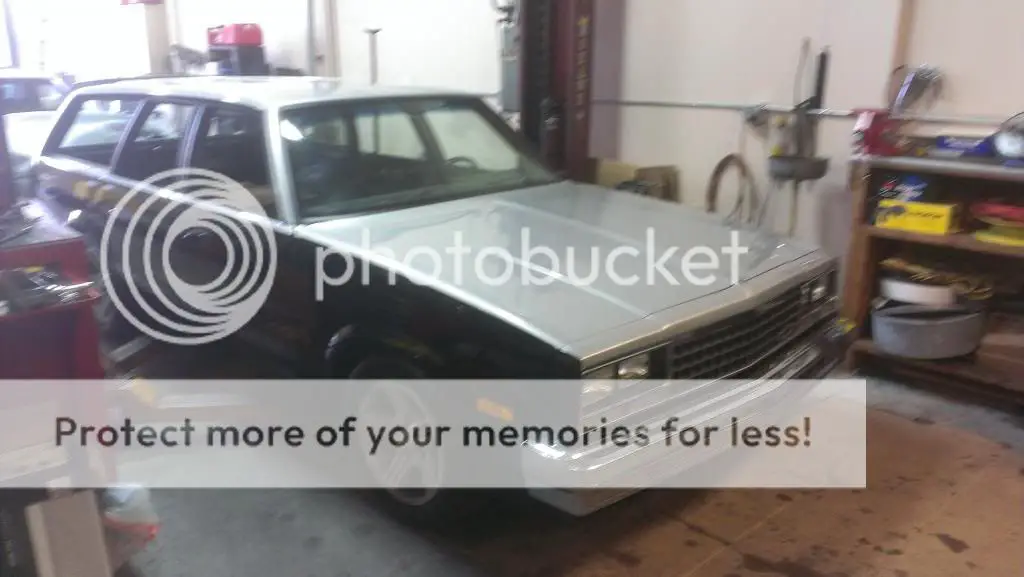
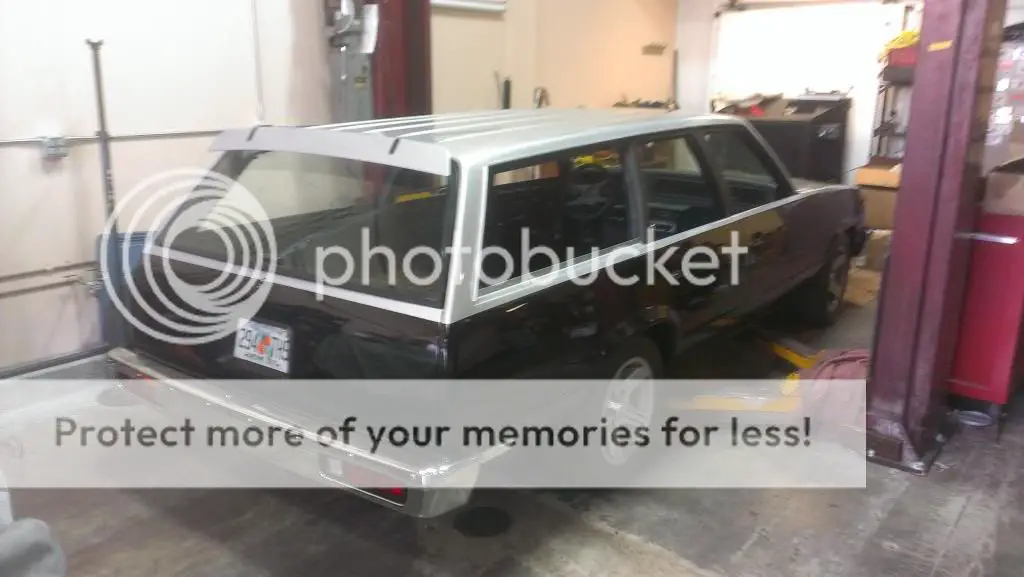
I am planning to start a thread about the whole build that is now into its 4th year, just had to get the old pics out of my broken computer and uploaded to photobucket. Currently drivetrain, suspension, brakes, and most of exterior is back together so just have to get glass installed and interior back together and I'll be running. :D
 

Longroof79

Rocket Powered Basset Hound
Oct 14, 2008
12,177
9,779
113
Gainesville, Fl
Griff,
That's a fine looking wagon. I like the two tone combination...that's slick! Thank you for the link to the fastener site. That will come in handy. That sounds like a neat trick using epoxy on the threads. I'm probably going to need at least one, maybe two of those studs for my windshield moulding. The last time I had a new windshield installed, I noticed that they used a short chrome trim screw to replace one missing stud. I'll probably replace it with one of those screw-in studs.

Ah, so you're a UF alumni? The UF has been on the national list of "party" schools over the years. I would have liked to have gone to school here... :lol: Best four year vacation... :lol: I love it!

I guess we're a good several hours apart. Coral Springs is in Broward County if I'm not mistaken.


Go GATORS!
 

Longroof79

Rocket Powered Basset Hound
Oct 14, 2008
12,177
9,779
113
Gainesville, Fl
BTW, what are you using to set the quarter window glass in...butyl tape, urethane caulk...or a combination of both?
I know most people recommend urethane caulk for the windshield application.

Anyhow, my camera is a piece of crap. It's archaic, and does not have a wide angle lens for wider close up shots. So I apologize for that.

All the studs are spaced roughly a 1/4"- 5/16" from the window flange.

Looking at the left side(driver side) quarter window.
The lower ledge has 7-studs. Actually two of them were used for plastic spacer blocks for the glass. So probably the two that are closer together with the others could be eliminated.
From left to right: The first one is 3 1/8" from the window frame, 2nd.- 3 1/4" from the first stud, 3rd- 5 3/4" from the second stud, 4th- 8 7/8" from the third stud, 5th- 8 3/4" from the fourth stud, 6th- 5 7/8" from the fifth stud, 7th- 5 1/4" from the sixth stud...and 2" from the seventh stud to the edge of the frame.

leftside vertical window frame:
there's two studs. first one from the top is 6 3/4" down, second 8 1/2"-8 5/8" from the first stud and 2 3/4" from the bottom.

top of frame: 7 studs
First, from left to right, 2 1/8", second,2 1/8" from the 1st stud, third, 6" from the second stud, fourth, 8 1/4" from the 3rd stud. fifth, 8 1/8"-8 1/4" from the fourth stud. sixth, 8 1/4" from the 5th stud, seventh, 2 7/8" from the corner.

rightside vertical window frame: 3-studs
1st, 3" down from the corner. 2nd, 5 3/4" from the first stud. 3rd, 6 1/4" from the second stud. 3 1/2" from the bottom..

I hope this will help you somewhat. I know pics would have been cool, but again, sorry about that. Time for a new camera.

A build thread would be cool. I'll be tuned in... :wink:
 

GRIFF442

Not-quite-so-new-guy
Oct 9, 2012
36
3
8
Coral Springs, Florida
Thanks Jack for the measurements, I used a sharpie today to map out where to put the holes and it looks like it they are where they need to be. I will be drilling and putting in studs next week so glass can go in next weekend. I plan on using the uretane caulk with special primer painted on the sealing surface to help it seal.

Got one more question for you.....Do you know which of these size clips to use?

IMAG0140_zpsc5767a00.jpg


I think it is the one on the left but not sure. I will get some pics of the finished product to post on here for others doing this conversion.

Again, thanks for the help with the clip placement.....and yes C.S. is in NW Broward county about 4 hours south of Gainesville.
 

Longroof79

Rocket Powered Basset Hound
Oct 14, 2008
12,177
9,779
113
Gainesville, Fl
Griff,
You're quite welcome buddy... glad I could help. I pictured you going around the window frames measuring and marking the areas to be drilled with a Sharpie. :)
Again, the lower ledge probably has two more studs than needed. Two, as I might have said, were used for the glass spacer blocks. You'll most likely use the rubber spacers.

As for the clips, the one on the left looks like the proper one. I'll take another look at my old ones, but I'm pretty sure that's the right choice.

Are you installing your own glass? If so, please give me an idea of how much of a caulk bead you're using. When I removed my glass, there appeared to be a sort of rubber gasket. I'd like to be able to achieve the same spacing between the glass and the flange in order to seat the trim properly.

A comprehensive thread on this conversion would definitely help other wagon guys in the same predicament.

Thanks man! :)
 

Josh Hanna

Greasemonkey
Feb 3, 2013
130
1
18
Coral Spings FL
Damm That a sweet car!!!! mabe it will get done for super chevy!!!!! :mrgreen:
 

liquidh8

Comic Book Super Hero
Jack, I have the aluminum trim. Was supposed to get s stud welder to weld the stock studs in, but that never panned out. I think the aluminum trim looks best. Jack, I would also like to see some pics, even a rudimentary drawing, with the clip location. I never did that before I scrapped the Malibu wagon, I should have.

Pontiac, I know what you are saying. I have been working on aircraft for 13 years. Sheet metal and machine shop would use alondine (spelling) on the aluminum and all after adding rivnuts or the nut plates. For things like ground straps, we would put some clear rtv over the fastener to try and inhibit dissimilar metal corrosion.

That being said, my wagon will be a daily driver. I have used rtv on the windshield clips screws on chevelles and the like. Still rusted :?

I guess you can just do as best as you can ya know? paint in the holes after drilling, add sealant to the threads of the screws while putting them in.
 

Longroof79

Rocket Powered Basset Hound
Oct 14, 2008
12,177
9,779
113
Gainesville, Fl
liquidh8 said:
Jack, I have the aluminum trim. Was supposed to get s stud welder to weld the stock studs in, but that never panned out. I think the aluminum trim looks best. Jack, I would also like to see some pics, even a rudimentary drawing, with the clip location. I never did that before I scrapped the Malibu wagon, I should have.

Pontiac, I know what you are saying. I have been working on aircraft for 13 years. Sheet metal and machine shop would use alondine (spelling) on the aluminum and all after adding rivnuts or the nut plates. For things like ground straps, we would put some clear rtv over the fastener to try and inhibit dissimilar metal corrosion.

That being said, my wagon will be a daily driver. I have used rtv on the windshield clips screws on chevelles and the like. Still rusted :?

I guess you can just do as best as you can ya know? paint in the holes after drilling, add sealant to the threads of the screws while putting them in.
Jim,
My archaic camera is unable to take closeups. No wide angle lens, unfortunately. The best I could do is what I did for Griff.
I outlined the measurements of my existing studs. No scanner. I could draw a diagram for you ans send via snail mail if that would help you.
Let me know.
Speaking of quarter windows. I need to locate a pair of the plastic strips that clip on to the screw on metal rails that help support the inner cargo panels. I kind of tore them up a bit when I was removing the glass.
 

GRIFF442

Not-quite-so-new-guy
Oct 9, 2012
36
3
8
Coral Springs, Florida
Hey guys, got all my holes drilled and studs and clips installed.

If you give me a couple days I will get some pics of all clip locations and that should give you a good idea of where the studs should be. I got them in late Sat. night and forgot to get pics. I have a friend stopping by shop tomorrow night to help me glue qtr qlass back in and install aluminum trim. Assuming everything goes well I will get pics of entire process and post for other members who want to do this conversion :D
 

Longroof79

Rocket Powered Basset Hound
Oct 14, 2008
12,177
9,779
113
Gainesville, Fl
GRIFF442 said:
Hey guys, got all my holes drilled and studs and clips installed.

If you give me a couple days I will get some pics of all clip locations and that should give you a good idea of where the studs should be. I got them in late Sat. night and forgot to get pics. I have a friend stopping by shop tomorrow night to help me glue qtr qlass back in and install aluminum trim. Assuming everything goes well I will get pics of entire process and post for other members who want to do this conversion :D

Griff,
Pictures would be great. I can't tell you how many times other wagon guys have hit a brick wall deciding what to do for their quarter window trim. The aluminum trim is getting harder to find. Ironically, it's the best replacement for the newer glue-on crap.
Are you also going to use the beaded trim that goes between the sill and lower moulding?
 
Status
Not open for further replies.

GBodyForum is a participant in the Amazon Services LLC Associates Program, an affiliate advertising program designed to provide a means for sites to earn advertising fees by advertising and linking to amazon.com. Amazon, the Amazon logo, AmazonSupply, and the AmazonSupply logo are trademarks of Amazon.com, Inc. or its affiliates.

Please support GBodyForum Sponsors

Classic Truck Consoles Dixie Restoration Depot UMI Performance

Contact [email protected] for info on becoming a sponsor