BUILD THREAD my 1980 Grand Prix w/BBC 454 build thread

Status
Not open for further replies.

454GrandPrix

Master Mechanic
Jul 27, 2016
429
818
93
Lehi, Utah
Having the day off work, yesterday I decided to go to the local Pick N Pull. My top priority was to find and remove the steering gear box (along with the pitman arm and steering shaft) from a ZJ Grand Cherokee. Being Utah, the yard was full of ZJs. I literally had more than a dozen potential candidates, which meant I could be choosy... so I decided to check mechanical odometers and select the one that was the lowest (assuming the corresponding gearbox showed no signs of leakage).

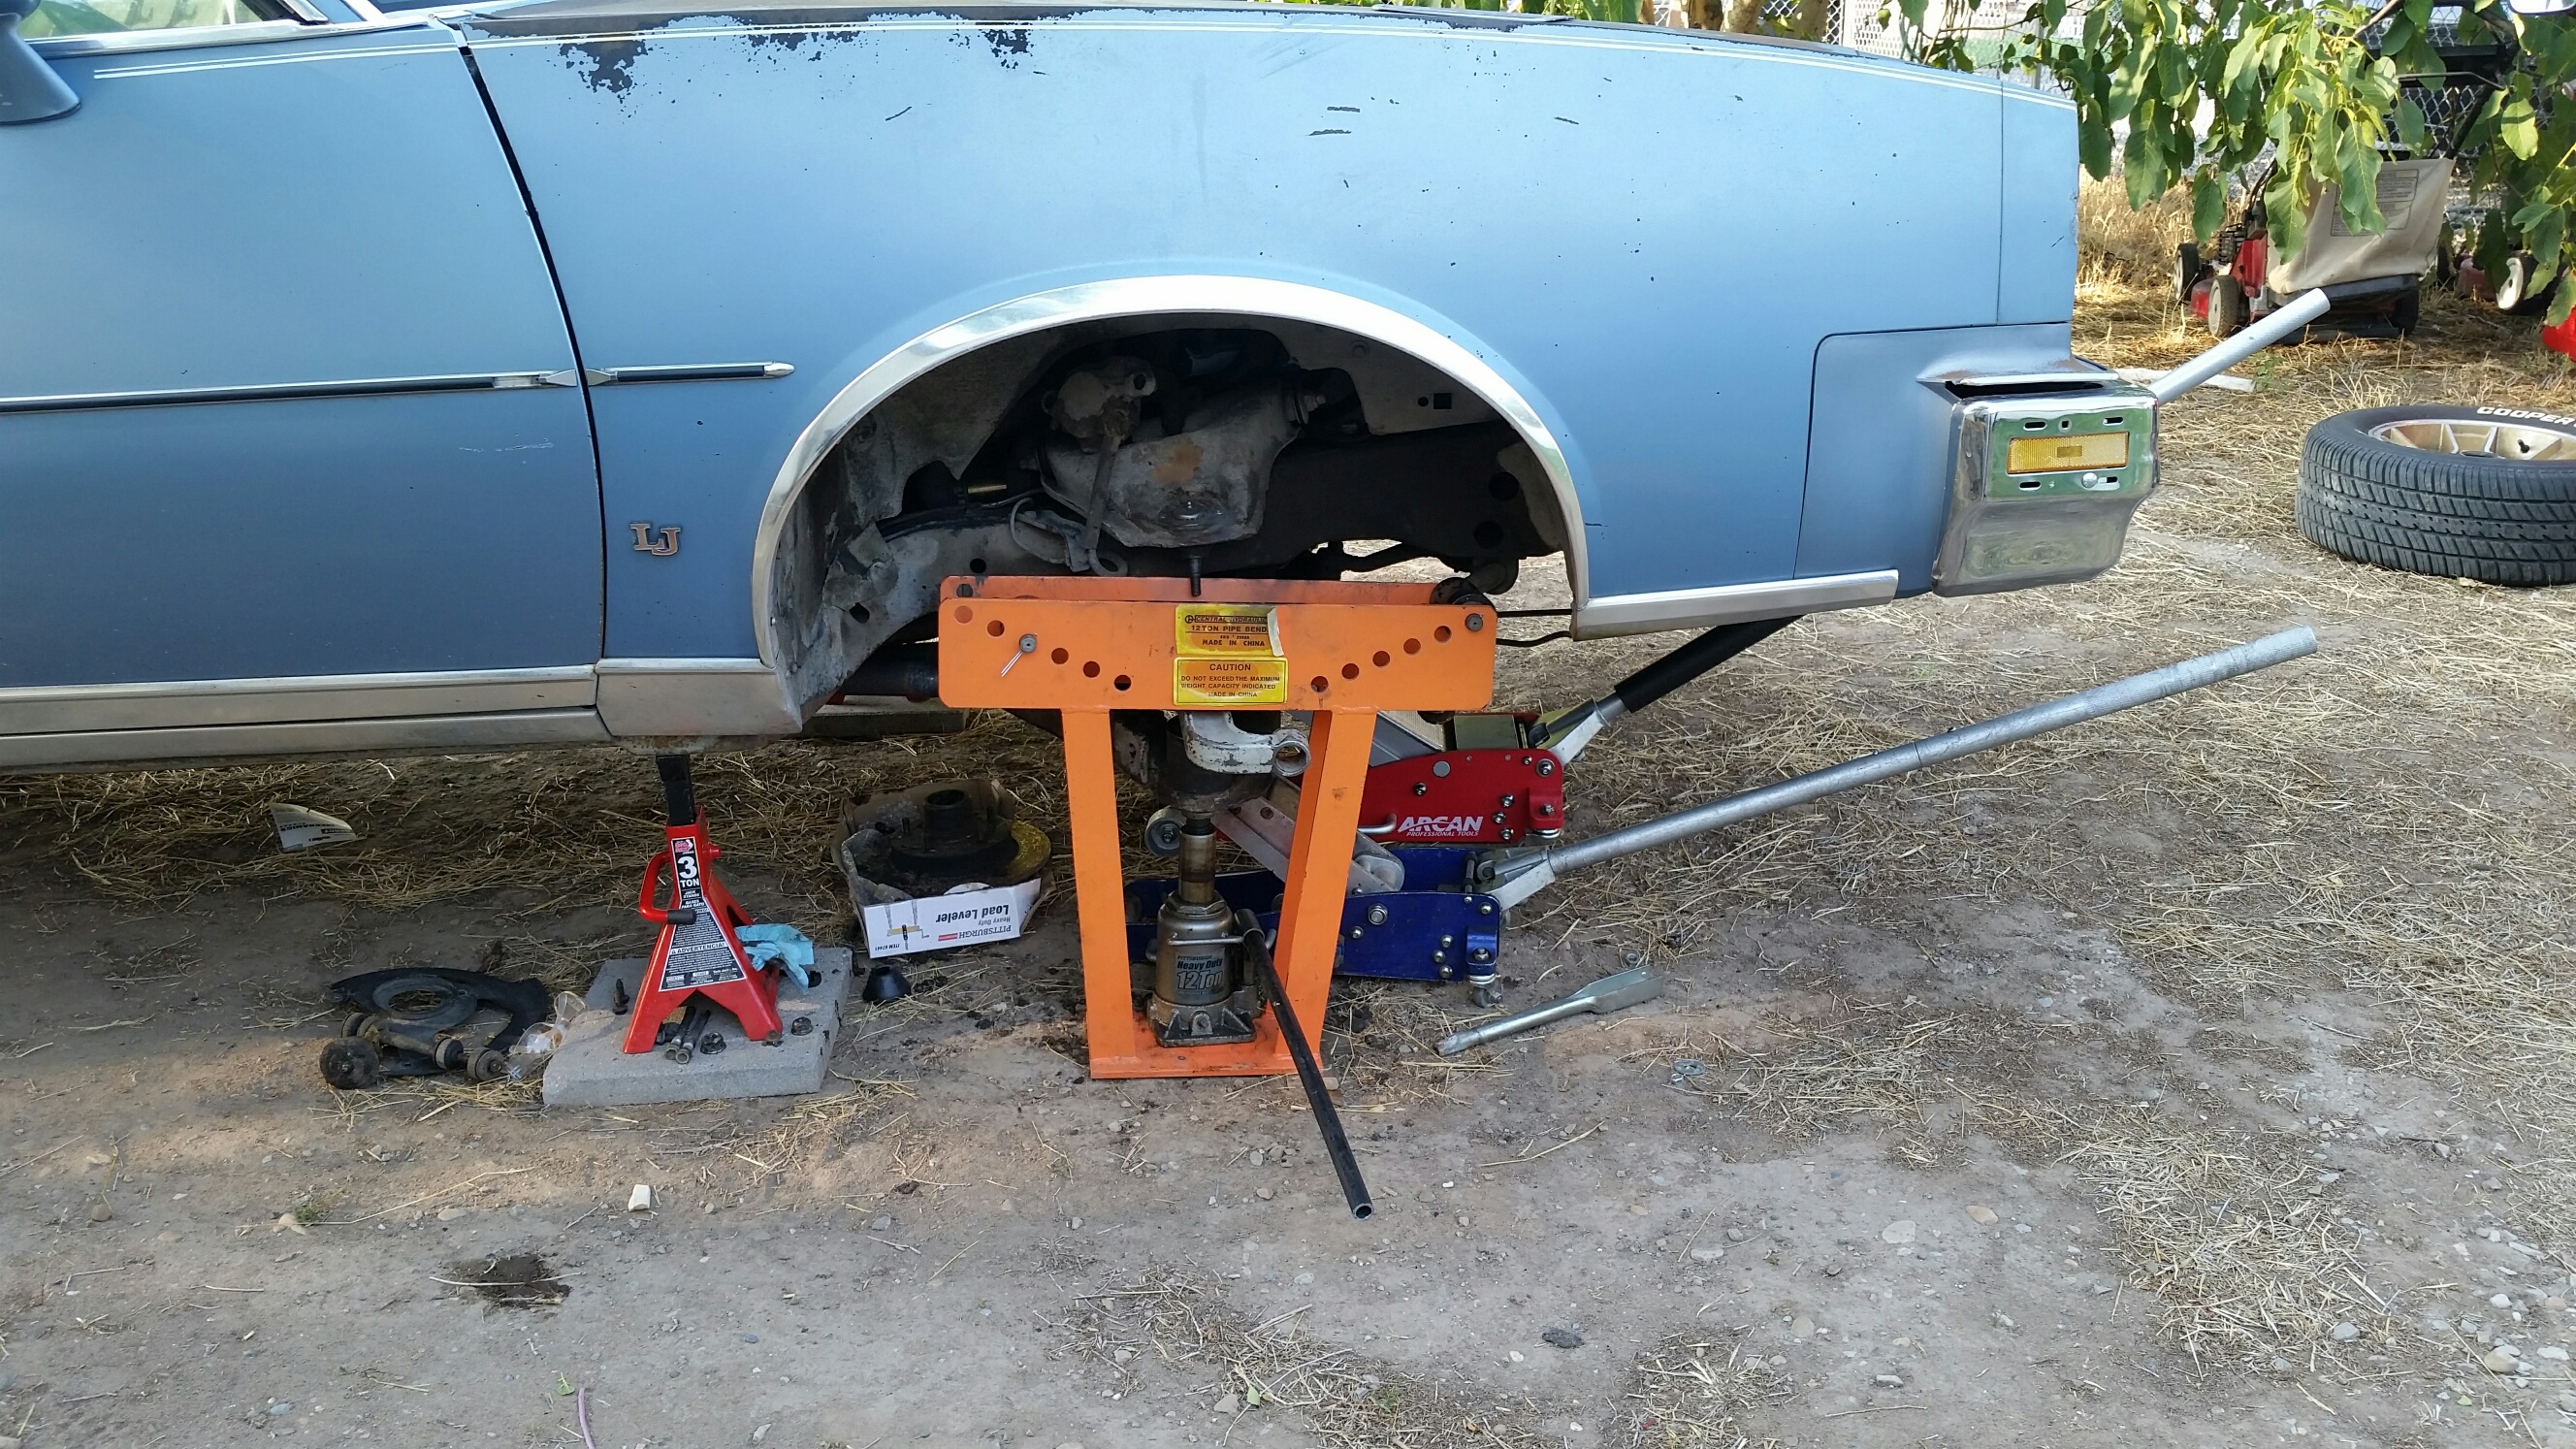
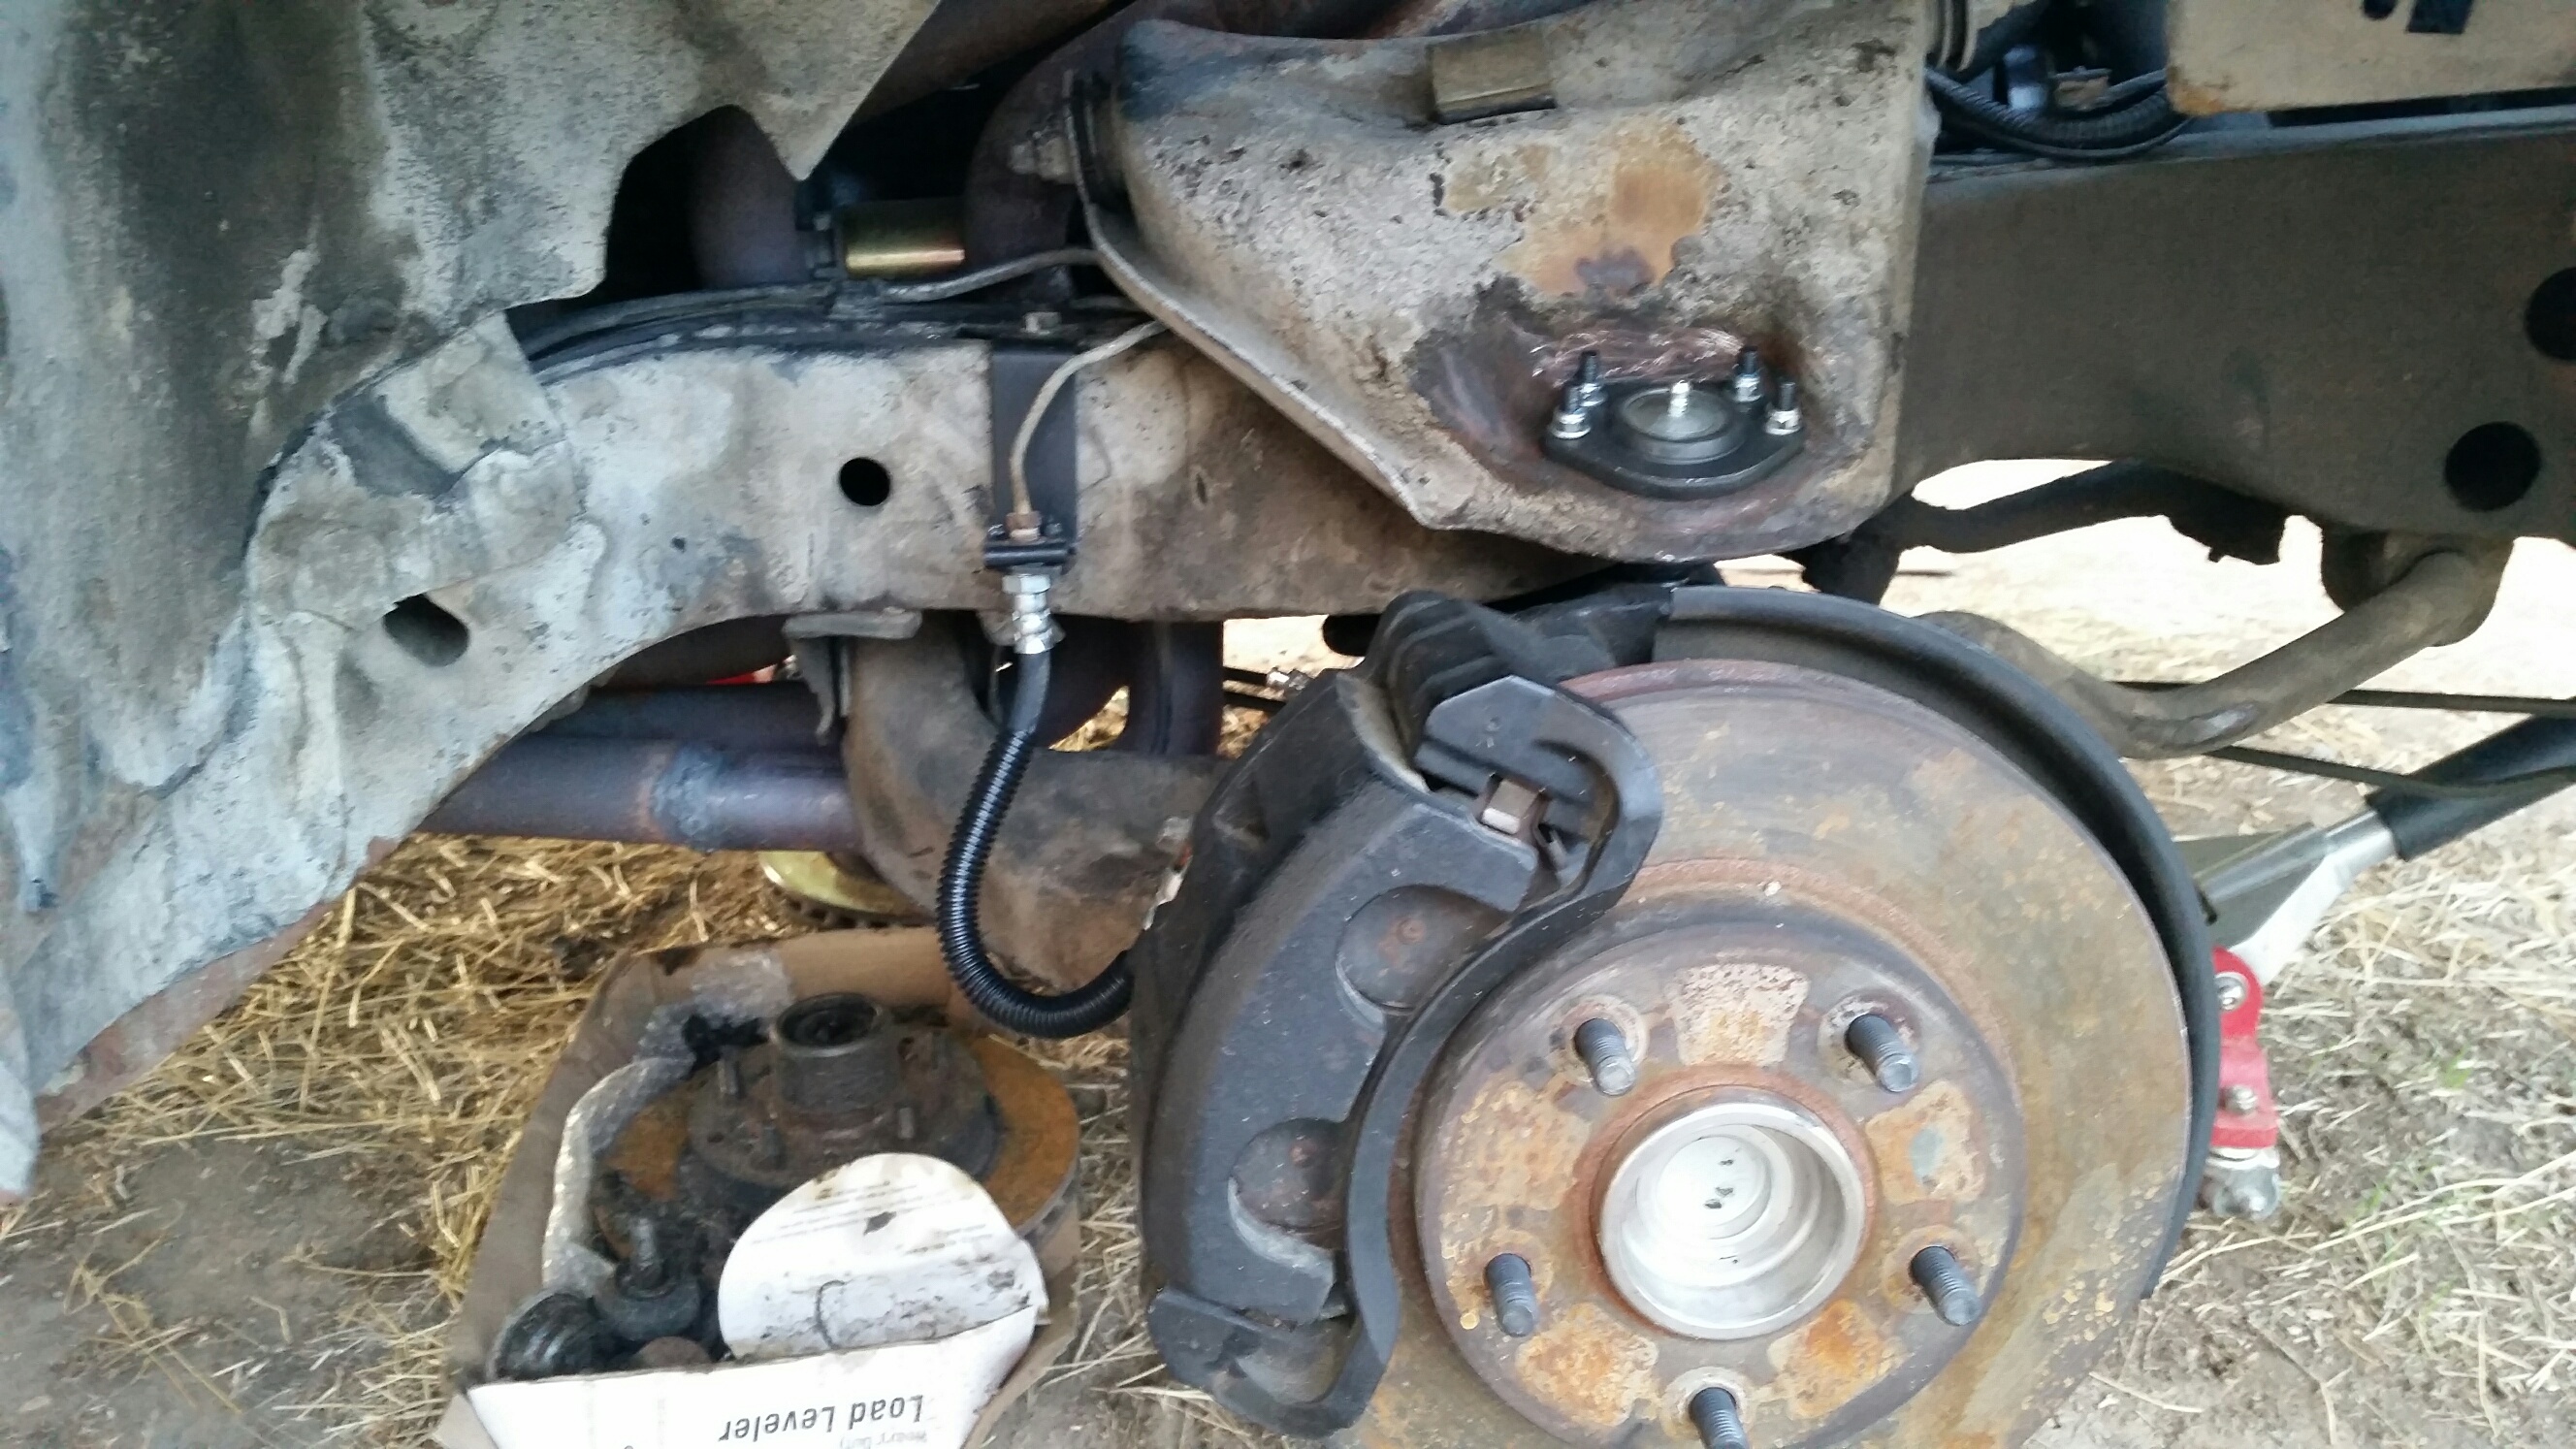
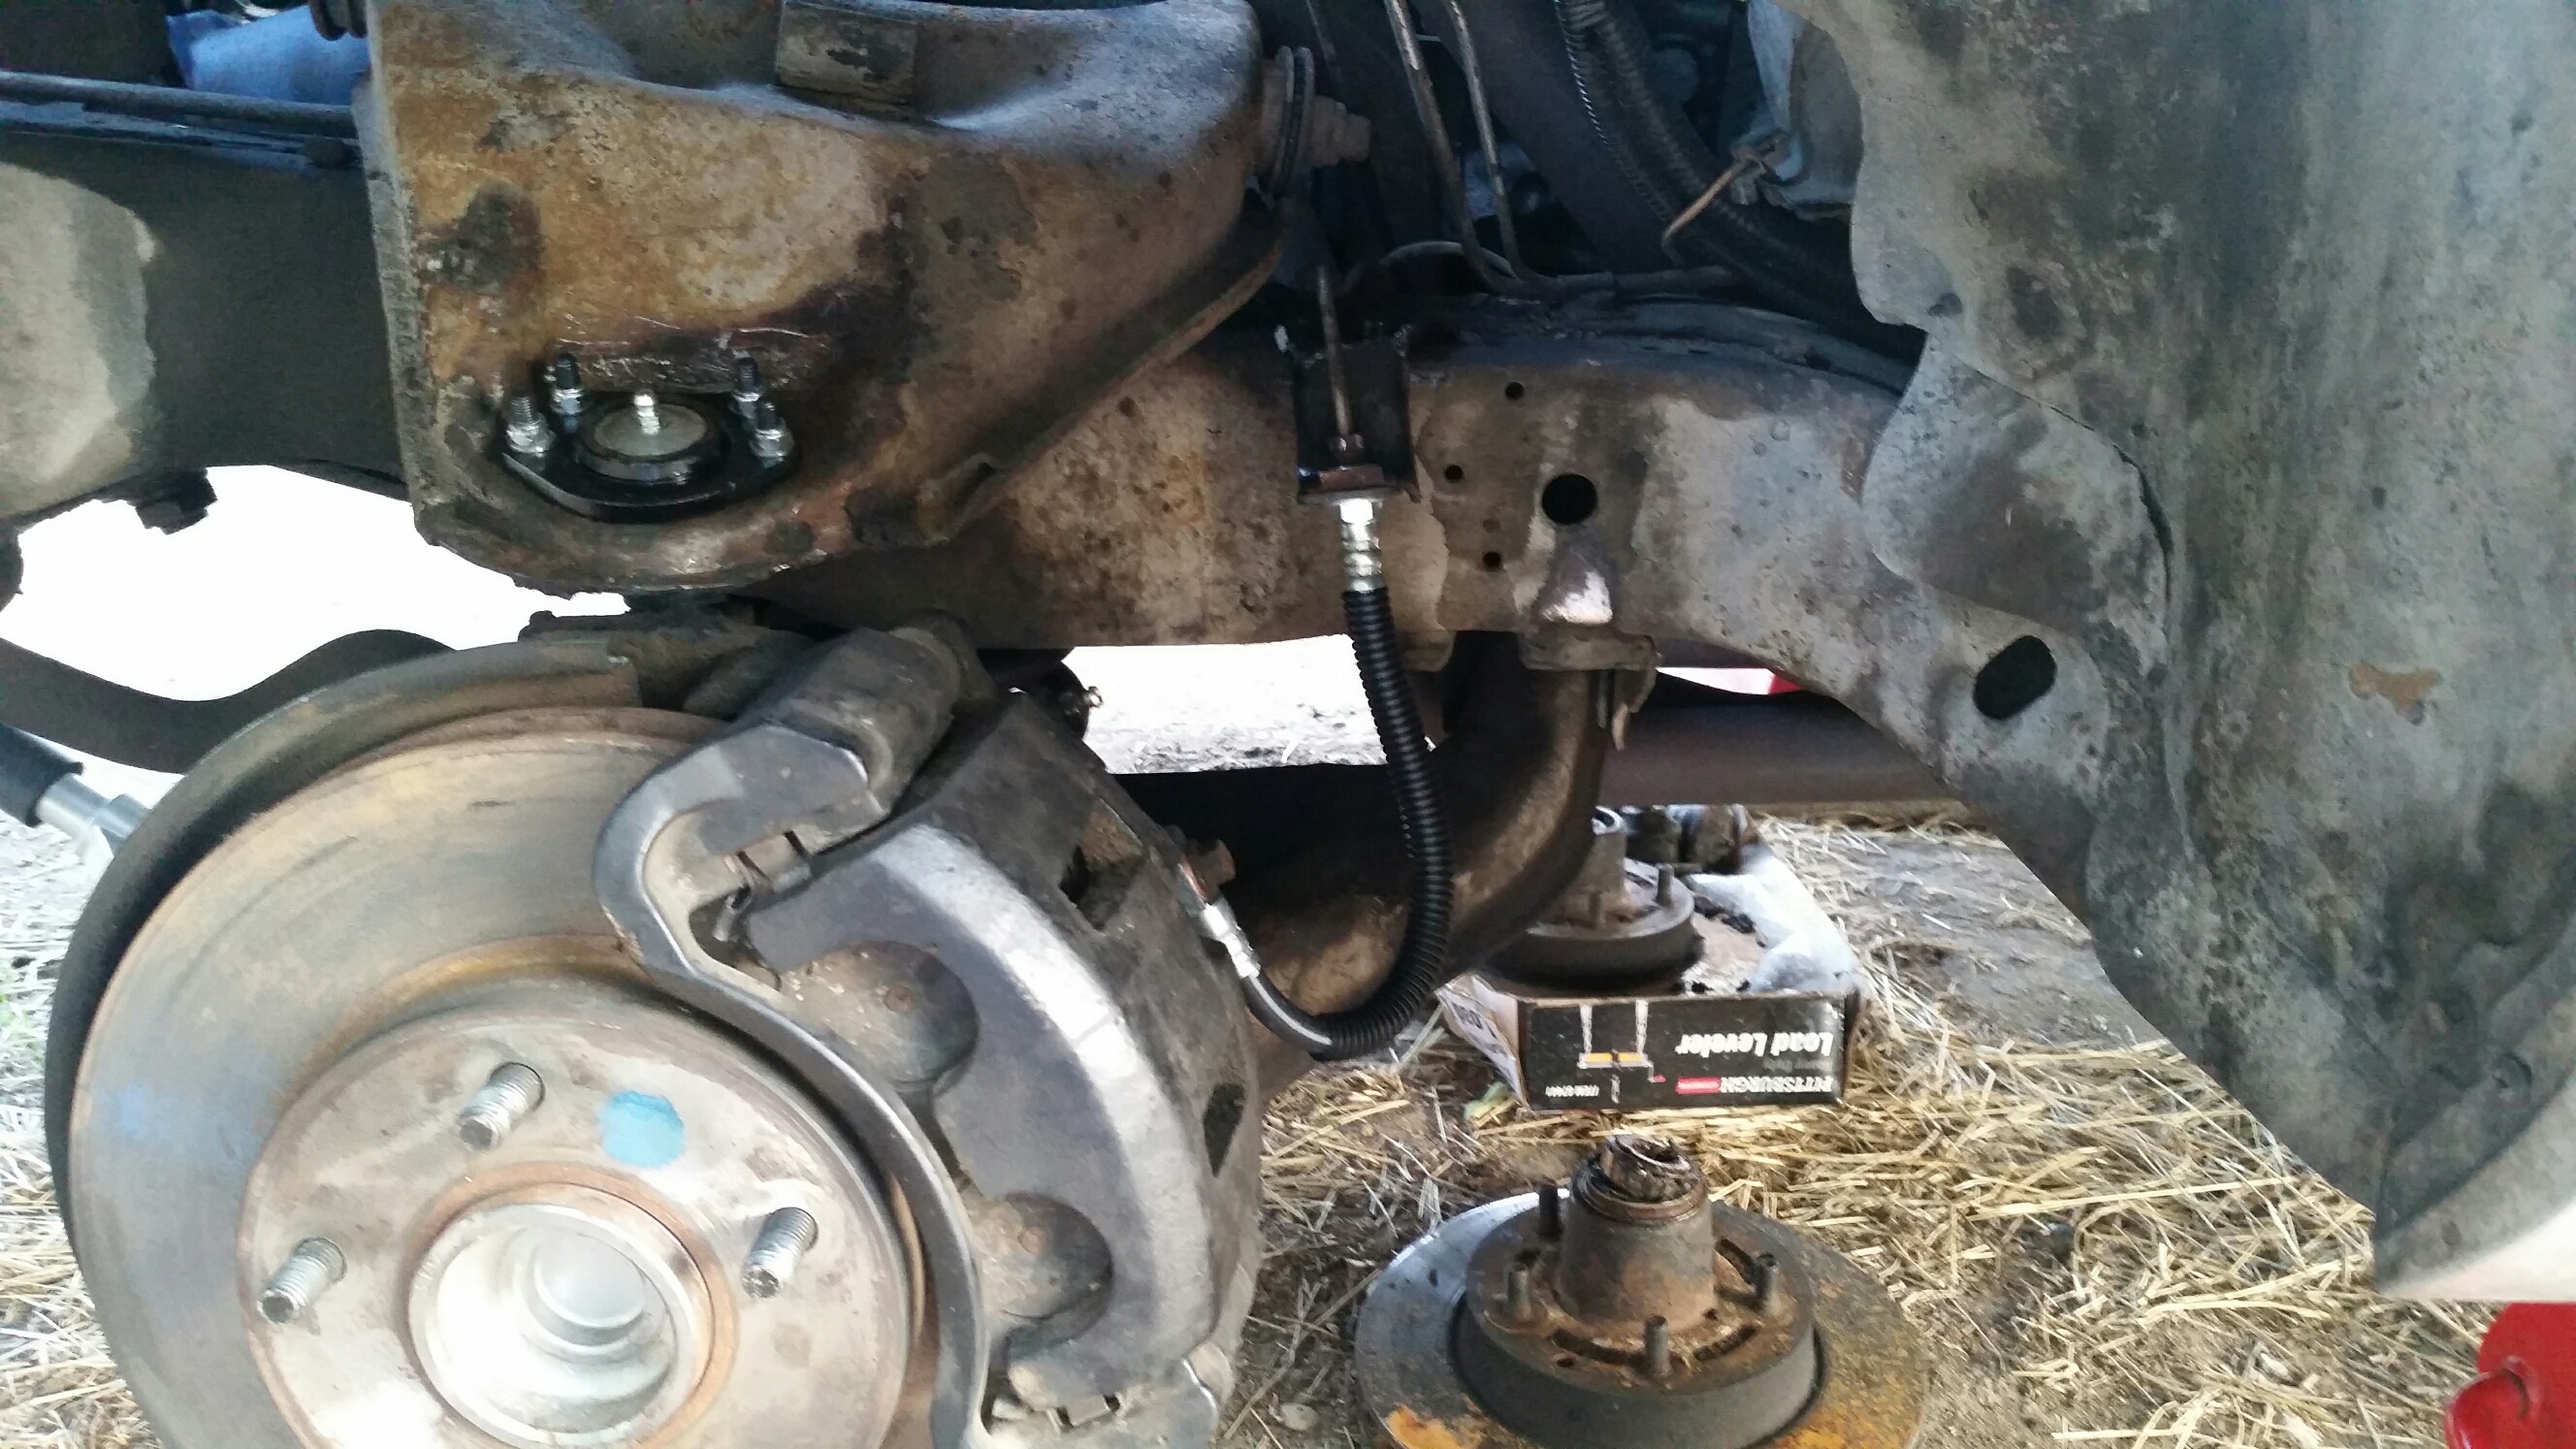
Being highly organized, Pick N Pull puts all their compact/mid-size SUVs in the same section. This meant I could also keep an eye out for 99-05 Blazers at the same time. However, this is Utah... meaning a 2WD Blazer is about as rare as hen's teeth. So you'll understand my surprise when I saw they had one 2WD vehicle, a 1999 GMC Jimmy. But wait--it gets better. As I took a closer look, I saw that someone else had already beat me to this prized gem... but apparently all they wanted were the front coil springs. When I looked at the front wheelwells, this is what I saw:

lyXdwTF.jpg


zuP8Hcj.jpg


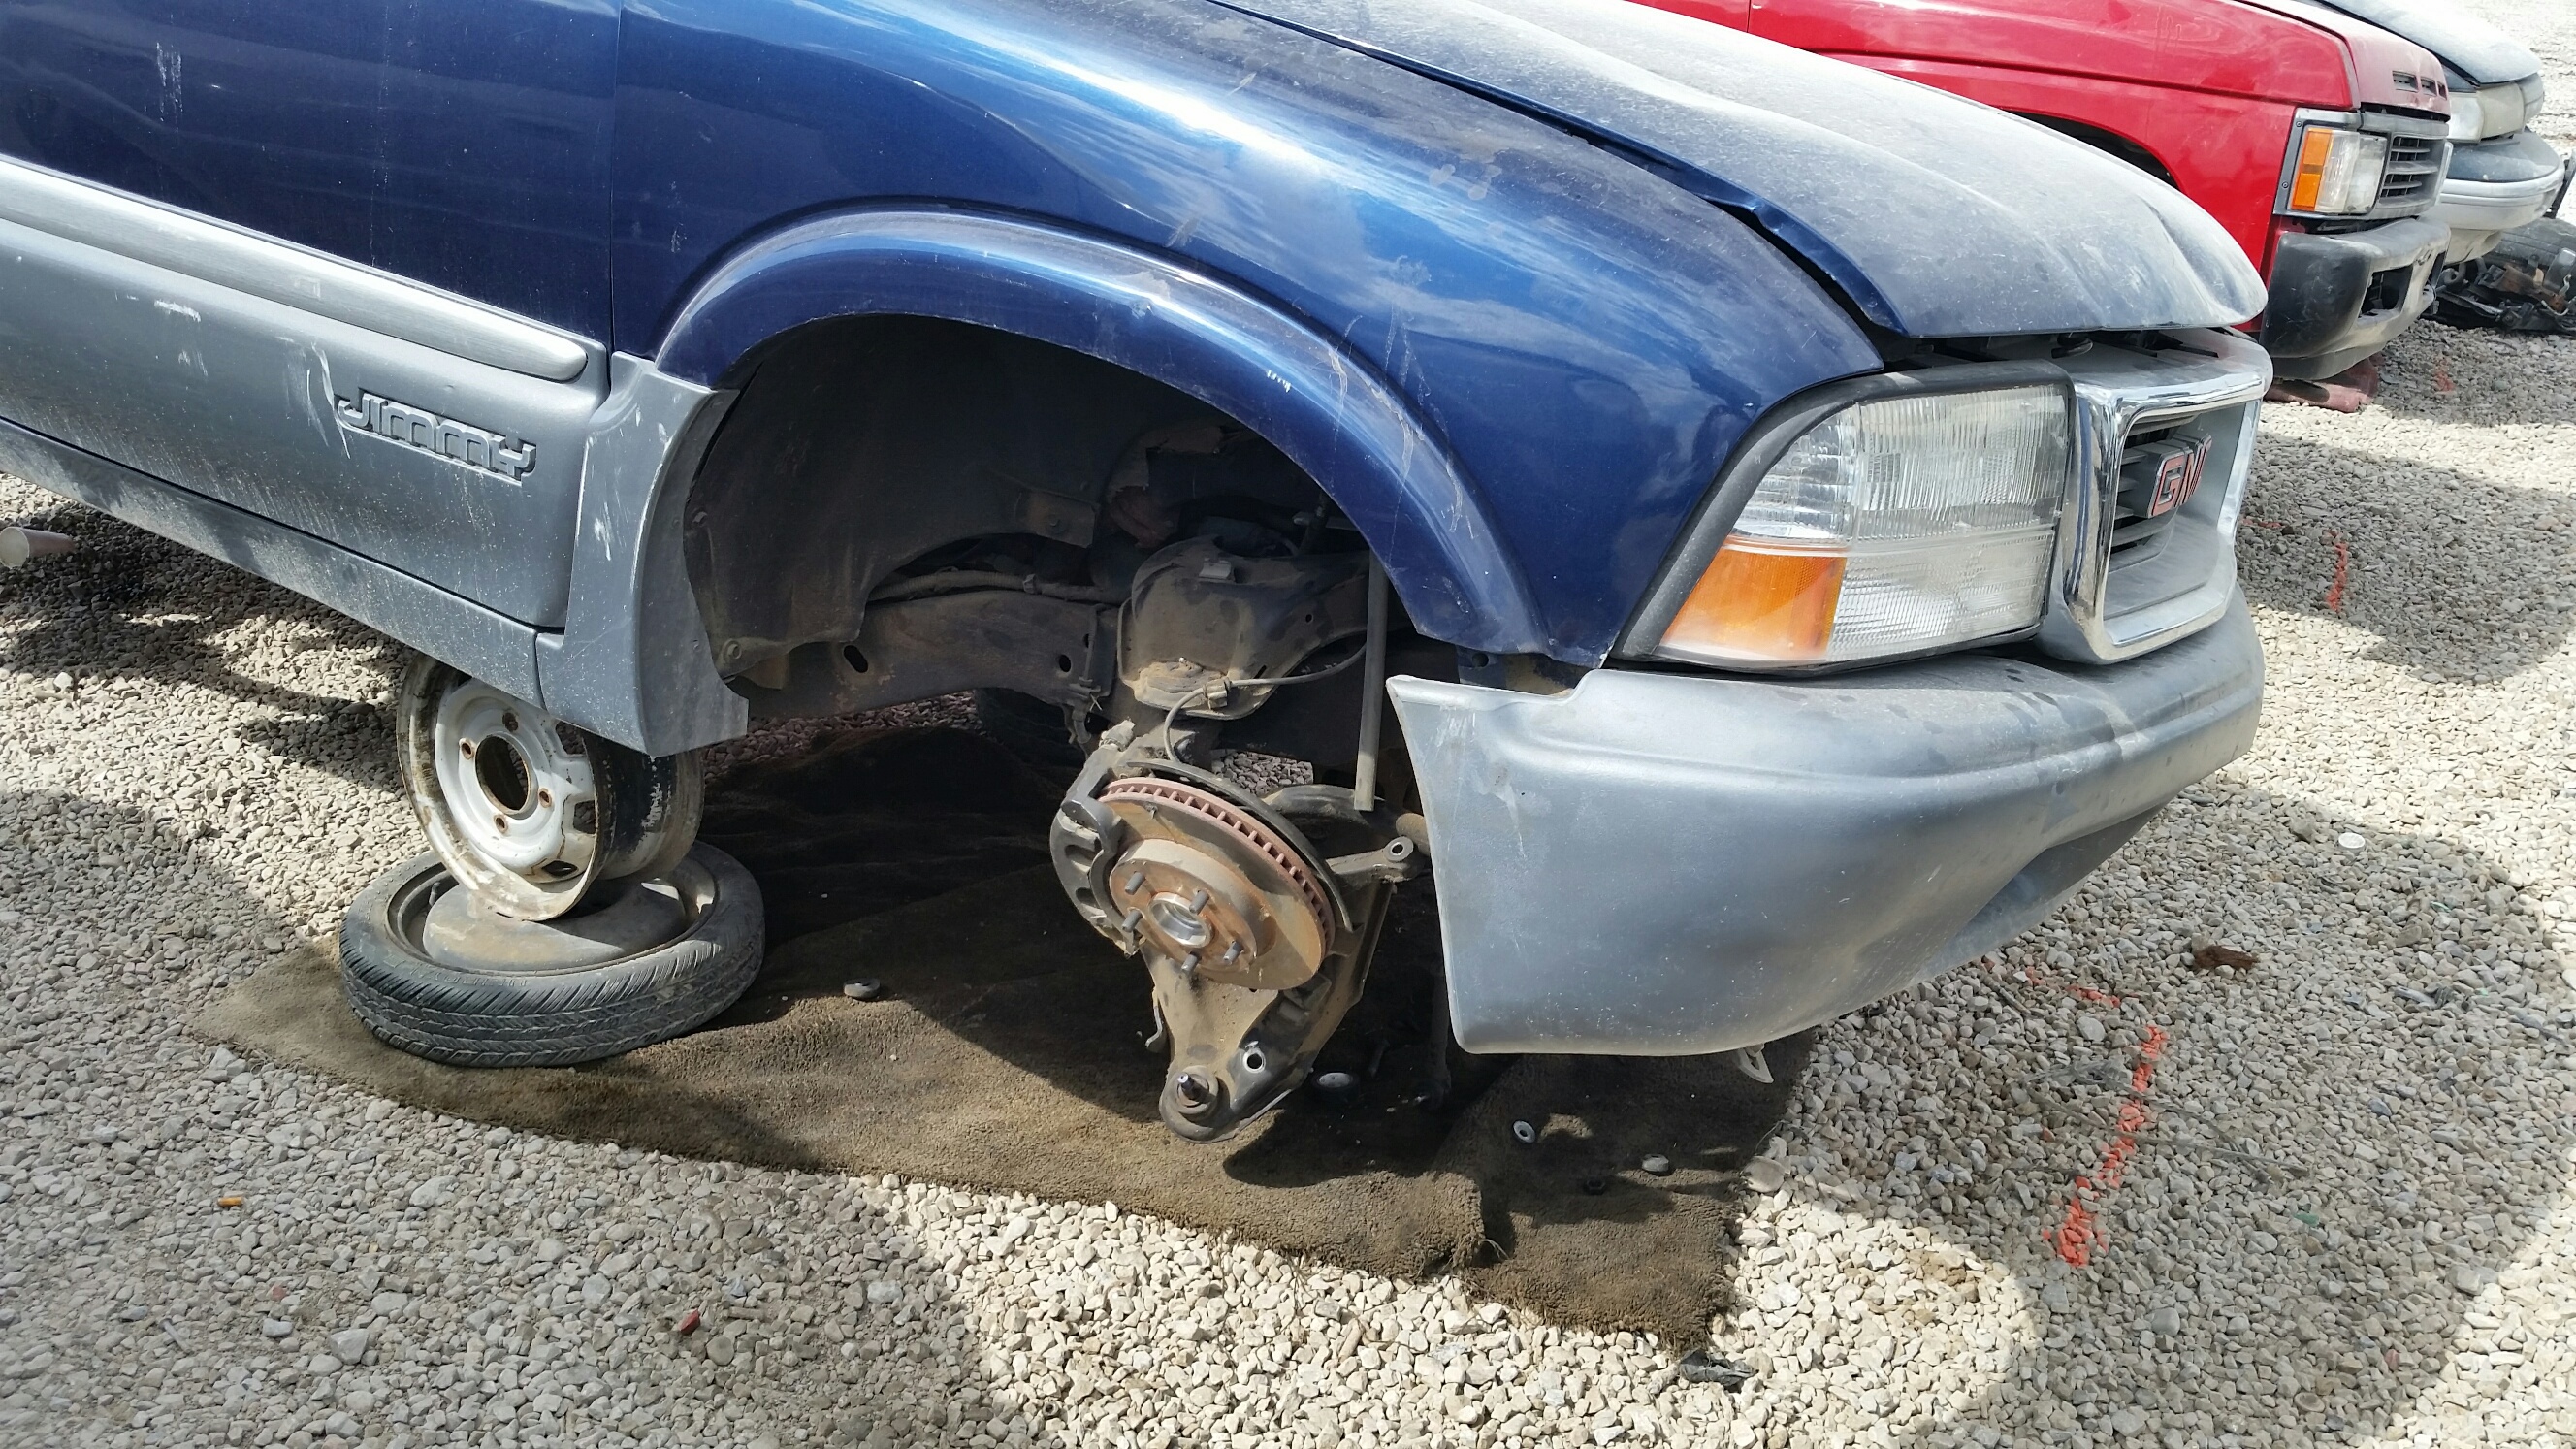
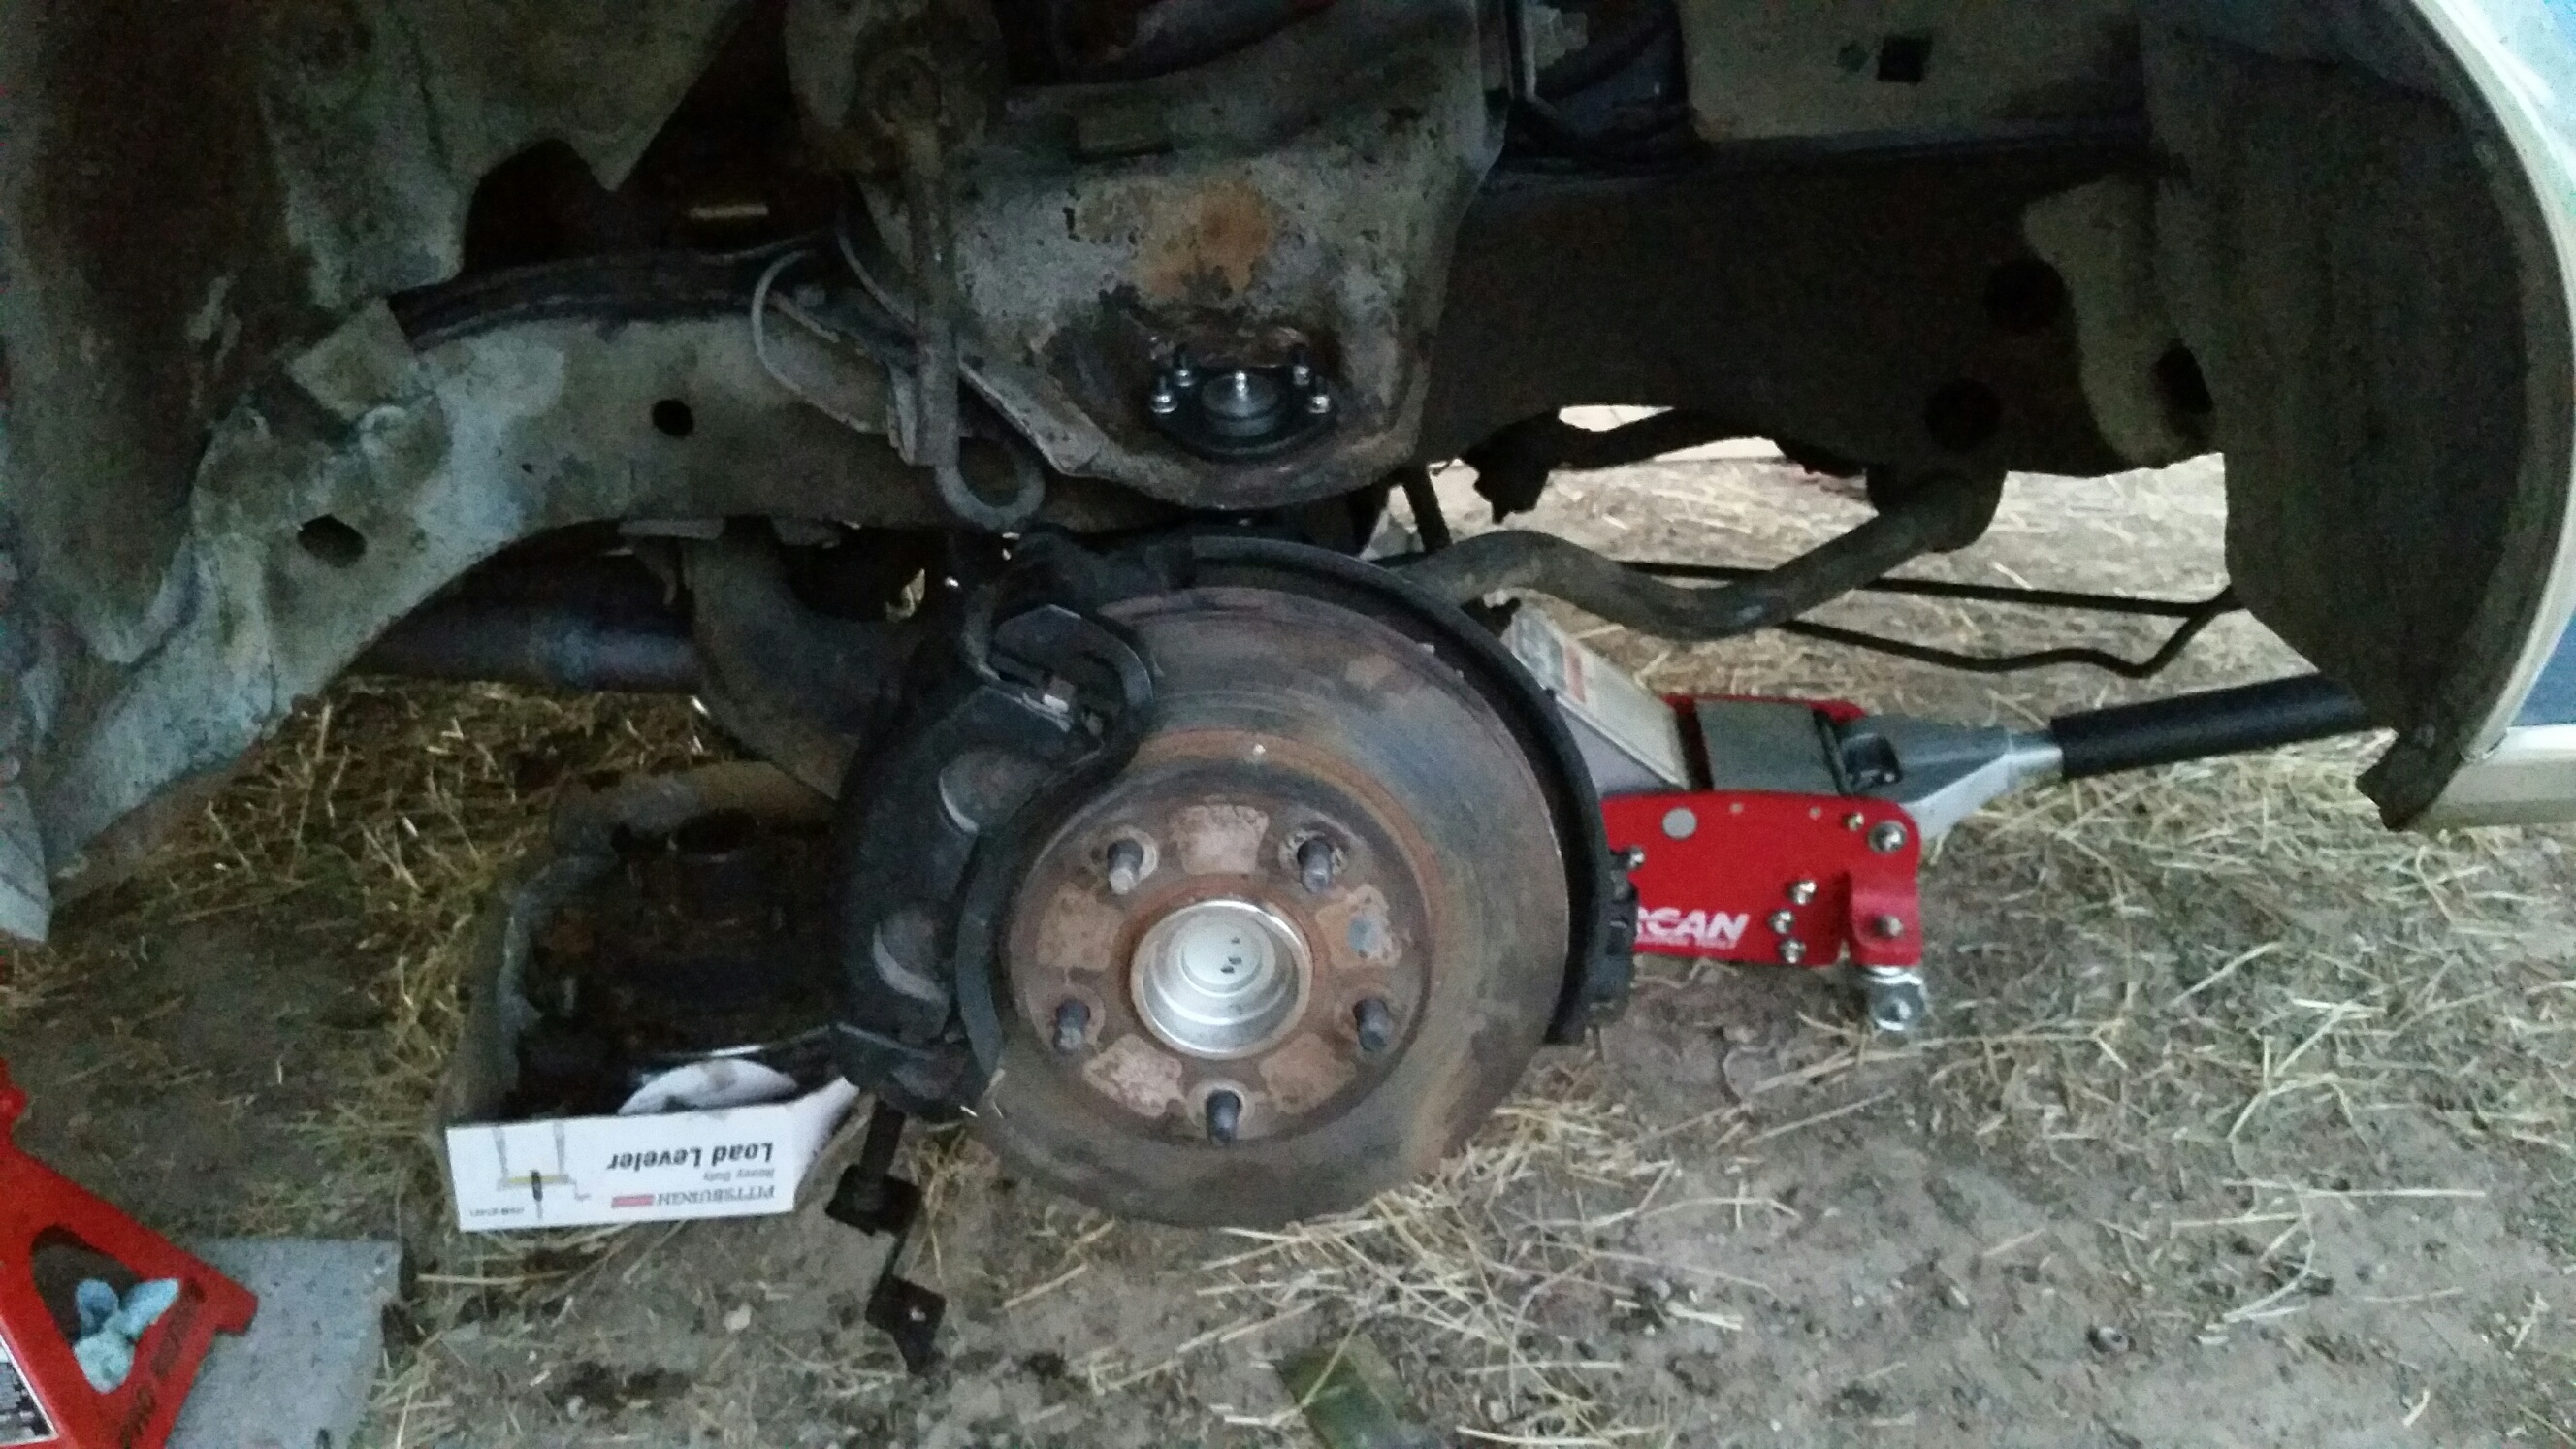
That's right, each knuckle was hanging there, attached only via the upper ball joint. All I had to do was cut the ABS sensor wire, remove the castle nut, and hit it with my hammer. Plop! The entire assembly then fell harmlessly onto the conveniently-located carpet placed there by whoever yanked the coils. In one fell swoop, I got my knuckles, hubs, calipers, caliper brackets, dust shields, all the bolts and nuts, and even a set of okay pads. I could not believe my good fortune.

The only downside was I didn't have enough money on hand for these items and a steering box... but, who cares. It's not like I won't be able to find a steering box on my next trip here.
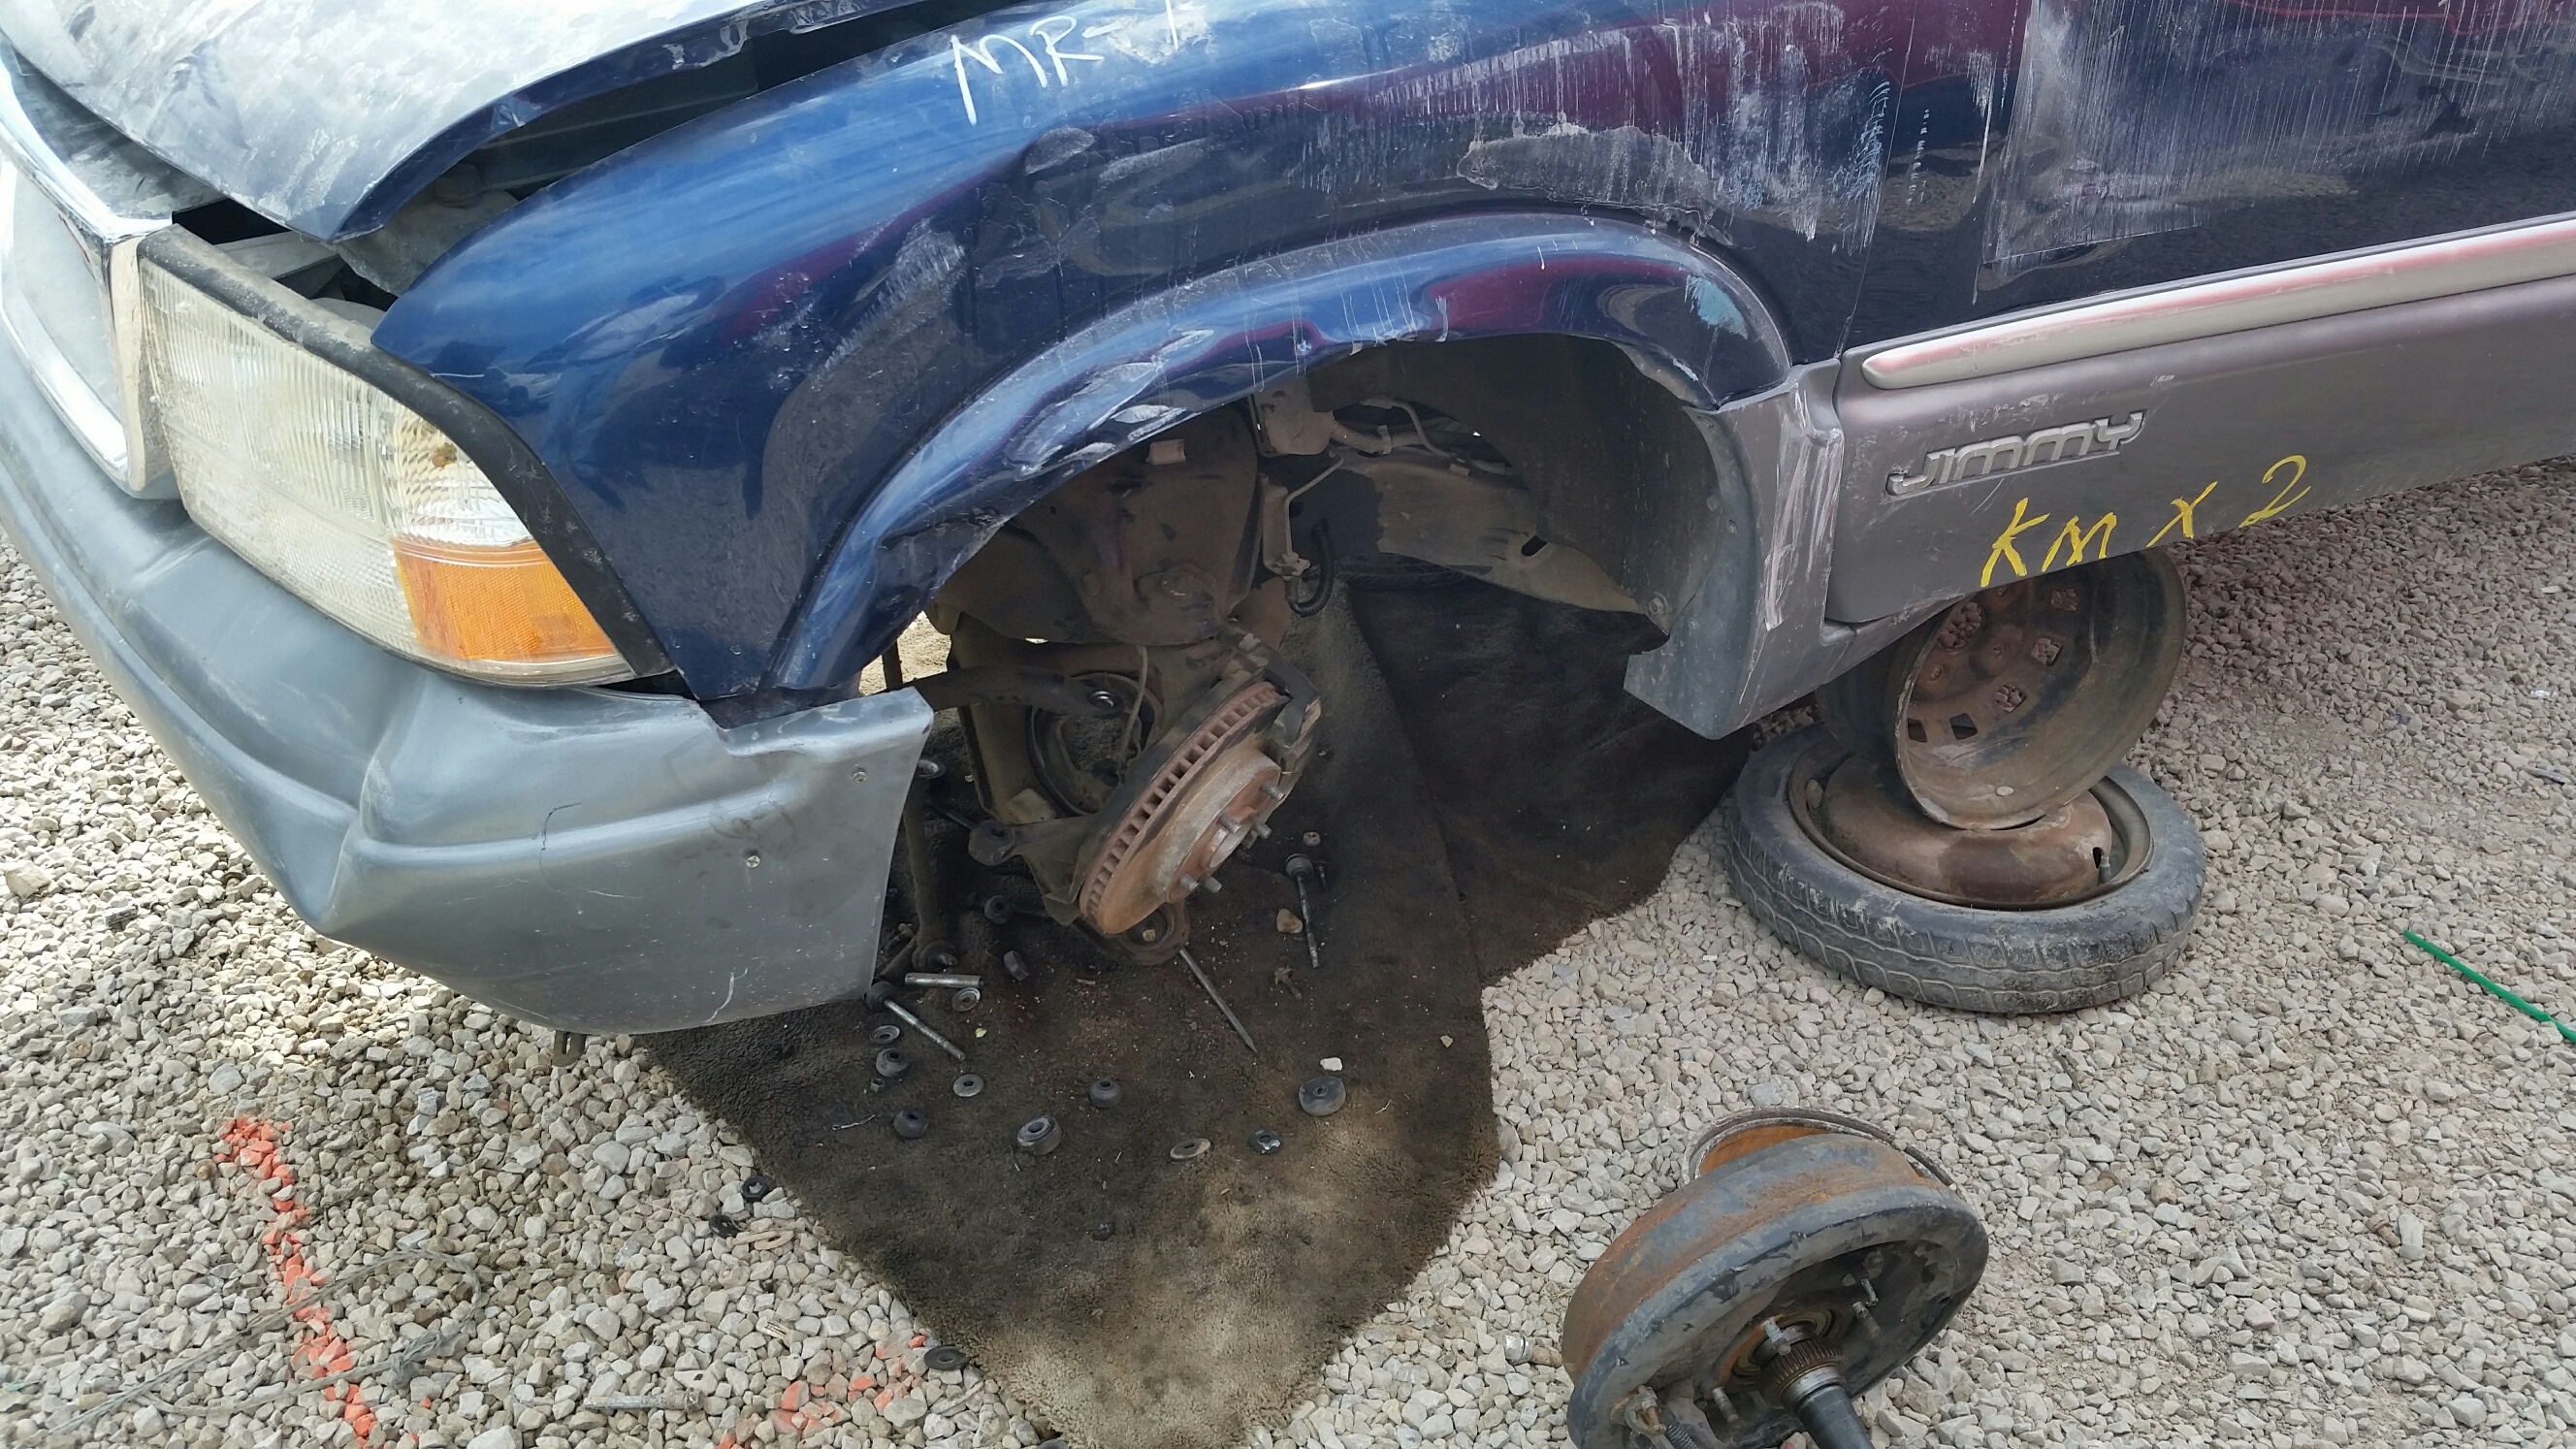
 
  • Like
  • Winner
Reactions: 6 users

TURNA

Rocket Powered Basset Hound
Jul 24, 2009
10,941
19,992
113
Socialist NY
if you get the Jeep box or any F41 box get the valve out of the steering pump.

They are different as i just learned myself!!!
 

454GrandPrix

Master Mechanic
Jul 27, 2016
429
818
93
Lehi, Utah
I decided it was time to install my upgraded brake hardware. As I removed my stock spindles, I noticed the ball joints appear to be vintage 1980 pieces... in other words, the well-worn originals. I decided to install new ones at the same time. Even though this might complicate things and slow me down a bit, I felt it was worth it.

Good grief, is it always this difficult to install new ball joints?
banghead.gif


I began on the right side of the car, at the lower ball joint (meaning I'll still have three more to go after I complete this one). We simply hammered out the old joint--no problem. I did rent a ball joint press kit from one of the local parts stores; doing the job right requires the right tool for the job, correct? Well, not so fast. We put the new joint in place along with the cup and cap to press it in, then we put the receiving cup and cap in place in order to have something to press against. But with all that in place, the C-clamp is too small to fit over everything... and thus it is completely useless. We tried removing just one cap, replacing it with a piece of flat steel. This let the C-clamp fit into position (which is good) but when we applied pressure the new ball joint went in crooked (which is bad). We removed the ball joint and started over, but only managed to repeat the undesired effect.

So we decided to improvise. Mike has a small pipe bender, which we dismantled and tried to use as a press (of sorts). Our hope was that we could 'aim' our pressure in a more correct direction and prevent the ball joint from going in crooked. To say it looked Roadkill would be an understatement:

DtkxpLY.jpg


This backyard-engineered setup helped the ball joint to go in at less of an angle, but it still won't go in straight. Frustrated (and tired after a long day at work), we hung it up for the night. The next day, we changed our setup slightly to see if we could get the joint to go in straight. Still no luck. I was getting frustrated, so I stepped back and took a few days off from working on it.

dU03MMj.jpg


"Get the right tool for the job," Dad always said. I thought I had done so--I did rent a ball joint press, after all. When that didn't work, we ignored Dad's advice and tried adapting the pipe bender into a bizarre press, as seen above. Not only did that not work any better, it also permanently deformed Mike's bender.

Oops.
6lhI1bz.jpg


I decided to look for a better tool. I eventually found a newer, much larger Super Mega Deluxe Turbo Ninja 3000 ball joint press kit at a local AutoZone. The first kit I rented only had 6 or 7 pieces in it, total (including the c-clamp and screw-in piece). This newer kit had over two dozen pieces in it. Maybe this would help.

Further stacking the odds in my favor, I also coaxed another co-worker into coming over and lending a hand. Dave has years of experience working as a suspension tech, and he was confident he'd be able to button everything up rather quickly. Surprise, surprise: his experience plus the wealth of pieces in the big kit did allow him to get both lower joints pressed in with little delay. To say I was grateful would be a severe understatement. Not content to stop there, we also used his air chisel (with my large compressor that I had brought to Mike's place) to remove both upper joints and bolt in their new replacements. With all four new joints properly installed, we bolted in the upgraded knuckles and their attached hardware.

It's finally starting to look like an assembled front end again:
7x6TIrD.jpg


This was destined to be my stopping point for the evening. Why would I stop when I am so close to being finished? Well... when I first put the car on jack stands and began to dismantle things, I removed both shocks. The left side came out and looked fine, as expected. The right one? Not so much.

Because Roadkill:
AKQB9le.jpg


I am baffled by this bent shock. How on Earth did that happen?!? Also, did you notice how the body of that shock is ground away at the top (kinda hard to see against my fading paint)? Needless to say, I will be replacing this shock with a(nother) new one... which means the project won't be finished until that arrives.

But at least I'm very close.
 
  • Like
Reactions: 2 users

454GrandPrix

Master Mechanic
Jul 27, 2016
429
818
93
Lehi, Utah
Yesterday afternoon, the game plan was to finish the GP and trailer it to my work where it would get an alignment. To that end, I drug my trailer over to Mike's place and backed it down his 100-yard street/alley (like always) and dug right in. I began by inspecting the right side to see how or why the shock might be contacting. After closely looking from multiple angles, I noticed the coil spring isn't properly seated. The control arms each have notches to hold the spring ends in place, and it seems we didn't rotate that coil into the proper position when we put it in. As a result, the spring is 'kinked' and not perfectly straight as it should be. Since I won't be driving it away from Mike's place, I'll just leave the shock uninstalled for now; I'll reorient the spring when the car is on the alignment rack.

On to the brake hoses. For safety's sake, I decided to install new ones. Looking up the correct part for my Blazer brake donor, there were two hoses listed; the caliper end was always a 10mm banjo bolt, but the vehicle end was either a 3/8-24 or 7/16-24 fitting. Hmm. I got two of each just to be sure. It turns out the Grand Prix has 3/8" metal lines, so I installed the matching hoses and was ready to add fluid... lots of fluid. We bled each side until there was no air and the fluid came out clear, which required refilling the master cylinder three times. At last, the project is done and I'm ready to drive the car onto the trailer.

lEJYEtE.jpg


fP2J2VO.jpg


As I went to mount the wheels, I quickly discovered a problem: my lug nuts didn't fit. :mad:

This car has been a lug nut nightmare since day one. Way back when I first mounted the Z28 wheels, I had to buy a full set of 7/16-20 mag wheel lug nuts with washers. Later when I swapped in the Ford 8.8 axle, I had to get new conical lug nuts to hold the Mustang wheels in place. Then when I just installed the Strange axles, I had to get new 1/2-20 mag wheel nuts to fit the new studs. And now I discover that the Blazer hubs have M12-1.50 studs on them. Mike and I didn't have any mag wheel style nuts on hand in that size, and of course we didn't discover this until five minutes after every parts store in town closed for the night... so I got to drag my empty trailer back home.

Today I will source ten new lug nuts, then return to his house to finally get the car off jack stands and trailer it to work. I hope.
 
  • Like
Reactions: 1 user

565bbchevy

Geezer
Aug 8, 2011
9,611
12,670
113
Michigan
I know when I installed my Moser 9' that came with 1/2" studs I also ordered a set of longer 1/2" ARP studs for my front rotors and drilled them out and pressed in the new ones, besides giving me added strength I was able to order the same size shank lug nuts all the way around.
Your car is coming along nicely by the way.
 
Last edited:
  • Agree
  • Like
Reactions: 2 users

454GrandPrix

Master Mechanic
Jul 27, 2016
429
818
93
Lehi, Utah
Your car is coming along nicely by the way.

Wow, thank you for the compliment. I know my heap will never be as nice as your car, though I greatly appreciate all the info you've shared with us about it.
 
  • Like
  • Agree
Reactions: 2 users

454GrandPrix

Master Mechanic
Jul 27, 2016
429
818
93
Lehi, Utah
On my lunch break Monday, I stopped by the local O'Reilly and purchased 12 shiny new mag wheel lug nuts in my needed M12x1.50 thread pitch. (True, I only need 10 of them... but they are sold individually and in 4-packs, and one 4-pack costs less than 2 individuals. Go figure.)

Anyway, I hurry home after work to dress down and jump in the Suburban so as to drag my trailer back over to Mike's house again so I can finally get my car out of there. Right off the bat, I open one pack of lug nuts just to check that they are what I need. Sure enough, the lug nut threads on like butter. Yes! I take it back off, then lift the first wheel into position and begin threading two lug nuts (and washers) into place by hand. I snug them all the way until they are hand tight...

... which is when I discovered the back of the spokes contact the new larger brake caliper. :mad: :mad: :mad:

I don't mean there is a slight rub. No, even with just the two nuts hand tight I cannot turn the wheel at all due to so much contact. #BecauseRoadkill. If this were somebody else's car, I'd laugh. But it's mine, so I try no to cry even though nobody is around to witness it anyway.

I'll say this for Mike, though: he stocks more parts than AutoZone. When I called him with my unfortunate news, he didn't bat an eye. "In the shed are two sets of 5x4.75 wheel adapters." I go looking and find them, and I learn that one of them even has M12-1.50 studs on them so I can use my nice new lug nuts. Gee. I clean them up a bit, go digging for the small open nuts to hold them to my car, and manage to get them installed. At last--finally--I get the front wheels put on the car, remove the jack stands, and put it on the ground. I got it loaded up and towed it to work without further incident.

Since I'm no longer running the stock rear axle, I decide to compare the rear track width to the now-augmented front track width. The adapters push each front wheel about an inch or so outward compared to the tail... meaning the front stance was about identical to the rear but now it is a couple inches wider. I need to get rid of those adapters... which means now I need to find some different wheels for the car.

The saga continues....
 
  • Like
Reactions: 4 users

axisg

Comic Book Super Hero
Jul 17, 2007
2,685
2,354
113
YYZ
Umm I thought I was gods little joke !! Guess he's playing with you too !
 

Turbo Zach

Comic Book Super Hero
Sep 8, 2015
2,534
5,874
113
50130
If you lived closer I would make you a good deal on a set of GTA wheels and tires. Would look awsome on a blue car.
 

454GrandPrix

Master Mechanic
Jul 27, 2016
429
818
93
Lehi, Utah
I started another thread to ask about backspace measurements of factory G-Body alloy wheels. That thread gave me hope that a G-Body wheel would solve my problems, but what are the chances I could find a set somewhere around me, and at a low price to boot? I wasn't very hopeful.

I guess I've been living better than I thought. Checking the local classifieds on Thursday, there was nothing. I checked again on Friday and a new ad was now up for a set of hot air T-Type wheels. I could not believe my luck. While it is true I prefer the look of the Vector-style later T-Type wheels, at this point I value function over appearance. After work I drove straight to the guy's house and took measurements for myself. Sure enough, they have 1/4" less backspace than my Z28 wheels. Even better, their spokes are all out at the face of the wheel, meaning I should have tons of clearance between them and the brake calipers. I happily handed him $75 for the set.

Today at work, I test fit them to the car. As I expected, the spokes clear the calipers by a mile. The only downside was that these wheels require conical lug nuts... meaning I needed to spend another $30 on yet another 20 lug nuts for this car. (sigh) Oh, well, I'm just glad I found a solution.

I only had time to swap tires on two wheels today, so the car currently has mis-matched wheels. At least I'll be able to get the other wheels installed before I start driving it again.

Prrg5iK.jpg
 
  • Like
Reactions: 3 users
Status
Not open for further replies.

GBodyForum is a participant in the Amazon Services LLC Associates Program, an affiliate advertising program designed to provide a means for sites to earn advertising fees by advertising and linking to amazon.com. Amazon, the Amazon logo, AmazonSupply, and the AmazonSupply logo are trademarks of Amazon.com, Inc. or its affiliates.

Please support GBodyForum Sponsors

Classic Truck Consoles Dixie Restoration Depot UMI Performance

Contact [email protected] for info on becoming a sponsor