Just got caught up...nice progress! Good to see it sitting on the frame.
BUILD THREAD 1987 Monte Carlo from Iceland
- Thread starter Sævar Örn Eiríksson
- Start date
You are using an out of date browser. It may not display this or other websites correctly.
You should upgrade or use an alternative browser.
You should upgrade or use an alternative browser.
- Status
- Not open for further replies.
thanks man, yea for myself it is a real relief... and I surprise myself sometimes, all this work in one week, but it's been 40 weeks since I started this project! haha
You're on a better schedule than me, it's been over 10 years & I still haven't finish the current build.🙁 Now that I'm on my unscheduled vacation/holiday I have to put anything that cost on hold.thanks man, yea for myself it is a real relief... and I surprise myself sometimes, all this work in one week, but it's been 40 weeks since I started this project! haha
yea they do... its expensive but i go an alternative route and use a service called www.myus.com it combines all my shipments and sends only one crate overseas
That is cool. never heard of that
Last edited by a moderator:
How does the rear of car attach to rotisserie?
Hi, thanks for asking, it's not a conventional way of attaching a rotisserie to a car at all.. Usually you would use the body mounts to attach the rotisserie to, but then again, I had no such body mounts... they were all gone.
There was only one way to do this really, lay on my back and fix these body mounts prior to attaching the rotisserie, with sparks flying down my face and weld spatters in my ears(i'm never doing that again...)
Or the other way, which I quickly decided to do, make a clamp around the trunk body and clamp the sheetmetal fastening it to the rotisserie at the correct weight-balance so the car can be rolled by hand, this was a difficult calculation and I got it surprisingly correct..!
I don't have any great photos of this attachment, except for those in page 1 of this thread, I'll repost them here for you, and again, this is by no means a recommended way of attaching a car body to a rotisserie
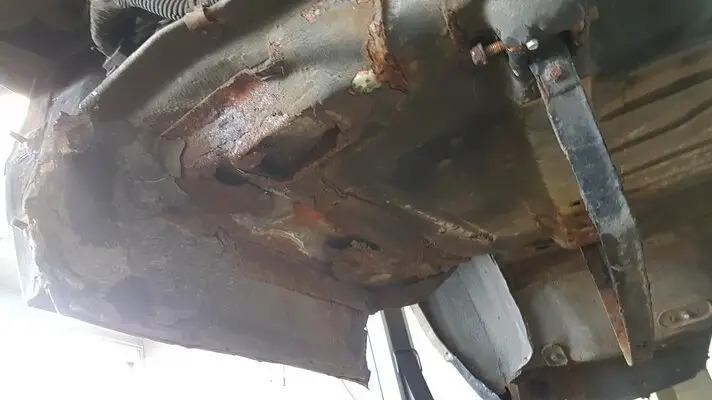
These are the body mount braces I had in the body, they were completely gone
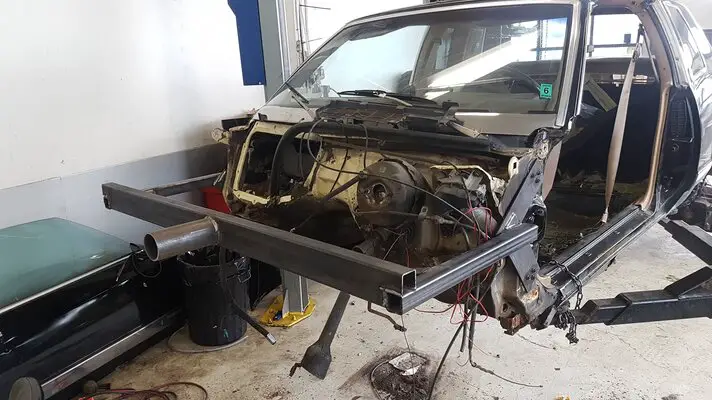
The front body mounts were the same, so I used the door hinge supports
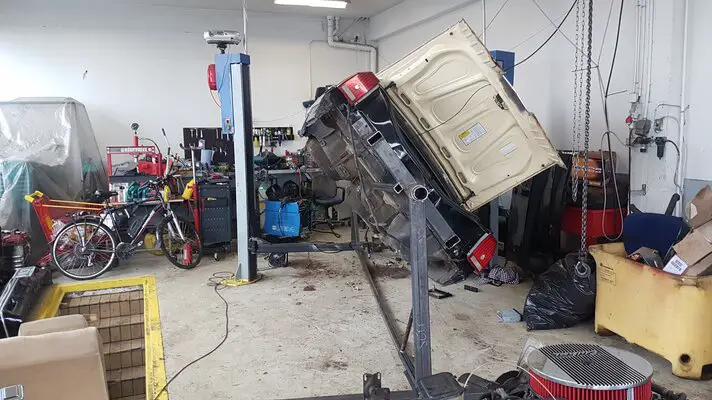
In this photo you can kind of see how I clamped the trunk body between two thick pieces of flat steel
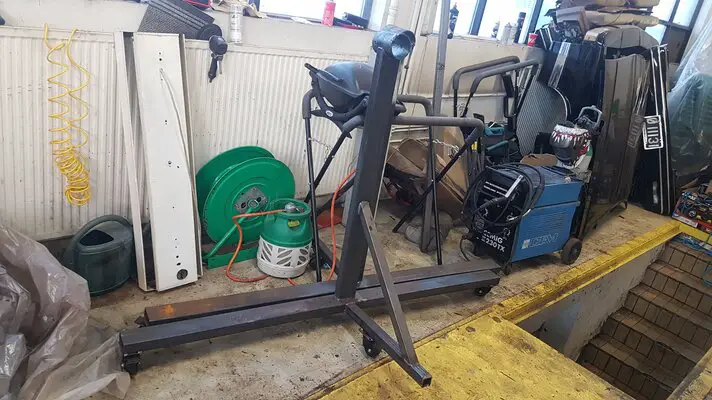
Here's the rotisserie after I removed it yesterday, it worked very smoothly and rolled easily
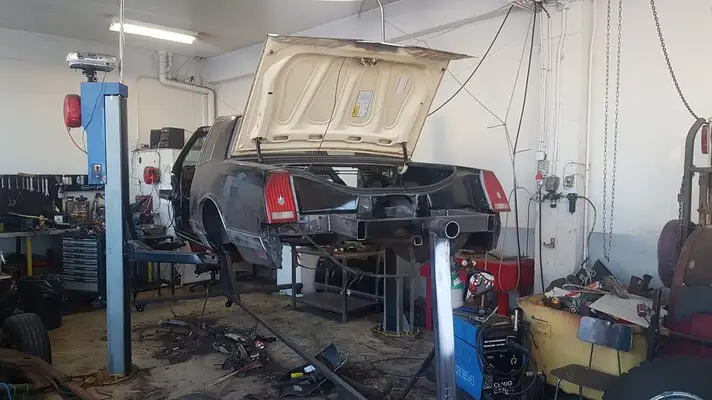
Another photo shows the rear attachment
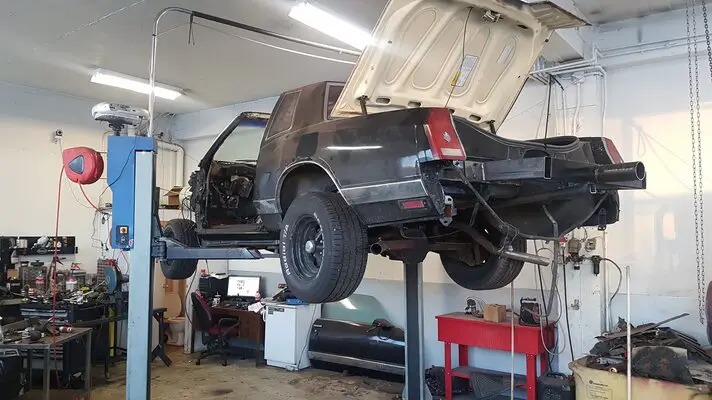
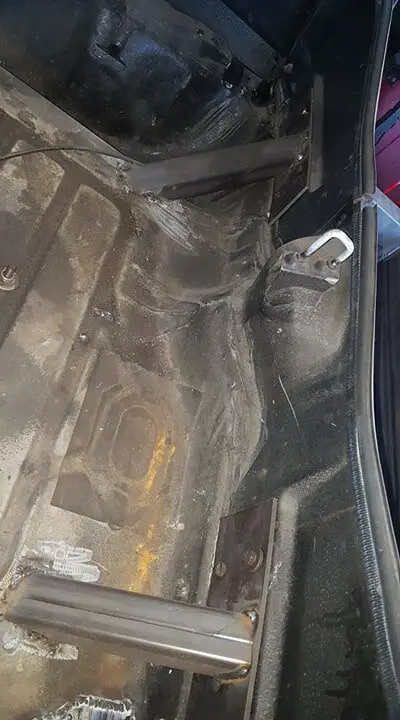
and finally the last photo I have of the attachment, I'll take another photo tomorrow from the inside of the trunk, I did some additional bracing from the clamp on the inside of the trunk body to the trunk floor, just for safety, this all held up great and there is no sign of any movement
this would be the inside of the trunk, just to prevent the sheet metal of the trunk to rip apart and move on the joints, and I'm glad I did this because it all worked good, nothing moved or cracked not even paint peeled at the seams so it was done right given the circumstances.
today mostly was cleanup day at the shop, this sparks motivation too, as I've been dreading the cleanup, but having the car in two piles now, instead of 7 piles makes me feel more motivated to spend time at the shop !
My girlfriend is always a great help when it comes to cleaning at the shop, organizing tools and shelves and fasteners, she loves it, each to her own I guess... I throw my tools away where I stand and move on, hehe...
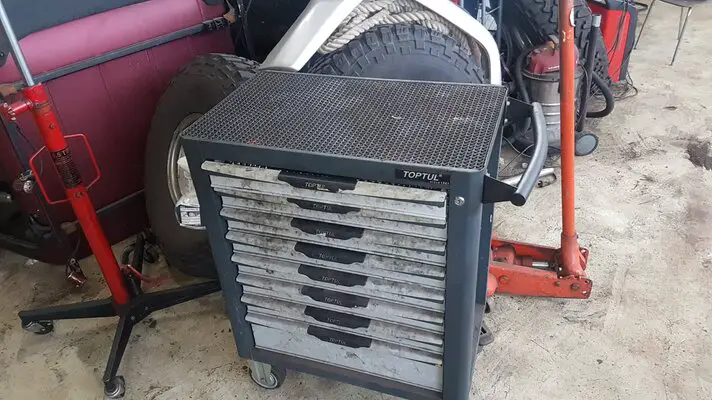
This toolbox has had >30 things on top of it since may last year... now it just needs a bath and it will look new !
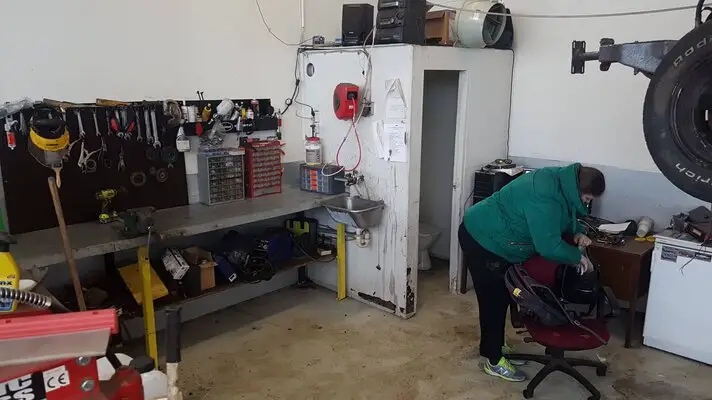
The worktable, it's there after all..! I haven't seen it for a while..!
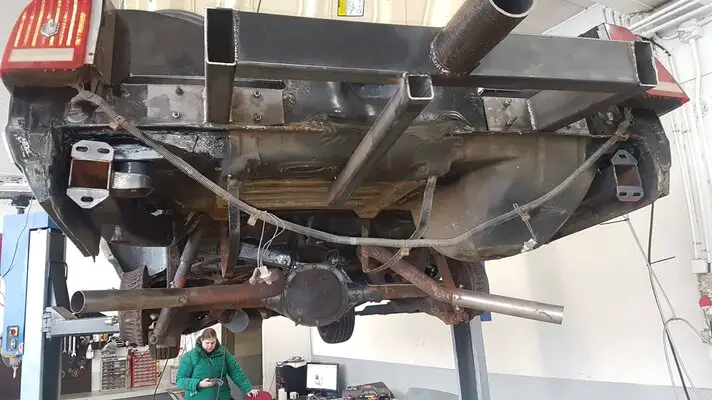
I had to make a few minor changes in the angle of the rear frame rail sections, they were hanging a little low so there was about two inches of gap between the body mount bushes and the nuts in the body, one inch was just swaying of the frame from being hung from the 2 post lift, but if I bolted it together with the other inch aswell there would have been binding in the body.
We don't want that on our rust prone and weak body so I changed the angle of the frame and now the body sits resting on the body mount bushes, no tension anywhere all bolts screw in by hand and the body perfectly centered on the frame...
this is evident around the rear section where the bumper crash bumps go where there is very little clearance from the inner fenders, and also near the rocker panels where there is only a fingers' gap between it and the frame.
I'm very pleased with the fitment of the body after all this welding and eyeballing, because there was hardly anything to take reference from in the beginning, everything was rusted or out of place to begin with...
Now I'm not safe yet, I still have to fit the doors to the car... if they fit good I'll be very happy, but I'm also prepared that some mending will be needed to get them fitting perfectly, so be it, it's only metal... play dough really.
On that note, the doors are ruined! Simply buying the outer skin will not be enough, I'll have to buy the two doors along with the door frames new! But that will wait until summer, it's arpimd 1300 bucks with shipping, aftermarket.

today mostly was cleanup day at the shop, this sparks motivation too, as I've been dreading the cleanup, but having the car in two piles now, instead of 7 piles makes me feel more motivated to spend time at the shop !
My girlfriend is always a great help when it comes to cleaning at the shop, organizing tools and shelves and fasteners, she loves it, each to her own I guess... I throw my tools away where I stand and move on, hehe...

This toolbox has had >30 things on top of it since may last year... now it just needs a bath and it will look new !

The worktable, it's there after all..! I haven't seen it for a while..!

I had to make a few minor changes in the angle of the rear frame rail sections, they were hanging a little low so there was about two inches of gap between the body mount bushes and the nuts in the body, one inch was just swaying of the frame from being hung from the 2 post lift, but if I bolted it together with the other inch aswell there would have been binding in the body.
We don't want that on our rust prone and weak body so I changed the angle of the frame and now the body sits resting on the body mount bushes, no tension anywhere all bolts screw in by hand and the body perfectly centered on the frame...
this is evident around the rear section where the bumper crash bumps go where there is very little clearance from the inner fenders, and also near the rocker panels where there is only a fingers' gap between it and the frame.
I'm very pleased with the fitment of the body after all this welding and eyeballing, because there was hardly anything to take reference from in the beginning, everything was rusted or out of place to begin with...
Now I'm not safe yet, I still have to fit the doors to the car... if they fit good I'll be very happy, but I'm also prepared that some mending will be needed to get them fitting perfectly, so be it, it's only metal... play dough really.
On that note, the doors are ruined! Simply buying the outer skin will not be enough, I'll have to buy the two doors along with the door frames new! But that will wait until summer, it's arpimd 1300 bucks with shipping, aftermarket.
Wow your cruising through that project! Would it be cheaper to get a good set of original doors? They usually fit better than aftermarket anyway.
yea if we find a set of doors that are spotless and willing to ship to florida !Wow your cruising through that project! Would it be cheaper to get a good set of original doors? They usually fit better than aftermarket anyway.
Glad to see you are back at it, lookin' good.
I do have a set of spotless doors, 81-85 mirror location though in case that matters, fresh from California Also not sure about shipping them 🤔
I do have a set of spotless doors, 81-85 mirror location though in case that matters, fresh from California Also not sure about shipping them 🤔
- Status
- Not open for further replies.
Similar threads
- Replies
- 0
- Views
- 120
- Replies
- 0
- Views
- 121
GBodyForum is a participant in the Amazon Services LLC Associates Program, an affiliate advertising program designed to provide a means for sites to earn advertising fees by advertising and linking to amazon.com. Amazon, the Amazon logo, AmazonSupply, and the AmazonSupply logo are trademarks of Amazon.com, Inc. or its affiliates.

