BUILD THREAD 1987 Olds 442 Project Build

Thought I would move the build over here from the 442 page. Here's what's been done so far.

Get the car home
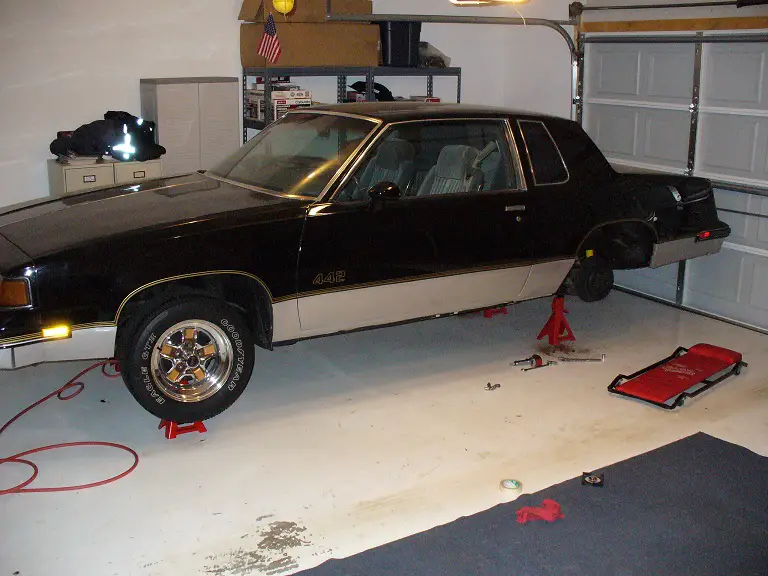
442_2.JPG

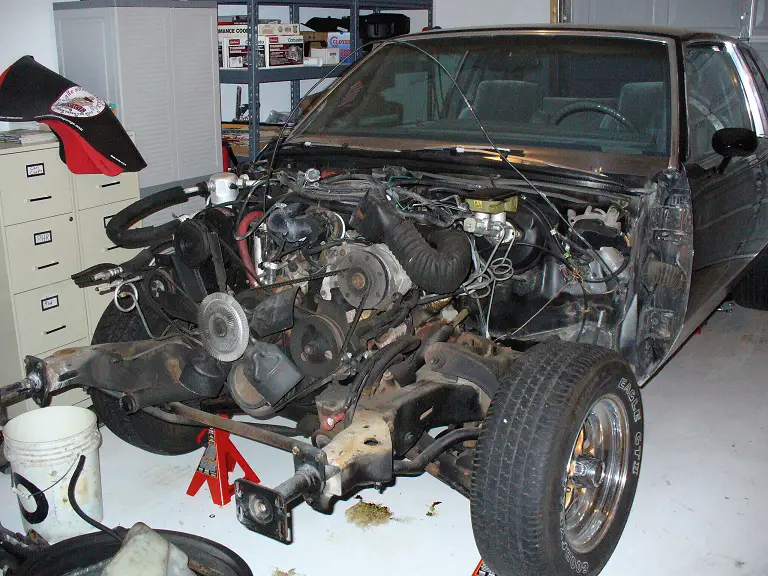
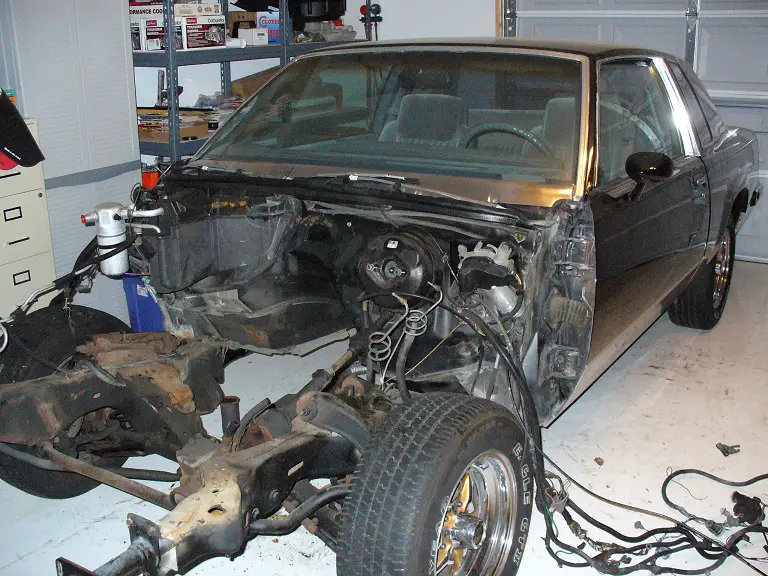
Tear the front end off
442_4.JPG

Take the engine out
442_5.JPG

Take the body off the frame

Start to strip the frame
442_10.JPG

Sand blast the frame
442_11.JPG

The frame blasted clean
442_12.JPG

The frame coated
442_14.JPG

Install Inline Tube rear disc proportioning valve and stainless brake line
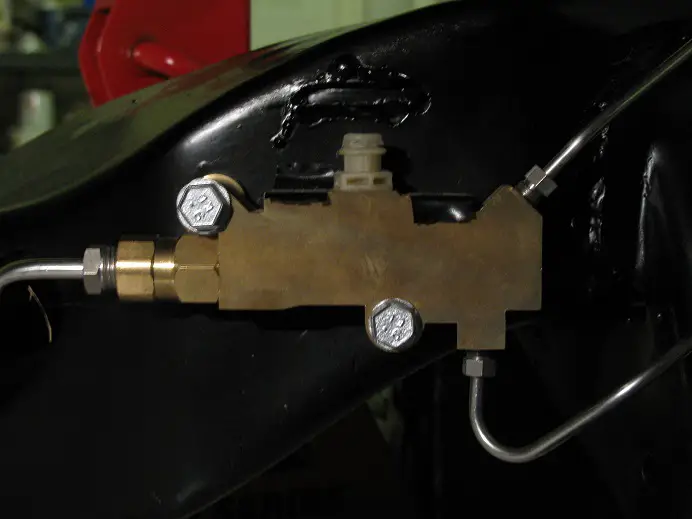
442_15_Proportioning_Valve_2.JPG

Come to grips with rear torque box body rot
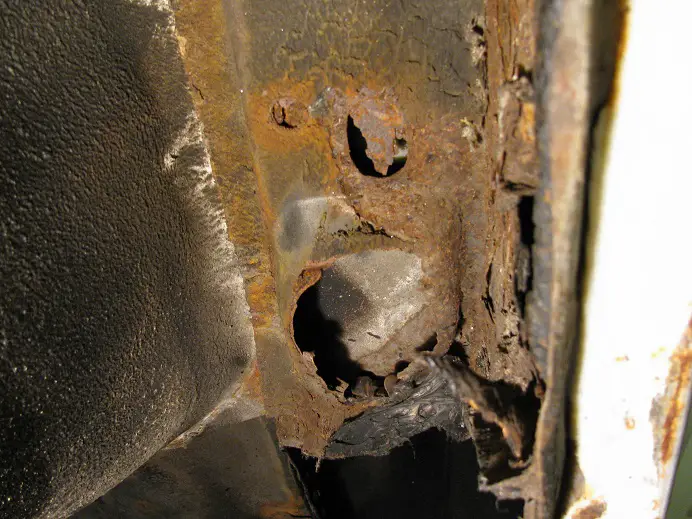
442_16_Rusty_Body.JPG

Put the F**D 9 inch with rear disc together
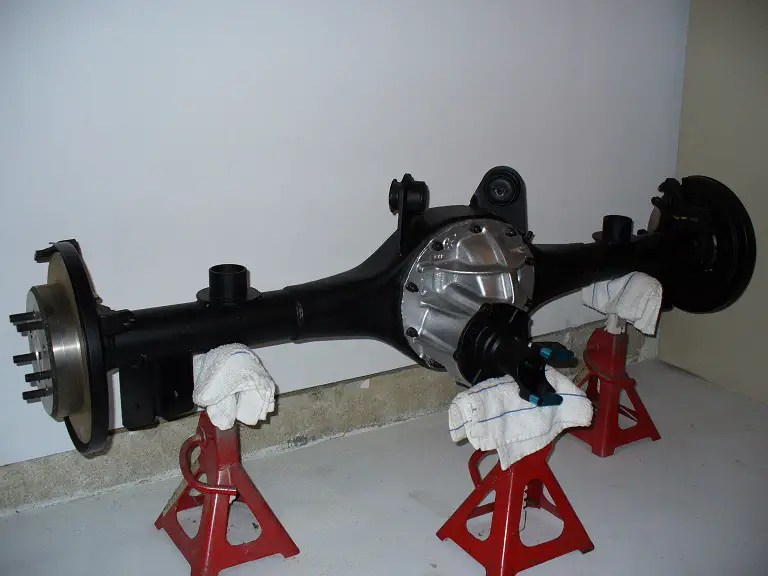
Rear_2.JPG

Rebuild a Monte SS 12.7:1 Constant Ratio Gear Box
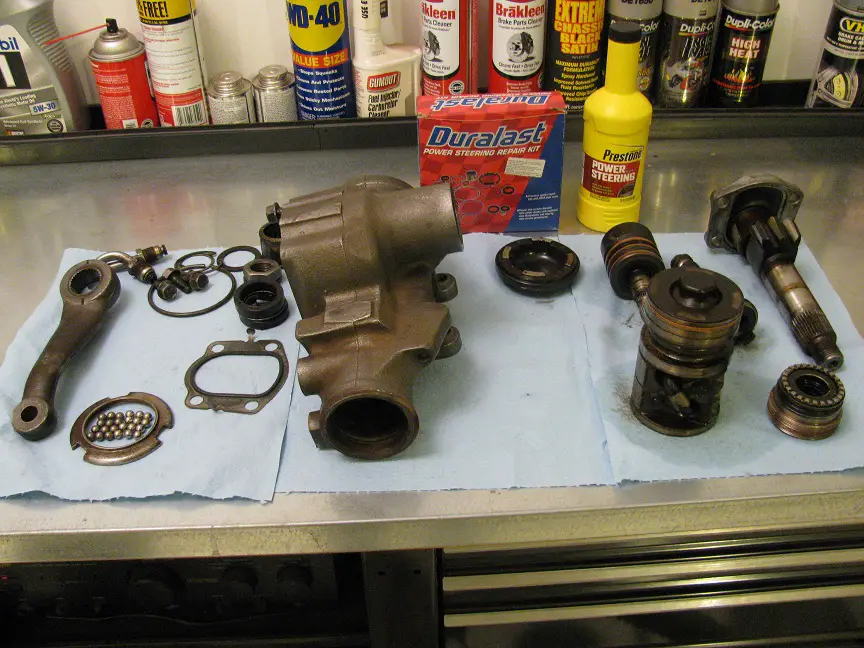
Steering_Gear_2.JPG

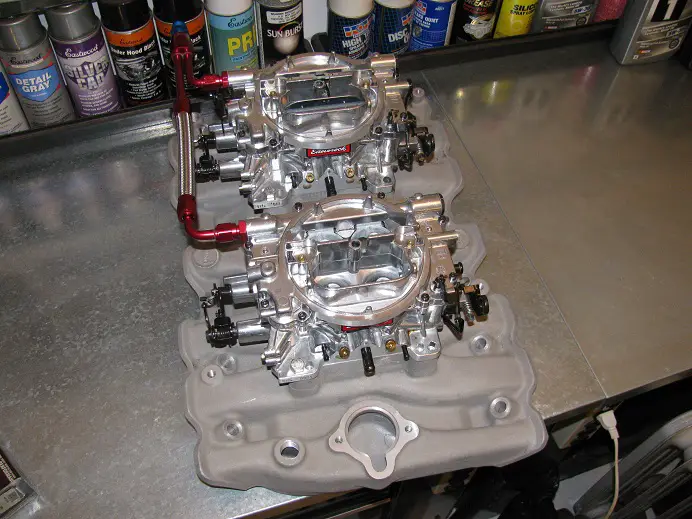
Show off the Dual Quad intake
Dual_Quad_1.JPG

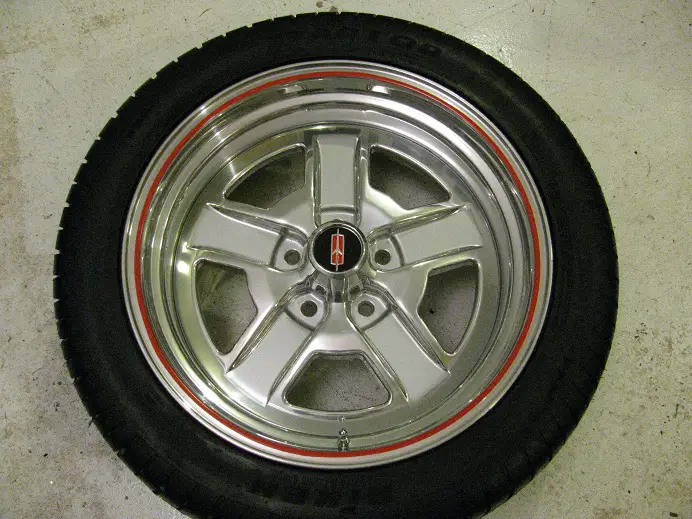
Test fit the prototype 18 Billet SSIII wheel with silver vinyl inserts and red pin stripe
IMG_3926.JPG


So that's where I am up till now.

Hutch
Thought I would move the build over here from the 442 page. Here's what's been done so far.

Get the car home
442_2.JPG

Tear the front end off
442_4.JPG

Take the engine out
442_5.JPG

Take the body off the frame

Start to strip the frame
442_10.JPG

Sand blast the frame
442_11.JPG

The frame blasted clean
442_12.JPG

The frame coated
442_14.JPG

Install Inline Tube rear disc proportioning valve and stainless brake line
442_15_Proportioning_Valve_2.JPG

Come to grips with rear torque box body rot
442_16_Rusty_Body.JPG

Put the F**D 9 inch with rear disc together
Rear_2.JPG

Rebuild a Monte SS 12.7:1 Constant Ratio Gear Box
Steering_Gear_2.JPG

Show off the Dual Quad intake
Dual_Quad_1.JPG

Test fit the prototype 18 Billet SSIII wheel with silver vinyl inserts and red pin stripe
IMG_3926.JPG


So that's where I am up till now.

Hutch
Where did you get these wheels?
 
  • Like
Reactions: Tony1968
Where did you get these wheels?

Gary Willard. A great guy who made 4 centers and 1 prototype. He wanted to do more, but things didn't work out.

Hutch
 
What a week! I find out the repro Hurst Olds Scoop and Lower Front Spoiler were only made in a small quantity and no more. I pour over the interwebs to try and find someone who still carries them..no joy.

When I saw they were being reproduced I sat back and thought "No prob now, I'll just buy them when I hit the bodywork stage" WRONG

I found the scoop on e-bay, but that front spoiler was like finding Joe Biden speaking in complete coherent sentences (translation: impossible). When I was about to give up and try next week, I ran across a Front Spoiler for an 81-88 Monte (non SS). It was at Original Parts Group. It looked very similar to the Hurst Olds, so I jumped on it. It was the last one they had and marked "Discontinued". It's made by Lauren Engineering (when I found the HO parts were all gone, that's where I looked next...They're out of business). So I think, GREAT! I'll make it work.

Then FedEx stepped in. The part was on the truck for delivery Tues, Wed, Thurs, and Fri, but they wouldn't deliver it. Had comments like "Future Delivery Requested", "No Attempt Made", "No One Home".

I thought they lost a 1 of 1 part and were hoping I did a loss recovery with OPGI. NOPE. I hounded them and drug the hell out of them on social media using @FedEx etc. Don't know if it helped, but on the 5th day they decided I could have my package. No explanation why it took 5 days from my local FedEx center to get to me. Oh well.

IMG_4708.JPG

IMG_4712.JPG


:banana::banana::banana:

Hutch
 
Finally getting some 442 work done. I'm on to the Firewall finally. So as I stated prior, I stripped down the center top of the firewall where it will be visible with the engine installed. I sanded in all the spot weld divots to get to bare metal.
IMG_4715.JPG


I decided to use All Metal as my filler.
IMG_4716.JPG


I lay it on...
IMG_4717.JPG


and sand it off
IMG_4718.JPG

IMG_4720.JPG


Taped and ready for primer.
IMG_4721.JPG


3 good coats of Eastwood Self Etching Primer
IMG_4723.JPG


With the primer still wet I could see some ripples here and there. Not surfboard worthy, but enough that they'll have to be addressed. I guess it's a ton of sanding and more sanding for me now, with some primering in the middle. Wish me luck, bodywork is not my calling.

Hutch
 
After a lot of sanding and primer, this is as good as it gonna get!
IMG_4725.JPG

IMG_4724.JPG


Now I just wait the 2 hours and sand 220, primer, 320, primer, 400 and shoot the Eastwood Underhood Black.

It's not perfect, but way better than before.

Hutch
 
I went to 320 and hit it with the black.

What it looked like before.
IMG_4499.JPG


Now
IMG_4730.JPG

IMG_4731.JPG


Not perfect, but way better.

Now I can start bolting things back on (after I clean up a pound of paint dust off the floor)

Hutch
 
I watched your video "part 1" and holy moly! That's a lot of sanding!!

Yes it was. The All Metal is a sturdy filler, but I cut down most of it with my orbital, which helped a lot. It still wasn't fun though.

But now I can start installing things. I like that part.

Hutch
 

GBodyForum is a participant in the Amazon Services LLC Associates Program, an affiliate advertising program designed to provide a means for sites to earn advertising fees by advertising and linking to amazon.com. Amazon, the Amazon logo, AmazonSupply, and the AmazonSupply logo are trademarks of Amazon.com, Inc. or its affiliates.

Please support GBodyForum Sponsors

Classic Truck Consoles Dixie Restoration Depot UMI Performance

Contact [email protected] for info on becoming a sponsor