BUILD THREAD '78 Cutlass Supreme Lichen Edition

Looks good man. I think it'll turn out real nice when you're done. I've been checking out all of the available caps and adapters myself since I lack an air compressor, and there's quite a few options out there thanks to the graffiti artist movement. It's good to know that they work well for spraying a car. I personally like the fan spray tips and have been sourcing them from depleted cans of urethane because they offer better coverage and far less overspray than the tips that come on paint nowadays.

Years ago, my father and I painted a '79 El Camino with rattle can black metallic and learned a couple things the hard way. It turned out alright but I wish I would've known beforehand that:

• Unless you paint everything on the same day there's a good chance it won't match perfectly.
• The shade of paint can slightly vary batch to batch so it's a good idea to purchase entire flats/boxes of cans with matching numbers.
• Buy more than you think is necessary, and it's going to take more cans than you originally think it will.
• Don't use halogen lights to see what you're doing, as they put off too much heat and affect how the paint lays down. With metallic this causes shadows because the flakes settle at different angles.
• Use a $5 gun attachment for spray cans to avoid extreme hand fatigue or even cramps.
• Employ a friend or child to constantly pre-shake your next can before you need it.
• Lightly wetting the floor prevents dust from being stirred up but too much leads to water splashing onto the car as you work.
• Spray paint takes forever to harden, it honestly takes about a month to fully cure. Wet sand only, and add soap to the water or the paper clogs immediately. Buffing/rubbing compound can be applied by hand but a machine is too aggressive since the paint is so thin.

I know you said you weren't trying for perfection and you definitely didn't ask for my input but I felt compelled to share my mistakes in the hope that it helps someone.
Thanks for the tips. I bought 12 cans and I'm half way through. Turns out the fat nozzles disrupt the metal flake in the paint, so I may put down the final coats with the stock spray cap. 10-4 on giving it a month to harden. I wish I had a garage. My 6-gallon compressor says 'intermittent use only" for HVLP spray guns.. I might see how well it works. I really need to keep the scope down and remember that I just wanted to stop the rot and remove that top. I can paint it up nice years later.

Regards,
Mike
 
  • Like
Reactions: Sweet_Johnny
Yo
Thanks for the tips. I bought 12 cans and I'm half way through. Turns out the fat nozzles disrupt the metal flake in the paint, so I may put down the final coats with the stock spray cap. 10-4 on giving it a month to harden. I wish I had a garage. My 6-gallon compressor says 'intermittent use only" for HVLP spray guns.. I might see how well it works. I really need to keep the scope down and remember that I just wanted to stop the rot and remove that top. I can paint it up nice years later.

Regards,
Mike
I don't remember how many cans we ended up using but I do recall that it was at least double what we had initially guessed. You might be able to pull off spraying one panel at a time with your gun so the pressure doesn't fluctuate terribly. And it's definitely good to keep things in perspective or the budget goes out the window. Or if you're like me then it either doesn't get started or it does get started and may not get finished.
 
LS swapping is easier than putting in your first windshield.... I can't get the upper trim piece to recess properly so there's a big gap. I'll work on that later. I'm also going to tape off some straight lines and blackout what urethane I can see from the outside. I thought the trim was going to hide that. I knew it was never going to be perfect but it's a bit of a letdown when I see the flaws. Maybe a G-Body Forum sticker will divert the eyes.
20240811_151552.jpg
20240811_151545.jpg
 
These umbrella clips holding the lower rear windshield trim are actually springs like archery bows that my smooth brain couldn't figure out without mock-up. Disregard all the marred paint scratches. This lower trim piece is truly evil. I believe the trim needs to be attached to the filler panel first and then the whole thing installed as a unit and slipped into the rest of the trim. Truly evil. So evil. 69hurstolds
20240815_211913.jpg
20240815_212057.jpg
20240815_212040.jpg
 
Last edited:
Simply amazing. Some six figure engineer figured how to put trim on using spring loaded plastic bows.
So many things I took apart a year ago. Should have taken more pictures.

You kicked me in the balls good with that six-figure engineer comment. I do paperwork for a living and live vicariously through all you fabricobblers.

Remember the real estate isn't worth more and the engineers don't make more.... the currency is worth less. A lot less
 
I believe the trim needs to be attached to the filler panel first and then the whole thing installed as a unit and slipped into the rest of the trim.

Yes. This.
 
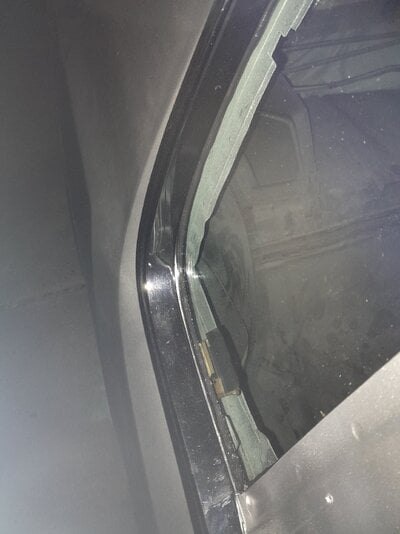
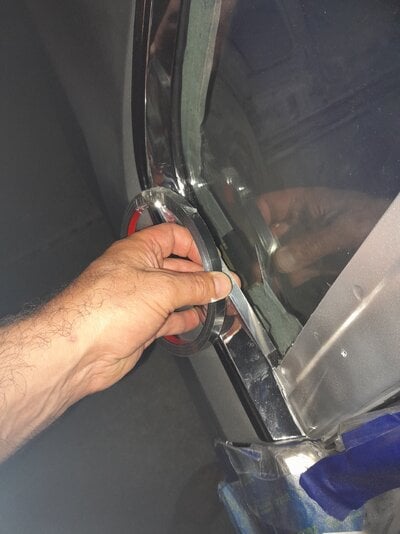
This is what quarter windows look like when you install without the steel-spine rubber seal - butyl rubber only.

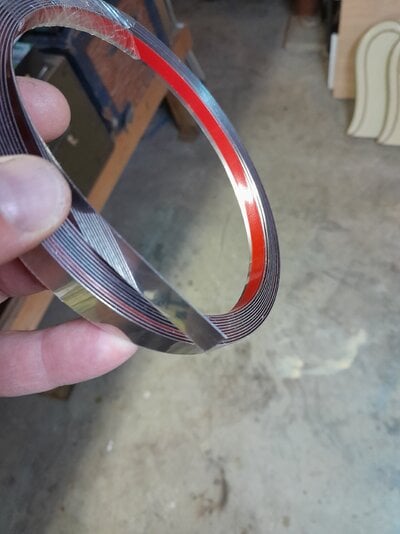
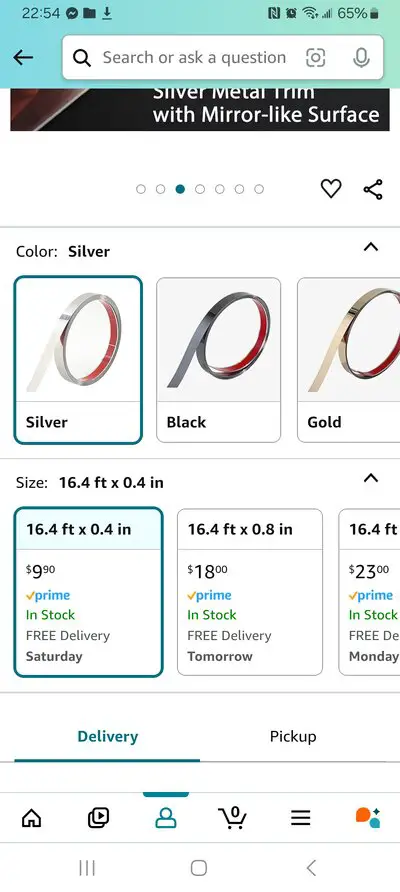
Six-figure engineer found a $9 coil of 10mm wide 0.3mm thick stainless that should snug right down in there and hide the prolapsed butyl, and keep it from trapping dirt.
 

Attachments

  • 20240815_224602.jpg
    20240815_224602.jpg
    1.4 MB · Views: 30
  • 20240815_224646.jpg
    20240815_224646.jpg
    1.4 MB · Views: 31
  • 20240815_224935.jpg
    20240815_224935.jpg
    1.5 MB · Views: 31
  • Screenshot_20240815_225404_Amazon Shopping.jpg
    Screenshot_20240815_225404_Amazon Shopping.jpg
    424.7 KB · Views: 28
This is finished rear window after landau delete. Meh. Won't win any shows on looks, but solid car. Gap around this trunk lid doesn't look uniform. Damn this spray paint still soft. Left it uncovered for a week but I got stitch imprints from covering it yesterday.

Thanks O. D. Showtime for shipping the trim from Saskatchewan to New Jersey so I could make this look passable.

20240819_170500.jpg
20240819_170512.jpg
20240819_161657.jpg
 
Last edited:

GBodyForum is a participant in the Amazon Services LLC Associates Program, an affiliate advertising program designed to provide a means for sites to earn advertising fees by advertising and linking to amazon.com. Amazon, the Amazon logo, AmazonSupply, and the AmazonSupply logo are trademarks of Amazon.com, Inc. or its affiliates.

Please support GBodyForum Sponsors

Classic Truck Consoles Dixie Restoration Depot UMI Performance

Contact [email protected] for info on becoming a sponsor