are you getting those from left hander chassis? where do i find those?No, ride height is the same. But while the spindles are off, you can swap in tall lower ball joints, which will lower the car about .75" and improve suspension and steering geometry.
98~05 Blazer brake upgrade! DONE!
- Thread starter mkube396
- Start date
You are using an out of date browser. It may not display this or other websites correctly.
You should upgrade or use an alternative browser.
You should upgrade or use an alternative browser.
Pro forged makes and sells them via summit, jegs, etc. UNGN might have the part # handy and he is quick to reply.are you getting those from left hander chassis? where do i find those?
Wanted to make a comment to save this thread. I just read the whole thing, and can't wait to change mine out. Really great write up on this.
ok so here's my next dumb question, i see they make a tall upper as well would that in effect make it stock height again, im ordering the tall lowers, then u saw tall uppers, that would effectively undo what the tall lower did right?
ok so here's my next dumb question, i see they make a tall upper as well would that in effect make it stock height again, im ordering the tall lowers, then u saw tall uppers, that would effectively undo what the tall lower did right?
That is not how any of this works 🙂
Tall upper will compliment the tall lowers. Tall lowers will lower the car and improve the tie rod location in relation to the control arms to reduce bump steer and improve the camber curve of the wheel (less negative camber when wheel goes down/more negative camber when wheel goes up). as the car leans to the outside in a turn, the outside wheel has more negative camber... what you want.
Tall upper doesn't effect ride height, has a much smaller effect on bump steer, but DOES improve the camber curve.
Tall upper and tall lower together will noticeably improve handling and if you're car can wheely, will keep the wheels nice and vertical when the car pops a wheely (instead going all full negative camber at full droop - which is NOT good for handling).
If you have 8" wide wheels that are 16" diameter or less, tall uppers can put the wheel close to the control arms are full lock, so that is a potential drawback in some applications. 7" wheels or narrower or 8" bigger than 17" shouldn't be a issue with G-body backspacing.
swear my car sits a shade higher than stock now with tall upper and lowers, so im gonna say you might be wrong.That is not how any of this works 🙂.
swear my car sits a shade higher than stock now with tall upper and lowers, so im gonna say you might be wrong.
Tall lower balljoint can't raise the ride height over stock length lower ball joints. With no other changes it physically raises he spindle 1/2" in relation to the body.
Lots of other things can raise the ride height, from not having the spring seated in the pocket to more positive wheel offset.
currently doing this swap i have ckeaned the blazer spindles and painted them put new gbody lower ball joints in my question is when i put it together the ball joint nut didn't tighten up untill it was a little below the cutter pin holes this normal? the pin gies in but ill halft to Bend both ends down to get it to catch the nut goodThis upgrade made a HUGE difference for me. My old hardware was only 2 years old on the calipers, rotators, and pads.
i am going to have my alignment looked at in a few weeks. But for now it is parked till it gets nicer out.
I just wanted to post an easy to do, bolt-on upgrade for our g-bodies braking system. This can be done with all GM parts, in just a few hours, and is a worthwhile upgrade for anyone looking to upgrade to a dual caliper braking system.
The thickness of the blazer rotator was 1.20" and the G-body was 1.0” the diameter is 10.5 in for the G-body and 10.78 for the blazer
To upgrade stock G-body brakes, you will be using 1998 ~ 2005 blazer / Jimmy Knuckles (2WD ONLY!)
Blazers allso came stock with 14" rims so stock seel rims will work
The 4wd might work but you would have to install the lower ball joint upside down. but that would not work any how because the 4wd ball joints are not pressed in there bolted in. and the 2wd and G-body ball joints are not made to install like that and would fall out, when you hit a bump... here is 2 pics comparing the two
4WD
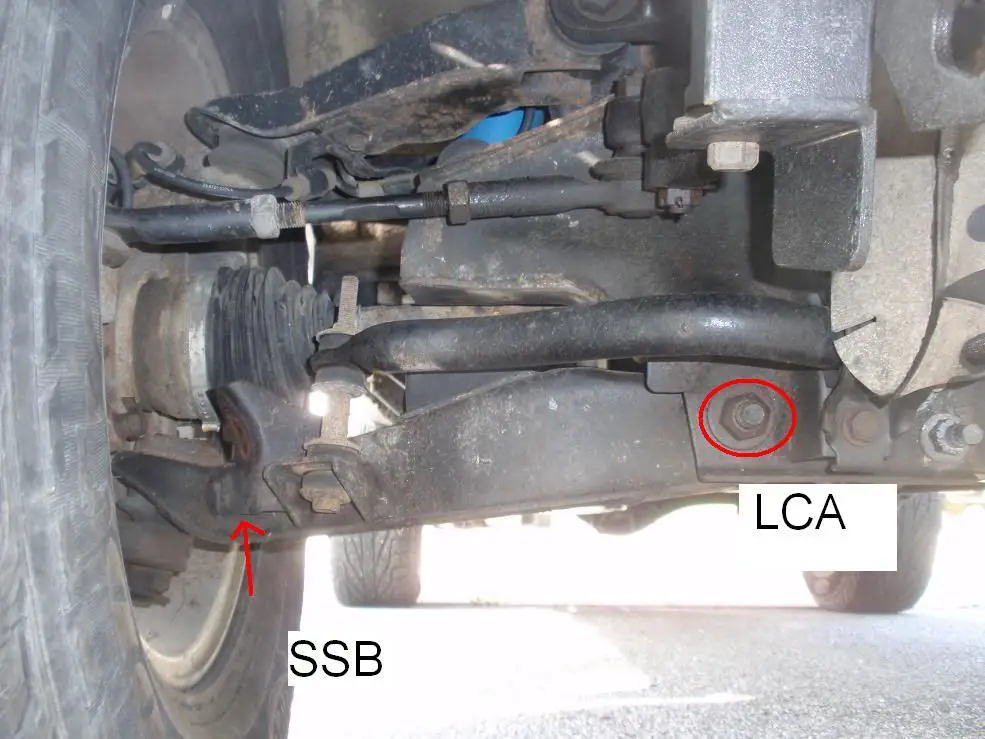
VS
2WD
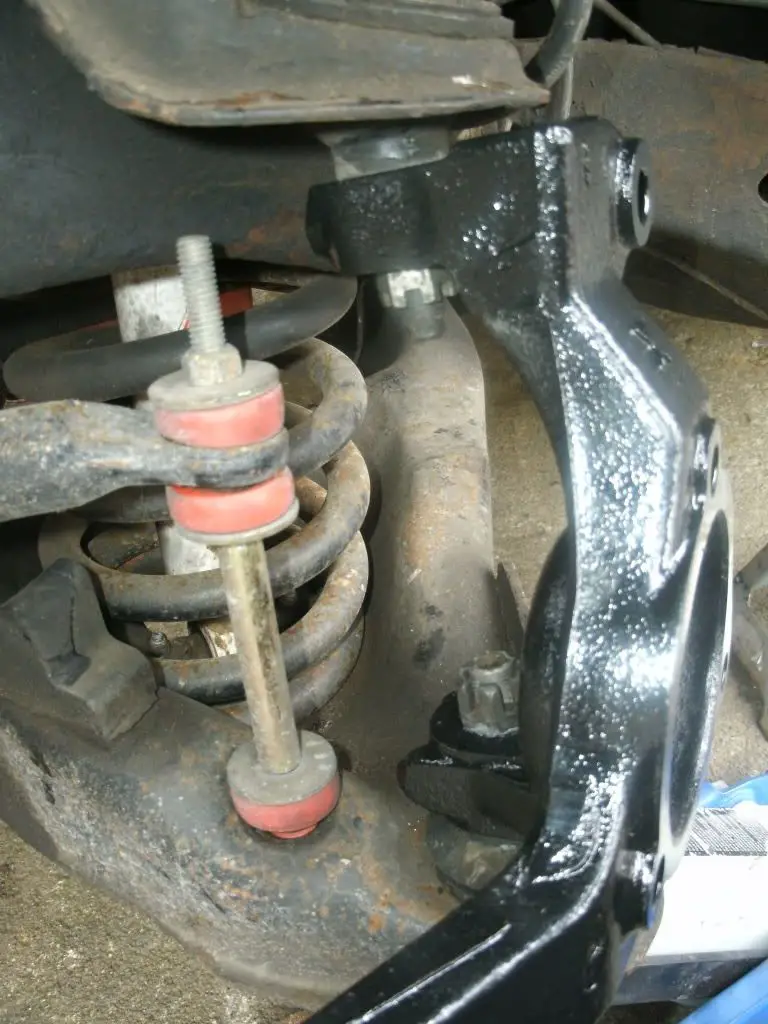
In my case I used spacers on my GTA rims to move them out so that is the only added setep here that you can ignore.
Here is where you start! Ugly rusty brakes wave bye bye :wavey:
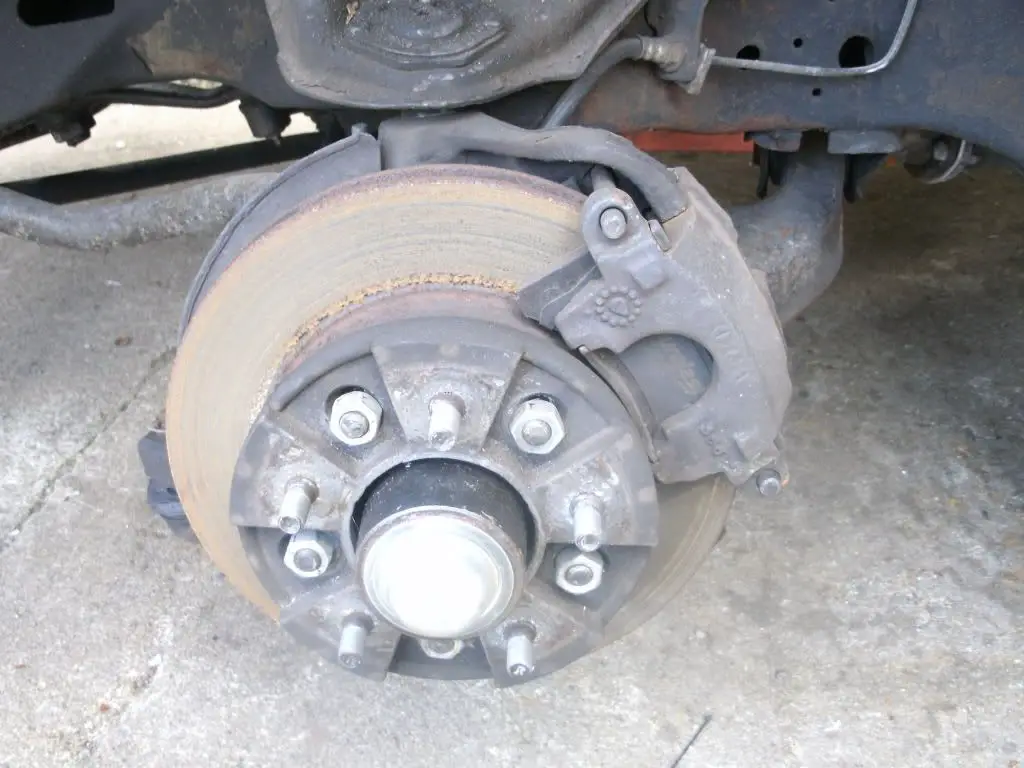
Make sure to put a jack 1" under the lower arm to catch it, during removal. I just use a hamer to hit the lower control arm if it pops out good! If not, time to use the pickle fork.
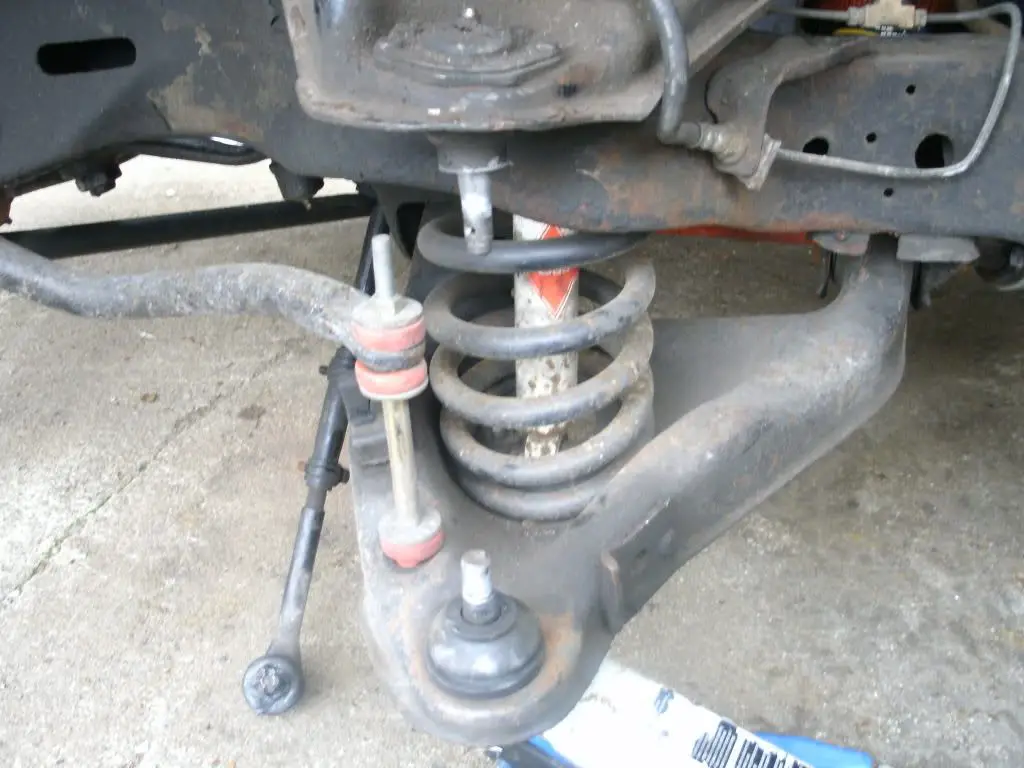
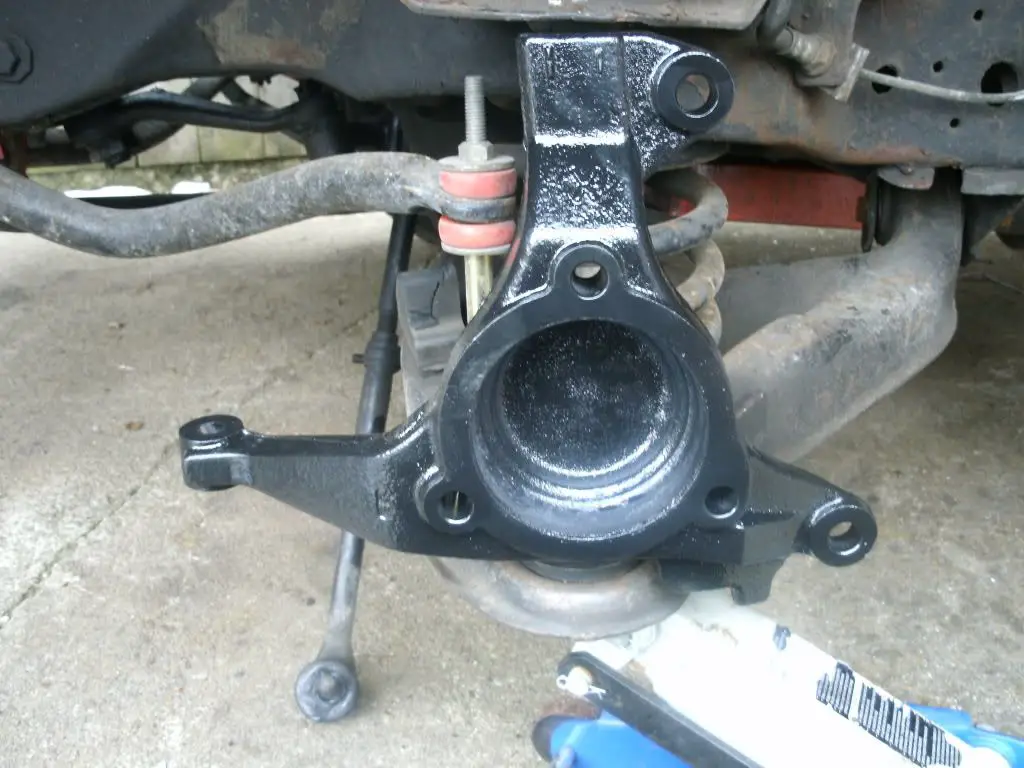
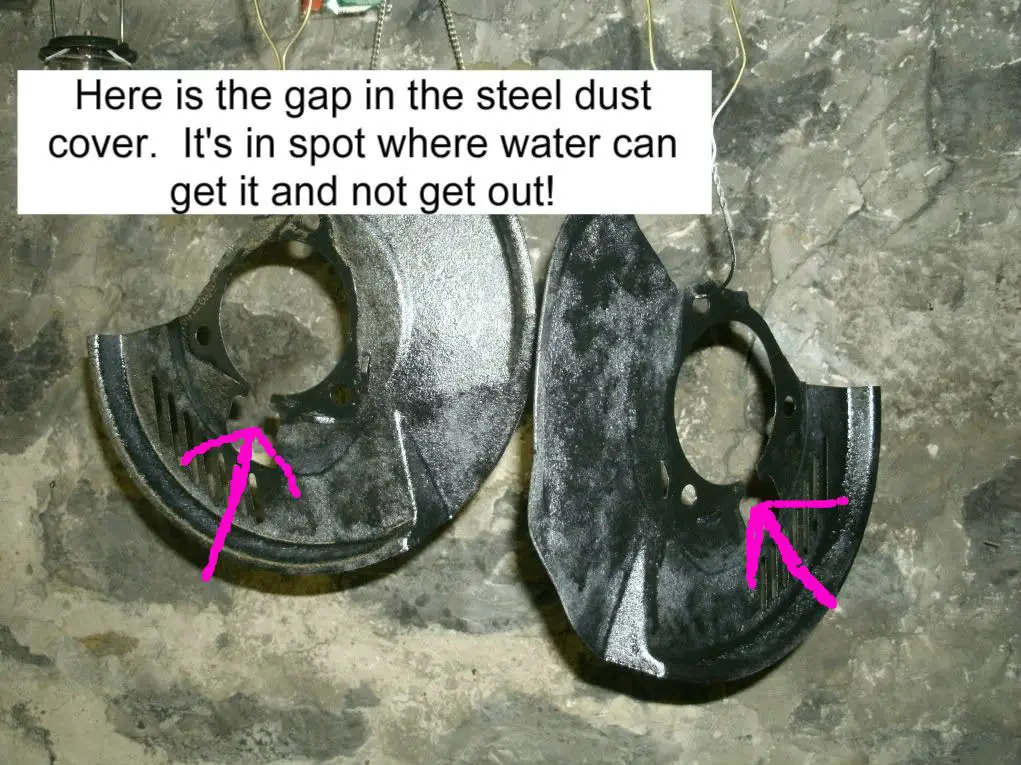
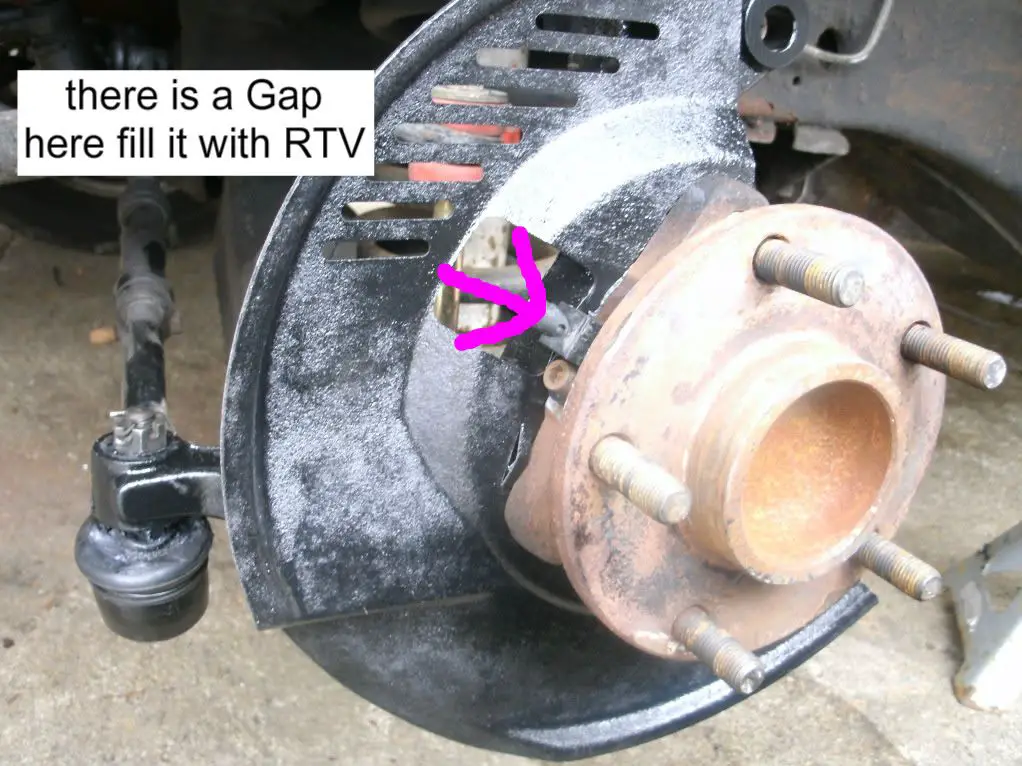
Here is the knuckle installed. I recommend using a paper thin coat of RTV on the setting surface of the dust cover and the bearing/knuckle and filling the gap in the dust cover. If you don't do this it can let water in and trap it behind the hub bearing. That can lead to premature failure. Most after-market Hub bearings will give you a O-Ring for this purpose.
Hub bearing installed. The gap I mentioned is behind the ABS Sensor.
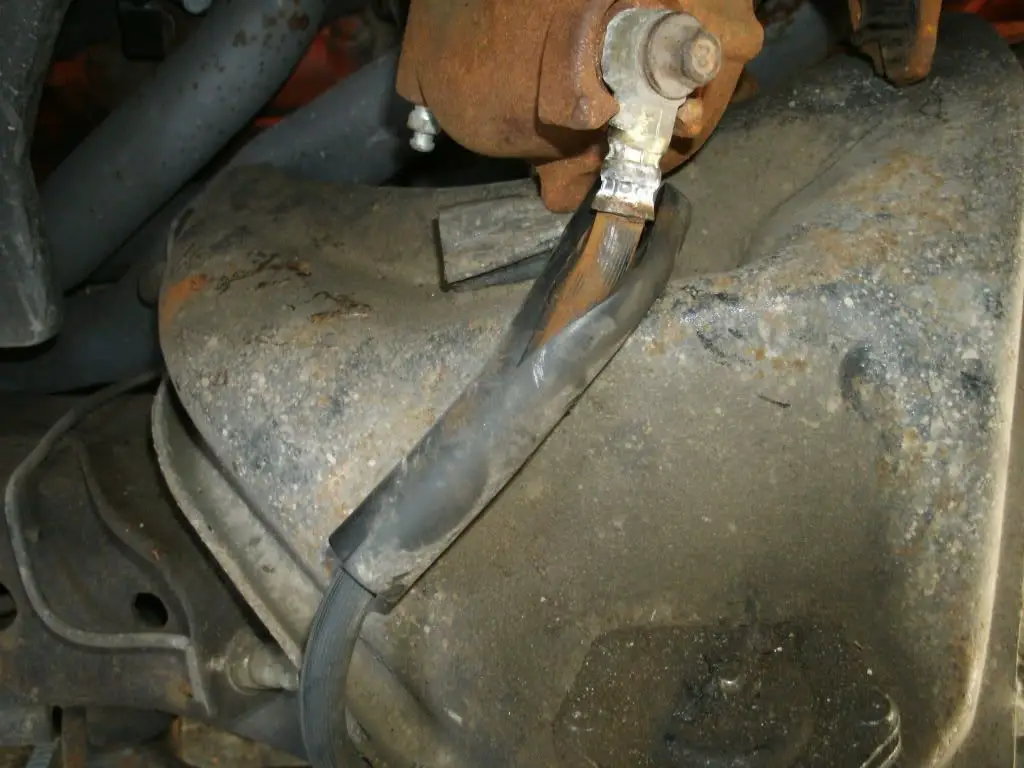
An important thing to note, is you will be using the stock G-body brake hose here. However, you will have to cut off the rubber boot on it so it can flex right. It’s not a big deal I just put some wire loom over. Just dont nick the F*ing brake hose!!!!
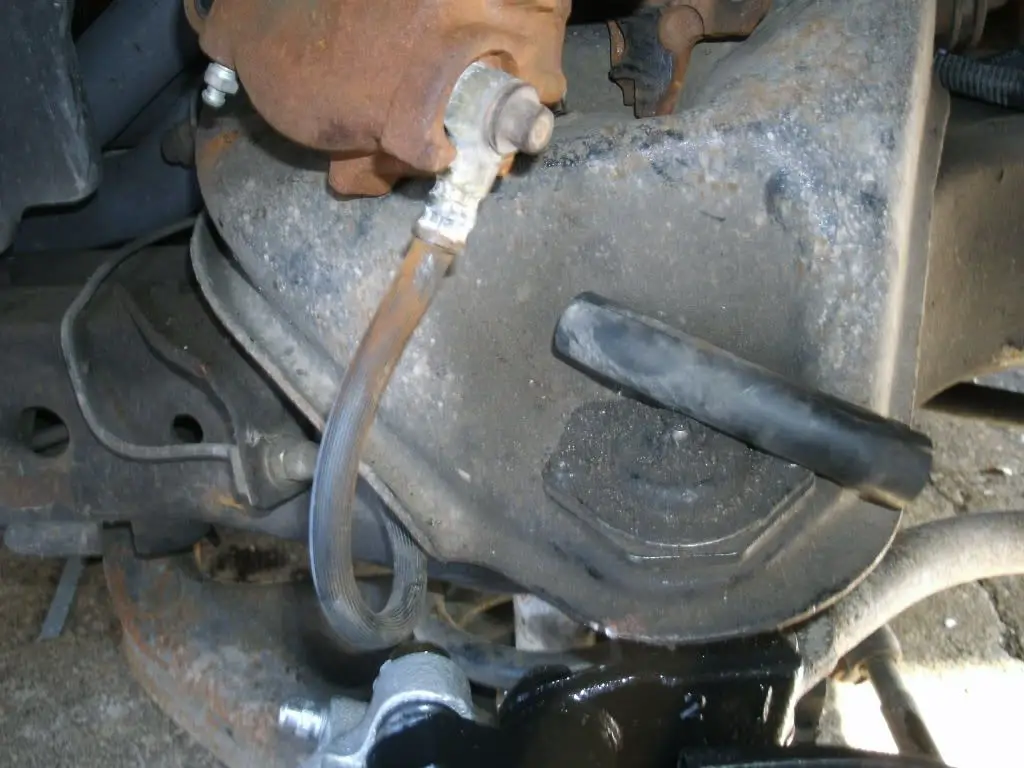
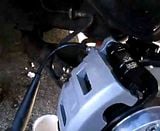
Here it is installed
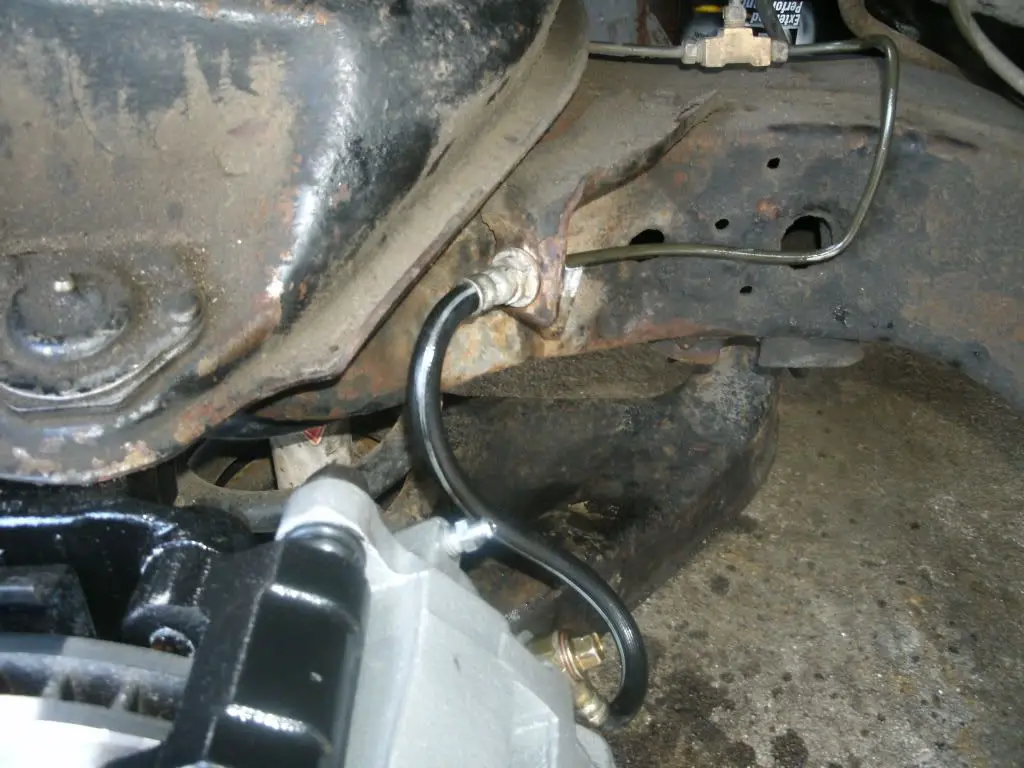
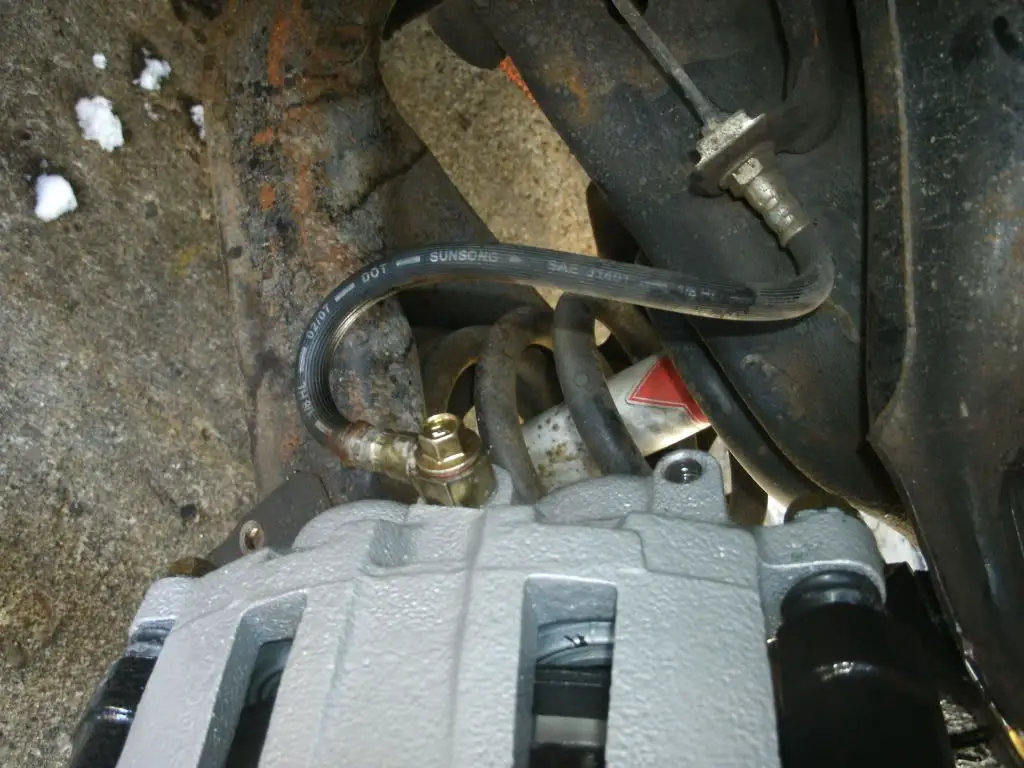
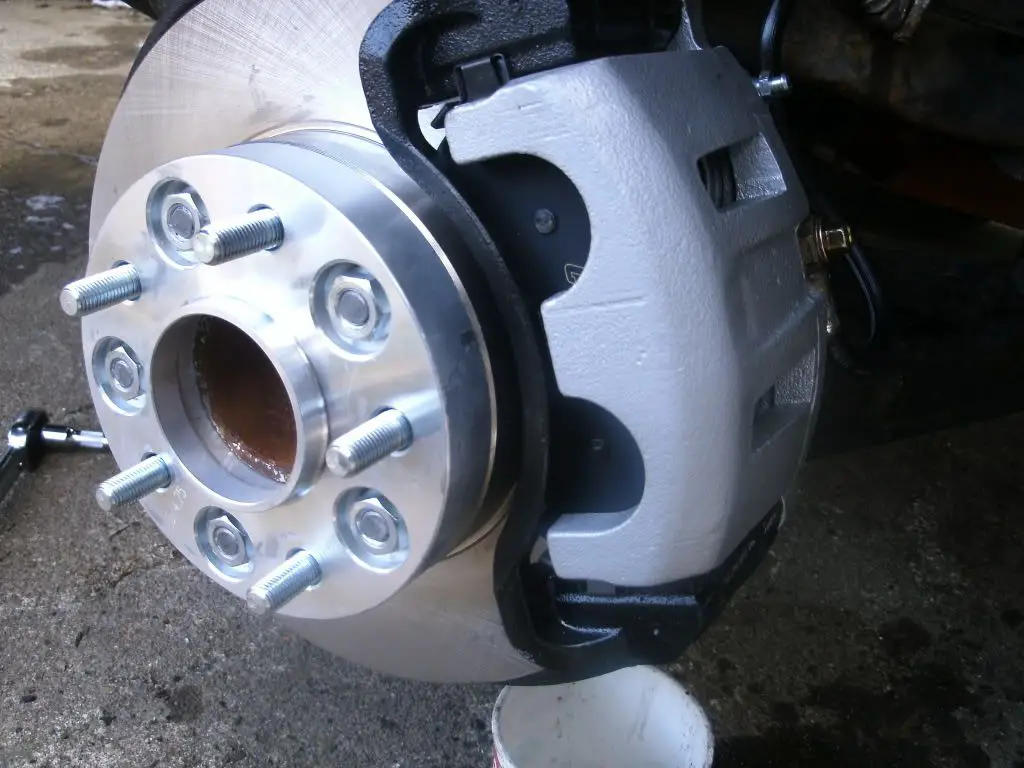
You're all done just put your tire in and drive!
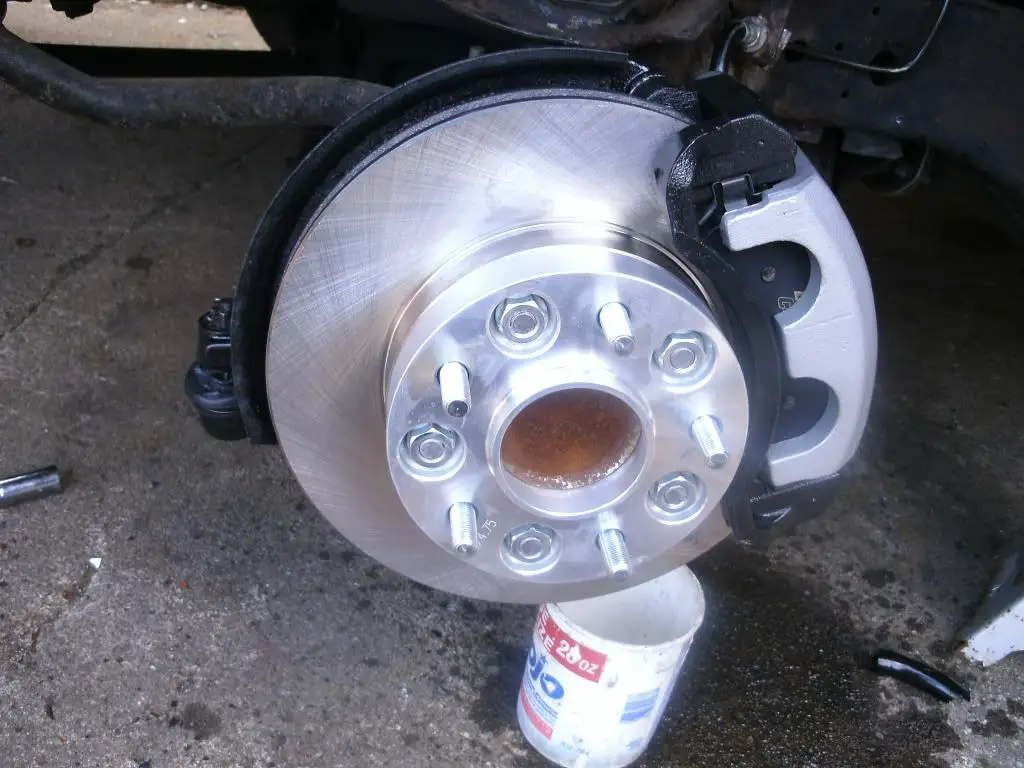
Thats it!!!
here are some shots comparing the 2 calapers
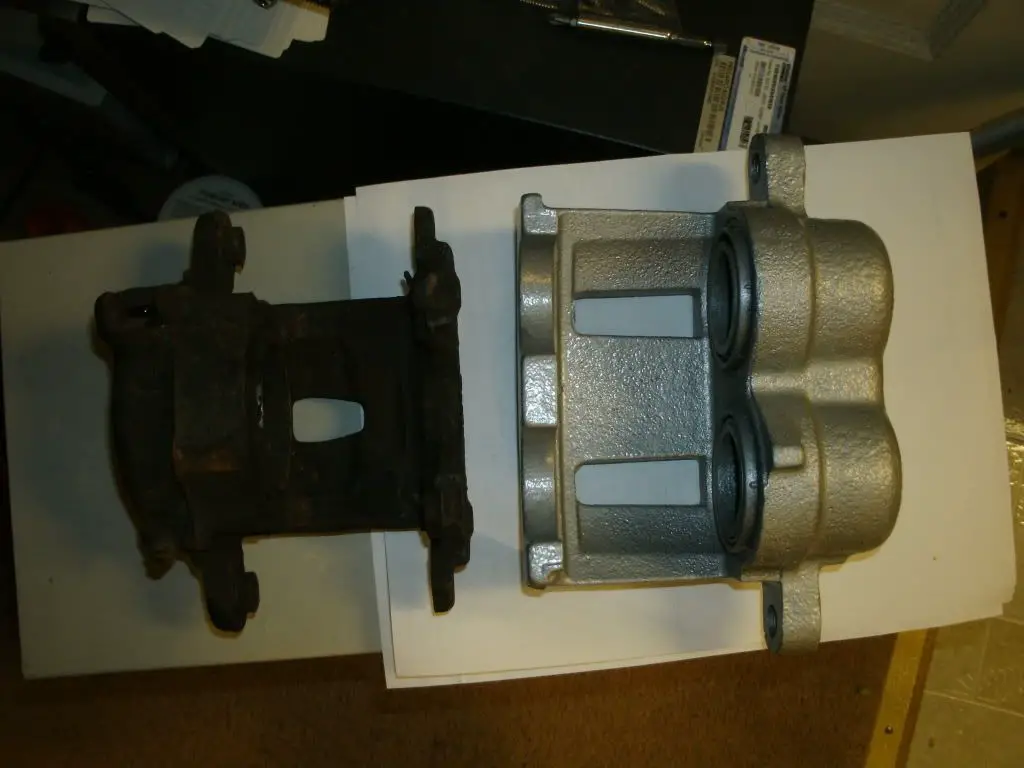
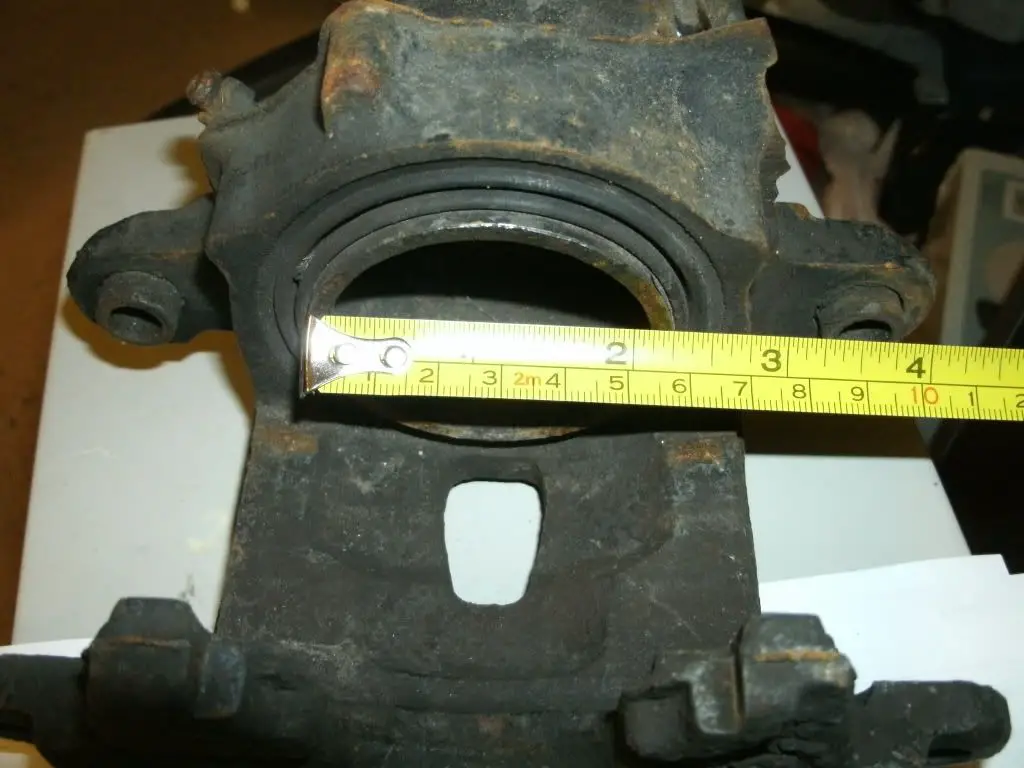
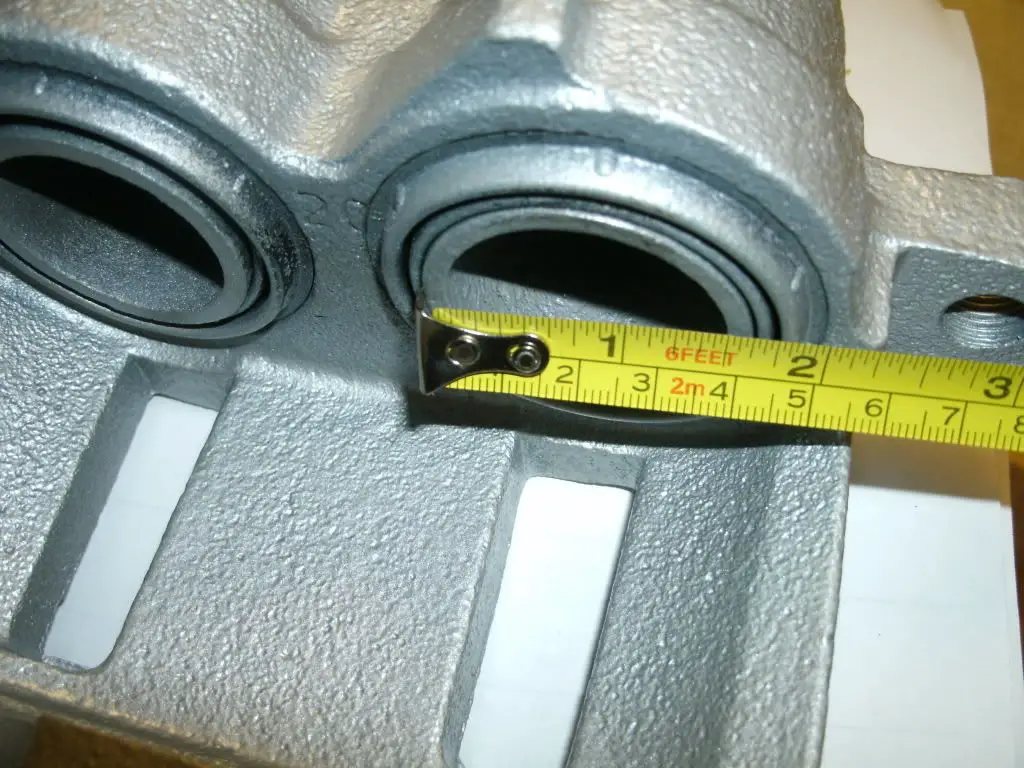
Torque Specs
Wheel Hub and Bearing Assembly to Steering Knuckle Bolts 77 ft.lb
Ball Joint (Lower) 79 ft.lb
Ball Joint (Upper) 61 ft.lb
Ball Joint (Upper Replacement Joint Bolts) 17 ft.lb
Here's some part number help.
Brake Caliper “Passanger side C599 & driver side C598” $45.00 new core $25 each
Brake Pad Caliper Bracket PN# 14-1105 and 14-1106 $11 each on Rockauto
Brake Rotor PN# (55047) $20~$40 each
Brake Pads PN# (726) $20.00~$60.00
Bearing Hub assembly PN# (513200) $50.00~$200.00 each
The knuckles I used came from the junkyard and cost me $50 each for the yard to pull for me, and also came with the Hub bearings. You can get Hub bearings cheep on line for $50~$60 new
and my 1 man bleeder system 😀 click for the video
Similar threads
- Replies
- 7
- Views
- 1K
- Replies
- 2
- Views
- 96
- Replies
- 4
- Views
- 204
GBodyForum is a participant in the Amazon Services LLC Associates Program, an affiliate advertising program designed to provide a means for sites to earn advertising fees by advertising and linking to amazon.com. Amazon, the Amazon logo, AmazonSupply, and the AmazonSupply logo are trademarks of Amazon.com, Inc. or its affiliates.


