

Cheating The Reaper
- Thread starter DRIVEN
- Start date
You are using an out of date browser. It may not display this or other websites correctly.
You should upgrade or use an alternative browser.
You should upgrade or use an alternative browser.
You'll notice an improvement with the roller rockers. The stamped OEM rockers are anywhere from 1.45 to 1.5 and are usually under the 1.5. The rollers will be constant with their ratios. I noticed it mine when I when from stock to 1.5 rollers.
I honestly don't have super high expectations. These are a cheap Chinese (I suspect) ebay set. They actually came packaged with polylocks but there wasn't enough clearance for a socket and they were too short for the screw-in studs I have. No thread left for the set screws. I just ended up reusing the factory nuts instead.pontiacgp said:You'll notice an improvement with the roller rockers. The stamped OEM rockers are anywhere from 1.45 to 1.5 and are usually under the 1.5. The rollers will be constant with their ratios. I noticed it mine when I when from stock to 1.5 rollers.
I know that the ChevyinnaFord thing is unpopular right now but I figured instead of trying to hide it -- I'll just embrace it. The plan is to dress it like a late '60s factory performance option. It'll have a mix of DZ302, LT1, and early Corvette pieces on it. Figured it's got more street cred then a crate 350 with a bunch of ball-milled billet crap thrown at it.-83MONTESS- said:Nice! Nothing purtier than chevy orange!
Just some late shots of the additional painting/parts/mockup...
Water pump and pulley painted and on.

I also played around with my weirdo pipe-dream of diagonal crossram just for giggles.


With the top removed you get a better idea of how the runners are laid out.

The EGR passage dumps right in the middle but luckily it's pretty easy to cut out.

Painted and mocked up my CS130 alternator low-mount kit.

I actually haven't done anything in about a week. Spring break, personal stuff, blah blah blah...
That is a corvette crossfire F.I. intake correct? I did a similar idea once but I did two 4's on a diagonal. I will be interested to see how it works out for you. The biggest pain for me was the linkages.
James
James
Yeah, it's an old Crossfire intake. It's just a side project that probably won't get done for a couple years. My plan was to use some ebay spacers in top of an aluminum top plate. Speedway has the tripower kit with the baseplates and progressive linkage. The intake base will need a TON of porting and reconfiguring to remove the EGR stuff. It may never see the top of this engine anyway. Probably be a pain to tune due to the cam.
Finally got the rails blasted. Holy crap have I been procrastinating! Anyway, I learned a lot in the process since the guy I got it from had never actually used it and had zero pointers for me.
1. Play sand does work. But it needs to be dry and it needs to be sifted.
2. The recovery rate is about 60-70%. Meaning if I put 10lbs in the pot and run it empty, then sweep up everything on the tarp, I'll have about 6-7lbs to reuse the next time.
3. Blasting when it's windy sucks.
4. My compressor just barely keeps up. If I were doing this more regularly or a larger project I'd need a bigger compressor.
5. Aluminum oxide works better than play sand but costs 10x as much.
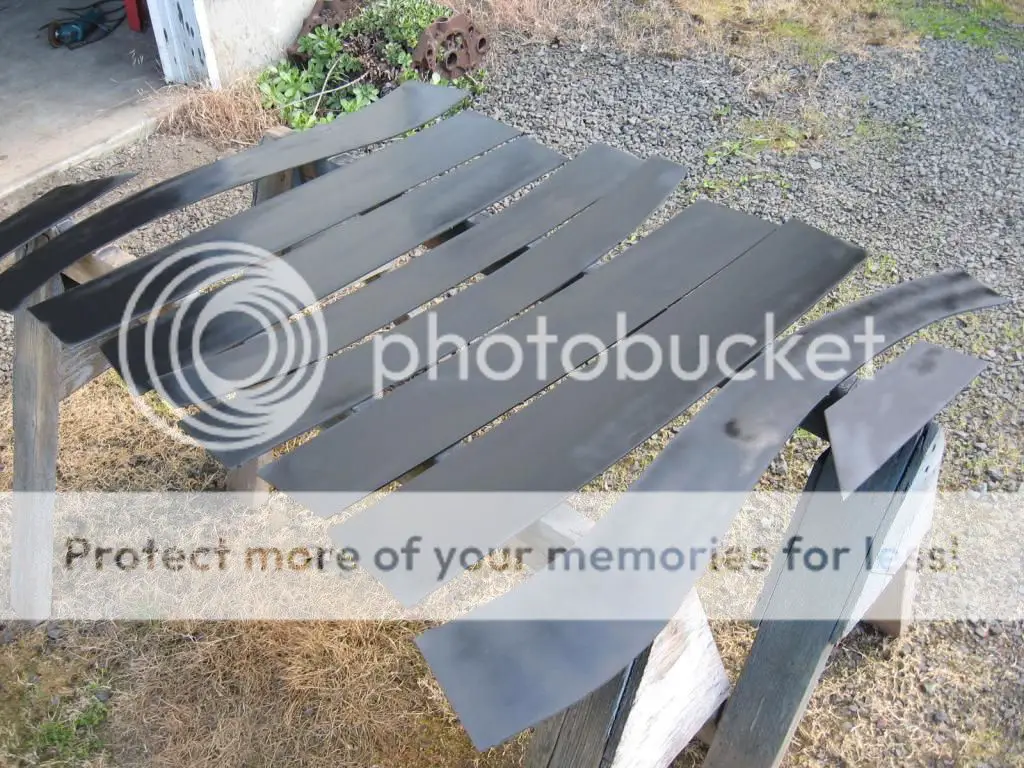
Basically, I knocked the majority of the ugliness off with the blaster. Next step will be to weld up some unused holes, add captured nuts, straighten everything out, hit it with the flapper discs, prime the inside, add the boxing plates, prime the outside, then start welding in crossmembers.

Rear crossmember and sifting screen.

Some of the heavy pitting I uncovered. Looks worse than it really is.

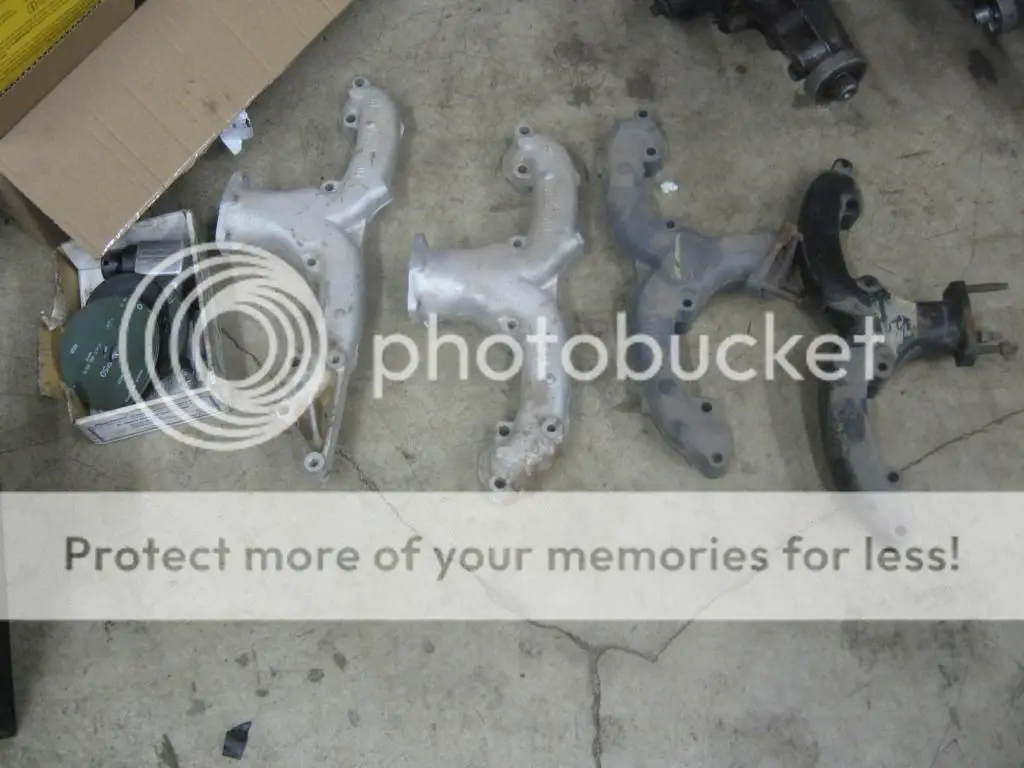
Also, Jerod brought down some various manifolds I'll use for mockup once I get the engine in the frame.
And lastly, Jerod delivered some motivation...

...not to be opened and enjoyed until after the maiden voyage. He handmade the rustic oak crate.
1. Play sand does work. But it needs to be dry and it needs to be sifted.
2. The recovery rate is about 60-70%. Meaning if I put 10lbs in the pot and run it empty, then sweep up everything on the tarp, I'll have about 6-7lbs to reuse the next time.
3. Blasting when it's windy sucks.
4. My compressor just barely keeps up. If I were doing this more regularly or a larger project I'd need a bigger compressor.
5. Aluminum oxide works better than play sand but costs 10x as much.
Basically, I knocked the majority of the ugliness off with the blaster. Next step will be to weld up some unused holes, add captured nuts, straighten everything out, hit it with the flapper discs, prime the inside, add the boxing plates, prime the outside, then start welding in crossmembers.

Rear crossmember and sifting screen.

Some of the heavy pitting I uncovered. Looks worse than it really is.

Also, Jerod brought down some various manifolds I'll use for mockup once I get the engine in the frame.

And lastly, Jerod delivered some motivation...

...not to be opened and enjoyed until after the maiden voyage. He handmade the rustic oak crate.
Spent over 8 hours working on the frame today. Finished straightening all the ripples using 2 large Crescent wrenches. Then hammered all the dents out. Once they were straight, I welded up a total of 160 holes. After that I welded the captured nuts onside that will attach the fenders and running boards. I also added 2 reinforcement pieces at the rear kick-ups which is a common weak spot on these frames. Once I was happy with that, I shot the inside of the frame rails and the inside of the boxing plates with primer. It took some trimming but I got the boxing plates to fit to my satisfaction and that's as far as I got. There are actually a few pics but I left the camera in the shop and, honestly, just don't feel like going out there right now.
Next step is to tack weld the boxing plates in, bolt in the rear crossmember, and start the front crossmember install and get the X-rails ready.
Next step is to tack weld the boxing plates in, bolt in the rear crossmember, and start the front crossmember install and get the X-rails ready.
Photo evidence...
For the dents that couldn't be accessed easily I clamped a section of heavy wall square tubing on the inside like a dolly) and hammered the outside, tightening the clamps as I worked the dent out.

The nuts inside the rails for fender and running board mounting bolts...

There were 20 all together. Not too pretty but no one (except you guys) will ever see them.

Coat of primer on the boxing plates.

Somehow forgot to update. This was about 2 weeks ago...
Snail pace progress report. Finished straightening the rails. Tacked in the boxing plates. Welded the X-rails together. Set it up on the hoist and leveled(ish) everything.

As usual, I had big plans for the day but got distracted by other tasks. Ended up wasting half the day on cleaning and reorganizing the storage shelves upstairs. Ended up throwing a ton of sh*t away. I've also decided it's just not very bright in the work bay too. When the shop was built 15 years ago we wired it for 2 additional 8' high output lights above the hoist but just never got around to installing them. Maybe 18' ceilings have something to do with it. I've had the fixtures, bulbs, hang chains and electrical pigtails on a shelf upstairs all this time. It just needs to be done. I'm embarrassed.
GBodyForum is a participant in the Amazon Services LLC Associates Program, an affiliate advertising program designed to provide a means for sites to earn advertising fees by advertising and linking to amazon.com. Amazon, the Amazon logo, AmazonSupply, and the AmazonSupply logo are trademarks of Amazon.com, Inc. or its affiliates.