CUTLASS Cracked tail light

Status
Not open for further replies.

Swindells

Apprentice
Jun 22, 2019
69
64
18
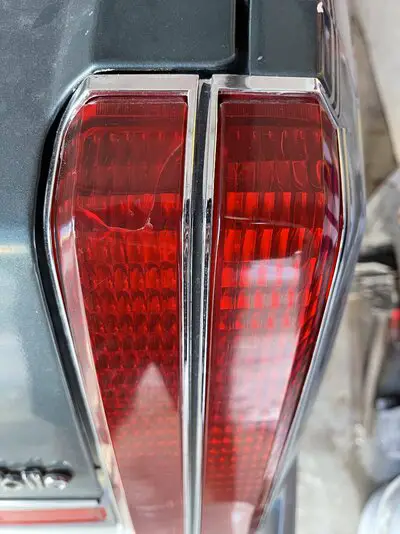
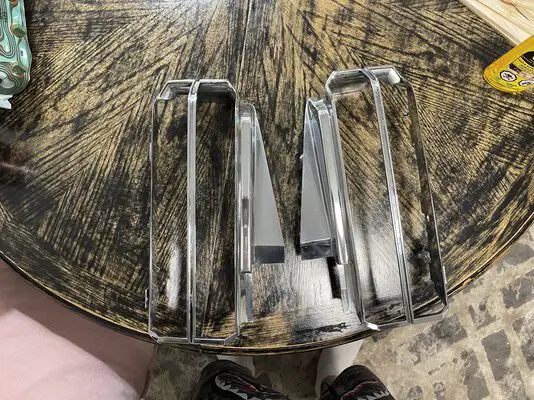
I have a small crack in the top of one of my tail lights
Does anyone know a decent way to repair this crack and make it less visible?

If no
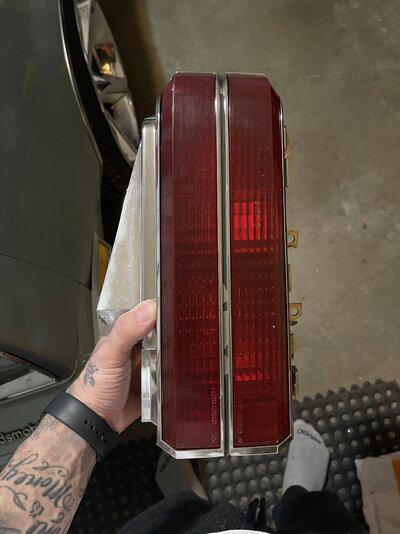
I do have a second set of lights that are for some reason a slight darker shade of red

Does anyone know of a good way to restore/refinish the plastic?
They have small scratch/scuffs on them I’d like to get out if I’m swapping them over

Appreciate the help 👊🏼
 

Attachments

  • 16D38F0C-F32A-4D0C-9DAD-E724A0DA13B2.jpeg
    16D38F0C-F32A-4D0C-9DAD-E724A0DA13B2.jpeg
    1.2 MB · Views: 129
  • image.jpg
    image.jpg
    1.3 MB · Views: 154

ELCAM

Royal Smart Person
Jun 19, 2021
1,124
1,270
113
Restoring the cracked ones is way above my paygrade.

Polishing the others is fairly easy.

First mask any fake chrome and things you don't want to abrade on.

Start with 1500 grit and wet sand them, use lots of water and use a random motion like a dual action sander. Sand till the milky color in the water goes away ( that's the oxidization coming off). Move up to 2000 grit or finer if you can get it.

After the wet sand I just use tooth paste, apply with your finger and also use random motion to apply it, it will begin to dry and become difficult to work, use a micro fiber cloth dipped in water to continue working the toothpaste in a random motion.

Rinse it all off and it should pretty nice as is. I then use a plastic polish spray that you spray on and let dry and then buff off. It is Novus #1 plastic clean and shine, no idea if it is still available I have had this bottle for over 20 years and it is still going.

Try not to get the water in the taillight housings, if you do let them dry completely, the light bulbs are not water proof and do not like getting wet.
 
  • Like
Reactions: 1 user

69hurstolds

Geezer
Supporting Member
Jan 2, 2006
8,198
17,600
113
Agree, that crack in the taillight is fatal. There's no fixing that, unfortunately.

As far as polishing, you can take the lens out of the chrome housing before polishing, then you won't need to tape anything off. You can buff those new lights to a good shine.

It's weird about the red tint in the plastic. When new, nearly all of them are the same, bright red color. As they age, especially if left outside, they can darken. I had heard it's a UV thing, but I'm not a plastic chemist. The plastic definitely becomes more brittle if left in the sun all the time. Nothing you can do about a dark lens, but you can smooth out the surface as ELCAM described and make them at least look shinier and better. As an aside, the 84-88 G47 Cutlass lenses had a tendency to craze crack on the top of the lens looking like a bunch of micro-cracks under the surface. Again, likely sun exposure. No fixing that, either.

Note- some cars actually could be built new with darker lenses. For example, one of the components included in the early 5th gen Camaros (2010-2013) with quad taillights was darkened taillights when you got the "RS" package. They weren't a whole lot darker, but they had a more smokey look to them than the plain red ones. I can't recall exactly when, maybe it was 2013, but at some point, they just made the darker lenses standard.
 
  • Like
Reactions: 1 users

Swindells

Apprentice
Jun 22, 2019
69
64
18
I like the look of the brighter red lights over the darker ones

I still might attempt to repair the crack decently
It’s so minor and on the roll you might not really notice it
Sand it down so you can’t feel it
Fill it with a watery thin crazy glue or clear coat and sand and polish it out

See how that looks before I commit to the full polish and replacement of the darker set

Even just polishing out the lettering has me intimidated and not wanted to attempt it just yet
😂🤦🏻‍♂️
 

565bbchevy

Geezer
Aug 8, 2011
9,614
12,683
113
Michigan
I have polished quite a few lenses after sanding the scratches out but I use Meguiars PlastX for final polishing.
 
  • Like
Reactions: 1 users

Swindells

Apprentice
Jun 22, 2019
69
64
18
Ok, so I’m going to attempt to refinish the second set I got

Buff out the DOT writing, re polish the plastic and attempt to bring back the polish on the chrome best I can

I have a couple things I need some help with please and thanks in advance! 👊🏼👊🏼

Anyone have any tricks for removing the skinny black tape strip down the centre of the groove on the chrome?

A couple of the mount bolts on the back of one light are missing.
What am I looking for to replace those bolts?

And maybe what are the little nuts called that are used to hold the chrome to the light housing?
Some of the ones from this set are a bit rusty and I wouldn’t mind getting some new ones before I tighten everything back up
 

Attachments

  • 3BD716E0-014B-4A3D-A355-F0660B13572F.jpeg
    3BD716E0-014B-4A3D-A355-F0660B13572F.jpeg
    1.1 MB · Views: 103
  • CF84F734-2D3C-44DF-BB43-E88D52CE67C4.jpeg
    CF84F734-2D3C-44DF-BB43-E88D52CE67C4.jpeg
    884.4 KB · Views: 116
  • D03CB28F-6527-4275-B47D-67DEF1EDF91C.jpeg
    D03CB28F-6527-4275-B47D-67DEF1EDF91C.jpeg
    1.1 MB · Views: 113
  • 5A6AB038-F864-4204-8095-7B3C84F63BC6.jpeg
    5A6AB038-F864-4204-8095-7B3C84F63BC6.jpeg
    1.1 MB · Views: 119

69hurstolds

Geezer
Supporting Member
Jan 2, 2006
8,198
17,600
113
They're known by several names, but generally the stamped nuts are called PALnuts.

You can usually get them rather easily at any auto body shop, or even some of the big box store auto parts have them. Mostly zinc plated so they'll look shiny silver, but they work the same. Or if you need several, you can get them here. I do not recall what size those are, however.


You may be able to minimize the visibility of the crack by the polishing and maybe clear-coating them. I've never tried that myself, but it's possible.

Sorry, I don't know what you can do with the black strip inside. From what I was to understand it was painted, but I haven't looked at the set I have for 81-83 in about 100 years. The rest of the chrome is vacuum plated plastic, so polishing that is not going to net you much if the chrome's already peeling/fading. So be careful removing/installing the PAL nuts for the plastic studs. You don't want to snap them off.
 
Last edited:
  • Like
Reactions: 1 users

Swindells

Apprentice
Jun 22, 2019
69
64
18
Yes I figured the chrome is kinda what it is, but doesn’t mean I’m not going to try and buff it up a little bit. Most of what’s exposed looks ok
Just a bit weathered. So why not try.

Thanks a bunch on the info for the self tapping nuts

What about the bolts that mount the light itself?
(See picture above)
There is 2 missing on one of the lights and they look like they just thread in and have a bolt on both ends type deal

Any help with those would be appreciated

Otherwise gluing in a bolt I guess is the next step?
 

turbogeezer

Greasemonkey
May 9, 2012
105
91
28
Yes I figured the chrome is kinda what it is, but doesn’t mean I’m not going to try and buff it up a little bit. Most of what’s exposed looks ok
Just a bit weathered. So why not try.

Thanks a bunch on the info for the self tapping nuts

What about the bolts that mount the light itself?
(See picture above)
There is 2 missing on one of the lights and they look like they just thread in and have a bolt on both ends type deal

Any help with those would be appreciated

Otherwise gluing in a bolt I guess is the next step?
The plastic studs use a 5mm stamped nut .The studs that hold the taillight to the body take a 6mm nut with floating washer, Auveco pn 12596. When sanding, finish with the finest grit that you have. I also recommend Meguiars plastX.
 
  • Like
Reactions: 1 users

Swindells

Apprentice
Jun 22, 2019
69
64
18
Well!

Some goo gone and some extensive elbow grease and that tape line is gone and these shells are ready for some buff and polish as good as plastic can be

Please help if anyone knows the answers for these next ones 🙌🏼

For some reason my cluster is missing some lights 🤦🏻‍♂️
Top left-Check engine, middle-wait, right-water in fuel, and the lower left hole is blacked out no light comes through it
So I’m assuming it is empty for that reason

But does anyone know where I can get these small twist in 194 bulb holders to replace the missing few?


Also!
The front side marker bulb connectors are all corroded inside and the bulbs worked before I started taking things apart and playing with them fitting and swapping to led bulbs
But now they won’t work at all
I stuck a flat head with some fine sand paper in there to try to clean the connections and still nothing

So
Time to chop these off and buy some new ones I guess 🤷🏻‍♂️
Anyone know the name of these style 194 bulb holders?
And where I might be able to purchase a couple of those?

Thanks so much
Any help is greatly appreciated!
👊🏼👊🏼👊🏼🙌🏼
 

Attachments

  • 891D0FEB-9A7D-4979-812A-96F0F8299802.jpeg
    891D0FEB-9A7D-4979-812A-96F0F8299802.jpeg
    2.3 MB · Views: 100
  • 4AE63E77-391D-43CF-90B8-4A9038375599.png
    4AE63E77-391D-43CF-90B8-4A9038375599.png
    967.8 KB · Views: 115
  • 9F5B38B5-0C22-4D1B-BD0D-4F81D1B2F973.png
    9F5B38B5-0C22-4D1B-BD0D-4F81D1B2F973.png
    684.5 KB · Views: 110
  • 1922D7EB-39EF-467C-9579-A83D189C5266.jpeg
    1922D7EB-39EF-467C-9579-A83D189C5266.jpeg
    1.2 MB · Views: 109
  • 68C7E35A-B78F-4462-A010-DB3FB81C19C8.jpeg
    68C7E35A-B78F-4462-A010-DB3FB81C19C8.jpeg
    856.9 KB · Views: 118
Status
Not open for further replies.

GBodyForum is a participant in the Amazon Services LLC Associates Program, an affiliate advertising program designed to provide a means for sites to earn advertising fees by advertising and linking to amazon.com. Amazon, the Amazon logo, AmazonSupply, and the AmazonSupply logo are trademarks of Amazon.com, Inc. or its affiliates.

Please support GBodyForum Sponsors

Classic Truck Consoles Dixie Restoration Depot UMI Performance

Contact [email protected] for info on becoming a sponsor