Frame off question?

Status
Not open for further replies.
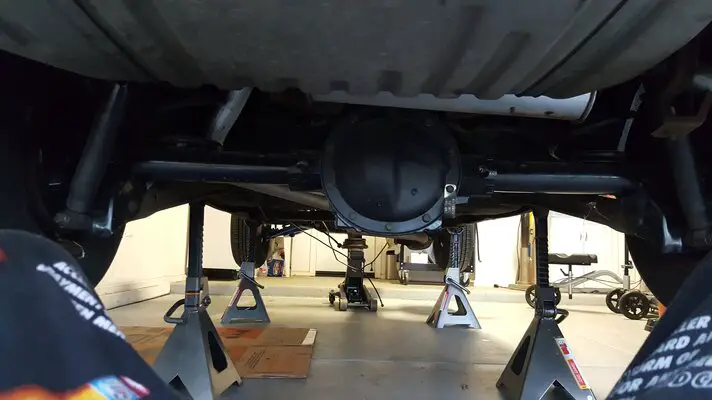
A few friends, mainly to watch. Four floor jacks and lots of scraps of wood. Basically do one corner about 4", move to another all the way around then repeat until you can get a full concrete block under it. Then start over again. Need 4 blocks high to clear everything. Starts getting a little nerve racking after block two Hahaha

It's actually still in the same spot. I ended up having back surgery so I haven't touched it since August. Going back out to the shop tomorrow to start on it again.
 
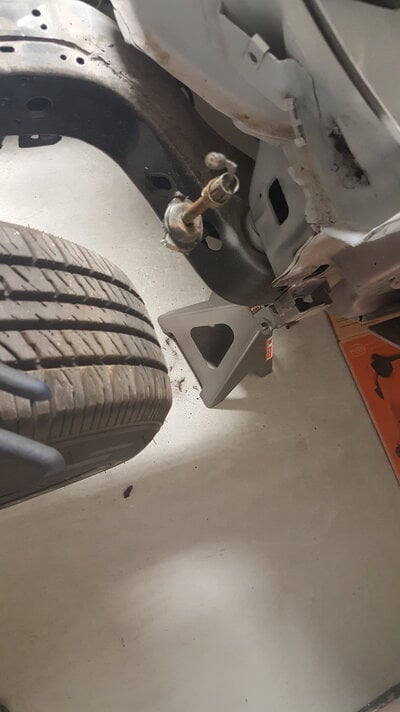
Happy new years fellas! I finally has some time to get under the car and remove the body mount bolts. Had no issues at all. Didn't even have to use a cheat bar. The all came out smoothly. I have everything else disconnected except the e brake cable going through the firewall. Any tips?
 

Attachments

  • 20170101_170903.jpg
    20170101_170903.jpg
    3.1 MB · Views: 289
  • Like
Reactions: Streetbu
Happy new years fellas! I finally has some time to get under the car and remove the body mount bolts. Had no issues at all. Didn't even have to use a cheat bar. The all came out smoothly. I have everything else disconnected except the e brake cable going through the firewall. Any tips?

I used a socket that had a hole large enough to slip over the piece that holds it in the bracket. The socket basically squeezes the tabs so you can push the round holder through the bracket to remove the entire cable. Otherwise you need 3 hands and two pliers to squeeze the tabs.

Sounds like you lucked out on the body mounts. I had to repair 5 on my 80' El Camino. 1 on the passenger side at the firewall and the 4 rear bed mounts behind the axle. I was able to chip away at the bushing and then pull the body with the mounts and washers still attached. One I got the body on a rotisserie I was able to cut a hole in the boxes on the bed mounts, get the junk out, insert a piece of flat bar with a nut welded, then patch the access hole I created. For the front mount, I cut two diagonal lines and bent the flap down. Cleaned out the inside and inserted a piece of flat bar with a nut welded on it.

Full documentation and pics of the project is here.
http://www.elcaminocentral.com/showthread.php?t=202449
 
I used a socket that had a hole large enough to slip over the piece that holds it in the bracket. The socket basically squeezes the tabs so you can push the round holder through the bracket to remove the entire cable. Otherwise you need 3 hands and two pliers to squeeze the tabs.

Sounds like you lucked out on the body mounts. I had to repair 5 on my 80' El Camino. 1 on the passenger side at the firewall and the 4 rear bed mounts behind the axle. I was able to chip away at the bushing and then pull the body with the mounts and washers still attached. One I got the body on a rotisserie I was able to cut a hole in the boxes on the bed mounts, get the junk out, insert a piece of flat bar with a nut welded, then patch the access hole I created. For the front mount, I cut two diagonal lines and bent the flap down. Cleaned out the inside and inserted a piece of flat bar with a nut welded on it.

Full documentation and pics of the project is here.
http://www.elcaminocwas ral.com/showthread.php?t=202449[/QUOTE

Thanks. I will give that a try as soon as I can
I used a socket that had a hole large enough to slip over the piece that holds it in the bracket. The socket basically squeezes the tabs so you can push the round holder through the bracket to remove the entire cable. Otherwise you need 3 hands and two pliers to squeeze the tabs.

Sounds like you lucked out on the body mounts. I had to repair 5 on my 80' El Camino. 1 on the passenger side at the firewall and the 4 rear bed mounts behind the axle. I was able to chip away at the bushing and then pull the body with the mounts and washers still attached. One I got the body on a rotisserie I was able to cut a hole in the boxes on the bed mounts, get the junk out, insert a piece of flat bar with a nut welded, then patch the access hole I created. For the front mount, I cut two diagonal lines and bent the flap down. Cleaned out the inside and inserted a piece of flat bar with a nut welded on it.

Full documentation and pics of the project is here.
http://www.elcaminocentral.com/showthread.php?t=202449


Thanks! I will give that a try once I figure out howTo disconnect it from the enchants l e brake pedal. Having a hard time reaching in there. Yea I'm glad I didn't have any issues with the mounts .I was dreading them breaking. Thanks for sharing your link. YOU DO AWESOME WORK SIR!
 
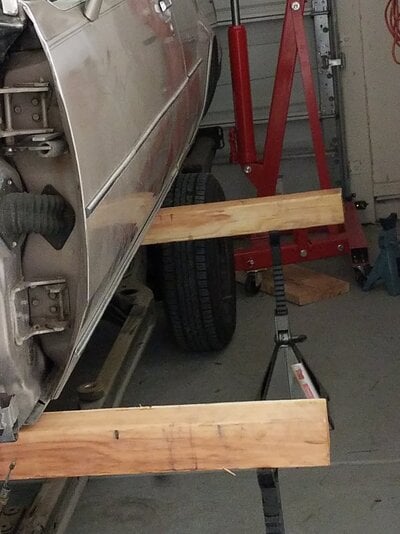
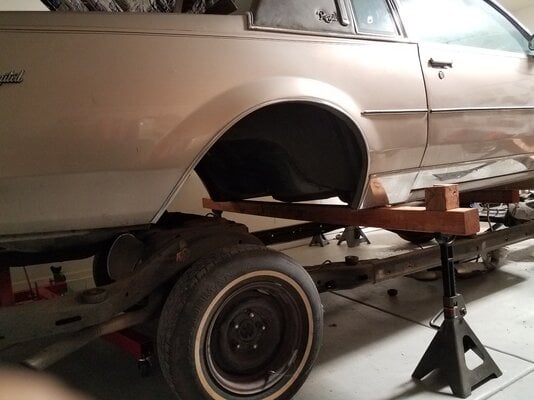
Sorry no pics had the phone for some music while I lifted the body but accidentally snagged the charger and broke it....I did however get the frame out. used some 4x4's 4 6 ton jackstands and engine hoist. Will post pics tomorrow once my new phone gets delivered. Used the hoist to lift the back end from the trunk latch hook and the jack for the front. took wheels off and used harbor freight casters to sit the body down low enough. Easy peasy. I did have the wife take a few pics but not enough detail. Plus computer i have sucks and freezes while trying to upload. Next step is to box the frame and off to the powder coat..will have pics up soon.
 
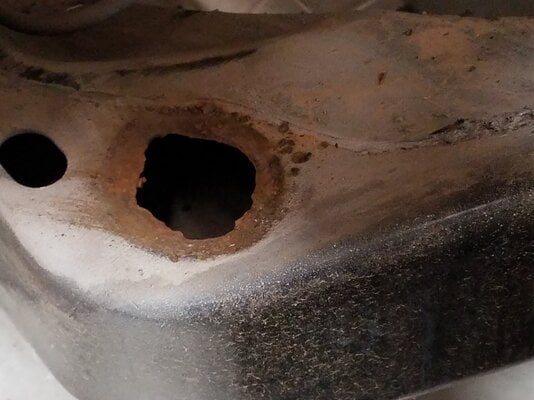
A few pics I was able to upload. That is the only frame mount location that needs attention. Clone TIE Pilot called it. Will have to repair that. Where can I get the frame washers I can weld in?
 

Attachments

  • 20170103_202233.jpg
    20170103_202233.jpg
    1,020.2 KB · Views: 381
  • 20170103_202157.jpg
    20170103_202157.jpg
    3.2 MB · Views: 360
  • 20170103_202212.jpg
    20170103_202212.jpg
    2.2 MB · Views: 331
Thanks ebay it is...pretty steep for a dang washer.buy what do ya do right?
They gave the measurements. You could look for them locally. What is your time worth? I hear you though.
 
Status
Not open for further replies.

GBodyForum is a participant in the Amazon Services LLC Associates Program, an affiliate advertising program designed to provide a means for sites to earn advertising fees by advertising and linking to amazon.com. Amazon, the Amazon logo, AmazonSupply, and the AmazonSupply logo are trademarks of Amazon.com, Inc. or its affiliates.

Please support GBodyForum Sponsors

Classic Truck Consoles Dixie Restoration Depot UMI Performance

Contact [email protected] for info on becoming a sponsor