BUILD THREAD my 1980 Grand Prix w/BBC 454 build thread

Status
Not open for further replies.

454GrandPrix

Master Mechanic
Jul 27, 2016
429
818
93
Lehi, Utah
I remember my regal in the exact same position yours is now, jackstands and all. Me and my little brother got it started and broke in the cam (no oil pressure at all. That graphite lube saved my *ss)

Ouch! I'm glad your engine survived. In my case, I made sure to build oil pressure before I first tried to fire the engine.

I know not a priority at the moment but id get a second set of vortec 454 valve covers and polish them. I think they'd look good either polished or brushed :)

In general, I am very anti chrome. Even that one thin little shiny alternator bracket bothers me... but I use it because it's what I have. I actually really like the look of the black valve covers, and I don't plan to change them.
 
  • Agree
Reactions: 1 user

L67ss

Royal Smart Person
Dec 8, 2016
1,350
420
63
Ah. I'm a bit of a chrome junkie lol. On the 454 going in my cutlass I'm gonna get everything chrome that I can :)
 

454GrandPrix

Master Mechanic
Jul 27, 2016
429
818
93
Lehi, Utah
Yeah, I know that is often the norm for vehicles like ours. I admit I'm the oddball.
 

MrSony

Geezer
Nov 15, 2014
6,791
6,675
113
Des Moines, Iowa
Ouch! I'm glad your engine survived. In my case, I made sure to build oil pressure before I first tried to fire the engine.

/QUOTE]
In retrospect, that was probably one of the dumbest things I've ever done. I had some No Name mechanical gauges I bought a long time ago. Temp and Volts were working, but oil pressure only read like .5 psi, and I knew I had plenty of oil flow, so I just thought the gauge was bad. Turns out I forgot the two oil galley plugs on either side of the cam. Had all the oil in the world to the mains and rods but the valvetrain? Nada. It being my first engine build I guess I just over looked them because the shop took them out when they bored and hottanked my block. That Moly Graphite enigne assembly lube, more of a paste really, saved my entire valvetrain. I didn't use the cam grease as well. Didn't like the looks of it.
Whoops. ¯\_(ツ)_/¯
 

Bar50

Royal Smart Person
Jan 1, 2009
1,180
870
113
Tulsa, OK
I just wanted to let you (everyone) know, you can get new reproduction transmission lines for less than $50 (my last set was from Jeg's).

Be advised, the fittings in the side of the case are NOT pipe thread (NPT), they have the same thread pitch, but, the threads are not tapered, if anyone tries to use pipe thread adapters for say AN lines or whatever it can and will break the transmission case.

The fittings you got appear to be flare to barb fittings.

I will caution you on your alternator bracket, not being tied or triangulated to the intake will allow the alternator to wobble and possibly pitch a belt.

If you have not bought the controller for the 4L80 yet you can Roadkill it with a simple set of switches and harness....look around on youtube.
 

454GrandPrix

Master Mechanic
Jul 27, 2016
429
818
93
Lehi, Utah
I just wanted to let you (everyone) know, you can get new reproduction transmission lines for less than $50

I wish somebody made pre-bent bolt-on trans lines for this setup. I would have bought them in an instant.

Be advised, the fittings in the side of the case are NOT pipe thread (NPT), they have the same thread pitch, but, the threads are not tapered, if anyone tries to use pipe thread adapters for say AN lines or whatever it can and will break the transmission case.

I read that in a number of places. I bought a pair of adapter fittings specifically made for the 4L80 case to convert to standard flare fittings. After that, I bought those two brass 90^ adapters to give me a hose barb.

I will caution you on your alternator bracket, not being tied or triangulated to the intake will allow the alternator to wobble and possibly pitch a belt.

I would have been happy to use a triangulated upper bracket if only there was a threaded hole in the intake to bolt it to. Since there is not, I'm just doing the best I can with it. At least the bottom mount is very rigid.

If you have not bought the controller for the 4L80 yet

I already have the TCI EZ-TCU sitting in the garage, awaiting installation. :)
 

454GrandPrix

Master Mechanic
Jul 27, 2016
429
818
93
Lehi, Utah
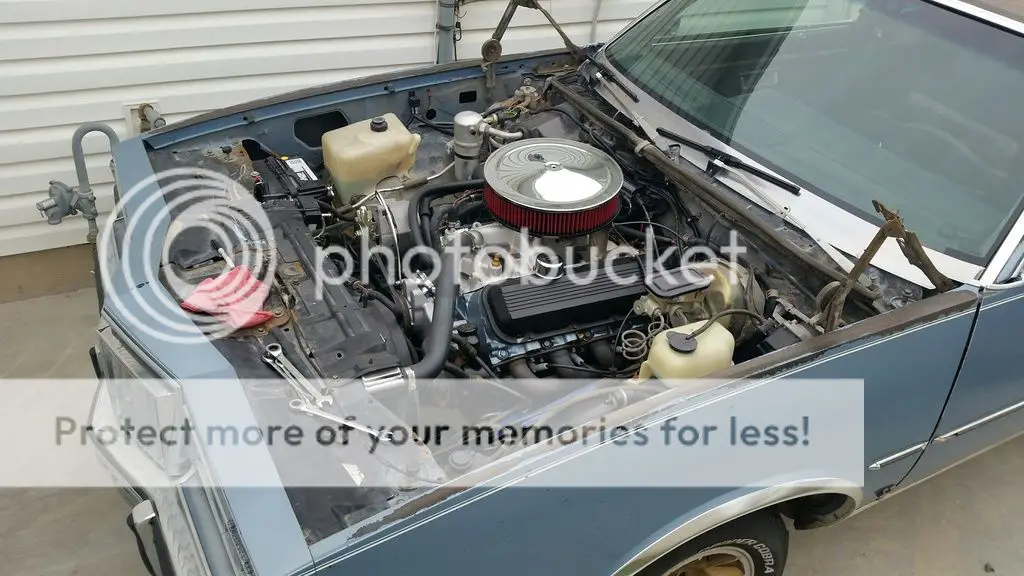
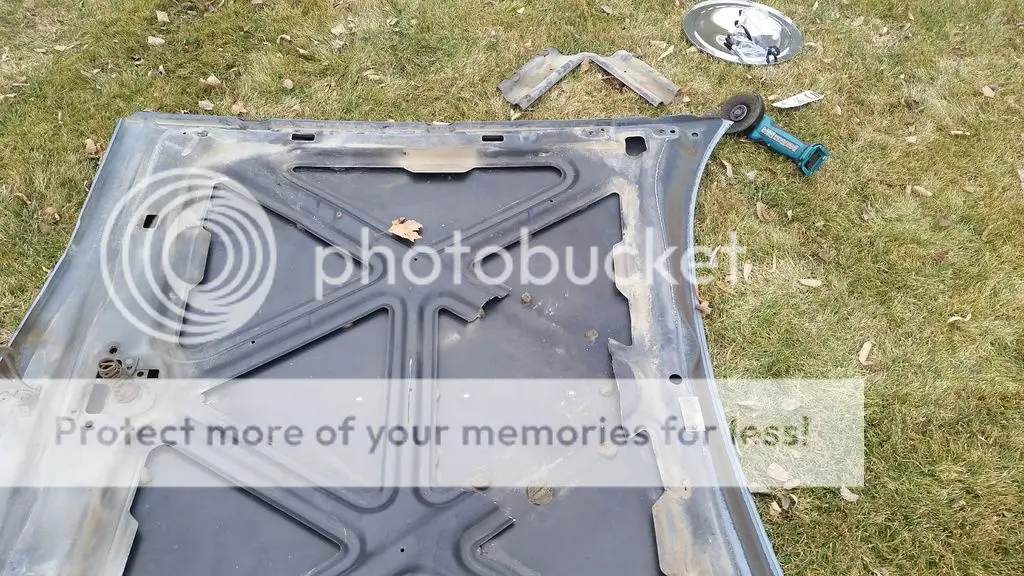
I spent some more time on the car yesterday. Up first, the hood. I had to take it back off so I could cut off a few of the support ribs on the underside, thus making clearance for my 14" drop base air cleaner.

AirCleaner_zpsaoc6jrmu.jpg


I didn't begin with a fully-charged battery, so it didn't surprise me when I had to stop at the ~80% mark for a recharge.

HoodRibs1_zpsm1g9gnqk.jpg


After some more juice, the last little bit came off with no difficulty. I then ground off the edges a bit, hit the appropriate spots with some touch-up paint, and I was good to go.

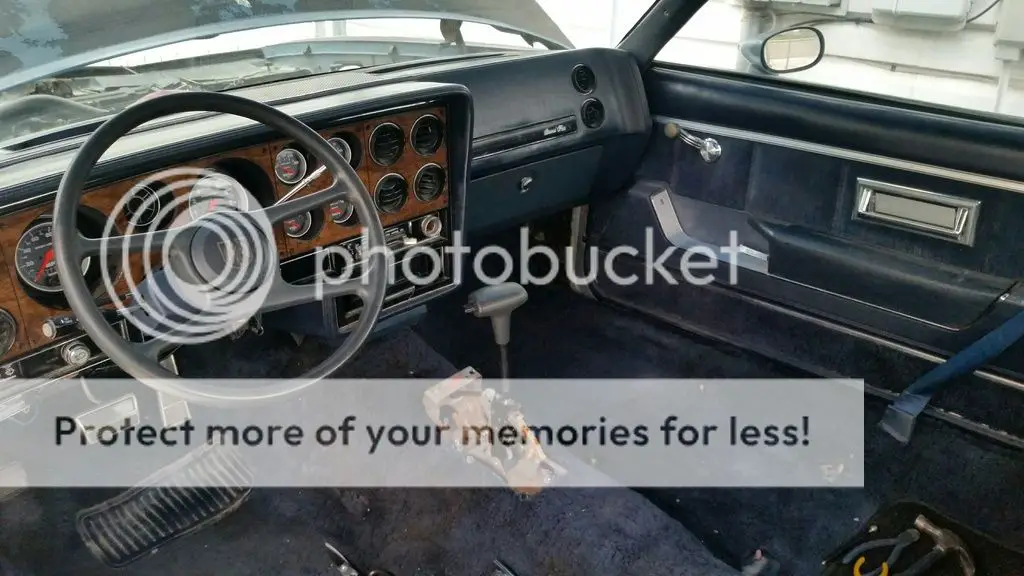
Next goal: install the junkyard floor shifter. I had already cut a rectangular hole in the carpet and made some marks on the tunnel, so it was just a matter of drilling holes and bolting the thing in place. I had been putting the off because my friend Mike had offered to use his nutsert tool so we could complete this process entirely from above... but since he wasn't here, I crawled under to take a closer look. Hmm, maybe I'll have enough clearance for standard bolts and nuts. So I grabbed my drill and went to town. After the holes were made, I was able to use a magnet to help hold two of the bolts in place after I pushed them in from below, then I got back inside and installed the washers and nuts. Nice.

The forward holes would not be so easy. Due to such small clearance between the trans and the tunnel, the bolt was too long to be inserted into the hole from below (thanks in part to the large round washers I was using on the underside of the car for additional rigidity). I found a different bolt which was slightly shorter--just enough to fit in the hole--but now it was too short for me to get a nut onto it by myself. I went next door and got a neighbor kid to sit inside the car and help me get this one together. For the last hole, even my slightly shorter bolt was too long to be inserted into its hole... so for now I had the kid help me tighten down the three bolts which were in place and I called it good enough. On my next run to Ace, I'll see if I can find an even shorter bolt for that last hole.

But, hey--I've got a (mostly) period-correct Pontiac floor shifter in my car!

Shifter_zpswmmnab3v.jpg


The cable that came with it (from an early '90s W-body Grand Prix sedan) was plenty long, so much so that I didn't even need to drill another hole in the tunnel. Instead, the cable goes under the dash, through the firewall, around the master cylinder, then back down under the car. I have it attached to the trans, but I need to 'customize' the bracket so the cable is rigidly held in the right spot... and I decided to do that another day.

Finally, I opened my fancy TCI EZ-TCU controller. The harness on this thing is much larger than I expected, though I guess that is due to all the capabilities it offers. I read through the instructions to see which features I don't need (or at least don't need to install right now), then I carefully bound up and zip tied the unneeded wires to minimize the bulk and excess wiring. I started to install the harness as they recommend, meaning I fished the transmission wires down from the engine bay and routed them to the trans. This let me see how much excess wire length there was, which in turn lets me decide where to mount the TCU. The driver's inner fenderwell is the spot I chose. However, this isn't a flat piece of steel... so I'll need some standoff feet to properly bolt the thing in place. Gee--looks like I'll be making that next Ace run soon enough.

At this point it was getting dark and starting to rain, so that's where I stopped for the night.
 
  • Like
Reactions: 1 users

454GrandPrix

Master Mechanic
Jul 27, 2016
429
818
93
Lehi, Utah
Winter has set in, giving me fewer practical opportunities to work on the car. But yesterday was a balmy 36^ and sunny, so I spent a few hours wrenching. Sadly, much of that time had to be devoted to my Jeep; it had developed a coolant leak after I changed the water pump last month. Once that was buttoned up, I turned my attention to the Pontiac.

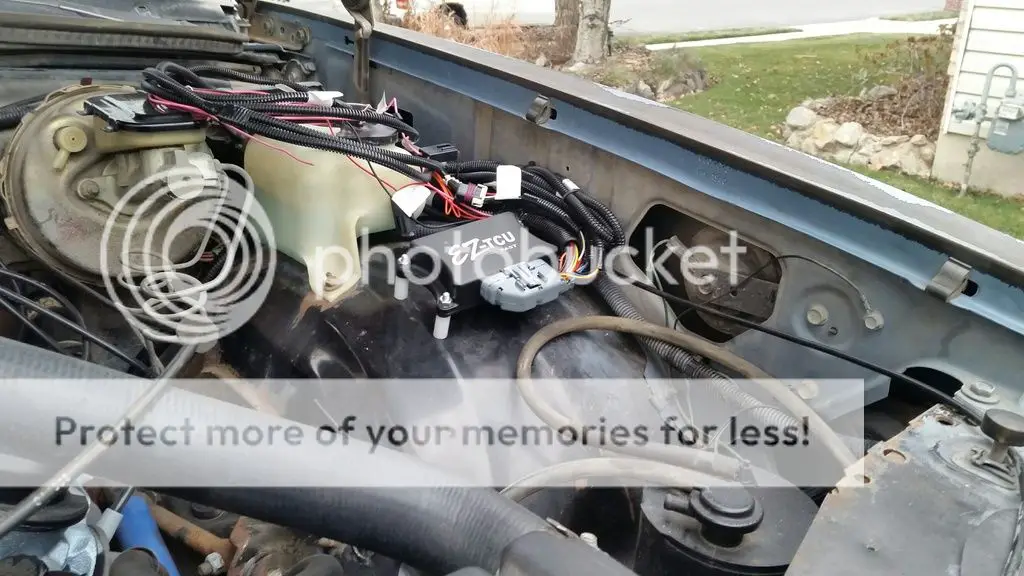
At the end of my last post above, I mentioned mounting the TCU on the inner fender. I found some nylon pieces which could function as standoff feet, and they let me mount the controller as I had envisioned:

TCUmount_zpslq7ohhft.jpg


Now I just need to finish wiring it up. The biggest hassle, of course, is engineering a throttle position sensor. I bought a generic GM-style sensor that has a steel arm hanging off it; now I just needed to mount it and connect it to the carb... somehow. After much thought, I came up with an idea. I rummaged through my garage and found a small angle bracket which I could cut down and mount to the throttle cable bracket I had on the engine. I made sure to place it so that the sensor arm is in the same approximate plane as my desired mounting point on the carb. I then made a rigid piece to connect the two and popped it on.

Now to check for unrestricted movement. Standing next to the open driver's door, I swung one leg in and worked the gas pedal while watching the mechanism underhood. It seemed to move just fine, but that's when it dawned on me: there was very little range of movement in the gas pedal. I swear there was more travel with the V6. To test my theory, I removed the cable from the bracket, extended it as far as it would go, and secured it in that position. Now when I looked at the gas pedal, it was significantly farther off the floor than it had been a moment ago. Hmm.

Back to the drawing board, I took the cable bracket back off the engine as well as the bracket that it was bolted to. These were two random brackets we found when putting everything together, and they clearly weren't designed for this application... you know, because Roadkill. Thankfully, it didn't take long to re-engineer them into something that would work properly. After some more cutting, grinding, and drilling, they were reinstalled and now it looks like they can work as intended:

CableBracket_zpsumnn9r9h.jpg


Now I need to build a new, longer piece to connect the sensor. After that, it's just a matter of routing the remaining wires. Oh, and I need to engineer the bracket to hold the shifter cable to the bell housing. But then I think it might be ready to move under its own power.
 
  • Like
Reactions: 1 users

454GrandPrix

Master Mechanic
Jul 27, 2016
429
818
93
Lehi, Utah
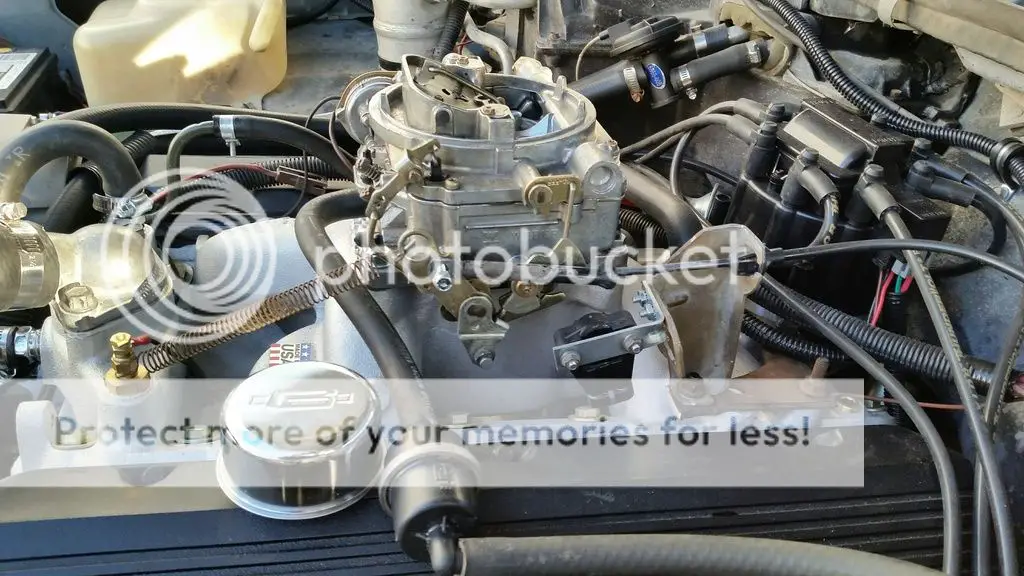
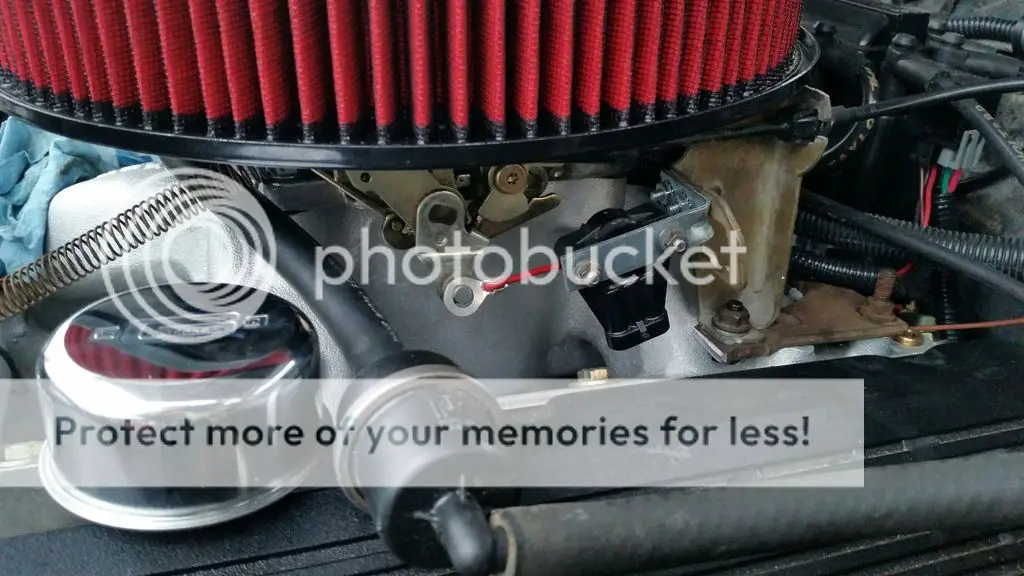
Here is my fancy, Roadkill-approved "arm" to connect the TPS to the carburetor:

TPSwire1_zpsticgujog.jpg


No, sorry--it isn't a zip tie. It's a random chunk of wire with two eyelet ends crimped on to it. This made it easy for me to create the exact length I needed, and it seems plenty sturdy for this application. I do plan to swing by Ace and find an appropriately-sized hitch pin clip to ensure the carb connection doesn't fall off; you can't see it in this photo, but I did install a clip at the sensor end for the same reason.
 
  • Like
  • Winner
Reactions: 3 users
Status
Not open for further replies.

GBodyForum is a participant in the Amazon Services LLC Associates Program, an affiliate advertising program designed to provide a means for sites to earn advertising fees by advertising and linking to amazon.com. Amazon, the Amazon logo, AmazonSupply, and the AmazonSupply logo are trademarks of Amazon.com, Inc. or its affiliates.

Please support GBodyForum Sponsors

Classic Truck Consoles Dixie Restoration Depot UMI Performance

Contact [email protected] for info on becoming a sponsor