BUILD THREAD my 1980 Grand Prix w/BBC 454 build thread

The 2025 Calendars are HERE. Two different editions, two different sizes, and a digital package!! Starting at $12.97US
Status
Not open for further replies.
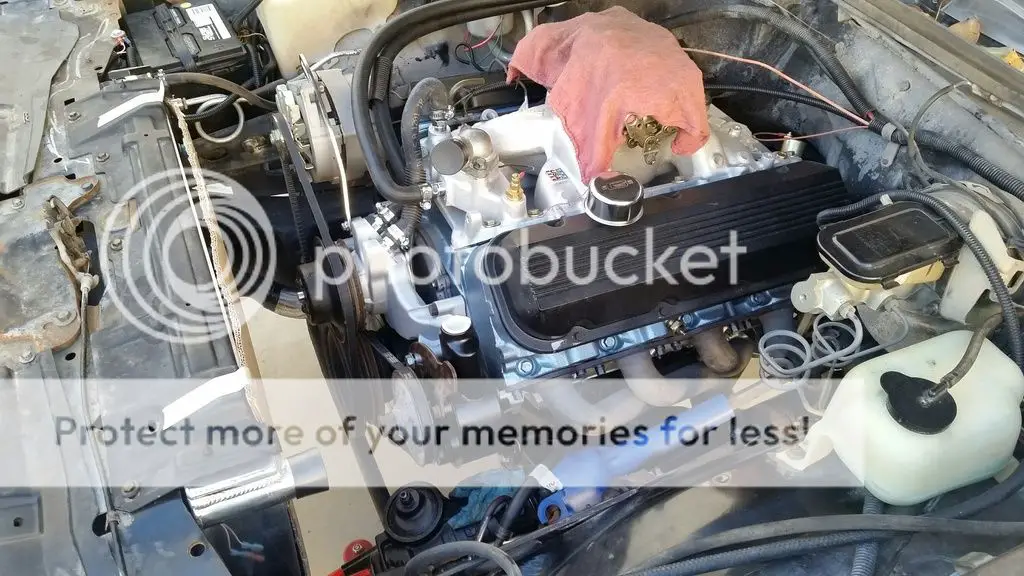
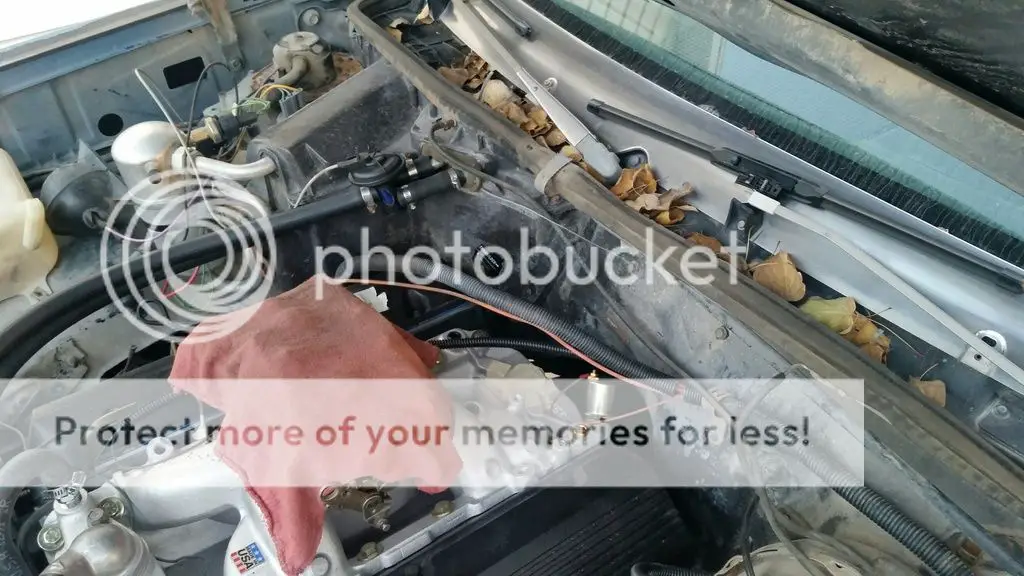
Yesterday was my day off work and the weather was beautiful, so I spent most of the day outside working on the car. I began modifying the wiring harness, installed the last two sensors, then routed and installed most of the harness. I finally found two radiator hoses which could be sufficiently modified to fit my application. I also found two heater hoses, each with a pre-formed bend to facilitate attaching them to the intake and the water pump. Then Mike showed up, taught me how to rebuild the Edelbrock carburetor he loaned me, and we installed that. He had a drop base air cleaner lying around, so he massaged it with a hammer to make it fit over the carb. It looks like a 3" air filter will fit under my closed hood (perhaps requiring me to remove a few spots of the support braces), which amazed us both.

It's starting to look like an actual engine:
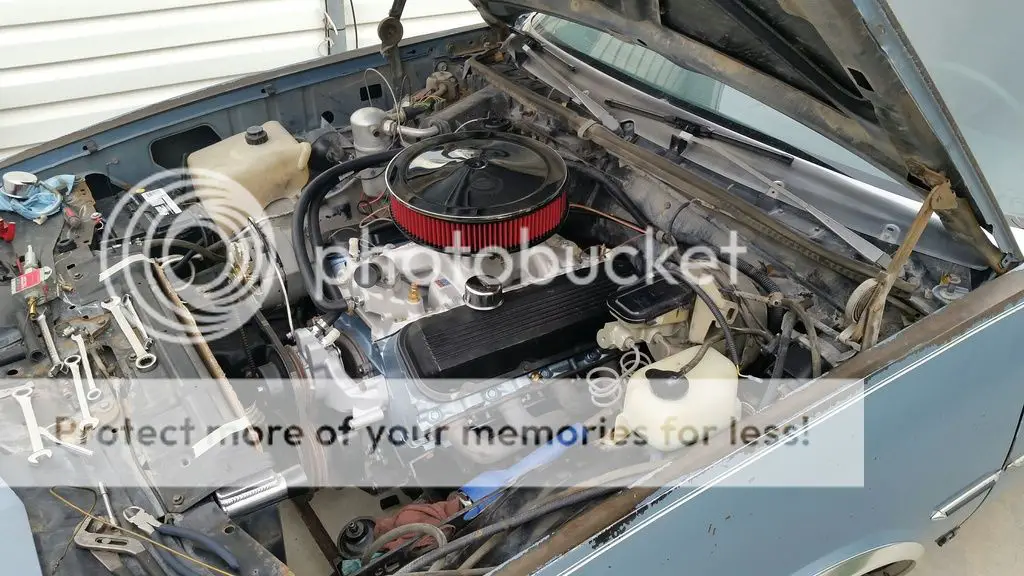
EngineClose_zpshattajhl.jpg


The heater hoses were... interesting. As some of you know, the big block Chevy engine has a small piece of heater hose (the water pump bypass hose, I think it is called) going from the intake manifold coolant crossover down to the water pump. On my AirGap manifold and aftermarket water pump, these two hose barbs don't come anywhere close to aiming at each other. I made a couple parts store runs, trying to find some goofy pre-bent hose that might connect the two, but no luck. So we decided to get creative. My intake coolant crossover has two outlet barbs on it; who says the one pointing forward has to connect to the water pump? I decided to instead route that intake hose barb to the heater core. The barb that points up and usually routes to the heater core would now be used to connect to my water pump... and I found a pre-bent hose that actually connects the two.

I admit, the hose area looks a bit... busy. You know, because Roadkill.
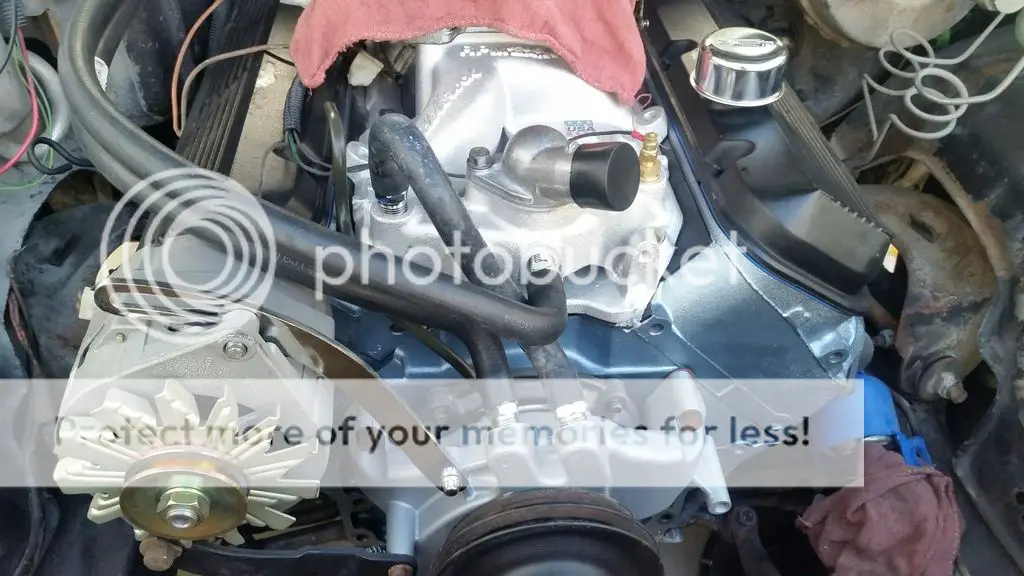
EngineHoses_zpsuybuse4g.jpg


Soon.
 
Lucky for me, Utah's Indian summer continues. The weather was perfect for a day of outdoor wrenching, so that's exactly what I did yesterday. As the project nears completion, I am constantly amazed by how long seemingly-simple processes can take. In other words, I didn't get nearly as much accomplished as I had hoped. Even still, I have managed to cross some things off my cardboard list.

ListUpdate_zpsj4vcrdqf.jpg


My initial goal was to get the power steering pump installed. Once it was in place enough to judge a proper belt length, I made parts run #1 to O'Reilly for a couple belts (because you always buy two or three sizes to ensure to have one that fits properly) and also to Ace Hardware for a couple short bolts to finally attach the transmission mount to the crossmember. Back at the car, one of the belts did work. This meant I could tackle the very last PS issue: hoses. The return hose just clamps to a barb on the pump, so I just reinstalled the stock V6 hose. The pressure hose looked like it could still work, until I tried to install it on the pump... only to learn my pump wants the flare style fitting rather than the o-ring style fitting of the hose. Hmm.

Back to O'Reilly I went for parts run #2. I returned my unneeded belt, then inquired about a PS hose that would fit the pump. They didn't have anything on hand that would work. However, my parts guy gave me an idea: I'm gonna see if I can just snip off my current fitting, flare the tube, and install it that way. I don't have a flare tool of my own, but he does and he offered to help me flare the tube. Now I was wishing I had brought my hose with me. Oh, well, I can tackle that another day.

But, hey, the front of the engine is almost entirely done:

BeltsOn_zpseo5q6drq.jpg


Now it is time to focus on the transmission and the underside of the car. Up on jackstands it went. I used the floorjack and a chunk of wood to gently lift the trans off the crossmember, allowing me to loosen and slip the crossmember side to side to get the holes to line up with the trans mount. This is when I remembered one of my crossmember bolts was missing and I need to buy one. Anyway, as I went to install my shiny new trans mount bolts, I now decided I wanted ones that were 1/4" longer than the ones I had just purchased. So it was back to Ace Hardware for parts run #3: longer trans mount bolts plus the last bolt/nut combo for the trans crossmember.

Back at home, the sun was setting. I had to grab a flashlight to install my latest purchase. At last, the transmission was lowered and its mount was finally bolted to the crossmember, and the crossmember is now fully torqued in place by all four bolts. At least I could say I accomplished something today.

As I left for work this morning, I took the two photos above plus the one below. Next up will be the starter and oil filter, fabbing up the trans cooler lines, installing a trans dipstick tube, a floor shifter, and the TCI EZ-TCU. Oh, and measuring for a driveshaft.

JackStands_zpsxs5yheh5.jpg


So much to do....
 
I think this adapter will allow you to connect the metric bubble thread hose to the older style pump that takes an SAE inverted flare. The picture doesn't look right to me but the first review leads me to believe these are the fittings you need. Worst case, call Summit to confirm but I know the conversion fittings you need are out there.
https://m.summitracing.com/parts/cl...-performance&gclid=CIGv2KSVodACFQimaQodEFQL4w
 
As I look around for conversion fittings, it seems everybody does the same thing: they install a newer PS pump into an older car. This means they can use fittings like the ones in your link. Lucky guy that I am, I did the opposite: I installed an older PS pump into a newer car. This means I need a fitting to do the opposite of the ones you linked... and so far I cannot find one that does this. I'm still searching, though.


In other news, I came home from work this afternoon with one hour of free time before I'd need to leave for an evening activity. I decided to use this time to remove what was left of the original transmission dipstick from the 4L80-E and install my shiny new locking dipstick in its place. The old stick's rubber bushing had hardened considerably over the years, as you might expect, and that was a source of much frustration. The new stick's new rubber bushing was very soft and pliable by comparison, making its installation a much more pleasant experience.

You have to look close, but that's one more thing crossed off the list:
TransDipstick_zpsd8ulw4d6.jpg


🙂
 
  • Like
  • Creative
Reactions: Blake B and drogg1
I did the opposite: I installed an older PS pump into a newer car.
I have an old BBC power steering pump on my engine and I had a local hydraulic hose place make me a new high pressure hose with a standard end for the power steering pump.
 
"You have to look close, but that's one morething crossed off the list:"

Oil pressure sender?
 
Did you consider getting the pressure regulator fitting from the pump that matches your hoses and screw it into the back of the power steering pump that is on the car?
 
Oil pressure sender?

Yeah, that's in the picture also.... but I was referring to the transmission dipstick.

Did you consider getting the pressure regulator fitting from the pump that matches your hoses and screw it into the back of the power steering pump that is on the car?

Not at first. However, I did come up with that idea this morning while brainstorming with Mike. I may look into that tomorrow afternoon. (My only concern is destroying my new pump trying to remove its fitting.)
 
  • Like
Reactions: Texas82GP
More food for thought on your power steering pressure hose.....
On my brother's LS swap in his 78 Z28 we retained the factory close ratio steering box which requires an SAE inverted flare fitting. However the late model (LS3) power steering pump required a metric bubble-flare/o-ring fitting. What we did was buy a new hose for a stock 78 Z28. We then removed the metal pipe and fitting on the pump end of the hose. Edelman has a line of hose repair ends. We bought one with the correct metric fitting and mocked up the hose on the car. Once happy with it, we took it to a local shop that makes hydraulic hoses and had them crimp the new end on for us. It turned out great. It looks factory.
 
  • Like
Reactions: Rktpwrd
It will not destroy the pump. The pressure regulator screws in the back of the pump and has o-rings that it seals with. I would look for a -686 Monte SS or GN or WS6 or Z28 steering box. Even the ones on S10s... with the aluminum cap and four bolts.
 
  • Like
Reactions: 454GrandPrix
Status
Not open for further replies.
The 2025 Calendars are HERE. Two different editions, two different sizes, and a digital package!! Starting at $12.97US

GBodyForum is a participant in the Amazon Services LLC Associates Program, an affiliate advertising program designed to provide a means for sites to earn advertising fees by advertising and linking to amazon.com. Amazon, the Amazon logo, AmazonSupply, and the AmazonSupply logo are trademarks of Amazon.com, Inc. or its affiliates.

Please support GBodyForum Sponsors

Classic Truck Consoles Dixie Restoration Depot UMI Performance

Contact [email protected] for info on becoming a sponsor