Olds ticket to 9s... LS swap adventure.

Status
Not open for further replies.
'It's not a full day until I'm bleeding' used to be my motto lol.

Nice burnt finger shot though!!! 🙂 I have two fingeers that are numb on the outside (reattached about 3 decades ago), I smell them burning before I feel it, and if the burn is bad enough it takes about a minute for me to start feeling burning sensation closer to the bone (and that really sucks). I've developed an acute sense for the smell of burning flesh lol.


I feel your pain with the coil pack clearance issue. I made that mistake once, and my solution is the pedastal mount on the frame rail - no more hanging T6 turbos on the manifold bolts for me. You can swap the valve covers side to side and deal with PCV/vent hole, but you'll need an extenion on the filler to clear the brake booster, hydroboost or whatever you have to get oil in it. If you roll with that setup, then you've just made putting oil in the motor mission impossible with the added benefit of melting plug wires/boots.

I'm being somewhat of a wise *ss, but I'm allowed - it's my name 😉. Seriously though, I'd strongly encourage you to revamp that flange to provide for an extra inch of clearance to the fill/pcv and coil.
The fill spout isn't an issue in that location, or at least not the one I am worried about, there is room for a blanket and that will insulate the filler just fine. PCV? Lol, thats plugged, no issue. The coil however is my concern, and I can tilt the flange a couple of degrees, add some space and mount a heat shield and some insulation. I think this will work. I already have insulators for the plug wires, that should help.

I've seen bigger turbos hung on log manifolds, I think itll be alright. Especially since I have ARP bolts. 😉
 
If it were a cast manifold I would say send it, on a fabricated one I'd brace it.
 
  • Like
Reactions: 64nailhead
If it were a cast manifold I would say send it, on a fabricated one I'd brace it.
That's what I'm talkin' 'bout. The bolts aren't the issue, the heat and weight are.

Either way I'm sure it will run. I was just sayin'.

Edit - forgot to ask - what are you doing for crankcase ventilation?
 
  • Like
Reactions: motorheadmike
If it were a cast manifold I would say send it, on a fabricated one I'd brace it.
That's what I'm talkin' 'bout. The bolts aren't the issue, the heat and weight are.

Either way I'm sure it will run. I was just sayin'.

Edit - forgot to ask - what are you doing for crankcase ventilation?
Its Sch40 steel not Sch10 stainless, plus I didn't build it. I could hang the motor from the log and not worry about it.
 
Had a not bad productive day today.

Got the roll cage holes all caulked up, chute bar is undercoated, as is the rear down bars and the trunk floor where the bars came through. All the cage now has 2 coats of primer and is ready for some paint.

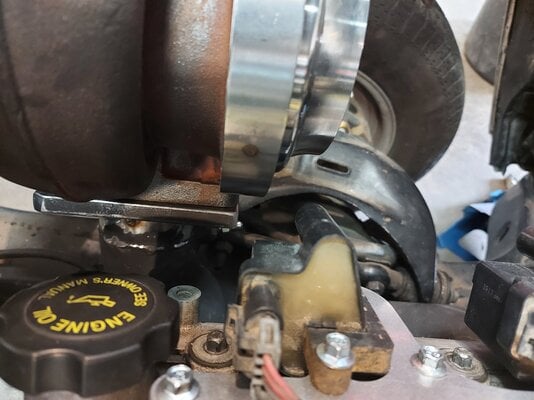
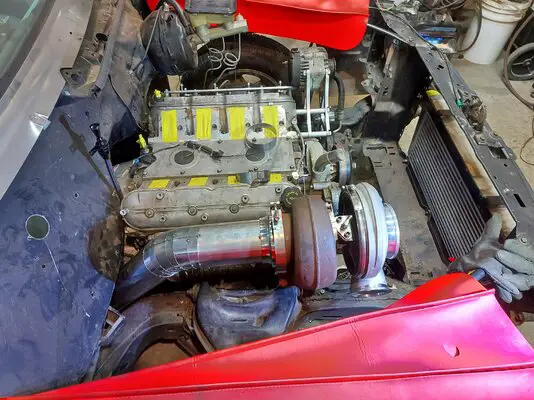
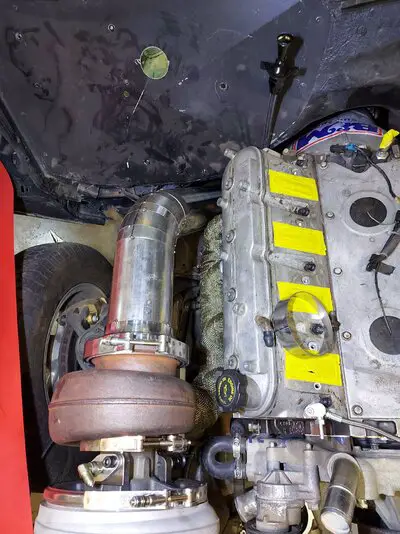
Cut the turbo flange off the log and put some tilt in it to buy some room from the coil.
It's hard to tell but I bought myself about 1/4 inch, seems small but that will make a heat shield work better.
20210328_170553.jpg

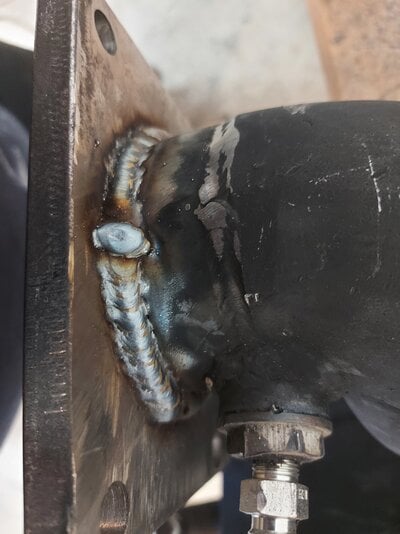
Got my mig game on for the 'Gram.
20210328_172144.jpg

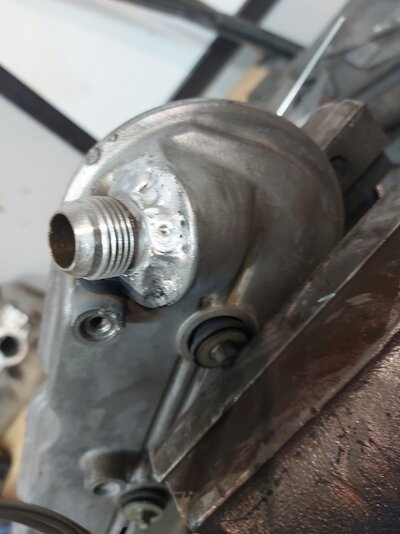
Cleaned up the B set of valve tappet covers with the oven cleaner method. They came out really nice, so I decided to weld on a -10 AN fitting for my breather setup.

Dirty porous aluminum is an unfriendly mistress...

20210328_204723.jpg

Tomorrow is another day....
 
2 Day update.

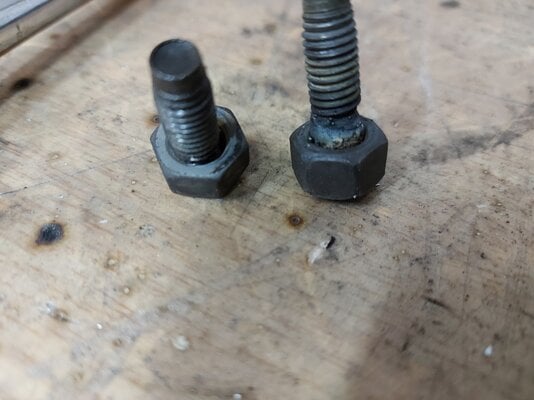
I have been chipping away at the stuck bolts in the heads. Turns out the best method is weld nut on, leave for an hour to cool and try. It took about 16 tries but the last 2 are out.
20210329_124558.jpg

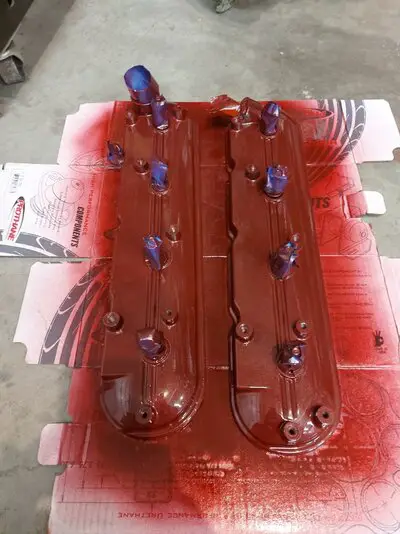
While that was going on I did the Oven cleaner trick on my "good" valve covers (I forgot the before and after but they were BAD, caked on dirt and grease). I decided to pretty them up on the advice of my style consultants. Unfortunately for them I used a color that I need to get rid of from my paint can collection. Metallic red is still sexy though.
20210329_125249.jpg

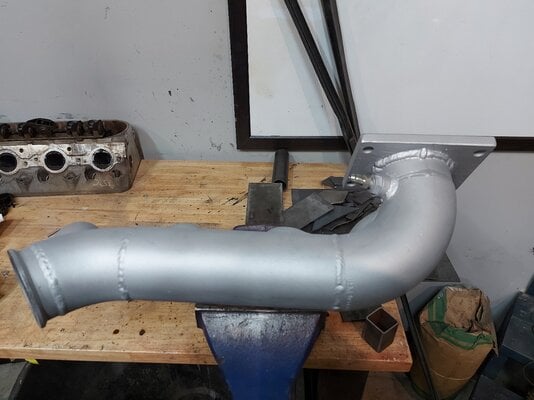
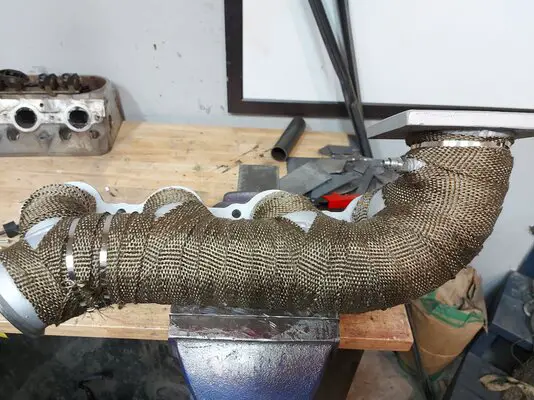
I painted up the log manifold at the same time and got it re-wrapped up.
20210330_103822.jpg20210330_111439.jpg

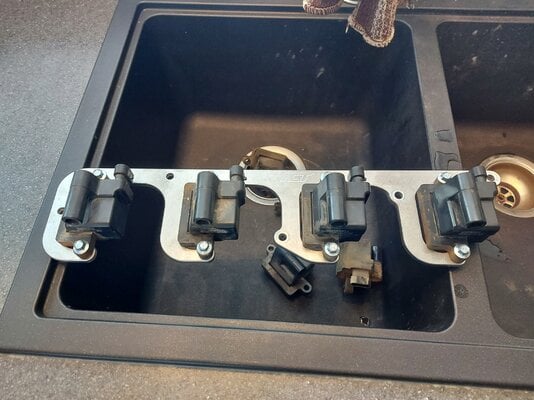
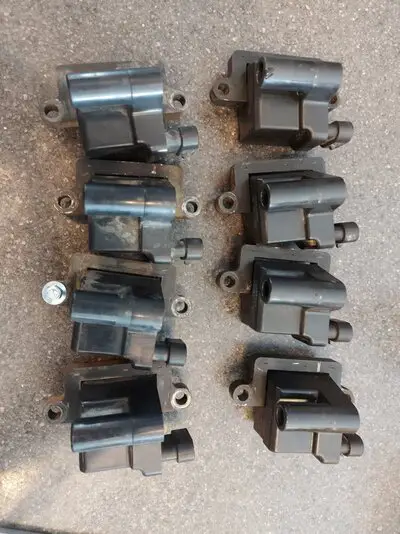
Since the oven cleaner trick work so well on the valve covers, I tried it on the coils.
Before, hand cleaned, and after. Oven cleaner.
20210329_133819.jpg20210330_124615.jpg

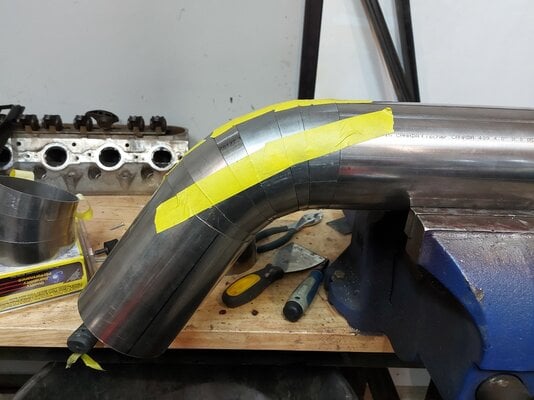
I decided to start on the exhaust mock up, put some of the pie cuts to use, and see how the 4" was going to fit in the space provided. It is tacked together for mock up purposes, might start on that tonight and get some of it welded out.
20210330_131924.jpg20210330_135645.jpg20210330_135801.jpg

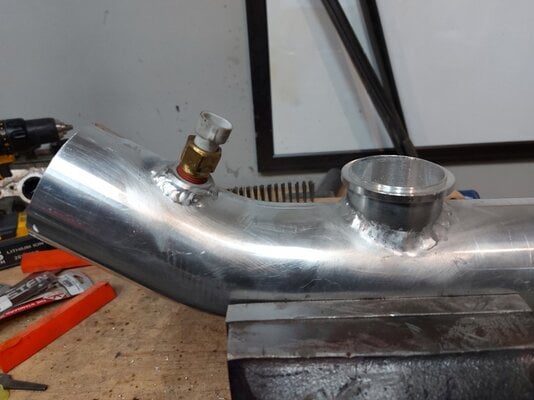
Also started mocking up the intake plumbing, Turns out I ordered the wrong v-band for the compressor outlet, so thats a bummer. But I got the IAT bung welded into the inlet pipe for the intake. So that was a win. Everything else looks like it will work with the new turbo also. So not too bad.
20210330_171039.jpg
 
Mr. Piecut rides again 😉

Nice work! Looks great. Looks like more clearance than before between the head and turbski (S4big)
 
Mr. Piecut rides again 😉

Nice work! Looks great. Looks like more clearance than before between the head and turbski (S4big)
Lol, Mr. Piecut...

Thanks man, I have a plan for a heat shield there to help protect the coil also. I think it will be ok.
 
Status
Not open for further replies.

GBodyForum is a participant in the Amazon Services LLC Associates Program, an affiliate advertising program designed to provide a means for sites to earn advertising fees by advertising and linking to amazon.com. Amazon, the Amazon logo, AmazonSupply, and the AmazonSupply logo are trademarks of Amazon.com, Inc. or its affiliates.

Please support GBodyForum Sponsors

Classic Truck Consoles Dixie Restoration Depot UMI Performance

Contact [email protected] for info on becoming a sponsor