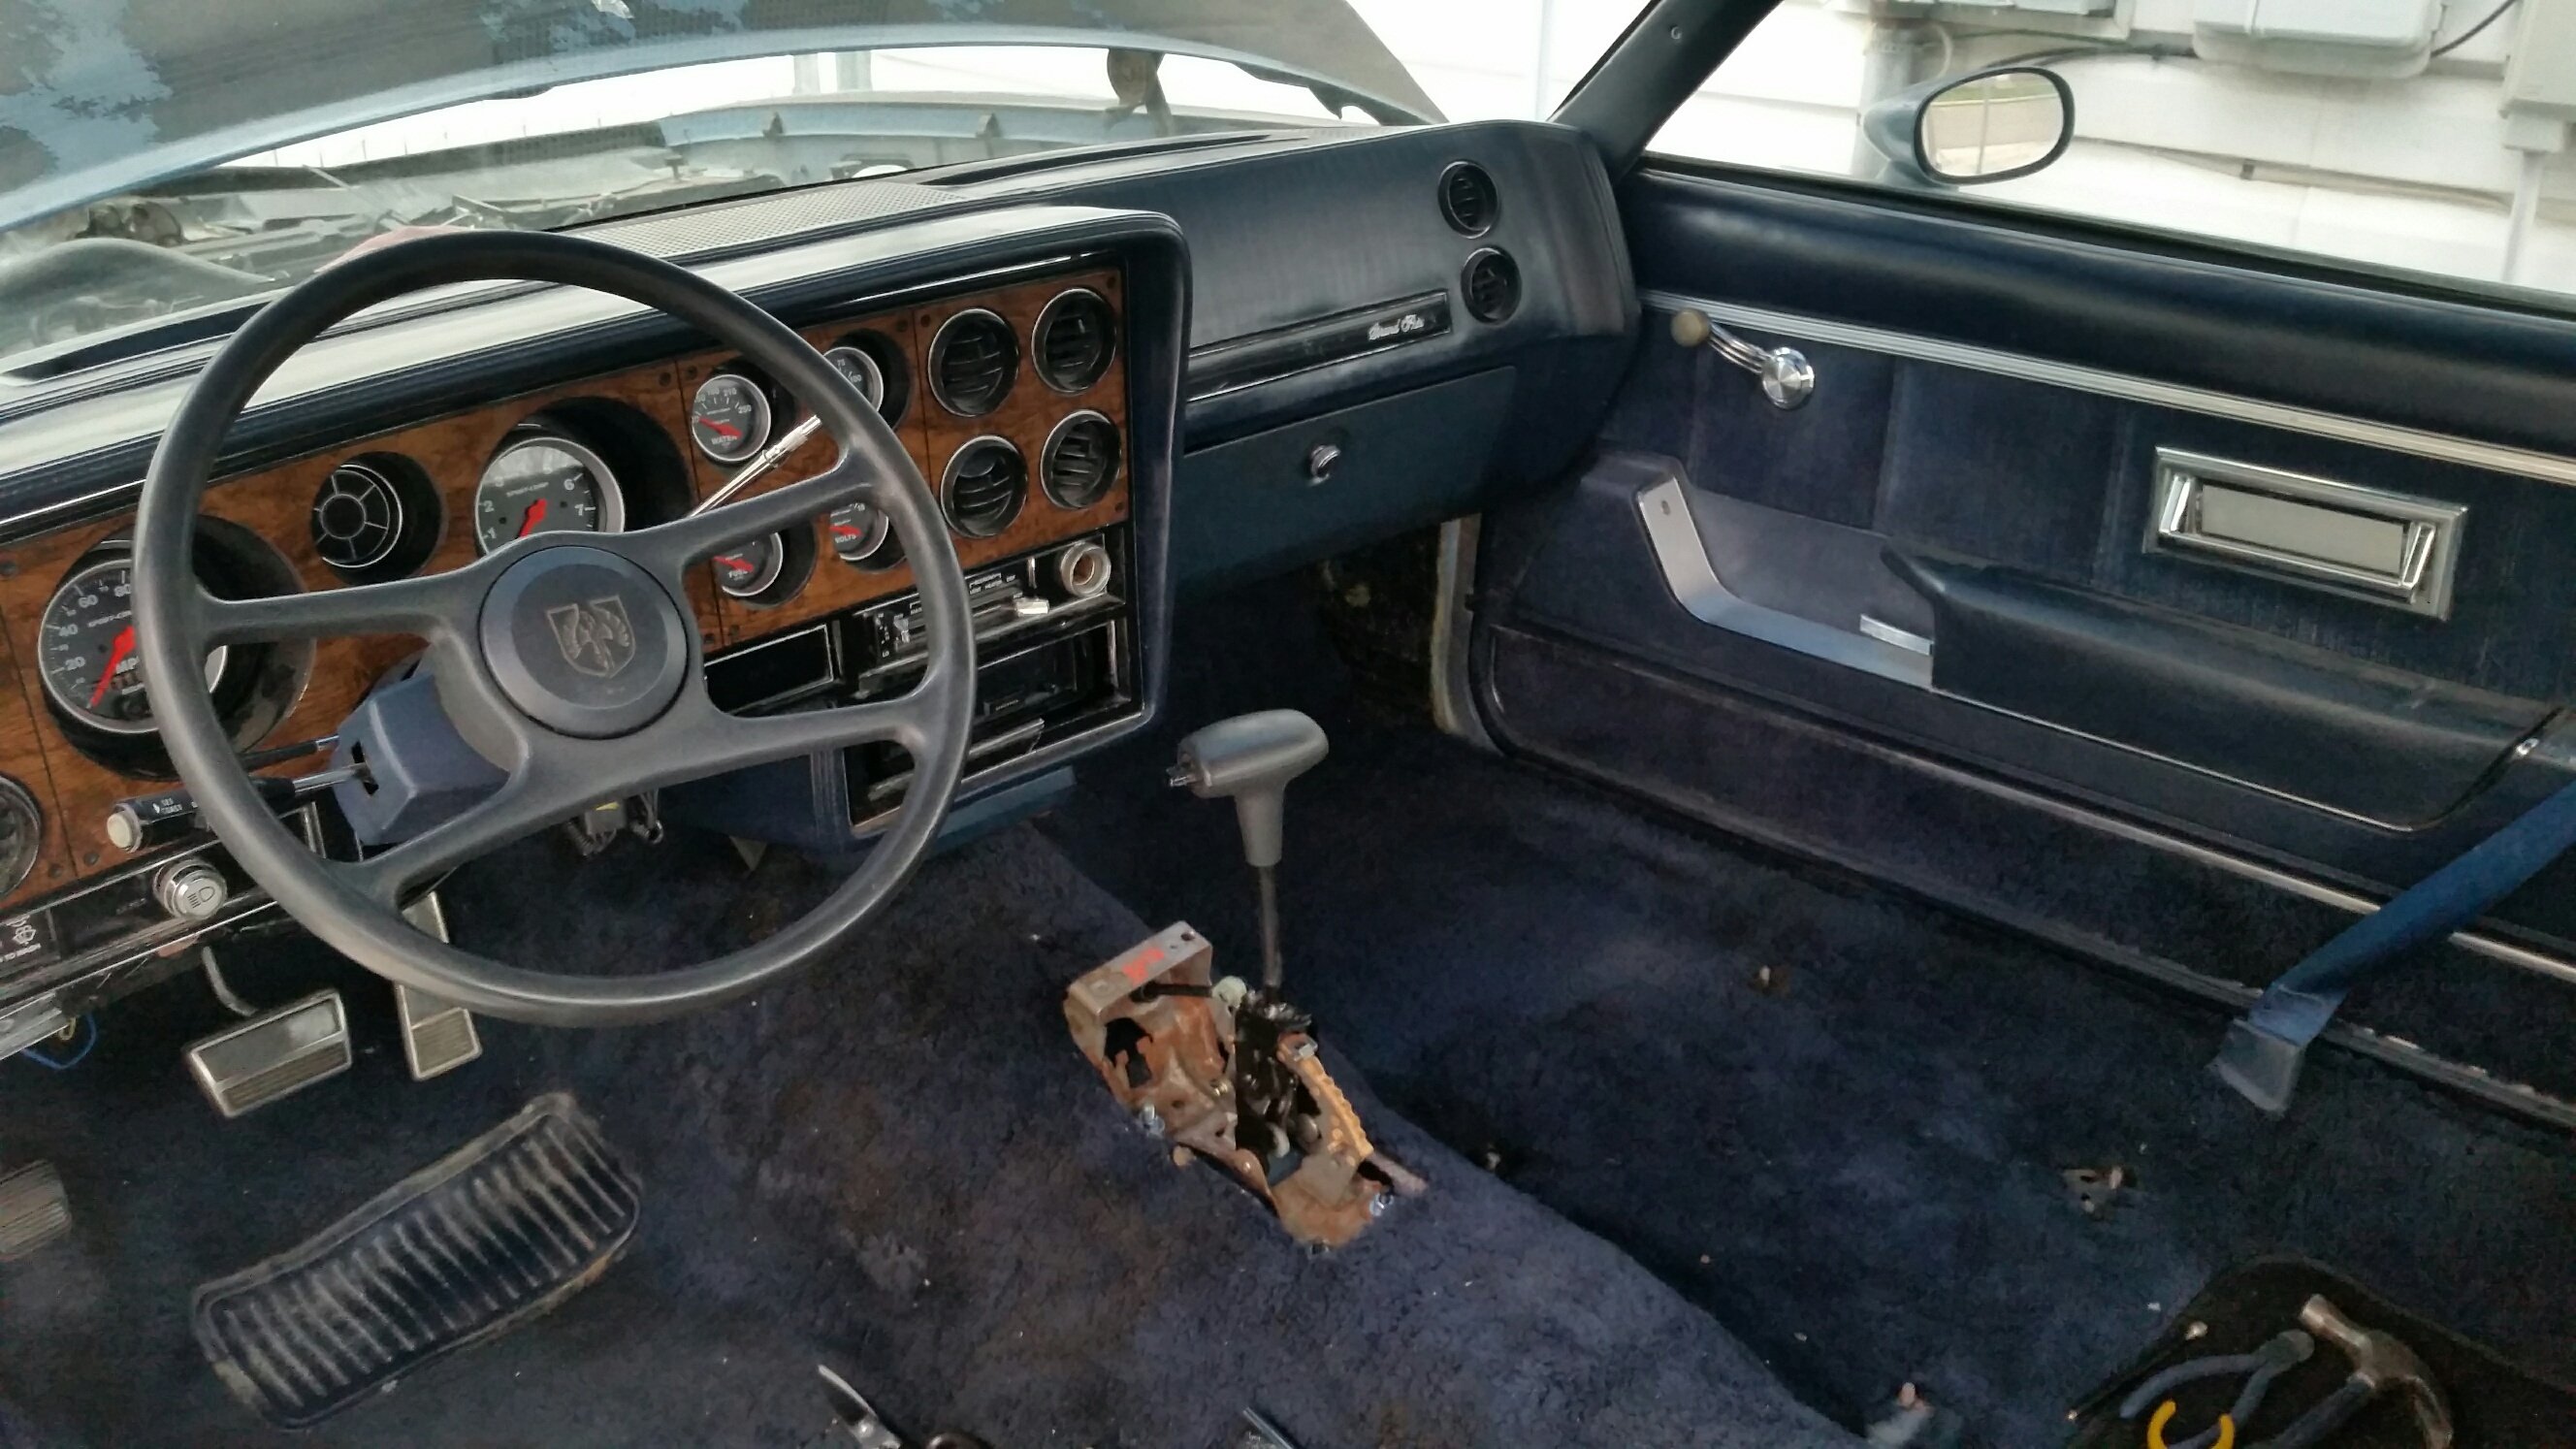
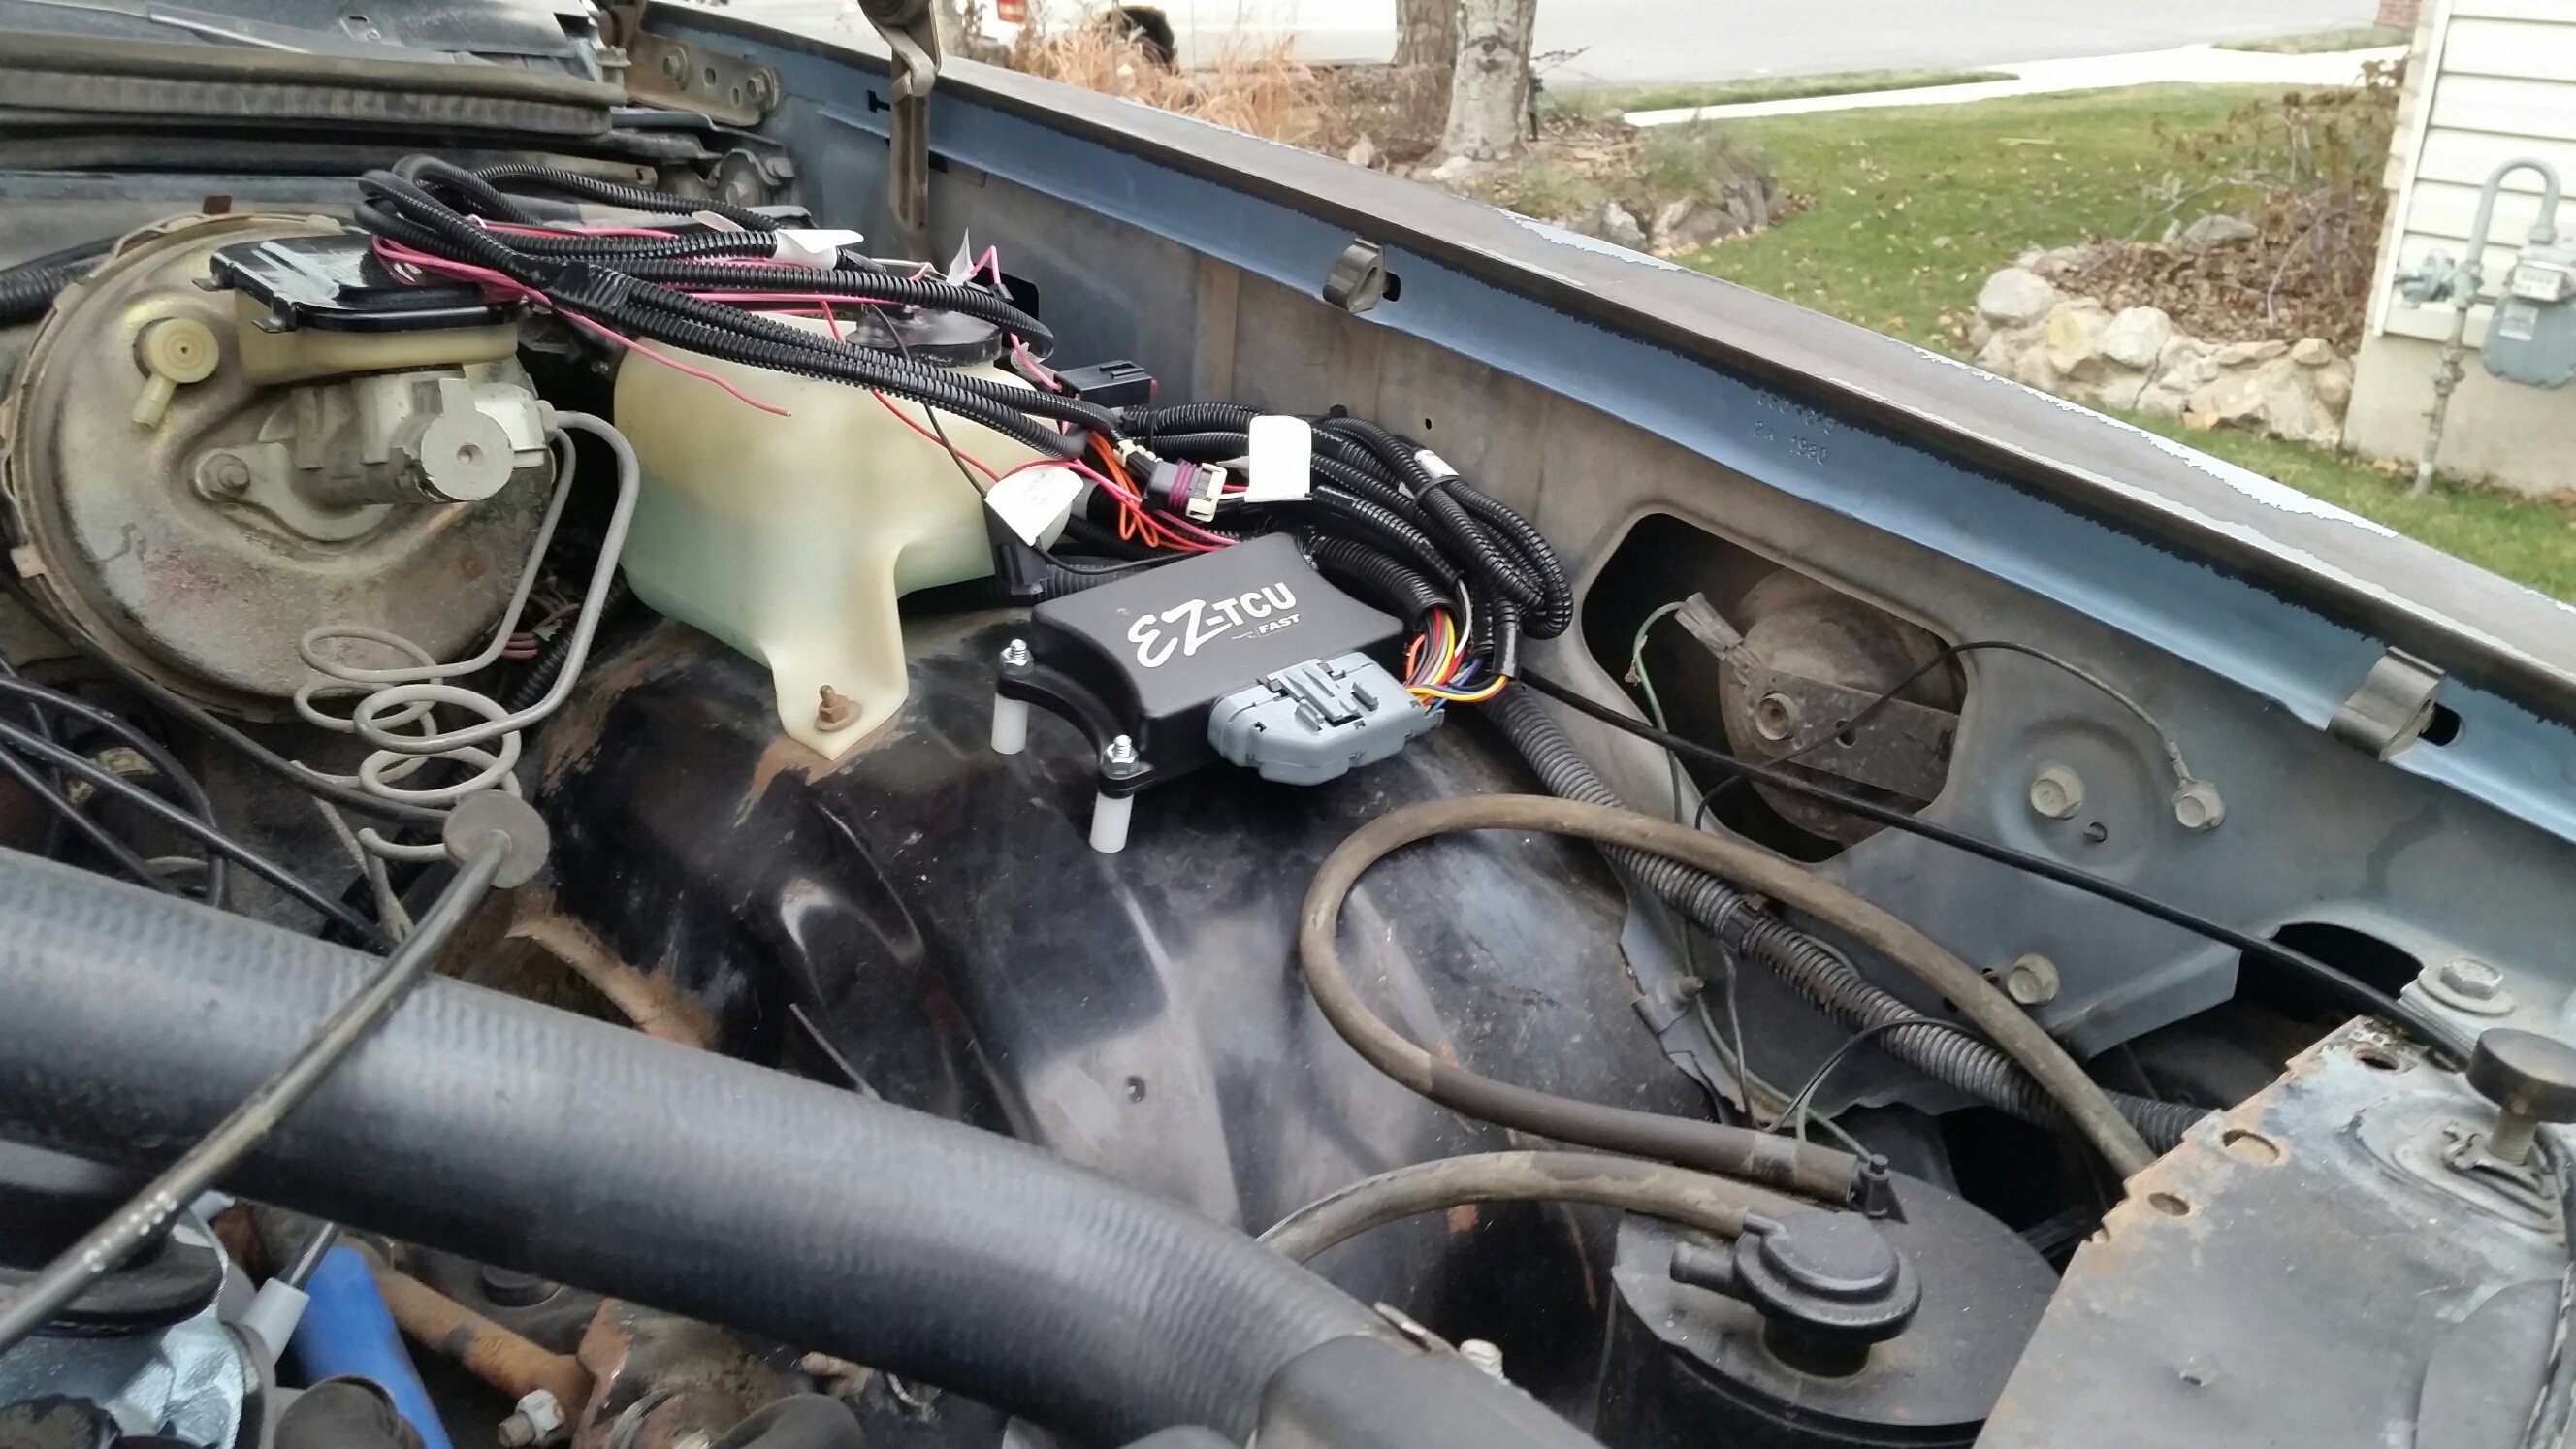
(Prologue: It seems that every time I mention my 4L80E transmission in this forum, somebody asks me for information about how I installed it. As I search around, I can find only one or two old threads with a few scraps of info... but it seems there isn't one all-inclusive thread to discuss the entire process. I'm hoping to change that now. Please remember that there is always more than one way to skin a cat. I tend to go for the low-buck Roadkill method whenever I modify my car, though I am not above spending a bit of money for something that is well engineered or that can save me significant amounts of time and/or headache. In other words, if you want to do something differently than I explain below, well, go right ahead--after all, it's your car. With that said, here we go.)
So you say you want to install a 4L80E into your G-body. Great! I put one in my 1980 Grand Prix, and I'm sure you can install one in your G-body as well. Let me guide you through the process--detailing the hijinks and heartaches, my failures and successes--so that you can pull this off with as little cursing as possible. There are a number of things you need to consider, and I'll attempt to address them all in a more-or-less systematic order.
Consideration #1: vehicle body prep
Good news: nothing outrageous is required. In fact, I did not hammer/dent/reshape any portion of my transmission tunnel or my firewall. I just dropped my 454/4L80E into the car and it fit. However, I later learned the transmission bell housing's left 'ear' contacts the trans tunnel--I should have cut that off. Oops. In my case, I've just been letting it "self-clearance" as I drive... which works, kinda, but it does transfer extra vibration to the interior. Cut the ear(s) off in advance and you should be golden.
Consideration #2: transmission prep
As I said above, my 4L80E is bolted to a 454. Both the transmission and the engine came out of a 1999 Chevy Express 3500. I already mentioned cutting off the ear(s) of the bell housing. Other than that, the only prep I performed on the transmission was a trans pan R&R to install a new internal filter, then I filled it with new fluid. I reused the stock converter.
Consideration #3: mounting it in the car
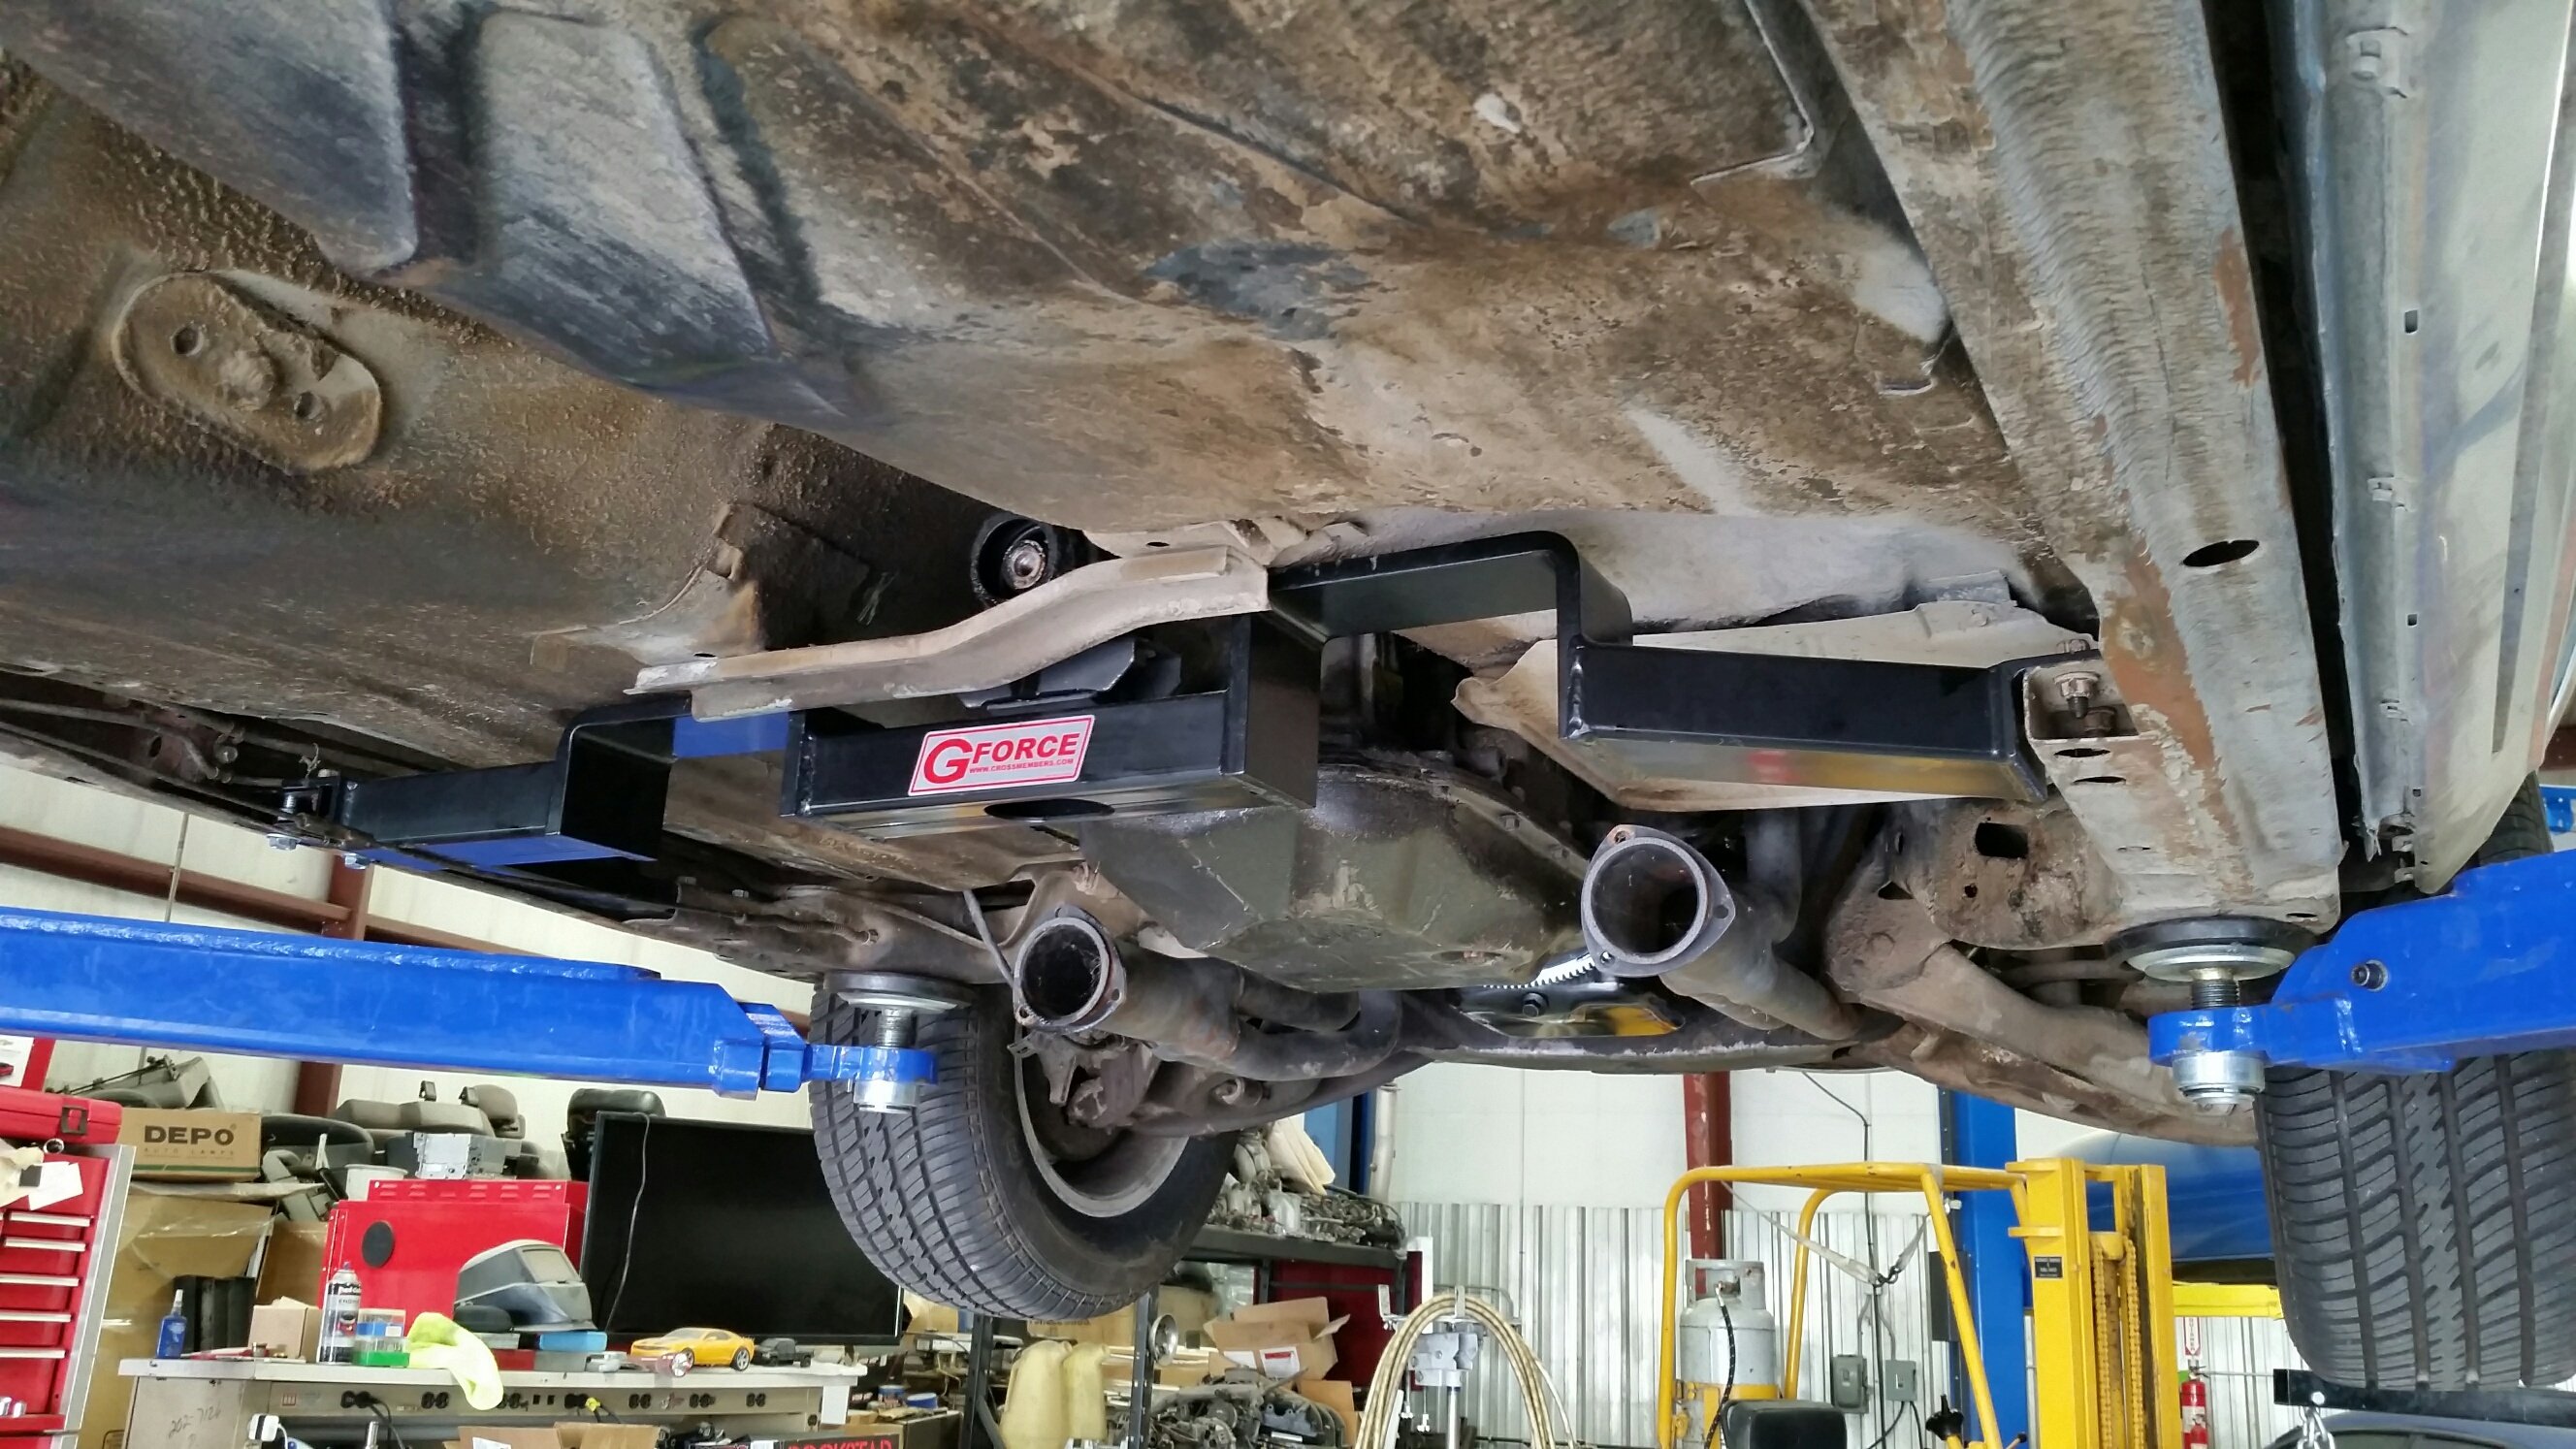
I used stock Monte Carlo SS frame mounts on the engine cross member + my donor van's stock engine clamshell brackets in order to mount the engine. For the rear transmission mount, I simply ordered the G-Force 4L80E crossmember. It bolted right into place, and the transmission bolted right to it. Because my G-body pre-dates the 4spd transmissions, I did need to also install the driver's side frame extension piece that they offer... but even that was a simple matter of drilling a couple holes and bolting it into position. You can see the extension here:
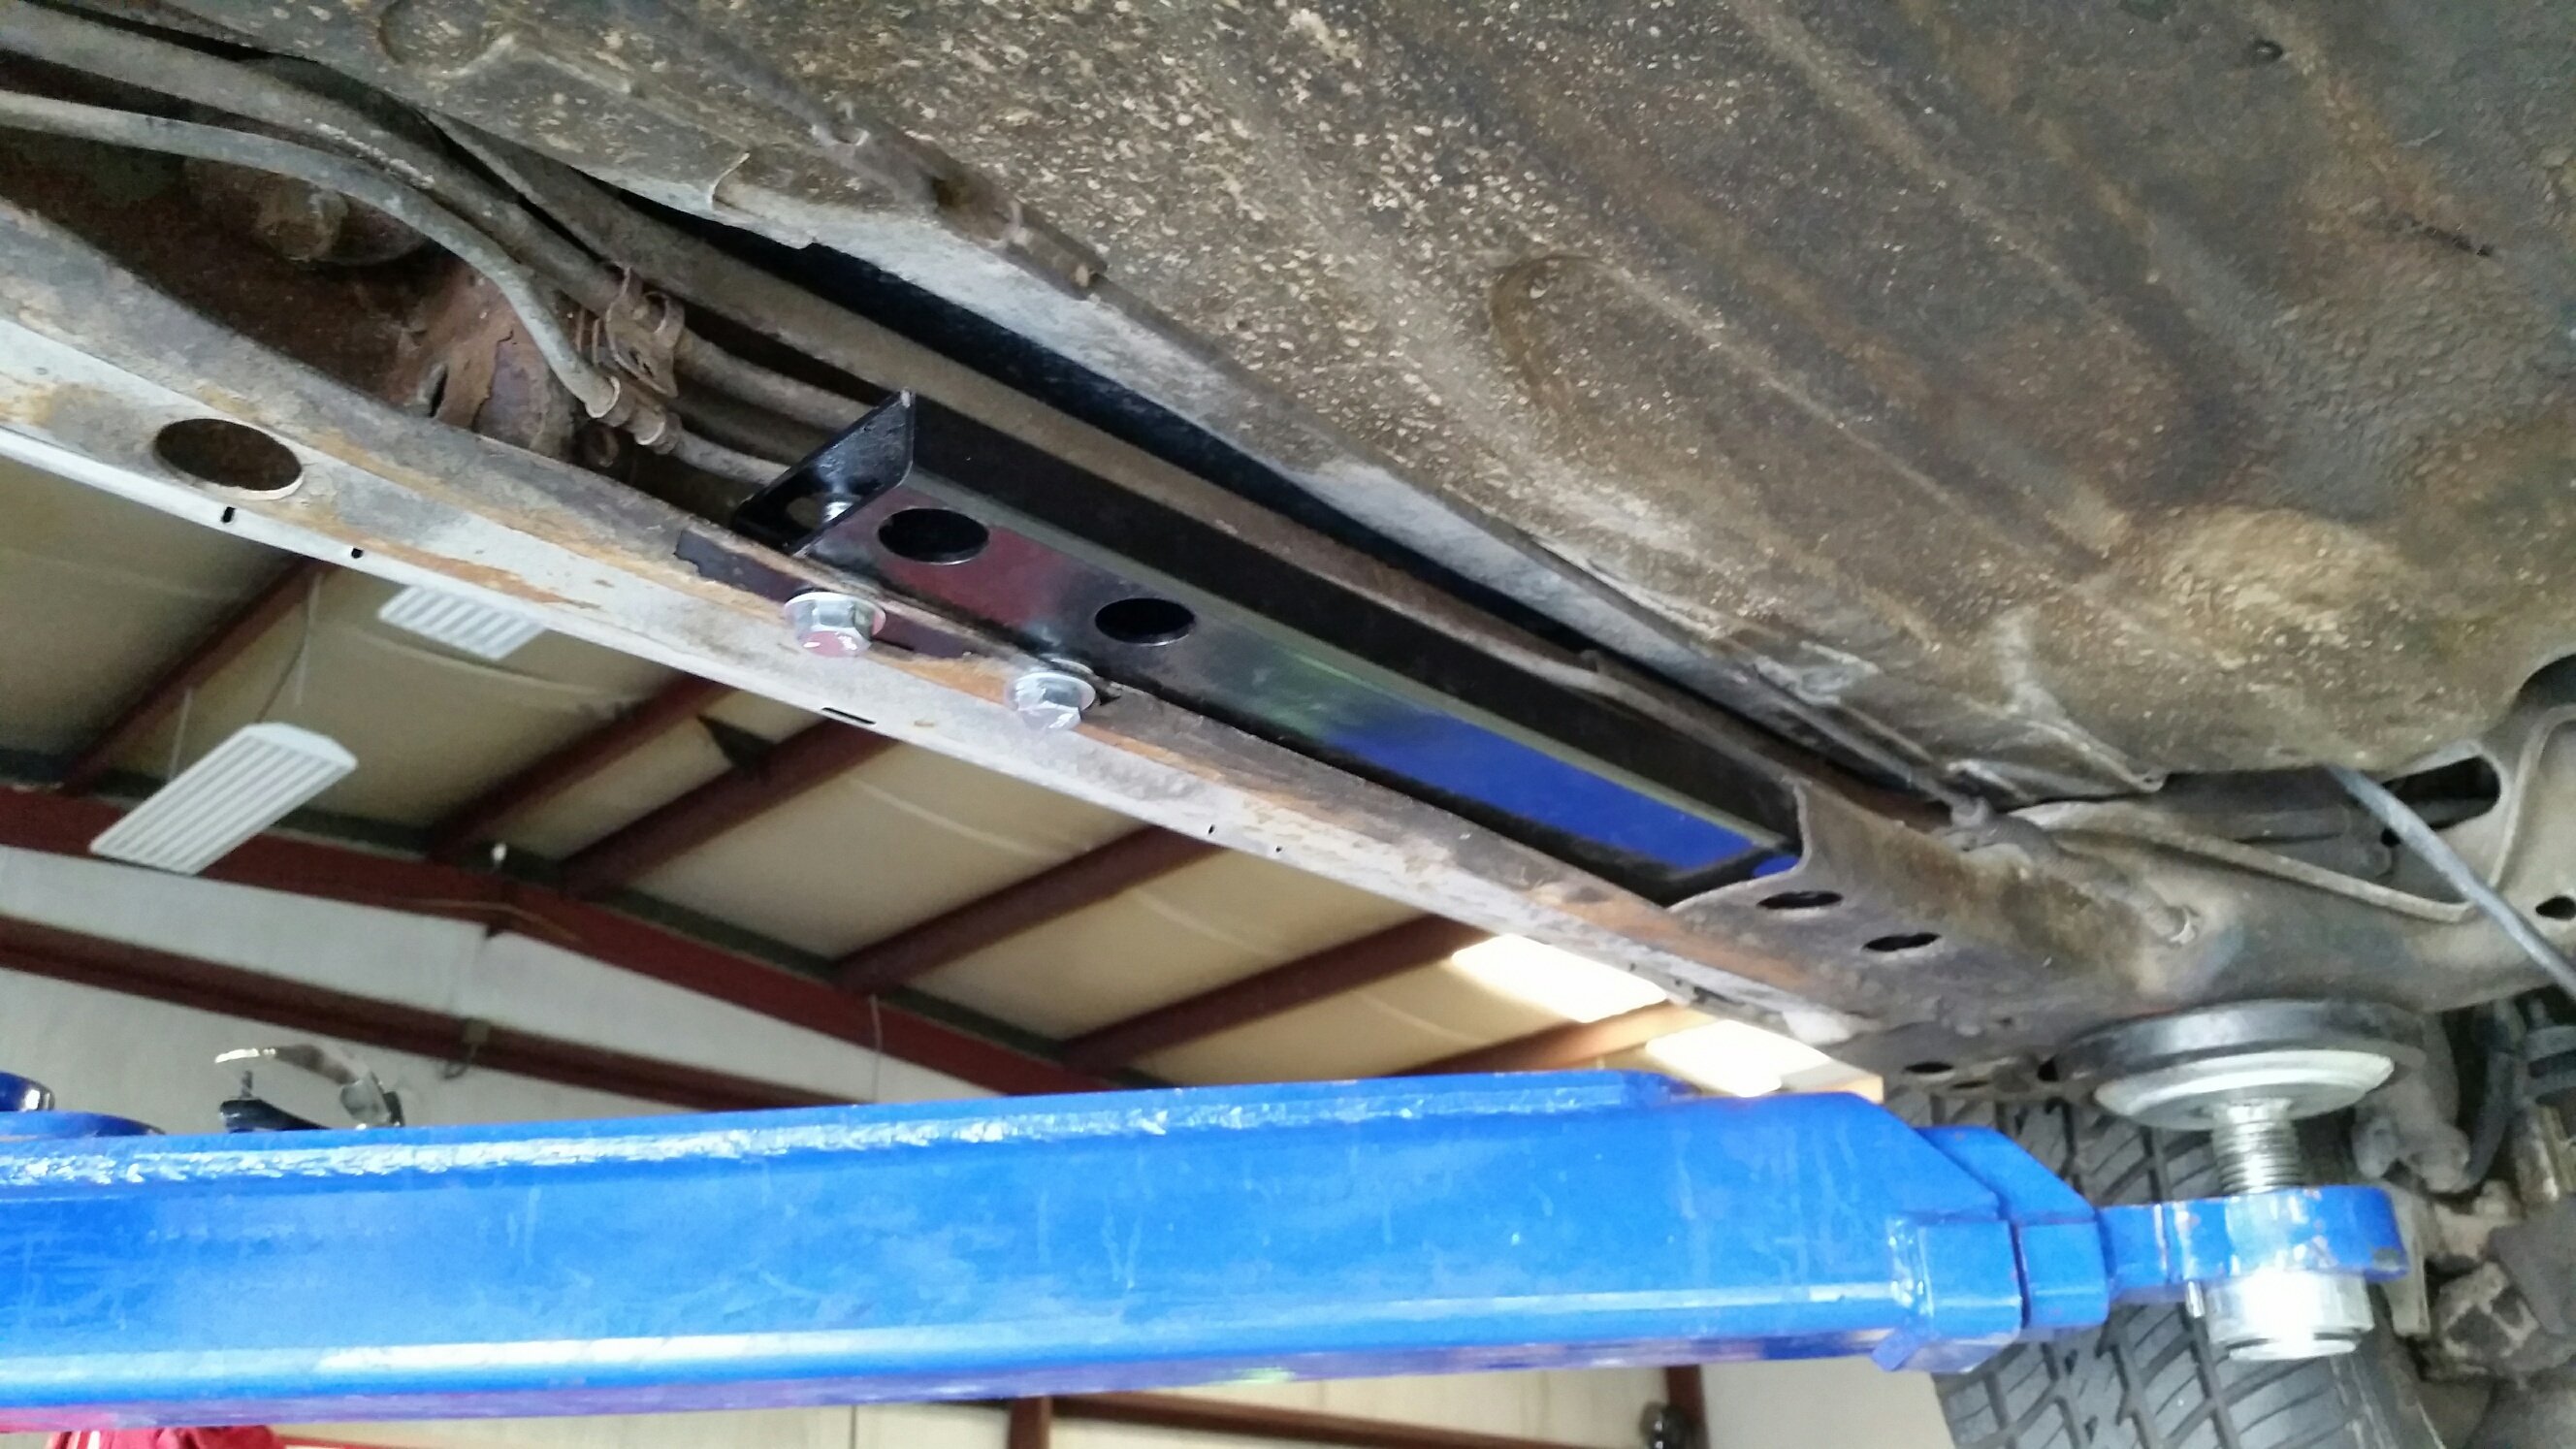
The G-Force piece is very well engineered, and it makes installing a 4L80E very simple (and it also perfectly cleared my dual 3" exhaust system). I am not a paid spokesman, but I endorse it completely.
Consideration #4: connecting it to your axle
This is as straightforward as it gets. I took some measurements, then went to a local driveline specialist and had him fab me a driveshaft. Easy.
Right behind the G-Force crossmember is the stock "driveshaft loop" bracket. When I installed my driveshaft, its u-joint was directly above that little bracket, and it would contact the bracket when the shaft spun. I quickly removed that bracket from the car. This didn't bother me, as I'm sure I'll install an NHRA-approved driveshaft loop at some point in the future.
Consideration #5: fluid cooling
There was no way I was going to try to adapt my stock V6 cooler lines to the 4L80E. Instead, I bought some lengths of steel brake line plus a handheld tubing bender, then I bent the lines into shapes that would work. At each end, I flared the tube and used rubber hose to connect it. At the transmission end, I needed some fittings to connect these rubber hoses to the housing. Because I had not modified my trans tunnel, I needed fittings with 90^ bends in them so I'd have room to attach the hoses. After looking at every part store in town, I found an old NAPA that came to my rescue: they had a dusty old cabinet with brass fittings--I literally blew the dust off the fittings as I took them out to inspect them. Here they are next to one of the transmission housing fittings:
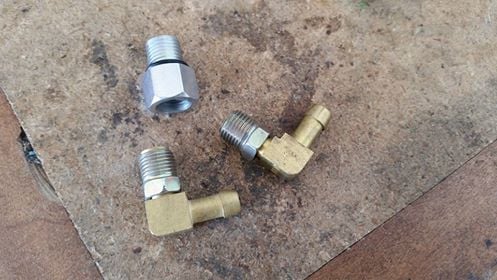
DON'T do what I did and wait to install these after the transmission is in the car! I barely had enough room between the trans and the tunnel to install these. Attach them to the trans while it is still sitting on your shop floor and you'll be much happier. If you plan ahead and "massage" your trans tunnel with a large hammer, you'll be significantly better off than I was. 😉
BE ADVISED: the early 4L80E transmission uses two identical fittings for the fluid cooler lines (they look like the one shown in the above photo). However, the 1997+ 4L80E transmission uses a rear fitting with a long 'nose' that protrudes into the housing. Here is a photo with two standard fittings and one long-nose fitting:
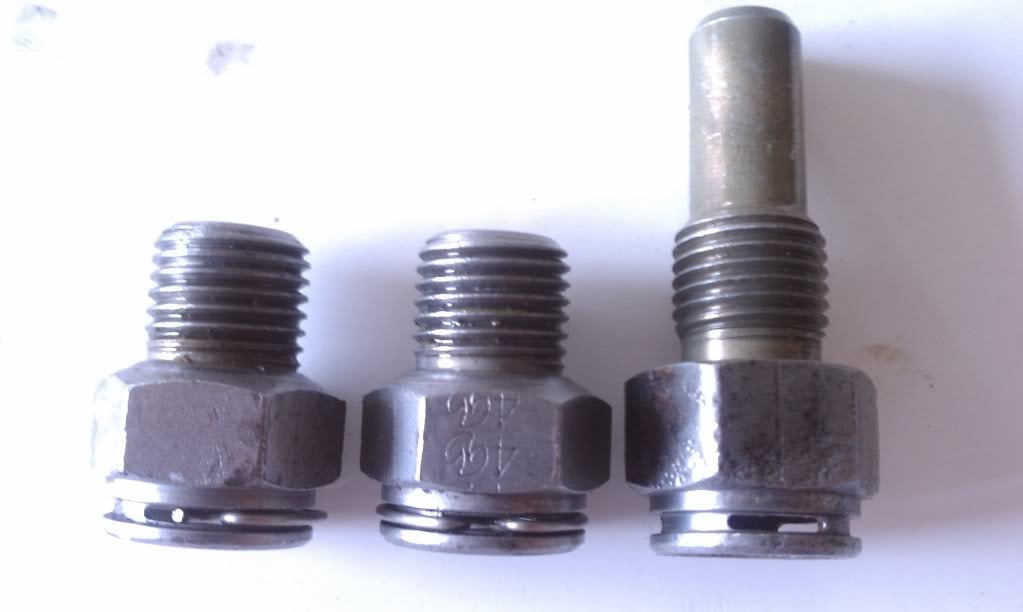
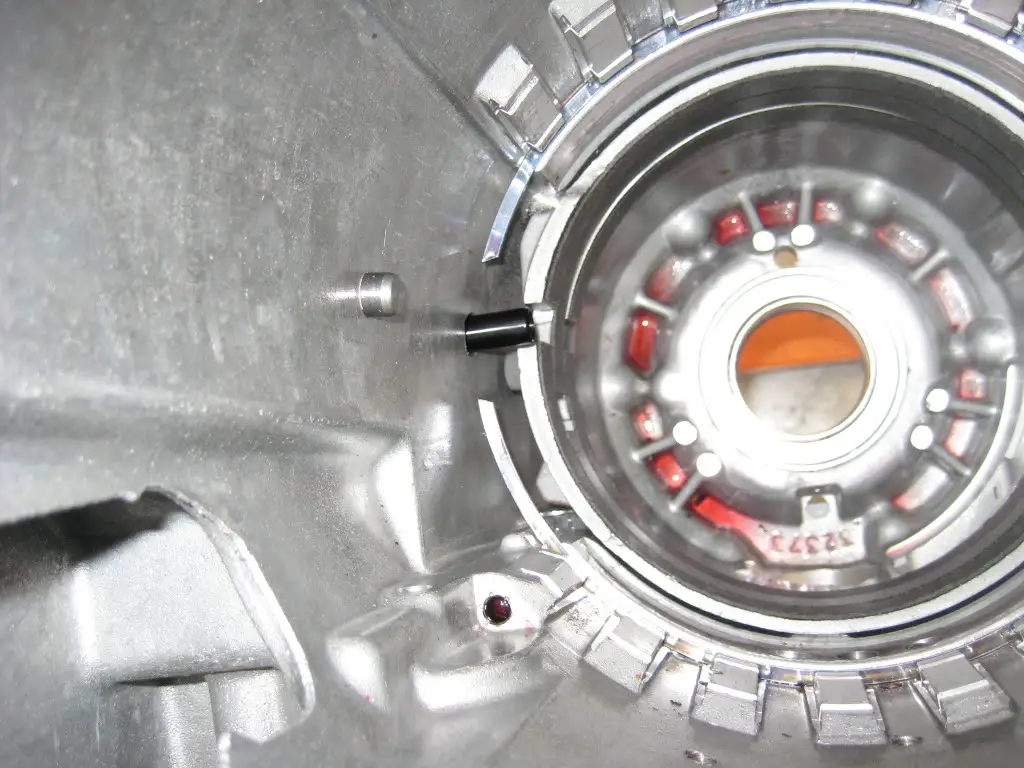
On that style of transmission, you must use this long-nose fitting in the rear. If you do not, fluid will not lubricate critical parts of the transmission and the entire unit will quickly die a horrible death. Here is an internal photo with an aftermarket black long-nose fitting installed to illustrate why this is so critical:
If you buy a working transmission and you simply re-use its stock fittings, you should be fine.
As for the actual heat exchange, I bought the largest bar and plate (or stacked plate) design cooler I could easily find--its core measures 12"x12". (This cooler design is much more efficient than the tube design!) I mounted it in front of the radiator but not attached to it; there is probably 4" or so between the two. As an old habit from my turbo minivan drag racing days, I also put an inline fluid filter in the inlet hose just before the cooler. I did not route my transmission fluid through the radiator at all; this external cooler is all I am using for temperature control. So far it has worked well; even in the peak of my summer desert heat, I have never seen the fluid temp go higher than 165^ at any time.
So you say you want to install a 4L80E into your G-body. Great! I put one in my 1980 Grand Prix, and I'm sure you can install one in your G-body as well. Let me guide you through the process--detailing the hijinks and heartaches, my failures and successes--so that you can pull this off with as little cursing as possible. There are a number of things you need to consider, and I'll attempt to address them all in a more-or-less systematic order.
Consideration #1: vehicle body prep
Good news: nothing outrageous is required. In fact, I did not hammer/dent/reshape any portion of my transmission tunnel or my firewall. I just dropped my 454/4L80E into the car and it fit. However, I later learned the transmission bell housing's left 'ear' contacts the trans tunnel--I should have cut that off. Oops. In my case, I've just been letting it "self-clearance" as I drive... which works, kinda, but it does transfer extra vibration to the interior. Cut the ear(s) off in advance and you should be golden.
Consideration #2: transmission prep
As I said above, my 4L80E is bolted to a 454. Both the transmission and the engine came out of a 1999 Chevy Express 3500. I already mentioned cutting off the ear(s) of the bell housing. Other than that, the only prep I performed on the transmission was a trans pan R&R to install a new internal filter, then I filled it with new fluid. I reused the stock converter.
Consideration #3: mounting it in the car
I used stock Monte Carlo SS frame mounts on the engine cross member + my donor van's stock engine clamshell brackets in order to mount the engine. For the rear transmission mount, I simply ordered the G-Force 4L80E crossmember. It bolted right into place, and the transmission bolted right to it. Because my G-body pre-dates the 4spd transmissions, I did need to also install the driver's side frame extension piece that they offer... but even that was a simple matter of drilling a couple holes and bolting it into position. You can see the extension here:

The G-Force piece is very well engineered, and it makes installing a 4L80E very simple (and it also perfectly cleared my dual 3" exhaust system). I am not a paid spokesman, but I endorse it completely.

Consideration #4: connecting it to your axle
This is as straightforward as it gets. I took some measurements, then went to a local driveline specialist and had him fab me a driveshaft. Easy.
Right behind the G-Force crossmember is the stock "driveshaft loop" bracket. When I installed my driveshaft, its u-joint was directly above that little bracket, and it would contact the bracket when the shaft spun. I quickly removed that bracket from the car. This didn't bother me, as I'm sure I'll install an NHRA-approved driveshaft loop at some point in the future.
Consideration #5: fluid cooling
There was no way I was going to try to adapt my stock V6 cooler lines to the 4L80E. Instead, I bought some lengths of steel brake line plus a handheld tubing bender, then I bent the lines into shapes that would work. At each end, I flared the tube and used rubber hose to connect it. At the transmission end, I needed some fittings to connect these rubber hoses to the housing. Because I had not modified my trans tunnel, I needed fittings with 90^ bends in them so I'd have room to attach the hoses. After looking at every part store in town, I found an old NAPA that came to my rescue: they had a dusty old cabinet with brass fittings--I literally blew the dust off the fittings as I took them out to inspect them. Here they are next to one of the transmission housing fittings:

DON'T do what I did and wait to install these after the transmission is in the car! I barely had enough room between the trans and the tunnel to install these. Attach them to the trans while it is still sitting on your shop floor and you'll be much happier. If you plan ahead and "massage" your trans tunnel with a large hammer, you'll be significantly better off than I was. 😉
BE ADVISED: the early 4L80E transmission uses two identical fittings for the fluid cooler lines (they look like the one shown in the above photo). However, the 1997+ 4L80E transmission uses a rear fitting with a long 'nose' that protrudes into the housing. Here is a photo with two standard fittings and one long-nose fitting:

On that style of transmission, you must use this long-nose fitting in the rear. If you do not, fluid will not lubricate critical parts of the transmission and the entire unit will quickly die a horrible death. Here is an internal photo with an aftermarket black long-nose fitting installed to illustrate why this is so critical:

If you buy a working transmission and you simply re-use its stock fittings, you should be fine.
As for the actual heat exchange, I bought the largest bar and plate (or stacked plate) design cooler I could easily find--its core measures 12"x12". (This cooler design is much more efficient than the tube design!) I mounted it in front of the radiator but not attached to it; there is probably 4" or so between the two. As an old habit from my turbo minivan drag racing days, I also put an inline fluid filter in the inlet hose just before the cooler. I did not route my transmission fluid through the radiator at all; this external cooler is all I am using for temperature control. So far it has worked well; even in the peak of my summer desert heat, I have never seen the fluid temp go higher than 165^ at any time.
Last edited:


