BUILD THREAD Sweet Johnny & Gina: A Love "Two Large" To Fail

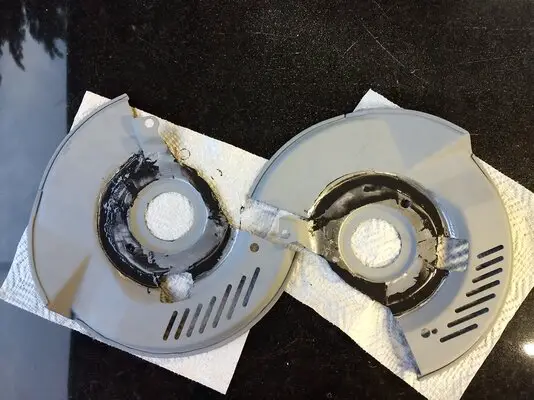
Alright, first and foremost I'd like to say that a couple days in the sun and a little time with a roller has eliminated many of the bubbles seen above, and I'll get a picture in the daylight tomorrow. Today's focus, though, was the dust shields. I was able to combine the other 2 shields into one that'll work for my passenger side by repeating the process I'd performed once already. Naturally they don't match because my second one looks better, but most won't notice the difference. I'm combining brake dust shields from different model S10 trucks and Blazers, part numbers 970-097 & 970-098 and 15704499 & 15704500. The 097 and 098 pieces are basically the G Body shields with the addition of a wheel speed sensor.

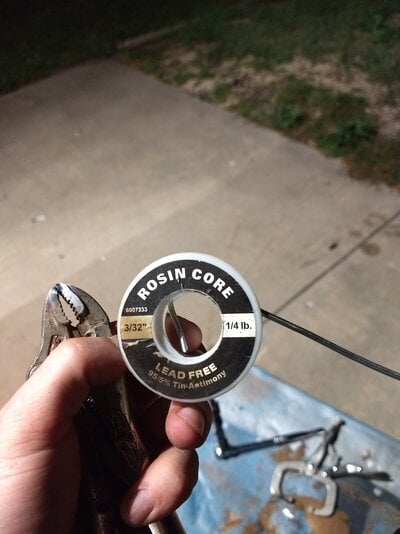
After tacking the pieces together I opted to solder them to make things nice and solid, but this can be tricky since the shields are coated in zinc. The absolute best way to get the solder to stick is to remove the zinc coating where possible and use a zinc chloride flux to make it flow. In leu of this you can utilize hydrochloric/ muriatic acid and that reacts with the zinc to make the chloride. This can be important in some applications because the antimony (lead substitute) in the solder combines with the zinc and makes a somewhat brittle intermetallic compound, but it's really only an issue when flexed and doesn't concern me and the big flat areas I was joining today so I didn't bother. I performed a durability test of dropping the soldered shield to the concrete from a height of 3 or 4 feet and it passed- nothing rattled, nothing broke.

Don't breathe in any of the fumes while welding or soldering something with zinc on it- it won't kill you but it's nasty and not exactly healthy.
IMG_20240523_212620729.jpg

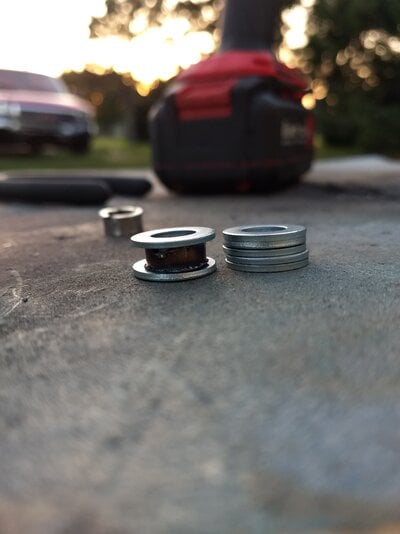
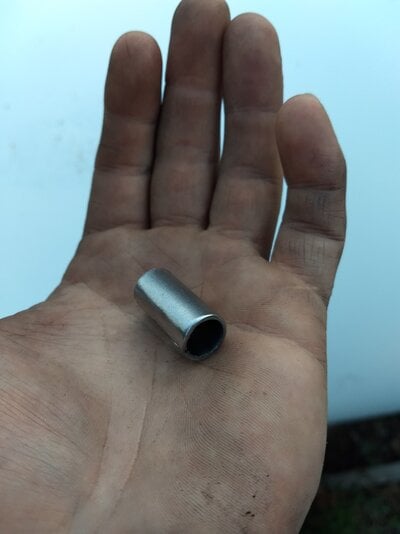
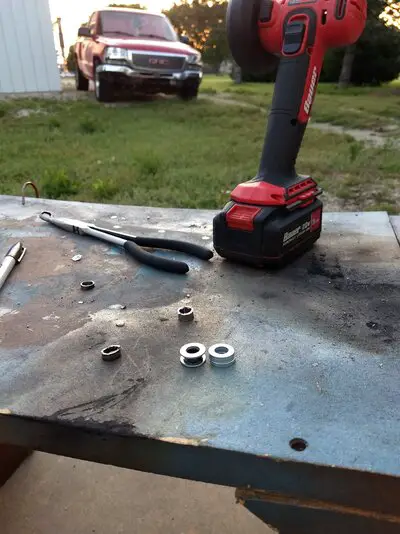
I used some rosin core solder and a propane torch to accomplish my goal, had to add a hole to the '98-'05 Blazer pieces for one of the 3 mounting bolts, and that bolt will also require a spacer. A battery operated cut off wheel was used to make a couple pieces of sleeve to be combined with a washer on each end to achieve a total thickness equal to 5 washers. I held the sleeve with some hose pliers while I cut.
IMG_20240527_203556850.jpgIMG_20240527_203115014.jpg
IMG_20240527_203122575.jpg

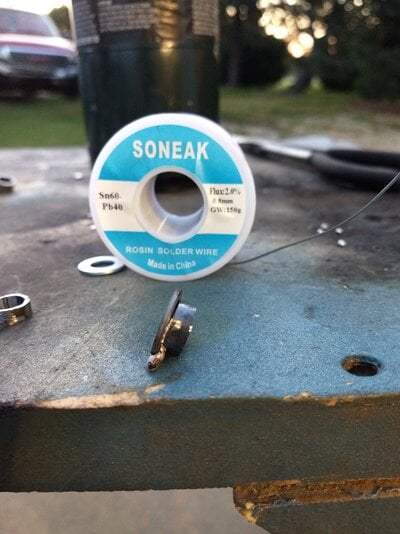
I then cleaned the burrs from the little sleeves using the side of the cutoff wheel as a grinder and tried to solder 2 washers to each.
IMG_20240527_205009165.jpg

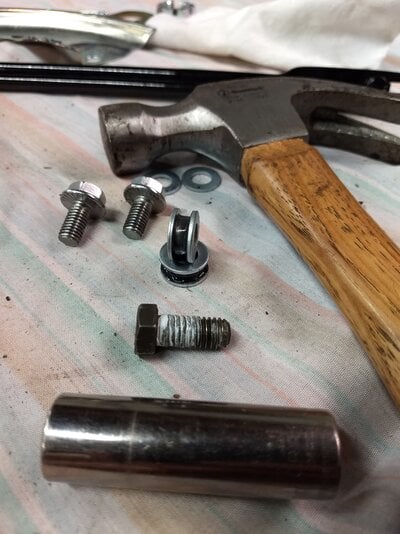
And failed miserably. So I switched gears and mixed up a little JB Weld to hold things together. I grabbed an old bolt, wrapped the threads in Teflon tape to prevent sticking, and screwed a nut up against the washer/sleeve combo to hold things in place. Even with the tape I needed to use a deep well socket and hammer to dislodge the spacer I'd made from the bolt.
IMG_20240527_225633452.jpg

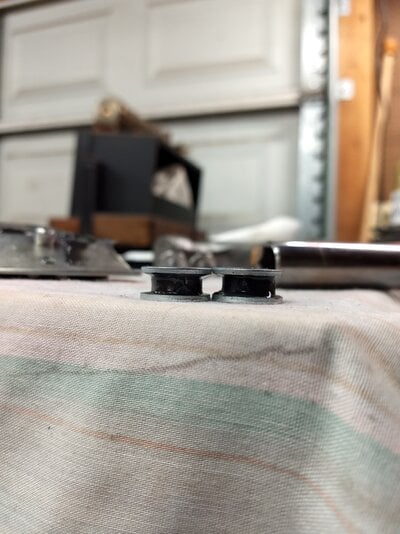
The end result is 2 little spacers that are just about even.
IMG_20240527_225707709.jpg

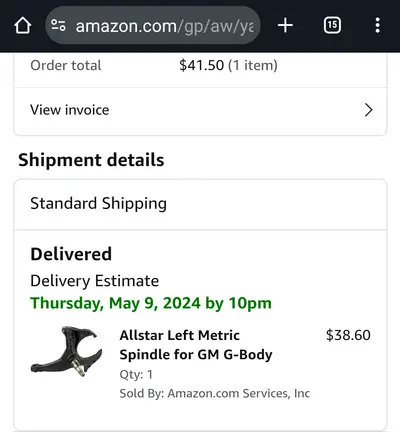
Being a car guy means I can't install tubular control arms and replace my booster/ master without also upgrading the brakes, but that's not so simple with a '78 model. New drilled and slotted rotors require new spindles with the appropriate sized bearings, so I chose spindles from All Star since I've had good luck with their parts and these are forged steel where others are cast iron. The right side is part # ALL56319 and set me back $135 on Amazon but the left (ALL56318) was available for just $40, "used".
Screenshot_20240523-062956~2.png

A pair of 4739 seals and some Set 6 (A6) alongside Set 3 (A3) bearings will keep the new TRQ drilled and slotted rotors (BRA74842) spinning. The factory replacement spindles require a 3/4 - 20 castle nut, 1/8" x 1.5" cotter pin, and funky washer to keep it all together, Dorman part numbers 615-065 (nut), 44503 (pin), and 618005 (washer). You can also buy these as Dorman kit 304993 for $7 - $10.
 
Here's that daylight shot of the window with fewer bubbles:

IMG_20240528_125412939_HDR.jpg

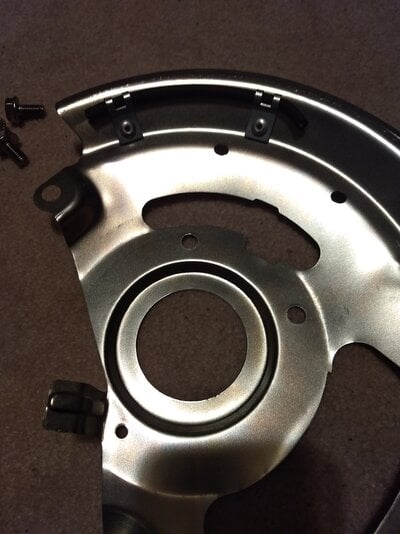
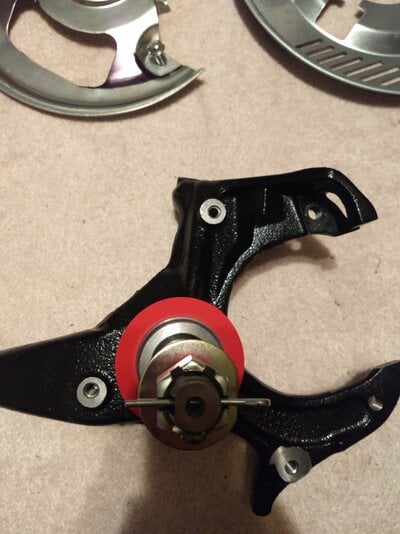
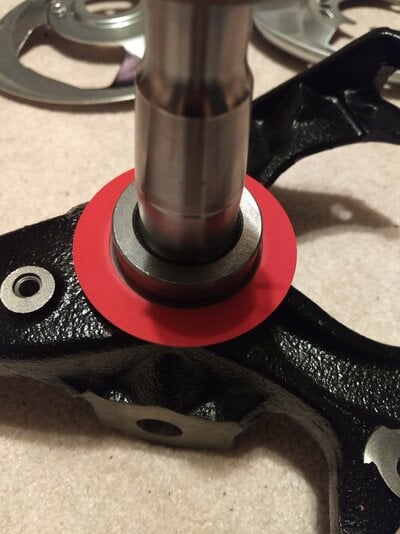
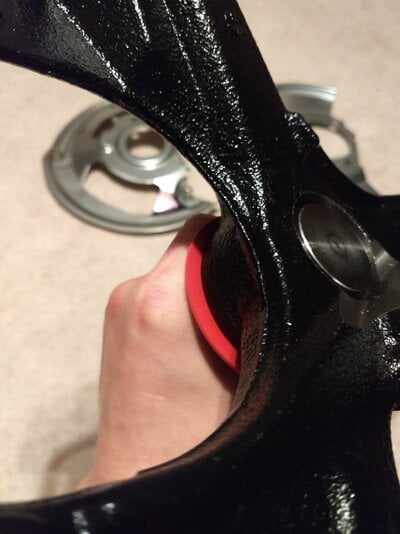
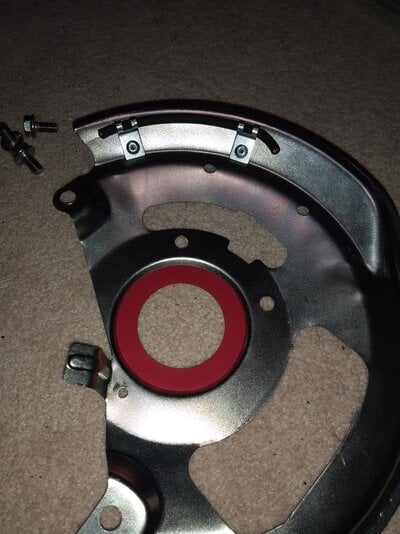
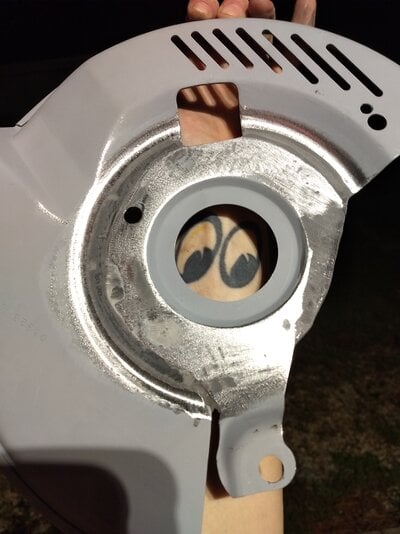
When it comes time for reassembly of the brakes and such there's a seal "required" between the brake dust shields and the spindles. It's up for debate whether its job is to somehow prevent grease from getting flung up onto the rotors or to simply keep things quiet by suppressing rattles but the general consensus is that using something there is necessary if running the dust shields. Some people use silicone such as Right Stuff from Permatex while others employ an actual gasket, and I'm a gasket kind of guy. The problem is that nobody but eBay seems to have these things, and even then they're all different because people are winging it. I didn't want to spend $13 for something I could make from $6 of gasket material, and I can't cut a perfect circle even if I trace it so I went hunting for something I could repurpose. A tape measure against the spindle revealed a desired I.D. of 2" but there's a little wiggle room to go bigger, and the minimum O.D. is about 2.75" if you wish to cover the whole "face" of the surface. Looking at the back of the dust shield provides a perfect view of how big the seal can be, and an O.D. of 3.125" is absolutely ideal to fill the recess seen below.

IMG_20240522_220541509.jpg

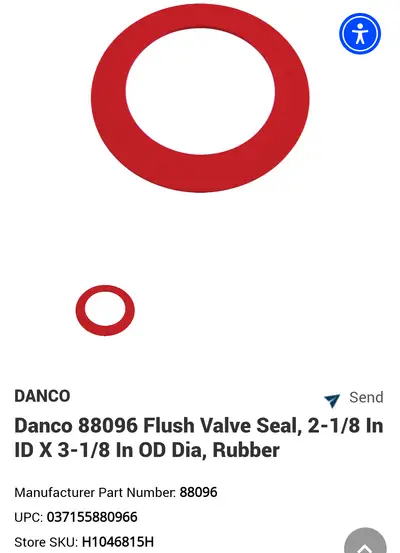
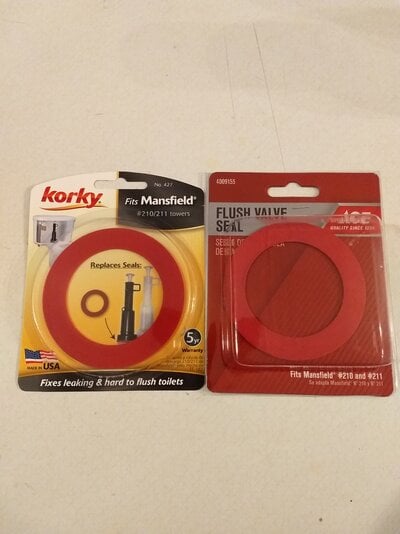
Armed with these numbers (2" ID, 3.125" OD) I could now start searching for a gasket that would suit my needs, keeping in mind that it couldn't be too thick. With diameters that size I figured there would be a cornucopia of rubber and paper rings to choose from considering the common American plumbing sizes, and while there weren't as many as I'd hoped there were options. Try not to laugh but the perfect gasket comes in the form of a rubber flapper seal for toilets, specifically Mansfield models 210 and 211. This particular rubber gasket has an ID of 2.125", an OD of 3.125", is roughly 1/16" thick, and it's even red to match my suspension parts! I found them readily available from Danco, Korky, and Ace Hardware at a cost of $2 - $4 each so I procured perfect gaskets for under $10 and didn't have to fiddle with anything. Even though I had to purchase 2 different brands they're an exact match to each other in every single way and are probably just the same part in different packages.

Danco 88096, Korky 427, Ace 4009155

Screenshot_20240521-171913~2.pngIMG_20240522_211009396.jpg

IMG_20240522_220417823.jpgIMG_20240522_220353270.jpgIMG_20240522_220453036.jpgIMG_20240522_220604790.jpg

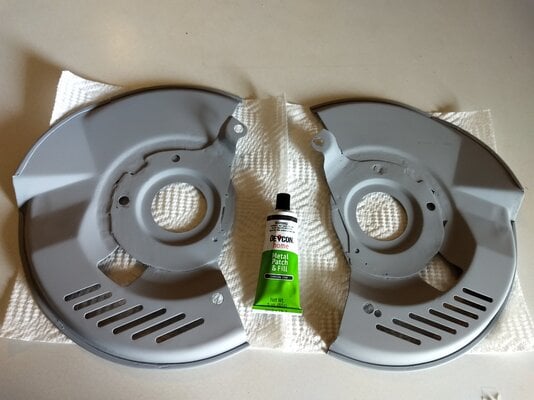
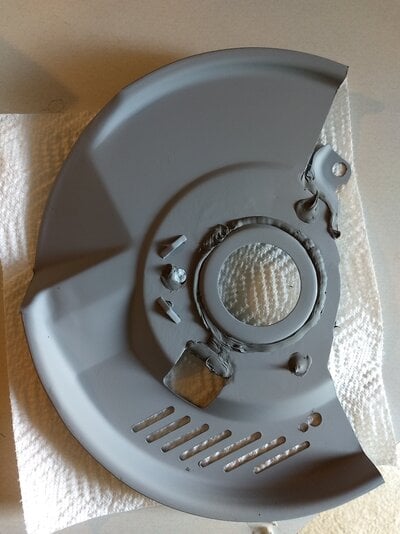
Clearly, that's a picture from before I started working on them, but I scrubbed and rinsed the shields after soldering and am about to use Devcon Metal Patch & Fill to smooth out the seams and fill a couple low spots. It may not be ideal but I sprayed them with Sealer after employing heat to rapidly evict the water from all of the crevices in an attempt to stave off flash rust. Brazing would have filled the edges of the seams better than solder but doesn't flow behind things as well, and Liquid Nails was also considered for joining the two pieces but ultimately rejected in favor of something I could actually sand. Ya know, because so many people will see it and care 🙄.

IMG_20240528_143707173.jpg
 
I've never used a metal patch paste before, and it's slightly different than the traditional JB Weld slurry. It's thicker, which is what I wanted, but it comes at a cost- very, very short work time. As it flows from the tube it acts just like RTV in the sense that it's stringy and grows a skin, but the skin forms almost immediately. You have about 10-15 seconds to reshape before you're better off just moving on. Once that skin forms you're not going to mash this stuff back into itself with any kind of success, and I also discovered that it spreads about as well as half-set Bondo Hair. Extremely poorly.


From the tube:

IMG_20240528_152859521.jpg

My reward for trying to spread it with a business card:

IMG_20240528_152935009.jpg
 
  • Wow
Reactions: Rktpwrd
The Devcon either didn't like my sealer or it actually is just as finicky as the online reviews make it out to be. I prepped the surface with 120 grit prior to sealing and plenty of texture was showing through when I applied the Devcon but it just didn't stick in a multiple places, others did alright. I'd hoped the reviewers were just whiners but you really can't put this stuff on thick at all, a small bead is too much: it cracks worse than drywall spackle then peels. The directions state that it can be applied in "up to 1/8" thick layers" and even layered upon itself- not in this scenario. I say this shouldn't be used to do anything more than smooth out the texture left behind after sand casting. Project Farm has a great video comparing JB Weld type products and it's too bad this wasn't one of them.

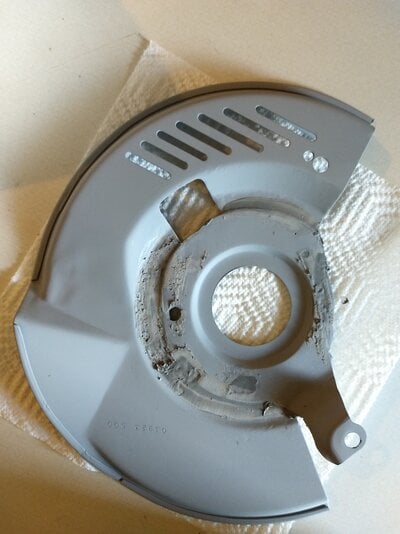
So I broke out the only weapon I had left and didn't want to use for this: JB Weld. The stuff is HARD to sand by hand.

1716946039851273208799.jpg
 
  • Like
Reactions: SoFloG and UC645
I'm still nowhere close to being done, but here's where I'm calling it quits with these for tonight.

IMG_20240529_005607483.jpg

The profile is off on one and there's still plenty of other areas that need attention.
 
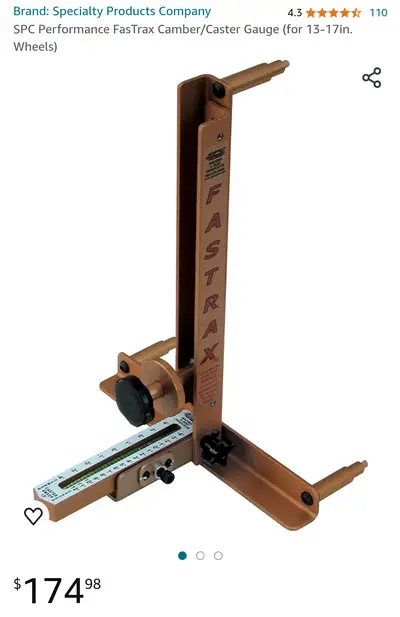
I had a dream of finishing the suspension and brake swap over the holiday but it was just that- a dream. I pretty well knew by midnight on Sunday that it wasn't going to happen since I still had a lot to paint in addition to finishing the dust shields. I stopped into a local shop that's been around a long time and often has older cars in the lot to see about getting an alignment once the swap is completed and wow, did those expensive! I was told that they do adjust caster, camber, and toe, it would start at $180, and that was before they even touched the shims. Since I'd have "custom aftermarket parts" they were unable to give a solid quote or even do better than "It starts at $180 and goes up". Well, I can see this going sideways in a hurry. I'm going to check with another shop or two if I can find a decent one, but I see that a Fast Trax is about the same price. Anyone have thoughts on this?

Screenshot_20240531-004253~2.png

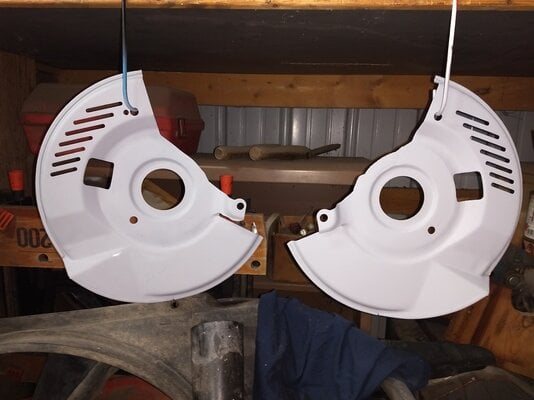
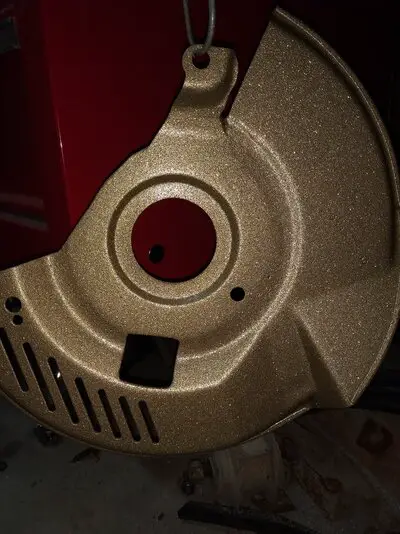
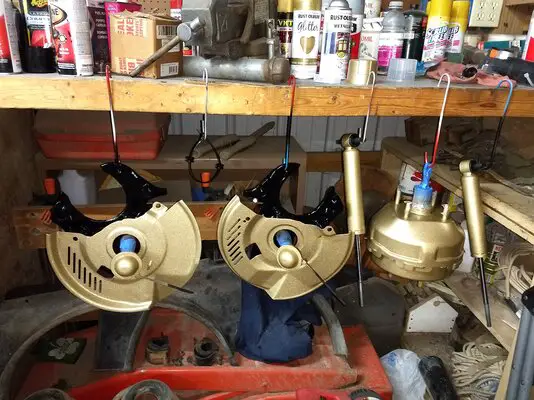
After I wrapped up sanding and sealing the shields again I sprayed them with filler primer, worked them again, applied more filler primer, gold "base", gold flake, base again, and 3 layers of clear acrylic enamel. I might add 2 more coats of clear in a couple days, but I'm nervous it'll lift if I do. They've been sprayed 10 times....

IMG_20240530_025201859.jpg

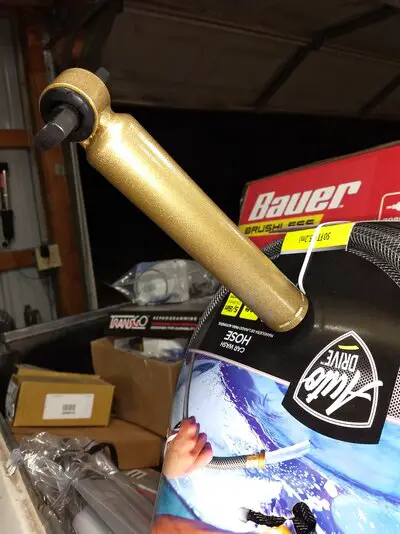
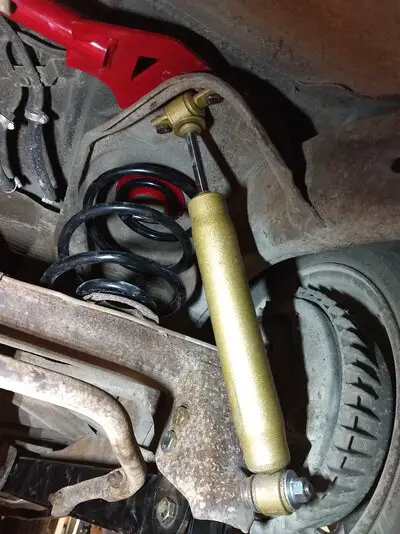
The Bilsteins were already yellow so after removing the decals and scuffing, I cleaned them with isopropyl alcohol, grabbed the blue stuff (tape), and shot them with the same Rust-Oleum Warm Gold, Gold Glitter, Warm Gold again, and you guessed it- numerous coats of clear. Disregard the difference in color between the pics, it's just the lighting. Yes, underlying coats can affect the outward appearance but when they're covered in layers of fine and coarse metal flake in addition to color it seems to be a moot point when seen in person. Seems to be.

IMG_20240530_025140952.jpg

I'm trying to match the color of these:

IMG_20240314_023131550.jpg

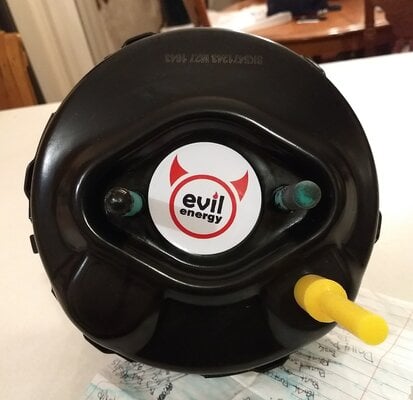
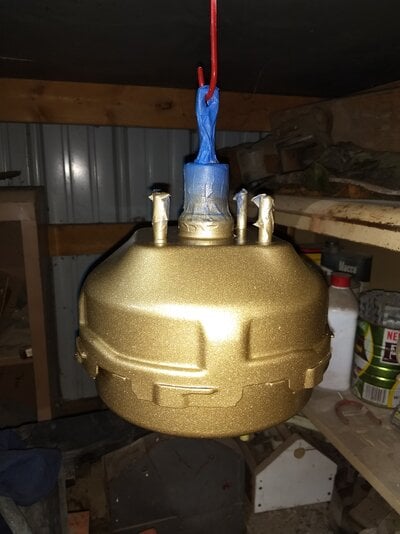
I would have preferred a brake booster that was gold zinc dichromate or cad plated but didn't find one that was correct and affordable, so I paid $70 for a new 9" double diaphragm unit for an '85 Monte from SKP: SK5471243. It didn't seem right to just leave this thing black but it was COVERED in something nefarious that was guaranteed to cause a sea of fish eyes to pop up. It wasn't cosmoline but rather a silicone based something - or - other. The grease they used on the pin was absolutely without a doubt silicone, and the whole booster was slicker than buttered Teflon, even after wiping with brake cleaner followed by 91% isopropyl. I was down to my last scrap of Scotch and only have Hook-It paper at the moment so I did what I could with the li'l green pad and cleaned the booster like it would cure disease. After a vigorous wipe down, I applied a sticker over the big hole and my employer supplied the rubbers for the other as well as the front studs.

IMG_20240530_004137765~2.jpg

I was now ready to apply a dose of Adhesion Promoter and Sweet Georgia Brown, am I glad I did! The stuff goes on clear of course, but you can plainly see where you sprayed even after it tacks up, and once it did I laid down some grey Sealer Primer. I noticed that one spot about 2" x 3" was trying to reject the paint and give me the eye so I avoided it and went back to it with a couple light spritzes, allowing it to flash in between. Crisis averted, but I have no doubt that it would've been a particular type of show had I not utilized the adhesion promoter. Naturally, the whole thing then received the five star gold treatment complete with clear coat. I can still feel texture so I really want to keep adding clear, but that'll have to wait.

IMG_20240530_234111943.jpg

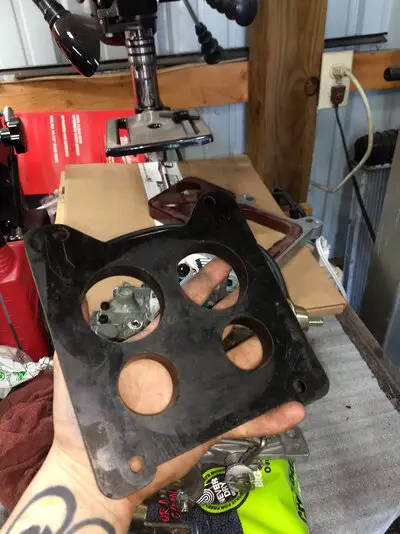
It was raining for a few hours today so I had to wait until pretty late to complete painting things, after 11 pm to exact. I decided today was a great time to install a beautifully rebuilt carburetor and then change the plugs and some gaskets, but that didn't go quite as planned. I tried multiple spacers and an assortment of gaskets but just couldn't get the engine to run right, though I don't blame the carb. It came from an esteemed member of the forum and I have absolute faith in his abilities when it comes to Rochesters, but even without a spacer Gina just wasn't happy with new parts. Shocker.

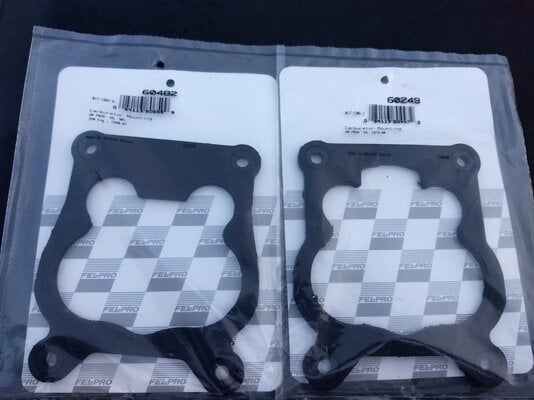
I'm still using the heat crossover to warm the intake but would like my carb to run as cool as possible, so I was really trying to run this spacer in conjunction with the thick Fel Pro base gasket.

IMG_20240530_154933283.jpg

I tried both of the following gaskets above and below the spacer (thin 4-hole ones too) but ended up just using Lefty with my old carb so I could still let the car idle in the morning and at stoplights without needing to work the pedal.

IMG_20240530_204534876.jpg

I couldn't achieve a steady idle or street manners even after making minor carb adjustments and changing my timing half a dozen times so I felt I had no choice. One second it's trying to die the next it's idling at 1100 in gear. Drives fine at 55 but idling afterwards leads to stalling, and in town driving was a nightmare with my bad brakes. There was very little vacuum to be had but I couldn't find a leak even by spraying starting fluid, which served well to find leaks earlier. With the old carb back on I've got a steady idle and vacuum but I'm wondering if that demon intake manifold is causing more issues. I very highly doubt there's anything wrong with the new carb, and suspect that the old one is just the right amount of messed up to keep that questionable engine running. It seems like whenever I fix something on this car it reveals another unforseen issue that was complimentary to the first. It's worth noting that covering the choke of either carb does raise the idle a bit.

Anywho, here are some things that got accomplished, including the spindles that were coated in Rust-Oleum Gloss Black Engine Enamel and 2 coats of clear. The little spacers received the same, and the dust caps got another coat as well.

IMG_20240530_235153404.jpg
 
Last edited:
I hate to disappoint everyone again but I'm not going to be able to perform "the swap" this week for a couple of small reasons. If I'm going to be that far into things then I might as well grab a new center link and tie rods so I can align it all just once, and if that's the case then the Afco 30271 improved geometry link is a contender alongside piecing together a shorter version of UMIs bumpsteer elimination kit for half the price. I still haven't found a local shop I like to perform the final alignment nor have I purchased the Fast Trax to do it myself but I'm eager to hear input on this matter from any and all willing sources.

The original plan also called for an upgrade to taller BJs for both the upper and lower CAs and there's no better time than when installing the new tubular units. I convinced myself that I should proceed with the CA swap and go back to those later but just can't commit to doing things that way. Speedway claims that their modified arms are compatible with the taller joints but I'm unsure if 1/2" on the bottom and 1" up top is too much... maybe just a 1/2" taller for each is in order. They don't have the answer to every question so I'm again open to wise words from others, but am considering Pro Forged, All Star, Afco, and Speedway joints with the deciding factor being availability.

Father's Day is coming up and I want to show Dad some love so my car parts can wait a little while longer, and I kind of overdid it a bit physically and need the rest anyway.
 
Last edited:
I missed why you were replacing the spindles and all...? I have those parts laying around (low miles).

I had to clearance the hole on the brake booster plunger to get the brake pedal pinned. I hope you have better luck with that. I was quite frustrated installing booster in the '78.
 
I hate to disappoint everyone again but I'm not going to be able to perform "the swap" this week for a couple of small reasons. If I'm going to be that far into things then I might as well grab a new center link and tie rods so I can align it all just once, and if that's the case then the Afco 30271 improved geometry link is a contender alongside piecing together a shorter version of UMIs bumpsteer elimination kit for half the price. I still haven't found a local shop I like to perform the final alignment nor have I purchased the Fast Trax to do it myself but I'm eager to hear input on this matter from any and all willing sources.

The original plan also called for an upgrade to taller BJs for both the upper and lower CAs and there's no better time than when installing the new tubular units. I convinced myself that I should proceed with the CA swap and go back to those later but just can't commit to doing things that way. Speedway claims that their modified arms are compatible with the taller joints but I'm unsure if 1/2" on the bottom and 1" up top is too much... maybe just a 1/2" taller for each is in order. They don't have the answer to every question so I'm again open to wise words from others, but am considering Pro Forged, All Star, Afco, and Speedway joints with the deciding factor being availability.

Father's Day is coming up and I want to show Dad some love so my car parts can wait a little while longer, and I kind of overdid it a bit physically and need the rest anyway. My Non- G Body project has been self improvement, and to be honest I'm a nervous wreck thinking about approaching "her" next month and trying to find the words.
Your ball joint heights really come down to what you want to do with the car and how low you want it to sit. See if you can get in touch with Mack from SouthSideMachine and discuss it with him, he’s an incredibly helpful guy.
 

GBodyForum is a participant in the Amazon Services LLC Associates Program, an affiliate advertising program designed to provide a means for sites to earn advertising fees by advertising and linking to amazon.com. Amazon, the Amazon logo, AmazonSupply, and the AmazonSupply logo are trademarks of Amazon.com, Inc. or its affiliates.

Please support GBodyForum Sponsors

Classic Truck Consoles Dixie Restoration Depot UMI Performance

Contact [email protected] for info on becoming a sponsor