BUILD THREAD Sweet Johnny & Gina: A Love "Two Large" To Fail

I missed why you were replacing the spindles and all...? I have those parts laying around (low miles).

I had to clearance the hole on the brake booster plunger to get the brake pedal pinned. I hope you have better luck with that. I was quite frustrated installing booster in the '78.
Multiple factors influenced my choice to replace everything at once. I hope you don't mind if I list them:

• Replacing the spindles is required to mount the budget friendly drilled & slotted rotors for G Body/ Camaro since '78 was a special case for spindle shaft and wheel bearing diameter. Nobody offers upgraded rotors for a '78. Opinions on D/S rotors on a daily driver vary, with most saying they're unnecessary, though I disagree when it comes to my personal vehicle- I occasionally flog the hell out of them and can't be having brake fade due to heat buildup.

• This approach also allows me to continue driving the ol' girl while piecing together a new set of parts that I can paint up real purrty like without needing to strip away layers of grime. I can also test fit everything to avoid finding myself in a pickle on the magical day. Hopefully. Any time I've used this approach it's gone much, much smoother with assembly being almost a joy.

• I wanted to upgrade the braking system while retaining the 14" wheels but plan on running some 15x7 2nd gen Z28 wheels by mid-summer. I have them but they need powder coated and lack rubber. These rotors and oversized calipers will fit and should work so long as the master cylinder has a large enough bore. After reading things again I'm afraid that GNVAIR is onto something concerning my selection and I may need to bump up to a bore of 1.125", though I'm on the fence about it.

• I'm not ready to mess with swapping to 1LE, LS1, or Corvette brakes, and have absolutely 0 interest in the Blazer spindle setup- I much prefer tapered wheel bearings. The newer dust shield I grafted to the old just plain looks better, will accommodate 12" rotors, and lends the appearance of having done the Blazer swap.

• The drilled rotors will serve until which point they become nothing more than a hub to mount bigger brakes in the distant future.

• I could not install tubular control arms, braided lines, new shocks/ springs, etc. without going all the way. I just couldn't.

All of this should garner a brake and suspension setup that looks and performs much better than before while maintaining an air of simplicity. It comes with the benefit of being able to clean and possibly paint parts of the frame while performing the complete swap in under 48 hours, which is absolutely necessary. I've also personally lost a considerable amount of weight by starving myself to afford car parts, so it was easy for me to rationalize replacing everything.

I appreciate the blessing and hope I don't run into unforseen issues.
 
Your ball joint heights really come down to what you want to do with the car and how low you want it to sit. See if you can get in touch with Mack from South Side Machine and discuss it with him, he’s an incredibly helpful guy.
I want the car to sit low and transfer weight well, and I'm looking for good steering response throughout the entire range of motion- bumpsteer is such a drag. This is my current daily driver but my requirements for that seem to be different than "normal" folks. I have no problem driving a fully stripped race car on the street every day regardless of the weather but am enjoying having a full interior car with all the amenities, though I went all winter with no heat. A little NVH is fine since I like a car to communicate with me. I don't want or need this car to ride like a living room couch but won't be doing any stoplight racing in it any time soon because the 305 is a 305. All bets are off when this engine blows, and I'm kind of setting up for the future where my truck will be the daily. The truck is an '04 Sierra with O.D. & lockup, stiff suspension, and wide tires so I've technically got a vehicle for touring the highway and don't need another.

I've seen quite a few posts from Macguyver and he does indeed seem helpful but I was hoping the G Body Consortium could be of assistance. I've spoken to people in person, on the phone, and in written form all to nearly no avail since they don't seem to truly understand what they're talking about and certainly don't know G Bodies worth a darn. I either hear "I need to see it in person", "I'm not familiar with those parts", "That person is wrong but I can't explain why", "You can't do that but I can't explain why", "No, ya wanna do it exactly like my friend did even though your setup is totally different", or something to that effect. I've not contacted anyone important in the industry, just locals.

I originally did the front suspension math for my El Camino, though it seems to work similarly for a car that retains A/C but rocks an aluminum hood and core support. Both cars sport an SBC with aluminum parts and headers with future plans including fiberglass bumpers which were factored into the El Camino math as well. I believe by using 6310 front springs (330#) in conjunction with 1/2" taller LBJs I'll achieve a 1.75" drop from stock without cutting coils. A 5006 (355#) spring should be about 1" taller than the selected 6310. I hoped knowing the spring rate, wheel size, intended use, and control arms being used would be enough for someone to say how tall is too tall, as I'm in deeper than I've delved before. All I really need to know is if the 1" upper joints are too much for the Speedway arms.
 
Last edited:
  • Like
Reactions: SoFloG
I richened the primary side for today's gas. The carb was originally set lean from factory and the apt is set at 2.5 so might need turned down a bit.

I'm going to send you the tool and a jet kit. The pickup tube I opened it another .004 should be ok but maybe to much??

The original core was very dirty, I rodded all the ports and pickups and bleeds, sprayed each one for patency. All lines were patent with none blocked. Could be maybe piece of dirt hidden loosened up and now partial blockage.

Also going to send 2 new mix screws, just to rule out the one on the right that had slight damage to screw head. The tips are good but didn't have replacement when buttoned up. Meant to send already but got busy with other stuff.

"Quadrajet"
https://www.hotrodders.com/threads/...odding Basics-,Quadrajet,-APT adjustments and
 
I richened the primary side for today's gas. The carb was originally set lean from factory and the apt is set at 2.5 so might need turned down a bit.

I'm going to send you the tool and a jet kit. The pickup tube I opened it another .004 should be ok but maybe to much??

The original core was very dirty, I rodded all the ports and pickups and bleeds, sprayed each one for patency. All lines were patent with none blocked. Could be maybe piece of dirt hidden loosened up and now partial blockage.

Also going to send 2 new mix screws, just to rule out the one on the right that had slight damage to screw head. The tips are good but didn't have replacement when buttoned up. Meant to send already but got busy with other stuff.

"Quadrajet"
https://www.hotrodders.com/threads/quadrajet-apt-adjustments-and-my-theory.409802/#:~:text=Hotrodding Basics-,Quadrajet,-APT adjustments and
Dude, thank you SO much! I plan on trying some different gaskets just to be thorough and honestly assumed that I messed up the primary butterflies, shaft, or something else- I hear the Rochesters are a bit sensitive compared to Holleys and I haven't used the carb stand every time. When I bolted it onto the car I blocked off every single vacuum connection and checked the entire perimeter of the intake and carb for leaks by spraying starting fluid and couldn't find one, I played with the curb idle settings and timing but didn't want to stray very far from what you set up for me. I've never adjusted the APT before and the material I read seems to indicate it almost always needs to be out at least 4 turns but I defer to your judgement on that. I haven't been able to work on anything for a couple of weeks though.
 
Alright, after a long hiatus I'm back to working on the car again. I initially took a break for Father's Day, had to let my credit cards cool off a bit, and then I messed up my neck again and was forced to continue the break. When we left off, I had tried to mount a rebuilt carb provided by the very generous 78Delta88 but had trouble getting it to idle or cruise correctly although I doubted that the carb was to blame. It wasn't very long ago that I replaced the distributor cap and rotor in addition to regreasing the module and cleaning up the magnetic pickup coil, and at the time I noted that the "in cap" coil showed signs of extreme heat and the rotor brush was basically worn to a nub. This was the time to replace the coil, module, pickup- hell the whole distributor as it was likely to become a problem if it wasn't already. (I figure it's what was causing the idle surge and other maladies that occurred after mounting the new carb.)

Well, I'm a gamblin' man so I just rolled the dice and kept the old coil/module which seemed to still be operational- at least until it started getting really hot outside. I knew they'd both need replacing but I'd hoped to get the carb sorted before I moved on to wiring in new ignition. After much research I'm now of the mindset that the ignition system was never suitable for the new camshaft, my driving style, etc. and wasn't fully lighting off the mix even with new plugs and wires. We all knew the timing curve and initial timing of over 20° was a band-aid but it's been working until now. This was indicated by random misfires, lightly fluctuating vacuum signal, declining performance, death on hot days, and an absolute refusal to climb above 3500 RPM. Naturally, these symptoms arrived and progressed over time until I lost all faith in Gina's ability to get me from A to B so I started swapping parts.

With the coil being the most easily accessible it was the first to get changed to one I had left over when I upgraded another distributor. This coil was in like new condition but I can't recall if it came from an Accel 59107 or not. No matter, as it made no improvement. So I swapped out the module for a spare, also of forgotten origin. This turned out to be a dead module and the heat sink plate also fell off. I then put in yet another module from a spare distributor on an engine that ran well when it was pulled and Gina came to life again. Still unhappy with the performance I then stole the Flame Thrower coil from Karma but it was non-operational as well, so I pulled out an Accel Super Coil which I thought would be bad but turned out to be the best in my arsenal. Following that I just pulled the whole distributor from Karma- the Accel unit with a Flame Thrower module that turned out to be bad- and that's what I've currently got under the hood after shuffling parts. I'm running an Accel HEI distributor with an unknown module and a rough looking Super Coil but that'll change soon.

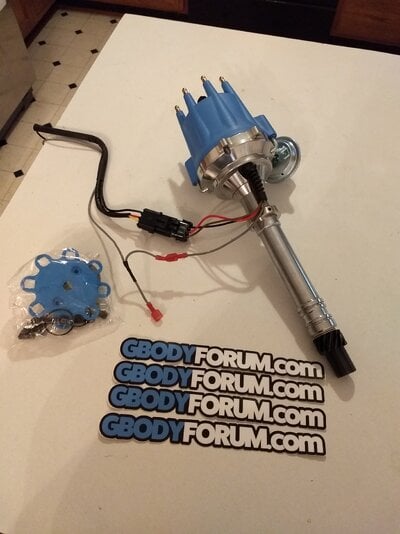
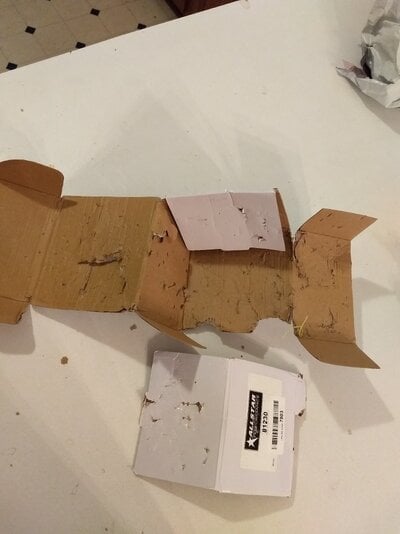
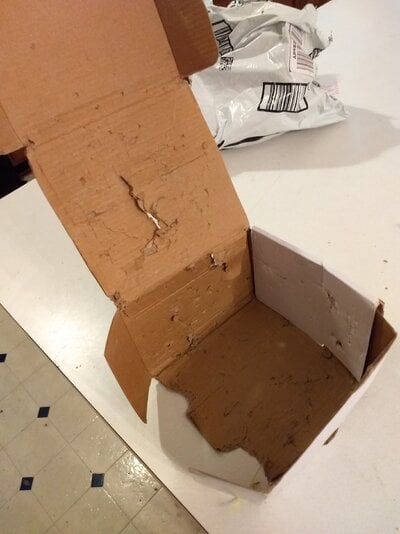
I haven't yet upgraded the front suspension, steering, or brakes but need to keep the engine in good health so my current focus is improving the ignition and utilizing the Street Fire CDI box that's collecting dust. I'm going to pair that with a Chinese knockoff of a Ready To Run Pro Billet small cap distributor with adjustable vacuum and mechanical advance alongside either an All-star 81230 E Core or a Standard FD478 TFI coil. I say that because I bought the Allstar on Amazon for $20 but it arrived all sorts of beat up so I grabbed the FD478 and accompanying S539 pigtail on Rock Auto for $40 shipped. If nothing else the Standard piece will fit inside the Allstar heatsink body. The box will be mounted in the glovebox area but I haven't decided where to place the coil, and it might reside inside the cabin as well.

IMG_20240823_183730406.jpg

Pics of the box that the coil arrived in, which was only protected by a bag and had 0 cushioning anywhere:

IMG_20240824_184912393.jpgIMG_20240824_184645204.jpg
 
Last edited:
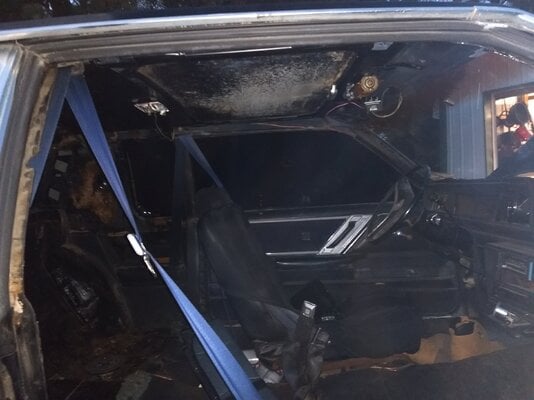
Time for another update, and it's probably no surprise that it's not ignition or suspension related since I have a habit of working on numerous things at once. This update is in regards to the interior, and although it needs much more love than it's going to receive any time soon this couldn't wait any longer. Until a few days ago I had yet to tint my rear window, but more importantly the headliner/ plastic & cardboard I'd added was sagging so bad that it basically filled the cabin by itself. You couldn't stand on one side and see through to the other, and that's with two curtain rods helping support things. I'd waited to pull the headliner for multiple reasons, one of which being the weather- having the added plastic and cardboard not only held things in place for nearly a year, it helped to better insulate a car with no functional heater or A/C.

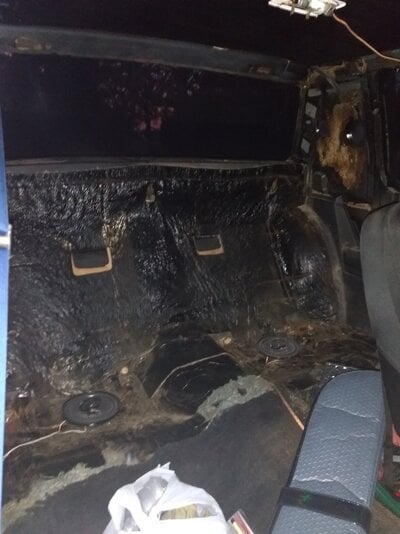
Tinting the rear window properly necessitates removing the B & C pillar trim that holds the headliner and package tray in place, and its absence allows me to take another stab at tinting the quarter windows in the coming days. I did them with the trim in place the first time and I know I can do better with that out of the way. Now, getting all of this out meant the back seat needed evicted, and I found the build sheet hiding underneath which I thought was cool. Nothing fought very hard to stay in the car and I managed to finish the window without breaking anything except a couple of clips.... and the darn styrofoam headliner board. I had hoped to recover the original but that thing was so cracked and delicate there was just no saving it. I guess I should budget $300-500 for a future replacement. The carpet needs replacing as well, and it was already cut where you see when I got in there. For a long time I've thought that it was an aftermarket piece and this pretty much proves that thought. I was glad to see very little visible rot/rust (it's all hiding under the carpet), and that the rear sound deadening panel is in excellent shape. I'll need to replace some decaying trim though, and still need to locate the proper seat belt receptacles too.

IMG_20240904_201055060.jpg

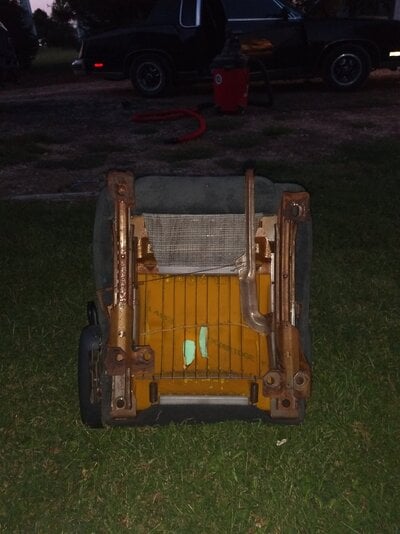
Once I got a little momentum going I didn't want to stop so I pulled the front passenger seat to see just how far out of alignment the brackets would be with bucket seats on top. Yep, I removed the rear seat first before doing the front. That's because I wasn't sure if I'd have time to fight any unforseen issues along the way like a busted track or rusted up bolts. It was removed without issue.

IMG_20240904_201107616.jpg

Here's a 4th generation Firebird seat with the factory G Body split bench brackets loosely bolted on. The rails on each side are not synced in the photo, and adjusting the seat is a two-handed operation until I shorten the wire that connects the release mechanisms to each other. That can be addressed when the brackets get cleaned, modified, and painted. Possibly even powder coated.

IMG_20240904_201025635.jpg

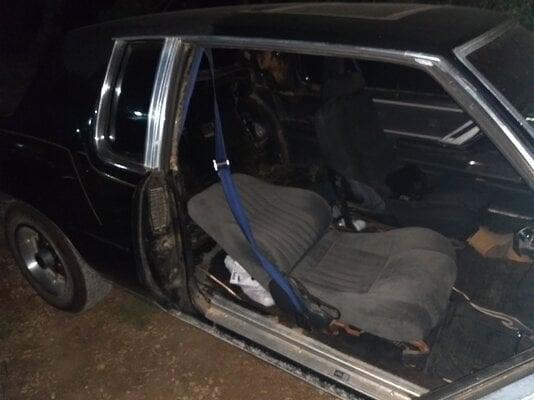
Once attached to bucket seats the brackets fit exactly how others have reported. Some, but not all of the bolts line up but at least the seats sit flat and true. I'll remedy the brackets correctly very soon but for now a simple plate with holes is working to overlap the factory piece and I've left one rear corner of each unbolted for now. It'll be fine for a week- there's normally 6 bolts (well, nuts actually) per seat and I don't plan on driving much in that time. The seat is sitting slightly crooked in this picture, but these particular ones recline to nearly completely horizontal. 😉

IMG_20240904_204242057.jpg

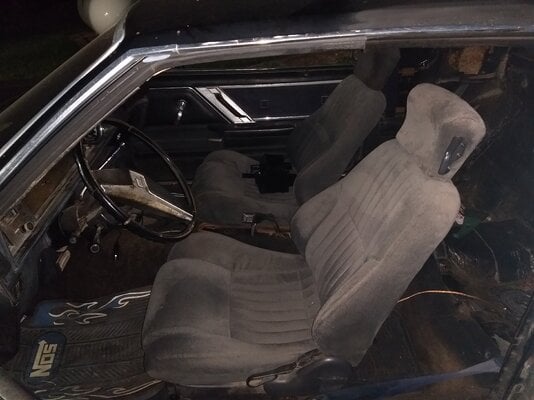
Not yet satisfied I proceeded to pull out the driver's seat as well and repeat the process.

IMG_20240904_232001211.jpg

Eventually they'll get dyed black but for now some black Dickies seat covers will do the trick. I hate the headrests. My dad helped with the rear seat and trim removal as well as applying the tint. He also helped remove and reinstall the door panels which came off so we could mend the tint on the front windows. Thanks again, Dad!
 
Last edited:
I had hoped to recover the original but that thing was so cracked and delicate there was just no saving it. I guess I should budget $300-500 for a future replacement.
I just came across this I'm thinking about it for Jr.'s car, a bow style headliner. It's listed as a Monte thing but should fir any 37 or 47 coupe body. Good bit of color choices
 
I just came across this I'm thinking about it for Jr.'s car, a bow style headliner. It's listed as a Monte thing but should fir any 37 or 47 coupe body. Good bit of color choices
Ooh I kinda like that, and I definitely like the price, thanks for the link. You're right, they give you quite a few options as far as colors and material patterns. I didn't see an option for Astro roof though, but I may look into it further.
 
Ooh I kinda like that, and I definitely like the price, thanks for the link. You're right, they give you quite a few options as far as colors and material patterns. I didn't see an option for Astro roof though, but I may look into it further.
I forgot about your Astro roof. They might have something that's not on Ebay.
 
  • Like
Reactions: Sweet_Johnny

GBodyForum is a participant in the Amazon Services LLC Associates Program, an affiliate advertising program designed to provide a means for sites to earn advertising fees by advertising and linking to amazon.com. Amazon, the Amazon logo, AmazonSupply, and the AmazonSupply logo are trademarks of Amazon.com, Inc. or its affiliates.

Please support GBodyForum Sponsors

Classic Truck Consoles Dixie Restoration Depot UMI Performance

Contact [email protected] for info on becoming a sponsor