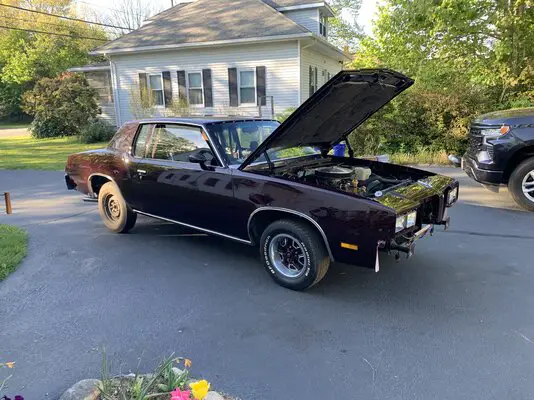
What did you do to your G-Body today 2024

Reinstalled the pickup tube, timing set, and cleaned up the timing cover. Waiting on a new front seal and hopefully it'll be all back in the car this weekend.
 
Last edited:
Got to the Driver side before the Sun could burn me some more. Brakes on the front (Pictured) were none existent, Bare Metal. I was worried a bit about the way I had to tighten the Caliper Bolts with that Guide Cylinder??? coming in from the outside of the caliper, where as it was found on the Inside of the caliper. but I think I sorted that out and Bolts are tight. So new Bearings, Rotor, and Brakes Pads on both sides, Done!

20240513_102600[1].jpg20240513_102616[1].jpg
 
Planned on installing the windshield and rear window trim last Saturday, but I noticed I hadn’t wet sanded and buffed the roof area just above the windows. No big deal, I thought, then had a case of screw it, and wet sanded the whole roof:
58FA8921-E352-4FA2-90E1-324C6B4147D7.jpeg


I had wanted to wait on this until I had the car on the ground but might as well while I was up there….

And my father gave me his car cover so I didn’t have to tape plastic to the car again:
73811FD5-EF1E-4769-8281-813FBD146694.jpeg

Hopefully I’ll have the trim and wipers on by Sunday.
 
Sunday I decided to tackle the leaking passenger side rear quarter window. The RePop reproduction seals look alright but do very little to seal the window. I cut away and cleared out the sealer around the perimeter of the glass. I bought another tube of 3M Window Weld 08609 and resealed the glass. I forced it into the underside of the glass / body with a putty knife and went back and filled the area with more sealer.

Had to move the '80 out of the garage this morning so I could put my wife's car on the lift for oil & filter change and tire rotation. Since the car was out in the driveway getting some sun I hosed it down with water and thankfully the quarter window doesn't leak anymore. More interior trim can be installed now that that is fixed up.

IMG_5283.jpeg
 
Been cleaning all the connections to the little cluster light bulbs .used fine sandpaper and put a light trace of engine oil to prohibit future corrosion ect.While I was into cluster',I took out gas gauge and soldered fine wire" onto the end of the guage studs(brass) that connect to the steel prong plugs in the cluster board,I then re-installed gas gauge poking the 3 short wire extensions though were I soldered them to the copper trace circuits on the back side.I proceeded to check the line(pink wire) to the tanks sender .To indicate a connection if the sender is open the gas hand will peg to the right if the sender wire ( or old sender is grounded or set to full pos) is grounded to body you will see empty on the gas hand.I had anouther sender and was able to simulate half,a tank ....I did som sanding and cleaning to the old sender but my ohm meter is at a different address anyways I'm just getting another sending unit . If you had a 10 watt 40 ohm resister',you could proubly test the circuit and get a reading somewhere in the middle area of the guage when I finally get the new sender. Il update" this post' ..with the ( high full 2 ohm) tank ohm rating (eventually) as I'm pretty shure the empty would be 90 ohms maybe ....as an educated guess . Most of the illumination lights weren't working on my cluster .I'm thinking it's a green wire but I did see what im debating today that the reastat ( brightness adjustment part) was open on one side what im thinking was caused by previous owners shorting the grounded bracket into that reastat poping the right side output to the green wire .. someone correct me if the green wire on light switch isn't the rite illumination circuit as I have them working even though currently I'm not impressed with the brightness .what am I saying that I need to fix the light switch of put up with it then again I'm thinking mod the black bezel houseing with 2 hole in the top hooded area and add 2 led blue dash lights there and simply tak (solder)them into that circuit (via extension wires).Aside from the lights and guage Hastles I did order some more sparkle silver paint for upcoming custom paint scheme .so far I have about seven colors selected actually more,but there should be about 4 major colors,and some possible small pinstrip and fat pinstrip stuff to contend with.
.Looking forward to that.Also have accumulated some different pipes and expect to use different mufflers soon ,sorry no pics yet...
 
Last edited:
  • Like
Reactions: Sweet_Johnny
Actually this brings up a thought and question, Will CLR purge a radiator core of the "salt" deposits around the tubes?


Nick
Guy on you tube says toilet bowl cleaner with the I'm thinking"/acid, I tried the clr many years ago and basically didn't think it did any thing at all .I know the toilet cleaner I used had to set in the core ( radiator) fir like 20 minets, (dangerouse)and I did that a couple times.it did clean it out enough to reach functionality".if you just had a mild dirt air pressure and tide wash ( backflush)powders.im shure there are times to simply replace the radiator or core .Worth mentioning if you ever get a car that had head gasket sealer put in the radiator you are in for it think about 4 flush cycles, the stuff dosnt seal anything but the holes in the end of your radiator ( with flakes)....
 
That rad now has a date with a local rad shop so that they can take a look at it and decide if it is a candidate for the tank. Not sure what they use to do the job but it is likely some kind of commercial or industrial decalcifier in a 45 gal drum. At this all point all I really want is a quote for the time/labor so I can decide if it is worth getting the rad rehabbed or easier to purchase a new one. Assumming availability still exists, of course.


Nick
 

GBodyForum is a participant in the Amazon Services LLC Associates Program, an affiliate advertising program designed to provide a means for sites to earn advertising fees by advertising and linking to amazon.com. Amazon, the Amazon logo, AmazonSupply, and the AmazonSupply logo are trademarks of Amazon.com, Inc. or its affiliates.

Please support GBodyForum Sponsors

Classic Truck Consoles Dixie Restoration Depot UMI Performance

Contact [email protected] for info on becoming a sponsor