I already had to clean some of it out as the new piece of sheet metal wouldn't fit in properly with it in a certain area. I have to wait for the Rust Treatment to cure, once that is done my plan is to use Truck Bed liner, at that point before I spray that on I will clean out more of that junk. 😎 we're on the same page here.Get that foam outta there while you’re at it!
That trash rotted out my dad’s Avalanche, it’s not worth the risk of letting it stay there.
What did you do to your G-Body today 2024
- Thread starter 64nailhead
- Start date
You are using an out of date browser. It may not display this or other websites correctly.
You should upgrade or use an alternative browser.
You should upgrade or use an alternative browser.
Ditch the bed liner, that stuff’s worse in an interior application. Make sure you’ve got the seam as clean of foam and rust as you can, rinse plenty and force dry, then go with epoxy primer. If you can find the small tubes of 2k seam sealer, that’s your best bet, imo.I already had to clean some of it out as the new piece of sheet metal wouldn't fit in properly with it in a certain area. I have to wait for the Rust Treatment to cure, once that is done my plan is to use Truck Bed liner, at that point before I spray that on I will clean out more of that junk. 😎 we're on the same page here.
Then topcoat with your paint of choosing, and only then would I risk bed liner. The problem with bed liner is that while it’s tough, it will separate from the surface over time, letting moisture in, then trapping it. Same as stuff like chassis saver, avoid it like the plague.
back at it...
Monte Carlo
installed the headliner (broke two front clips), head unit, and led foot well lights. Painted headlight rings black and changed the H4 bulbs. Ordered new dome lights, door lock pawls, etc... Lots of work to go on this car, pull out the seats, clean up wiring on the floor before I install the carpet, new seatbelts, and complete the intrerior. Most importantly, it's running well and I can drive it between this mad dash to reassemble everything.
Regal
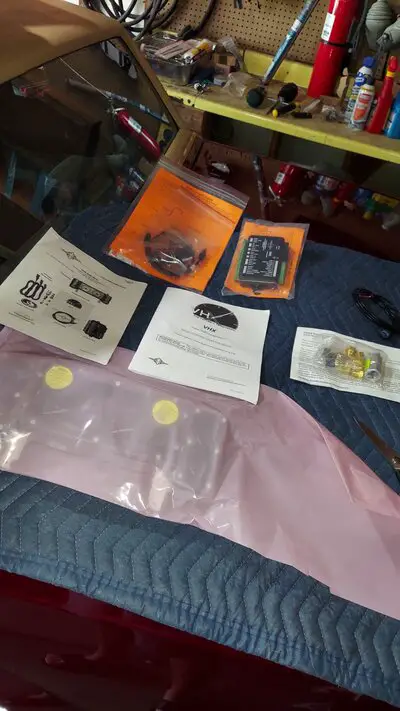
Working on installing a Dakota Digital dash and this is going to take more breakdown stuff than I thought. I really wish someone made a female adapter to the harness behind the gauge cluster for truly plug and play.


Attachments
What brand head unit did you go with?back at it...
Monte Carlo
installed the headliner (broke two front clips), head unit, and led foot well lights. Painted headlight rings black and changed the H4 bulbs. Ordered new dome lights, door lock pawls, etc... Lots of work to go on this car, pull out the seats, clean up wiring on the floor before I install the carpet, new seatbelts, and complete the intrerior. Most importantly, it's running well and I can drive it between this mad dash to reassemble everything.
Regal
Working on installing a Dakota Digital dash and this is going to take more breakdown stuff than I thought. I really wish someone made a female adapter to the harness behind the gauge cluster for truly plug and play.
View attachment 240114
View attachment 240116
View attachment 240117
Pioneer DMH-WT3800NEX - 2V preouts are not a choice I would make again. I can hear the SPL difference between this head unit and my previous 5V pre out Kenwood with the same power.What brand head unit did you go with?
Again I couldn't do much today except start sanding One side, fixed a dent on the passenger door outer edge and wheel well got grinded down so I could fill what dented it in. The Flux Welder was no Mas. I ended up having to take that thing back to Harbor Freight as it was not spooling at all, I've put the Line on correctly and made sure that tensioners weren't too tight, but even as I turned it on and pressed the button on the gun end the Spooler wasn't moving at all. So I got a replacement that I'll fudge around with tomorrow.
![20240530_200311[1].jpg 20240530_200311[1].jpg](https://cdn-0.gbodyforum.com/data/attachments/227/227136-2c829d90022772edd55525b43d322807.jpg?hash=LIKdkAIncu)
![20240530_200219[1].jpg 20240530_200219[1].jpg](https://cdn-0.gbodyforum.com/data/attachments/227/227137-5804988f21cdb642a4398d895de25e4d.jpg?hash=WASYjyHNtk)
![20240530_200212[1].jpg 20240530_200212[1].jpg](https://cdn-0.gbodyforum.com/data/attachments/227/227138-5638680b65eca36b90dbc3e91d2b4e5e.jpg?hash=VjhoC2Xso2)
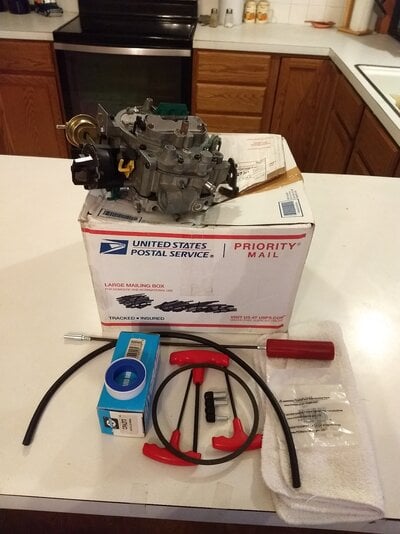
Basic tune-up parts on Olds Cool.
It’s been running a little rough lately, and a little down on power. Cap, rotor and 7 out of the 8 plugs tonight. The 8th I’ll have to do tomorrow night from underneath after I disconnect the battery, it’s the one right above the starter and I don’t particularly feel like accidentally arc welding my wrench to the block.
While I was in there, I snugged up the header bolts. I could hear a header tick coming from the passenger’s side, and sure enough the very back bolt was only finger tight. I got about a turn and a half out of the rest of them, so it was time.
By the way, who in the hell designed the exhaust port/header tube/spark plug configuration on the SBC?!?! I’d like to have a few words with him.
😡
The plugs weren’t great, fouled and ashey. Burning oil somehow, but not enough to be visible at the tailpipes. My immediate knee-jerk reaction was to think the worst and assume it was going to need valve seals or a hone and rings, but then I checked the torque on the intake manifold bolts. All definitely not to spec anymore. If it’s pulling oil from the lifter valley because the intake is no longer tight enough, then that could explain it.
Ran out of time and light for tonight, tomorrow night I’ll re-torque the intake and try and get that last plug changed. Hopefully that’ll make the difference, we’re going to the first car show of the year here on Saturday, and it’s a distance drive.

+!00 on flux core. For me it is strictly for use outside in the ambient environment where there is air movement and if dealing with things such as steel fence posts and such like. I will admit to using flux core when I did the first series of repairs on the frame of my Monte, but did go to absurd lengths to be inside an enclosed area and away from the elements when working. To make the best use of flux core, you should be working with a rheostat adjustable multi-process machine such as the Miller Multi-matic 215 or 225 or their equivalent in Lincoln. And yes, practice, practice, practice. You will find that absence of a gas lens will impact on the amount of heat being delivered to the work which in turn affects linger or on site time. Body metal will tend to burn through faster and more work will need to be done to dress or clean up the passes or tacks. You will also generate a higher degree of spatter that will need to be ground down plus have to chip your tacks and passes to remove the flux overburden. Rust will become an even greater enemy that it already is.
Nick
Nick
Last edited:
Similar threads
- Replies
- 231
- Views
- 10K
- Replies
- 310
- Views
- 17K
- Replies
- 99
- Views
- 4K
GBodyForum is a participant in the Amazon Services LLC Associates Program, an affiliate advertising program designed to provide a means for sites to earn advertising fees by advertising and linking to amazon.com. Amazon, the Amazon logo, AmazonSupply, and the AmazonSupply logo are trademarks of Amazon.com, Inc. or its affiliates.


