What did you do to your non-G body project today? [2023]

The 2025 Calendars are HERE. Two different editions, two different sizes, and a digital package!! Starting at $12.97US
I bought more shop manuals today, you can NEVER have too many shop manuals.

A local place was closing down so I bought everything on the shelf as flat-price. It's wasn't a lot, maybe 4 or 5 dozen books, but I know there's some I absolutely don't need so those are likely to become swap meet fodder.

Mostly the 4" thick motor manuals and Chilton manuals, but, sometimes extra pictures help when you're piecing together something that was stripped down.
 
  • Like
Reactions: joesregalproject
Where do I begin... like motherfūcker.

Okay.

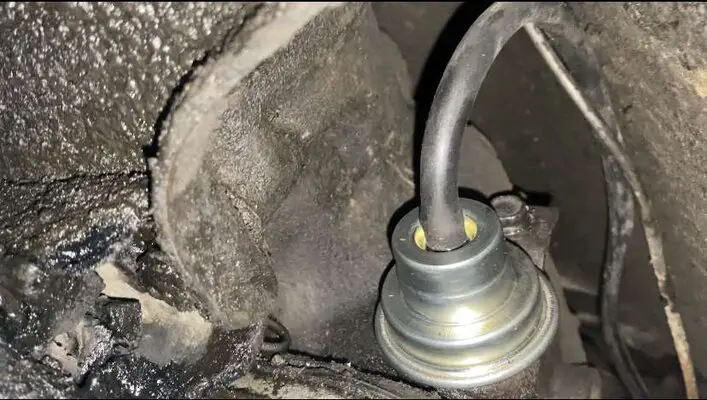
So first was the transmission. My Holiday 88 coupe is the first vehicle with a TH350 I have owned, and so far it's been easy to deal with.

It wasn't shifting properly, and thanks to some forum posts here I was able to figure out, the vaccum modulator needed replacing.

The second?

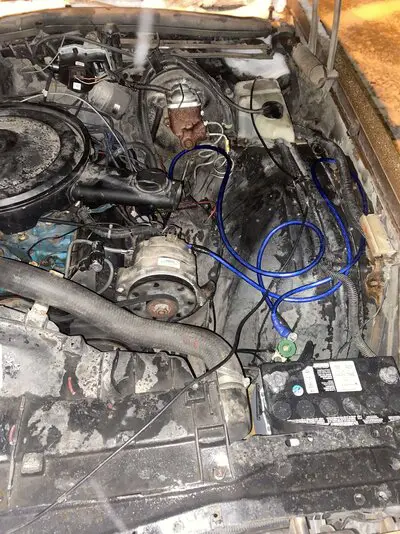
Well, the remy alternator that I believe is the factory one decided to stop charging the battery. It had the same issue, as the Caprice did when the rectifier blew and only could charge the battery enough to where it stayed at a little bit past 12 volts.
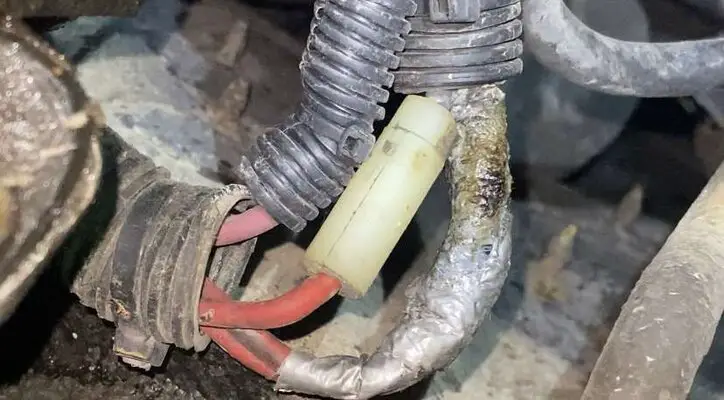
And the third? Well, look at the wiring these côck munchers made- it probably explains why the alternator also had issues.

I lost all power, as if the battery cable cables came undone which that caused the vehicle to break down- and luckily as it happened right as I was pulling back into the storage yard 🤦‍♀️😂😂😂

But only past the entrance... smfh.

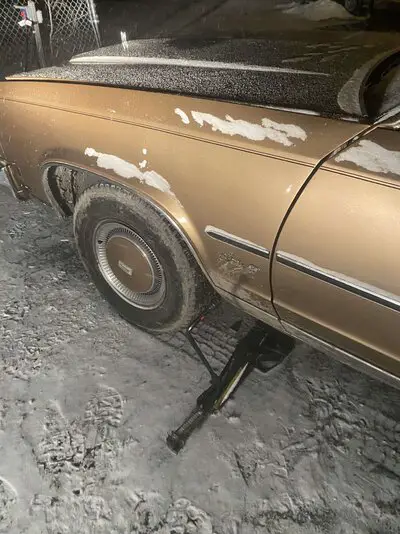
So, I had no choice being my canadian äss for the past 2 days, I have been outside not only rewiring the vehicle but dropping the starter because Oldsmobile thought, having exhaust get in the way of having the nut, for the battery cable removed was smart.

Well it wasn't- and made me scream pretty loudly freezing my testicles off the past 2 nights. Now that its back in the spot, I am sleeping in for another night because after dealing with that kind of wiring issue so quick?

I deserve the relaxing time tbh 😎💪💪💪
 

Attachments

  • 93DB64EE-7D79-4096-8774-BED2EF5E2761.jpeg
    93DB64EE-7D79-4096-8774-BED2EF5E2761.jpeg
    57.4 KB · Views: 57
  • A7586F42-632C-40BC-B069-80CE420B9C01.jpeg
    A7586F42-632C-40BC-B069-80CE420B9C01.jpeg
    1.1 MB · Views: 54
  • EEED3B3C-0B8A-42A5-9DE8-B398745FDFE7.jpeg
    EEED3B3C-0B8A-42A5-9DE8-B398745FDFE7.jpeg
    1 MB · Views: 58
  • C06DEEA6-4912-4EA4-889C-6B5B9B25227B.jpeg
    C06DEEA6-4912-4EA4-889C-6B5B9B25227B.jpeg
    46.9 KB · Views: 57
We took concrete block and 4x4x8 post which I have in abundance and built shelves today for the first 1/3 of the manuals I brought home yesterday. Then tossed some of the generics that came out of the local shop the day before that up on the top.

20230224_141130.jpg


It's a start anyways, and, at least I got a lot of the 'newest' stuff out of the truck that I know most of which I doubt I'll ever have a use for. Still need to make lists though, even just of it, and pick what I'm interested in holding onto.
 
DSCN3601.JPG


DSCN3602.JPG


DSCN3603.JPG


So a few pages back I mentioned that I was working on a vintage front fender for a war era Indian Chief. As acquired, it came to me minus both its fender mounting straps and the leading 6-7 inches of its body before the top mounting strap. At a guess it had suffered a fender bender at some point and the cure had been to cut away the damaged section.

In the pictures above, what I have created is a combination of cradle and jig that I can attach to the existing material by means of a pair of 5" vice grips. Because I cannot form the new nose for the fender in one piece, I will have to form and attach it in segments. This jig will help me support the body metal while I both tack it in place and then tweak/twist/dolly it to get the correct curves needed to line up with those that already exist.


DSCN3605.JPG


And this is the jig mounted in place and secured with a couple of pairs of vice grips. The smaller jawed versions allow me to get in tighter and take up less space.


DSCN3607.JPG


Just a detail shot taken from below/inside. You can clearly see how the vice grips register against the legs of the jig to hold it in position. Visible above is a shot of a third pair of vice grips that are holding a test section of body metal. This test piece is already shaped fairly closely to what the finished piece should look like. At this point the only major difference is that the test section is 20 ga body metal and the fender is actually 18 ga.


DSCN3610.JPG


DSCN3611.JPG


DSCN3612.JPG


And finally, a trio of additional detail shots taken from an overhead perspective that show how the jig sets the alignment of the two edges, that of the fender and the other of the test panel. There is a gap between the two equal to the thickness of the fender, about .060". Since the initial tacks will be Migged, having the gap present will allow the tack to sink into it as well as grab the edges. Once the tack is dressed flat, the joint should still remain strong and proof against any hammer and dolly work that will have to happen. For the inevitable someone who is thinking, "why not TIG it"? Well, the answer is that while I do have the capability built into my Multi-matic, what I also happen to have is a pacemaker embedded just under my left front shoulder bone. Pacemakers use the same, or a very close, wavelength as the TIG does so using the TIG interferes or interrupts the pacemaker which makes it unhappy and causes it to log an incident report in its onboard memory. The cardio lab reads the unit on a regular basis and gets snarky if incidents show up; they like a nice clean summary strip cause it makes life easier for them, and me too.

So the next steps in all this are to find some 18 ga scrap that I can use to fabricate the correct thickness of center panel and then tack it into place using the jig so that I can move on to try and bend a pair of curved side wings. They may end up getting done in short strips because it is easier to manipulate the curves.

Failing that i am still on the lookout for a murdered fender from which I can excise a donor section to use. For now I can give this a rest and return to my buffing wheel for a bit.


Nick
 
Yesterday i was able to get some hard-to-source non-reproduced trim parts into the hands of a shop that was banging their collective heads against the wall after their customer threw them away before the car went in. So that was a win.

Then we cleaned up the shed some, another win.

Then made it 38 seconds on a mechanical bull, next closest of anyone on that night was 7 second ride. That earned a lot of shots and drinks. And, as it turns out, a sports hernia that wasn't noticed till the following day.

So that was part win, part loss. Although at least everyone who works there is likely to remember us.

Today is just resting. Probably be days if not weeks to heal up. Being old sucks.
 
  • Like
Reactions: Texas82GP
Messed with the replacement drawer again all weekend cause it has driven me nuts, I would prefer to put as many screws as it came with in it but it just won't close right once I put the middle ones in for some reason. Don't know if its the soft close or what, but had it apart a bunch of times and finally have it closing as it should. Don't like the amount of pull needed to open it but honestly don't know that I will use it much. Now I have to affix the face to drawer and then start all the final staining of the inside of the cabinets and this drawer. While I was messing with the drawer it really annoyed me that my tenant put a few drawers in wrong swing directions, After I moved 4 of them around I am pretty sure that he put all the hinges in backwords....
20230225_190141.jpg
20230225_183314.jpg
20230226_175035.jpg
 
Not so much that anything was accomplished today but the new relief valves for my Canton Racing Accumulator came in the mail this AM so I count that as a plus. The existing one was sneezing oil so thinking the relief spring is about give up the ghost. Not a case of overpressure on the system, the air gauge at the tank reads 50 psi. The system as a whole is only there to prelube the engine prior to first start up in the spring, or if it has been sitting for a while. Best way I know of, short of pulling the timer and spinning up the oil pump ahead of time, to get oil into the galleries prior to twisting the key. As for valves, an heir and two spares.


Nick
 
The 2025 Calendars are HERE. Two different editions, two different sizes, and a digital package!! Starting at $12.97US

GBodyForum is a participant in the Amazon Services LLC Associates Program, an affiliate advertising program designed to provide a means for sites to earn advertising fees by advertising and linking to amazon.com. Amazon, the Amazon logo, AmazonSupply, and the AmazonSupply logo are trademarks of Amazon.com, Inc. or its affiliates.

Please support GBodyForum Sponsors

Classic Truck Consoles Dixie Restoration Depot UMI Performance

Contact [email protected] for info on becoming a sponsor