1984 Oldsmobile Cutlass Supreme Brougham

gdouaire

G-Body Guru
Supporting Member
Aug 7, 2013
630
443
63
Québec City, Québec CANADA
klaird said:
Where did you get the parts/bushings/sleeves for the rear sway bar installation? Do they attach to the inside of the control arms?

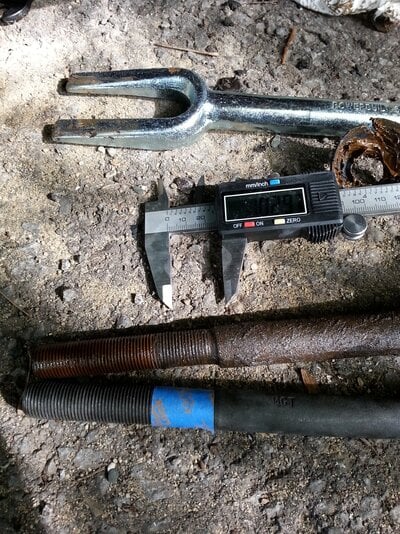
I used four 3-grade 3/8 bolts x 3 inches long, with flat washers and spring locks.

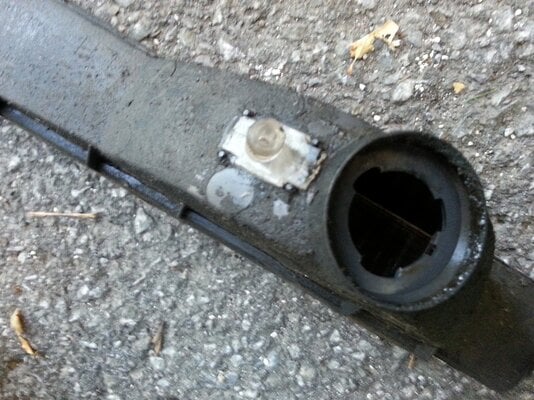
For the sleeves - I used 1/2 ID pipe that I cut to around 1 3/8 inch length and inserted this inside the control arms.

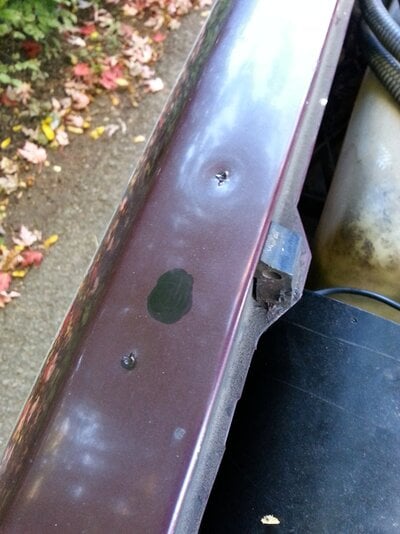
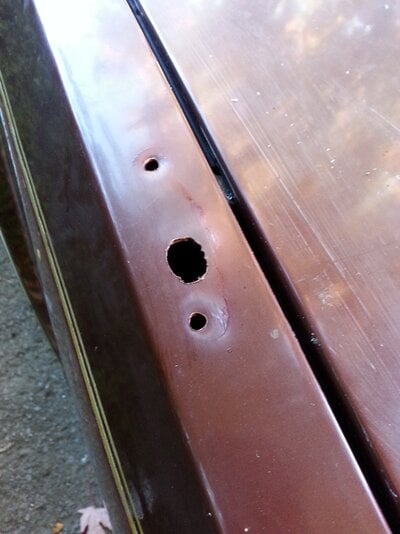
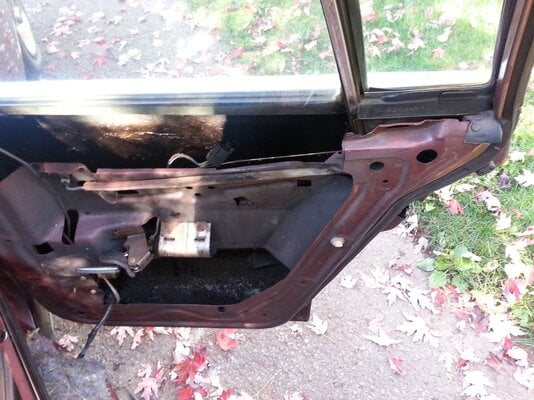
The control arms on my car already had holes for the bolts.
 

gdouaire

G-Body Guru
Supporting Member
Aug 7, 2013
630
443
63
Québec City, Québec CANADA
olds307 and 403 said:
According to Wikapedia 77-up is even fire. It should be a matter of matching your firing order on your original distributor on the CCC distributor. Very unique project. So many up here throw in the sbc up here, especially since the factory did it to most to begin with.

Odd fire were still produced in early 1977, some even had a one-piece camshaft as the even fire engines have. Transitional era.
 

gdouaire

G-Body Guru
Supporting Member
Aug 7, 2013
630
443
63
Québec City, Québec CANADA
Today was outer tie-rod day. I tried to preserve the current adjustment of the tie rod using a vernier.
 

Attachments

  • 20130923_145832.jpg
    20130923_145832.jpg
    1.3 MB · Views: 822
  • 20130923_150323.jpg
    20130923_150323.jpg
    859 KB · Views: 816

gdouaire

G-Body Guru
Supporting Member
Aug 7, 2013
630
443
63
Québec City, Québec CANADA
Installed the fiber optic light indicators... As sold by GBodyForum member Anubis. Set came with a 1:1 template to position the lens correctly on the fenders. I then punched+drilled holes on the fenders... Tested the location before drilling the BIG hole to route the optic wires.
 

Attachments

  • 20130924_161125.jpg
    20130924_161125.jpg
    509.9 KB · Views: 773
  • 20130924_161552.jpg
    20130924_161552.jpg
    497.7 KB · Views: 753
  • 20130924_162407.jpg
    20130924_162407.jpg
    410.8 KB · Views: 779
  • 20130924_163023.jpg
    20130924_163023.jpg
    339.3 KB · Views: 781
  • 20130924_163441.jpg
    20130924_163441.jpg
    453.5 KB · Views: 757
  • Like
Reactions: 1 user

gdouaire

G-Body Guru
Supporting Member
Aug 7, 2013
630
443
63
Québec City, Québec CANADA
Then drilled the big hole.


One of the parking light already had a port, the second one needed me to glue it on the light. This also came with the set.
 

Attachments

  • 20130924_164122.jpg
    20130924_164122.jpg
    337.9 KB · Views: 767
  • 20130924_165750.jpg
    20130924_165750.jpg
    299.9 KB · Views: 742
  • 20130924_170236.jpg
    20130924_170236.jpg
    467.3 KB · Views: 756
  • 20130924_175427.jpg
    20130924_175427.jpg
    622.9 KB · Views: 780

gdouaire

G-Body Guru
Supporting Member
Aug 7, 2013
630
443
63
Québec City, Québec CANADA
And the final -- BUT DIRTY -- results.

I need to clean up the back of the headlights -- so much dirt is preventing the light from reaching the optic fibers. Only the parking lights are working OK.
 

Attachments

  • 20130924_181101.jpg
    20130924_181101.jpg
    675.9 KB · Views: 762
  • 20130924_181117.jpg
    20130924_181117.jpg
    355.2 KB · Views: 757

gdouaire

G-Body Guru
Supporting Member
Aug 7, 2013
630
443
63
Québec City, Québec CANADA
Removing some pieces of the car to clean these lights and get the light indicators to work.


Fiber optic CANNOT work in such a greasy context. The car was rust-proofed every year with layers of oil by my father. This is a symptom of this.


And then, it works. I did not get a medal to make fiber optic work in such a dirty contaminated context, but maybe I should. I'll go through a second iteration of that. I'm sure I can get the monitor work better!
 

Attachments

  • 20130925_173237.jpg
    20130925_173237.jpg
    738.4 KB · Views: 725
  • 20130925_181502.jpg
    20130925_181502.jpg
    267.9 KB · Views: 718
  • 20130925_183146.jpg
    20130925_183146.jpg
    626.6 KB · Views: 736

gdouaire

G-Body Guru
Supporting Member
Aug 7, 2013
630
443
63
Québec City, Québec CANADA
My Cutlass has electric rear windows. Well, rear vents.

The passenger side vent did not work. Opened the door to investigate.

Soon found out there was not motor, the owner before my dad had removed it, using a coat hanger to keep the window shut.


Fortunately, my father being a visionary, he bought and kept a spare motor for all 4 windows. He had bought them when there was a whole bunch of g-bodys being scrapped in the 1990's, a long time ago. He gave me all these spare parts along with the car. Looks like a weird part - maybe like some kind of an insect - maybe a trilobite? :


So I installed the unit - it is held in place by weird rubber "nipples" - I've seen better engineering.


And now it's working. Pretty useless, but cool :)

http://www.flickr.com/photos/douaireg/10006217744/
 

Attachments

  • _5_20130929_153504.jpg
    _5_20130929_153504.jpg
    527.4 KB · Views: 691
  • _4_20130929_153500.jpg
    _4_20130929_153500.jpg
    383.3 KB · Views: 713
  • _3_20130929_153457.jpg
    _3_20130929_153457.jpg
    540.9 KB · Views: 702
  • _2_20130929_150159.jpg
    _2_20130929_150159.jpg
    739.7 KB · Views: 709
  • _1_20130929_145434.jpg
    _1_20130929_145434.jpg
    568.1 KB · Views: 681

gdouaire

G-Body Guru
Supporting Member
Aug 7, 2013
630
443
63
Québec City, Québec CANADA
Pretty tricky to install these rear window motors, PM me if you need advice, I'll be glad to share :)
 
  • Like
Reactions: 1 user

GBodyForum is a participant in the Amazon Services LLC Associates Program, an affiliate advertising program designed to provide a means for sites to earn advertising fees by advertising and linking to amazon.com. Amazon, the Amazon logo, AmazonSupply, and the AmazonSupply logo are trademarks of Amazon.com, Inc. or its affiliates.

Please support GBodyForum Sponsors

Classic Truck Consoles Dixie Restoration Depot UMI Performance

Contact [email protected] for info on becoming a sponsor