87 Monte SS build
- Thread starter T-TOP TONY
- Start date
You are using an out of date browser. It may not display this or other websites correctly.
You should upgrade or use an alternative browser.
You should upgrade or use an alternative browser.
Thank you 🙏🏽It looks awesome!
Hi Tony!
When I re-stalled my front end on a 57 Chevy, I made an assist tool to pull the lower control arm into position while the frame was on jackstands.
Here it's attached to the lower control arm by using the end off an old shock. The long nut attaches both the eyebolt and the rod:
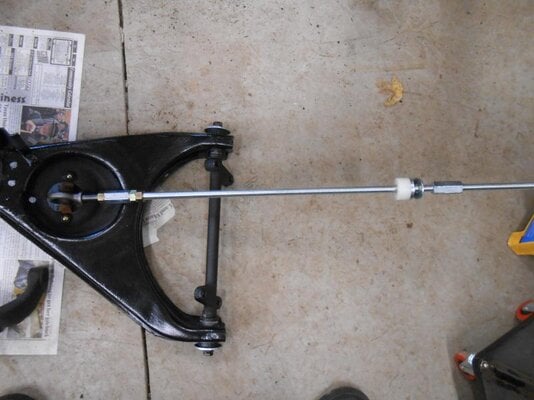
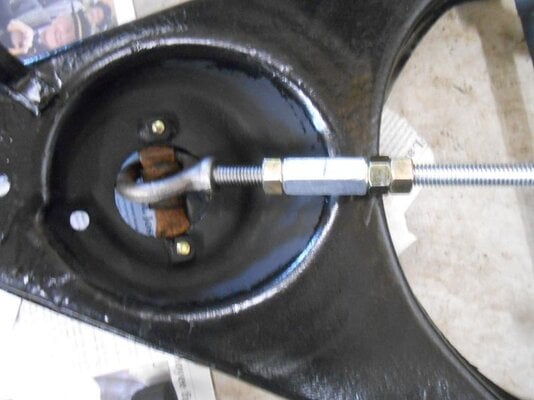
At the other end of the rod is another long all thread nut, three washers and a piece of 3/4" nylon:
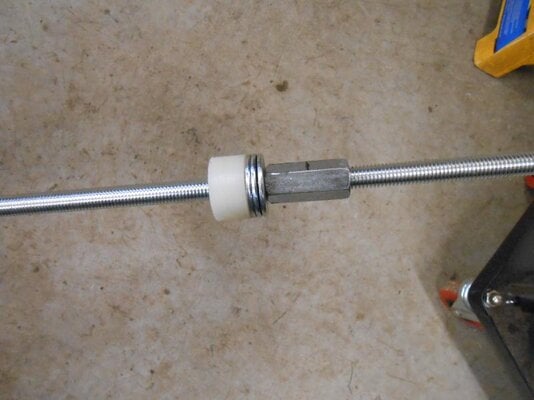
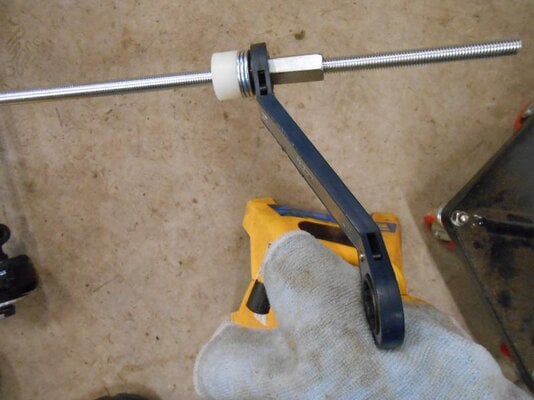
The nut clears the top end of the upper control arm and you can use a 3/4" ratchet wrench to turn it:
Here's a few pictures of it being used:
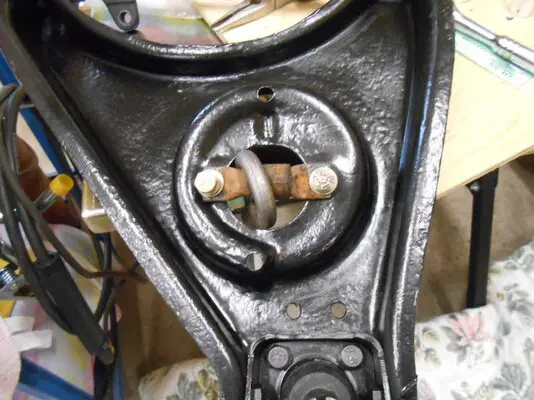
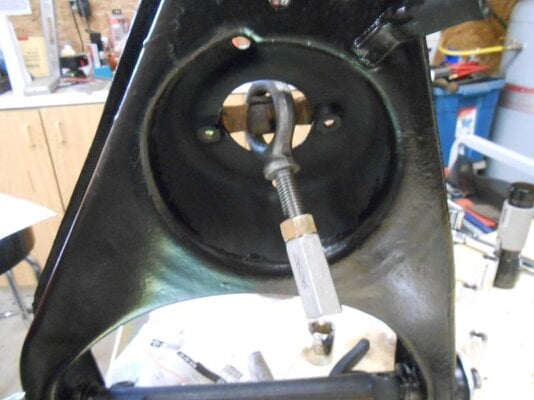
First thing was to install the lower portion of the tool to the lower control arm, using the mounting location for the lower end of the shock:
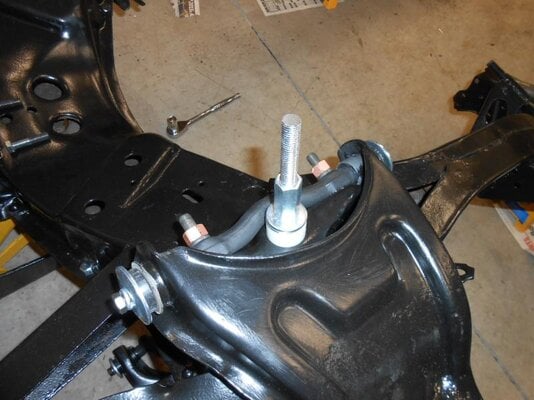
The upper portion of the tool was inserted down into the hole for the upper portion of the shock tower:
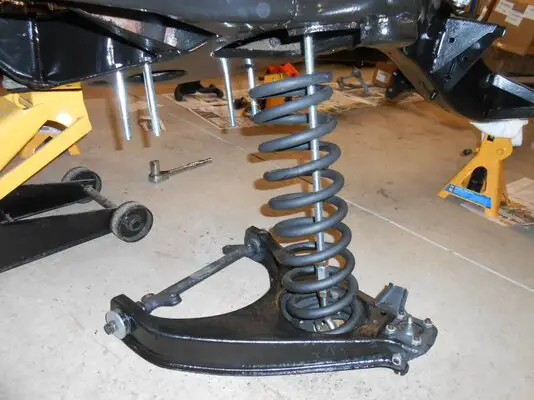
I laid the spring into the lower control arm, and joined the two halves of the tool together. I also chained the spring to the lower arm for safety sake:
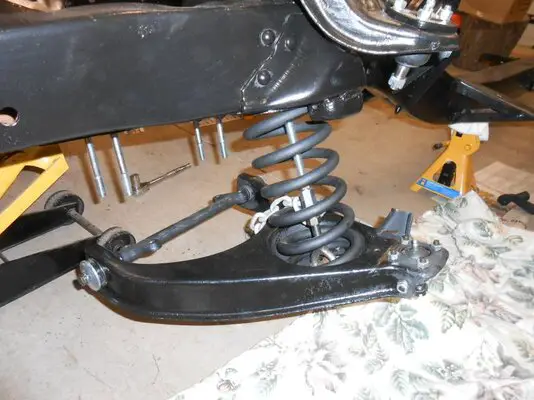
Next, started to crank on the upper nut and pull the spring up into the frame pocket:
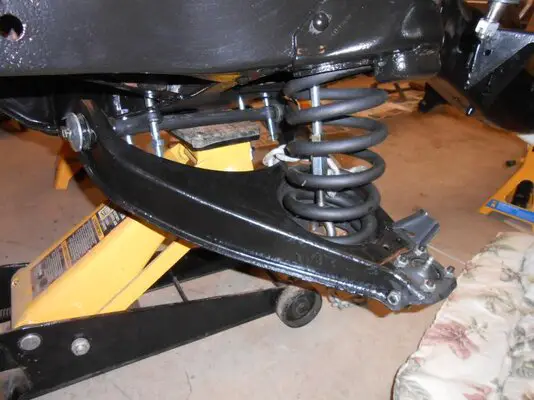
I used the floor jack to lift the control arm up and used long bolts to align the rod with the holes:
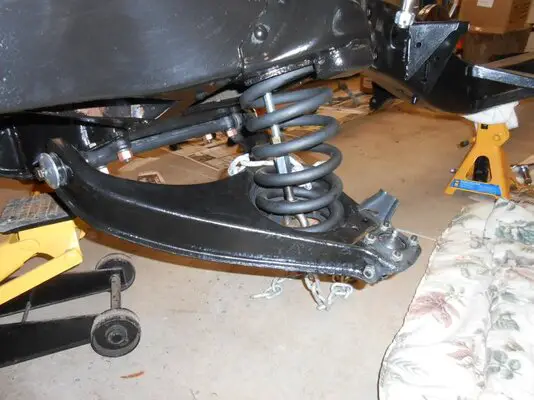
Replaced the temp bolts with the correct bolts, washers and nuts:
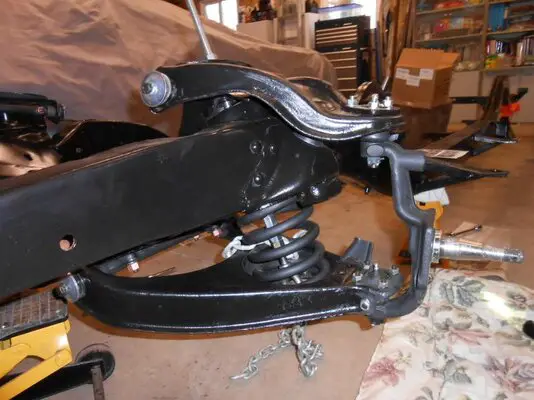
Finished cranking the spring to the correct height, added the spindle, installed the nuts and torqued as required, added the cotter pins, then backed off the tool and the job was complete!
Here's a link to the thread where i found the idea:
https://www.trifive.com/forums/showthread.php?t=113103
Dave
When I re-stalled my front end on a 57 Chevy, I made an assist tool to pull the lower control arm into position while the frame was on jackstands.
Here it's attached to the lower control arm by using the end off an old shock. The long nut attaches both the eyebolt and the rod:


At the other end of the rod is another long all thread nut, three washers and a piece of 3/4" nylon:

The nut clears the top end of the upper control arm and you can use a 3/4" ratchet wrench to turn it:

Here's a few pictures of it being used:
First thing was to install the lower portion of the tool to the lower control arm, using the mounting location for the lower end of the shock:


The upper portion of the tool was inserted down into the hole for the upper portion of the shock tower:

I laid the spring into the lower control arm, and joined the two halves of the tool together. I also chained the spring to the lower arm for safety sake:

Next, started to crank on the upper nut and pull the spring up into the frame pocket:

I used the floor jack to lift the control arm up and used long bolts to align the rod with the holes:

Replaced the temp bolts with the correct bolts, washers and nuts:

Finished cranking the spring to the correct height, added the spindle, installed the nuts and torqued as required, added the cotter pins, then backed off the tool and the job was complete!

Here's a link to the thread where i found the idea:
https://www.trifive.com/forums/showthread.php?t=113103
Dave
Dave,Hi Tony!
When I re-stalled my front end on a 57 Chevy, I made an assist tool to pull the lower control arm into position while the frame was on jackstands.
Here it's attached to the lower control arm by using the end off an old shock. The long nut attaches both the eyebolt and the rod:
View attachment 233299
View attachment 233300
At the other end of the rod is another long all thread nut, three washers and a piece of 3/4" nylon:
View attachment 233301
The nut clears the top end of the upper control arm and you can use a 3/4" ratchet wrench to turn it:
View attachment 233302
Here's a few pictures of it being used:
First thing was to install the lower portion of the tool to the lower control arm, using the mounting location for the lower end of the shock:
View attachment 233338
View attachment 233337
The upper portion of the tool was inserted down into the hole for the upper portion of the shock tower:
View attachment 233336
I laid the spring into the lower control arm, and joined the two halves of the tool together. I also chained the spring to the lower arm for safety sake:
View attachment 233335
Next, started to crank on the upper nut and pull the spring up into the frame pocket:
View attachment 233334
I used the floor jack to lift the control arm up and used long bolts to align the rod with the holes:
View attachment 233333
Replaced the temp bolts with the correct bolts, washers and nuts:
View attachment 233332
Finished cranking the spring to the correct height, added the spindle, installed the nuts and torqued as required, added the cotter pins, then backed off the tool and the job was complete!
View attachment 233339
Here's a link to the thread where i found the idea:
https://www.trifive.com/forums/showthread.php?t=113103
Dave
Thank you, but I have the viking shock that goes in there as well..
I want to preface that this isn't intended to be a insult or criticism. With that amount of welding I would take the frame to a chassis shop to have it checked for straightness and squareness and have it pulled if needed. Welding always causes some warpage which is why ideally major chassis welding should be done in a chassis jig or at least a flat chassis table. Concrete garage floors and driveways are not that flat to support a frame straight. Moreover, back step welding techniques should be used for major chassis welding jobs to mimimize heat induced warpage. With G body frames being so flimsy they are senistive to heat warpage.
Last edited:
Wow, great job on the frame Tony. Gives me motivation. 🙂 Do you need a proportioning valve if you use a disc disc master cylinder?
Your shop looks like mine. How did you support the body and drop the frame?Its been a while since I've posted on this thread, but I finally got some progress going on with the SS. On Thanksgiving morning I ended up removing the fenders and dropping the frame. The next few weeks I will clean it up, reinforce the rear lower control arm bracing, box in the center c-channels and notch the frame.
View attachment 231859
My welder made sure to not stay in the same area for a long time, he kept jumping back and forth so the frame wouldn't get too hot.I want to preface that this isn't intended to be a insult or criticism. With that amount of welding I would take the frame to a chassis shop to have it checked for straightness and squareness and have it pulled if needed. Welding always causes some warpage which is why ideally major chassis welding should be done in a chassis jig or at least a flat chassis table. Moreover, back step welding techniques should be used for major chassis welding jobs to mimimize heat induced warpage. With G body frames being so flimsy they are senistive to heat warpage.
Thank you brotha 💪🏽Wow, great job on the frame Tony. Gives me motivation. 🙂 Do you need a proportioning valve if you use a disc disc master cylinder?
Yes you will need a proportioning valve. Our cars come with one already but it's a disc/drum setup. I believe the one for disc/disc is a PV4
Similar threads
- Replies
- 2
- Views
- 110
- Replies
- 0
- Views
- 65
- Replies
- 3
- Views
- 109
GBodyForum is a participant in the Amazon Services LLC Associates Program, an affiliate advertising program designed to provide a means for sites to earn advertising fees by advertising and linking to amazon.com. Amazon, the Amazon logo, AmazonSupply, and the AmazonSupply logo are trademarks of Amazon.com, Inc. or its affiliates.

