What did you do to your G-Body today? [2011-2018]

Status
Not open for further replies.
Pulled the old carpet out of my 86 and cleaned up the floor pans. Will wait until tomorrow to put the new carpet in. .
 
Finished torqueing body bolts, painted fuel tank and straps, removed rear lowering springs and replaced with wagon springs cuz I decided I wanted to go back up, didn't like it low.... put shocks in aaaand something else, but I can't remember now
 
Put rear brakes on and rust converted the inside of the chrome for my rear bumper. Contemplated many many things.....😎
 
I spoke to the shop that's going to re-charge my system earlier this morning. On his advice he recommends at least a new drier and prefers a new drier and compressor ( mine is covered in oil and looks to be original with the Harrison R12 label on it ). I have them on-order with the local jobber. I am rapidly approaching the benchmark $500 budget I started with LOL.

Well my $500 budget is shot LOL
$ 386.00 for a compressor, accumulator, seals & oil. So Wed I swapped in the AC parts. I also had a new PS pump to put on. Shop called me over yesterday to show me the owners Snap On Puller in 2 pieces. It broke trying to get my pully off. We put another puller on it but needed a bunch o heat to get it off. In the end my pully is fooked. Couldn't find one local so I ended up with a chrome aftermarket unit. Its going to get some time in their blast cabinet before I can get some black paint on there.

If anybody has a 2 groove PS pully kicking around shoot me a PM if you could. I have never had much luck with aftermarket chrome stuff
 
Only time for fuel tank install and another touch of rust converter. Picked up some stainless hardware for bumpa re attachment.
 
  • Like
Reactions: Rktpwrd
So far today I took out front springs and cut 1/4 coil from the 5660's, rear bumper chrome is half reattached to support, just waiting on paint to dry on the bumper shock mount tabs.
Oh, and I re torqued all my body bolts to the correct spec with the correct torque wrench. I think we'll be much happier with that😉
 
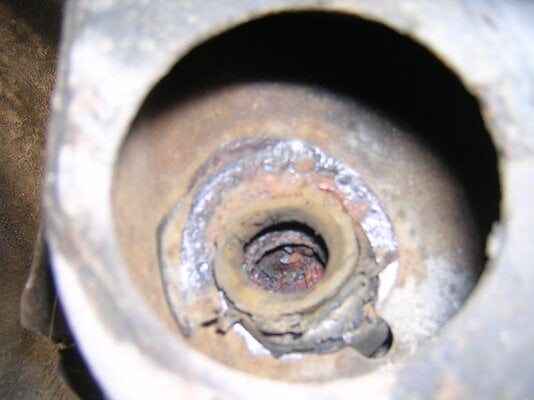
Got back to working on the body bushings on the wagon. Picked up an M12-1.50 tap and stuck it into a 9/32" 12-point socket (almost-perfect fit). With two extensions plus some spray lithium grease, I cleaned up the body mount plates. Put on a face shield, used a flashlight and a pick and dug out the one rotten body bolt (behind right rear wheel). Now trying to figure out how to replace it. There's just enough left that trying to drill it out will be a pain.
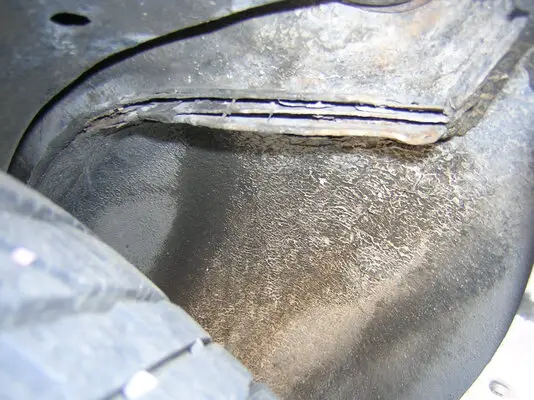
Looks like a logical place on a wagon to get in there is through the fender well, which you can see also has the iron 'spreading' disease. There must be a 'bonus' water trap in there because this is the only rotten place on the entire car. The opposite side, same location looks perfect. When I do this side's bushings, I'll see if I can stuff a new upper bushing in there and lockwire it down with out a bolt so it does not fall out. Then at a later date, I'll pick up the whole body and do surgery on that side. I have a new rear brake line to route and it looks like a snap if I can get to the top of the chassis. Not for today.
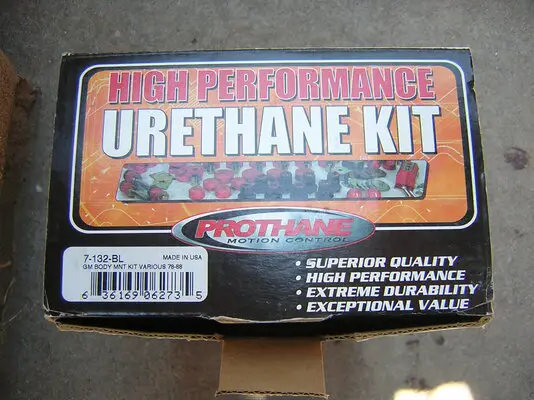
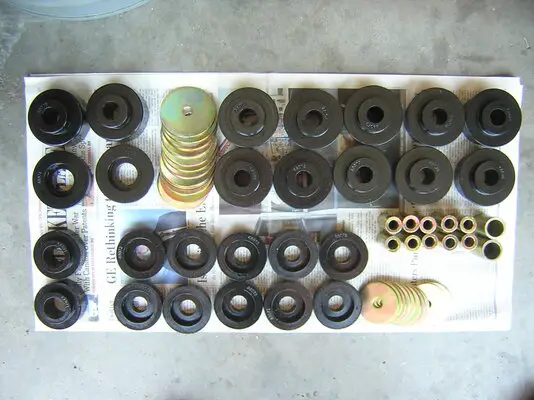
I had to find the Prothane Malibu bushing kit in the Shed o' Many Things, and was amused that there were no instructions. Maybe got left out ten years ago. After some extended searching, I found a watermarked copy NOT on Prothane's website. If I put the Prothane instructions with Energy Suspension's instructions, I can figure out what I am doing. After 10 years in storage, they are a little 'greasy' with silicone oil.
Got out my new McMaster bolts (black oxide, like OEM) and cleaned and painted the upper half of them with anti-rust paint, then threaded in new bolts and the bottom half of the Prothane bushings down one side of the car, using a dab of anti-seize on the end threads.
Tomorrow or next weekend, I will lift the driver's side body and start swapping in the new bushings, then repeat for the passenger side.
 

Attachments

  • DSCN5870.JPG
    DSCN5870.JPG
    411.8 KB · Views: 199
  • DSCN5871.JPG
    DSCN5871.JPG
    395.4 KB · Views: 212
  • DSCN5872.JPG
    DSCN5872.JPG
    369 KB · Views: 215
  • DSCN5880.JPG
    DSCN5880.JPG
    326.5 KB · Views: 227
  • DSCN5882.JPG
    DSCN5882.JPG
    399.6 KB · Views: 232
  • Prothane 7-132.JPG
    Prothane 7-132.JPG
    213.9 KB · Views: 217
Last edited:
  • Like
Reactions: drogg1 and mr evil
Status
Not open for further replies.

GBodyForum is a participant in the Amazon Services LLC Associates Program, an affiliate advertising program designed to provide a means for sites to earn advertising fees by advertising and linking to amazon.com. Amazon, the Amazon logo, AmazonSupply, and the AmazonSupply logo are trademarks of Amazon.com, Inc. or its affiliates.

Please support GBodyForum Sponsors

Classic Truck Consoles Dixie Restoration Depot UMI Performance

Contact [email protected] for info on becoming a sponsor