Given that I used to manage a.small engine shop, I know my way around them pretty well 😉
What did you do to your non-G body project today? [2021]
- Thread starter 500/600
- Start date
You are using an out of date browser. It may not display this or other websites correctly.
You should upgrade or use an alternative browser.
You should upgrade or use an alternative browser.
- Status
- Not open for further replies.
dicked with the fast idle on the holley learning how it works. the choke arm was rubbing against the cam instead of being underneath of it. I dont know a damn thing about holleys but i think it needs a bigger squirter. it hates sudden throttle blips but if ssssssssloooooooowlyyyyyyyyy roll into it its fine and revs up fine. it still works decent for a $50 ebay holley i threw a new diaphragm in.
Also drove it to the gas station. man
with no sway bar that thing is w a l l o w y
Also drove it to the gas station. man
with no sway bar that thing is w a l l o w y
Last edited:
So, the tank on my truck has been leaking for quite some time. This previous saturday I decided to remedey that. I crawled under and I guess knocked a piece of rust or sediment or something loose and it started p i s s i n g man. Just straight gasoline urination. Even though my fuel gauge said the tank was nearly empty, more than 12 gallons came out. Had to call a friend to run to the store and pick up another 5 gallon can. Apparently my truck has the 38 gallon tank, and I ordered the 19 gallon tank by mistake, which would be fine. Except no one but LMC truck makes a sending unit for the 38 gallon tank and they are backordered, they have no idea when they might get some in. You have to otherwise cut up and modify an already hard to find 19 gallon sending unit and hope it doesn't leak or fall apart. My sending unit I put in that tank to rectify my fuel gauge issue last year ****ing fell apart, the float and the sock were in the bottom of the tank, as well as another sock and tube. what the ****.
So, the truck is sitting in the street awaiting a new 19 gallon sending unit so I can put the 19 gallon tank in because every single parts store couldnt get one in inside of a week.
The thing that annoys me is the tank is pretty new and spotless inside. Either someone stabbed a hole in my tank or a rock hit it or something.
oh also got banned from Fvckbook marketplace for posting my t bird for sale, presumably because I said "unless you have x amount dont message me".
But them retards also banned me for a week because I linked a qjet youtube video i made with my thumb in the thumbnail and they said it was in violation of a nudity rule.
So
yeah.
thumb=dick according to fb
Last edited:
This incredibly lame/vague copy/paste from LS1Tech doesn't even begin to capture the asspain or headscratching that went into the big 3 fixes/mods I made to the Red Dragon the past few weeks. I have pics a plenty but am too lazy to deal with them as they show progress at a snail's pace. For the initiated the steel tank was weeping, I'd snapped an axle shaft, and my braking system continues to suffer from knock back. I hope the car is a different animal this season because I've blown a lot of damned money to do so.
Plastic tank is in. 3.73 axle is repaired and reinstalled. Stoptechs are rebuilt, gravity bled, and reinstalled with new pads and modified brake ducting and plenums. The LS1 pump is a few orders of magnitude quieter than the LT1 pump and fortunately the car fired right up. Only problem was it stunk the garage out like a 2 stroke. So my biggest concern now is the Stoptechs not leaking and the pump that's been sitting so long remaining happy about being alive. I think I did it all right, but the thing that screws you is always the thing you least expect so we'll see. I just want a successful practice day and race weekend even if it costs me some asspain.
Plastic tank is in. 3.73 axle is repaired and reinstalled. Stoptechs are rebuilt, gravity bled, and reinstalled with new pads and modified brake ducting and plenums. The LS1 pump is a few orders of magnitude quieter than the LT1 pump and fortunately the car fired right up. Only problem was it stunk the garage out like a 2 stroke. So my biggest concern now is the Stoptechs not leaking and the pump that's been sitting so long remaining happy about being alive. I think I did it all right, but the thing that screws you is always the thing you least expect so we'll see. I just want a successful practice day and race weekend even if it costs me some asspain.
This incredibly lame/vague copy/paste from LS1Tech doesn't even begin to capture the asspain or headscratching that went into the big 3 fixes/mods I made to the Red Dragon the past few weeks. I have pics a plenty but am too lazy to deal with them as they show progress at a snail's pace. For the initiated the steel tank was weeping, I'd snapped an axle shaft, and my braking system continues to suffer from knock back. I hope the car is a different animal this season because I've blown a lot of damned money to do so.
Plastic tank is in. 3.73 axle is repaired and reinstalled. Stoptechs are rebuilt, gravity bled, and reinstalled with new pads and modified brake ducting and plenums. The LS1 pump is a few orders of magnitude quieter than the LT1 pump and fortunately the car fired right up. Only problem was it stunk the garage out like a 2 stroke. So my biggest concern now is the Stoptechs not leaking and the pump that's been sitting so long remaining happy about being alive. I think I did it all right, but the thing that screws you is always the thing you least expect so we'll see. I just want a successful practice day and race weekend even if it costs me some asspain.
This post kinda sucked. Here's one with pics. I've been being lazy about my documentation but that's partly because of the minimal/sporadic day to day progress that I've been making lately.
I did get my knuckles and rear caliper mounts sandblasted and then painted with VHT roll bar and chassis satin black. Seems to be more durable than the regular Rust-oleum I've used for so long and doesn't need a primer either.


Here you can see an issue that developed, somehow, last time the car was out.


Somehow my rotors ended up lathing the caliper mounts to the point these hammered *ss brake pads tried walking right out. I was tired of wrenching on the car Sunday of that race weekend so ran it metal on metal out back twice, including my only win that weekend. No matter as the rotors trashed the mounts anyway. This happened on the borrowed axle with my brakes. All set up on my axle now it all looks OK. Next up I had to redo my brake ducting, but the solution ended up much simpler than I had originally imagined. I figured I'd get fancy with a pie cut and angle these suckers forward. When I went to do just that, I came to realize that this perpendicular setup really is ideal. I thought they pushed the hose into the coilovers, but when I checked range of motion with the tie rods hooked up I was clear and full lock the other way was much happier, so I welded the first one back together, moved the rest mount, and was done. I also reduced the diameter of the shrouds to fit these schwanky new rotors.


This side I cut back a little too far, so welded the piece I cut off back on.

Come on don't leak and do fix my knock back issue!
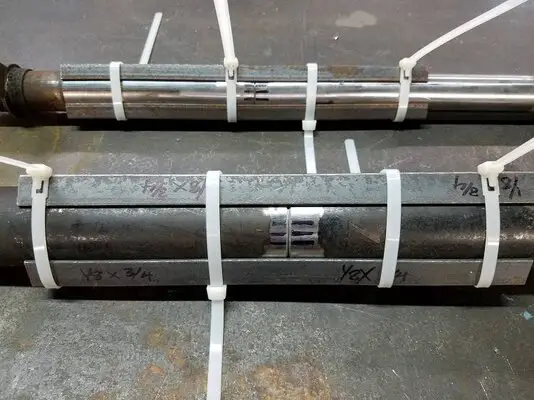
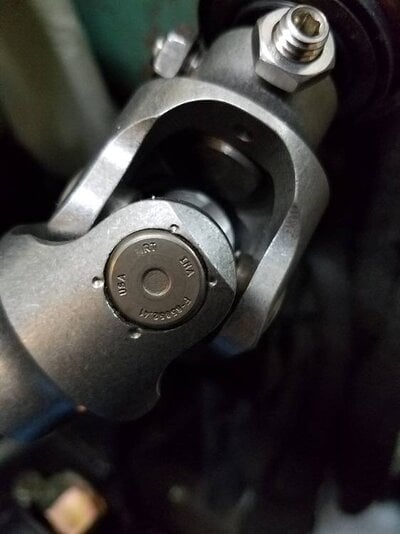
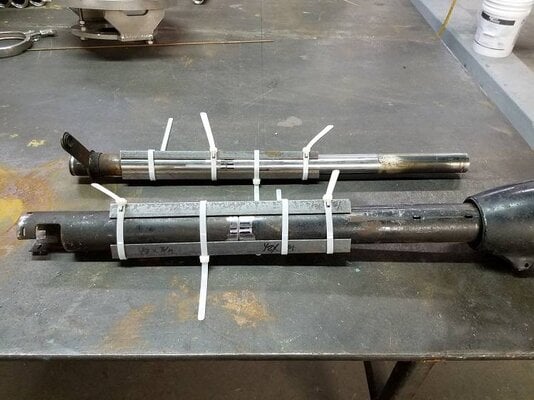
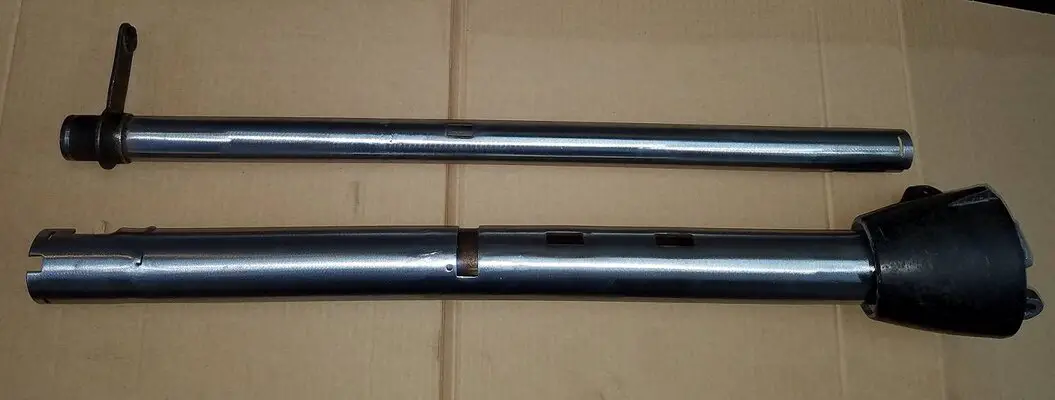
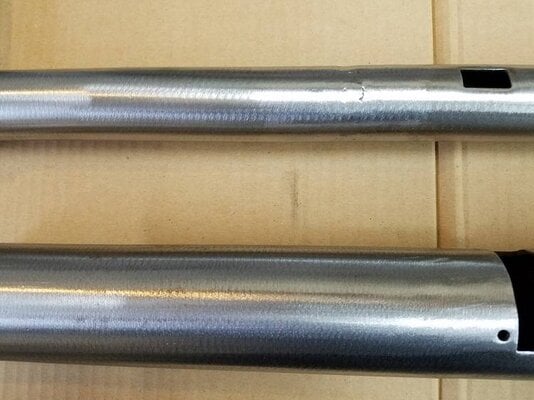
Another round of partial steering column assembly & validating things fit as anticipated for my 64 C10. I liked what I saw so just as quickly as it went in, it came back out.... and apart.
The column tube & shift tube will both now get finished tonight/tomorrow w/full welding vs just tacked together.
There were 2 reasons for shortening the column. First was to move the steering wheel closer to the dash as the pre-88 Chevy trucks are kind of cramped in the cab. The second was to put the R&P -to- column steering shaft between the C/O bracket & manifold flange which required the U-joint to be closer to the firewall.
1. Column housing tube & shift tube jigged up for welding.
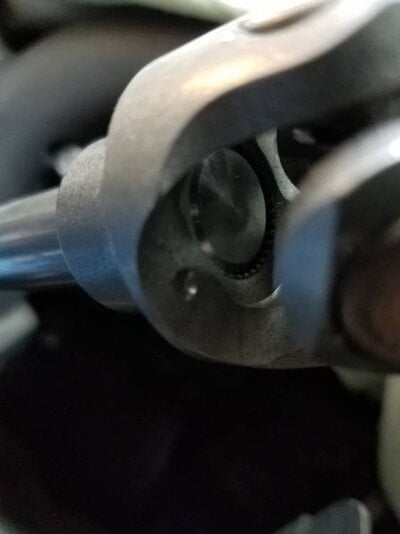
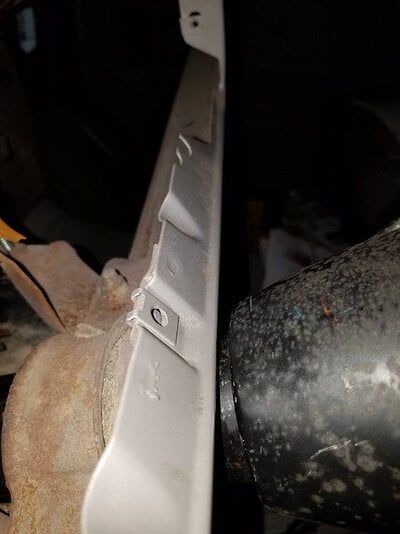
2, 3. Installed column close-up's verifying U-joint to shaft depth engagement.
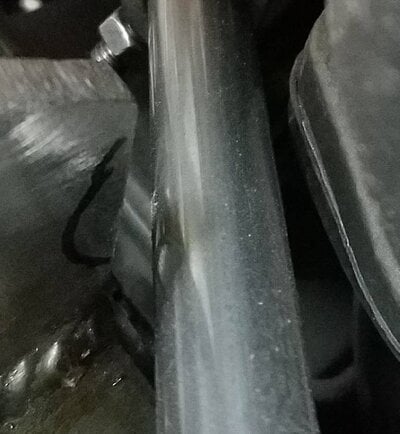
4. R&P to column shaft clearance between upper C/O mount & exhaust flange.
5. Gap @ dash.
Attachments
Last edited:
Which ones??? Revisited the section of tube that I tack welded to the 20T Press as an onboard socket to accept a work light and allow it to swing around and be pointed at a specific item for better visibility. Liked how it had worked so I clipped the lower section of the tube off as it was superfluous and then made solid passes between the tube and the press frame column on either side. Ground the outer face to make it look "pretty" and left the back side as was. No one gets to see it so why glamorize it?
Took two lengths of bent fence rail from off the scaffold rack and proceeded to introduce them to my vise. After a certain amount of persuasion both of them had the same curve and were the same length overall and from the bends to the ends, top and bottom. These will be the outer frame tubes for my Tank Dolly for the Mig Welder. So far the cost has been time and labor as everything I have used has come from the surplus or "junk" pile. Next step will be to find and cut some flat strap for the ribs. I have angle iron for the axle trunnions but have to scrounge a section of flat plate for the sole or foot. For the curious who might be wondering why not go with straight tube and use pipe ells for the bends, the fence tube is .060 wall and the ells are .140. In layman's terms the tube is about slightly less than 1/16th of an inch thick and the ells are over an 1/8th of an inch thick and closer to 5/32's. The O-D's match but the tube is thin wall meaning I have go gently to melt them together or I could get burn through. The rail tube is also galvanized and has to be thoroughly cleaned down to bar metal to avoid fumes and poisoning from the heat.
Finally managed to score some Econo grade 2x4x 8 foot studs for a half way decent price. Demand has beaten supply into the ground around here and prices for kindling have blown through the roof; never mind a stick of straight decent timber, Have that sitting on my pails of crusher fines, just waiting for some Saw Cat love to cut them to length so I can build my cribbing to lift my Other G-Body vehicle high enough that I can slide the new transmission under it. I need 20-24 inches of clearance with the 700R4 on a transmission jack so lots of wood to cut and assemble.
The crusher fines?? That is the fine shrapnel left behind when a rock crushing plant turns big boulders into whatever size stone they need for road foundation reconstruction. The fines, smaller than gravel, make a good base for patio blocks or new sidewalks, pack down easily and offer a solid substrate that doesn't move around when pushed by frost heave.
Oh, and I have a couple of vintage/antique m/c hubs sitting the drill press table that need to be reflanged or have the current flange reclocked. But that is a story for another time.
Nick
- Status
- Not open for further replies.
Similar threads
- Replies
- 155
- Views
- 10K
- Replies
- 48
- Views
- 2K
- Replies
- 88
- Views
- 4K
GBodyForum is a participant in the Amazon Services LLC Associates Program, an affiliate advertising program designed to provide a means for sites to earn advertising fees by advertising and linking to amazon.com. Amazon, the Amazon logo, AmazonSupply, and the AmazonSupply logo are trademarks of Amazon.com, Inc. or its affiliates.


