BUILD THREAD 1987 Olds 442 Project Build

Tom Lambert

Not-quite-so-new-guy
Jan 25, 2018
39
44
18
Thought I would move the build over here from the 442 page. Here's what's been done so far.
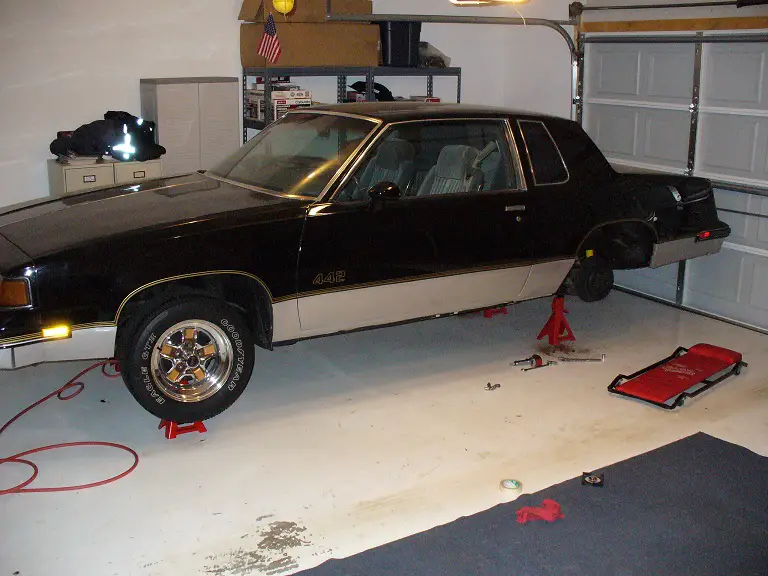
Get the car home
442_2.JPG

Tear the front end off
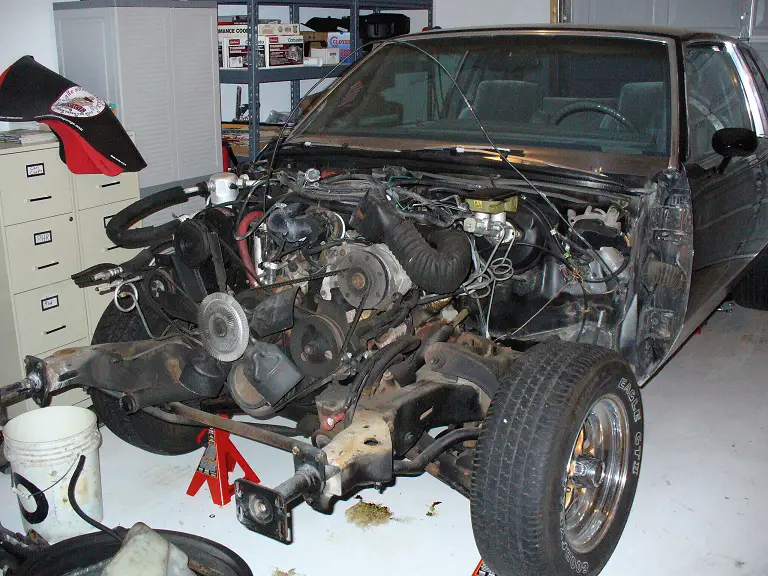
442_4.JPG

Take the engine out
442_5.JPG

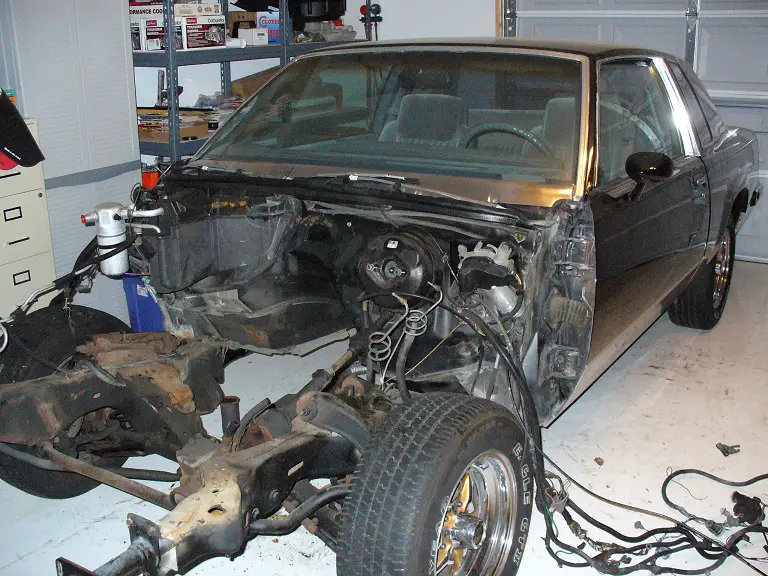
Take the body off the frame

Start to strip the frame
442_10.JPG

Sand blast the frame
442_11.JPG

The frame blasted clean
442_12.JPG

The frame coated
442_14.JPG

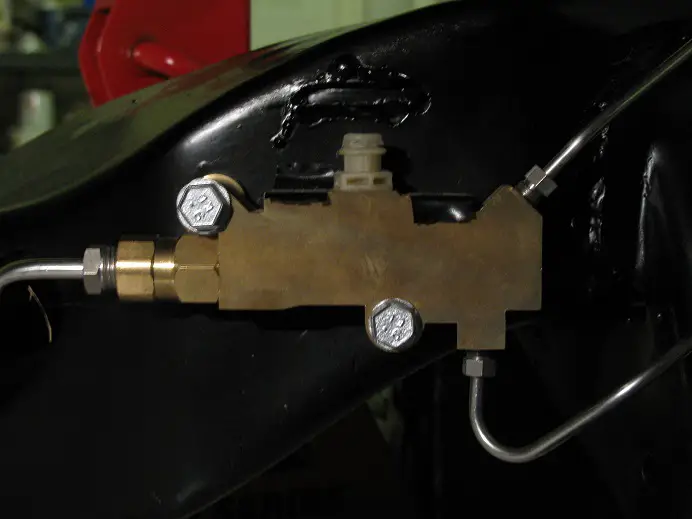
Install Inline Tube rear disc proportioning valve and stainless brake line
442_15_Proportioning_Valve_2.JPG

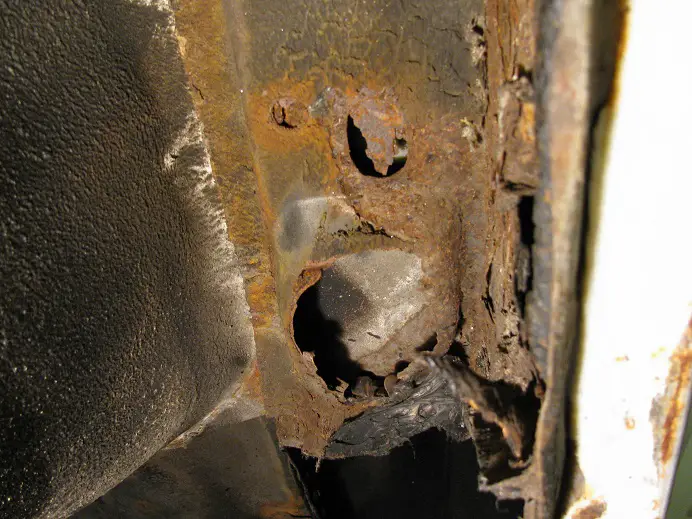
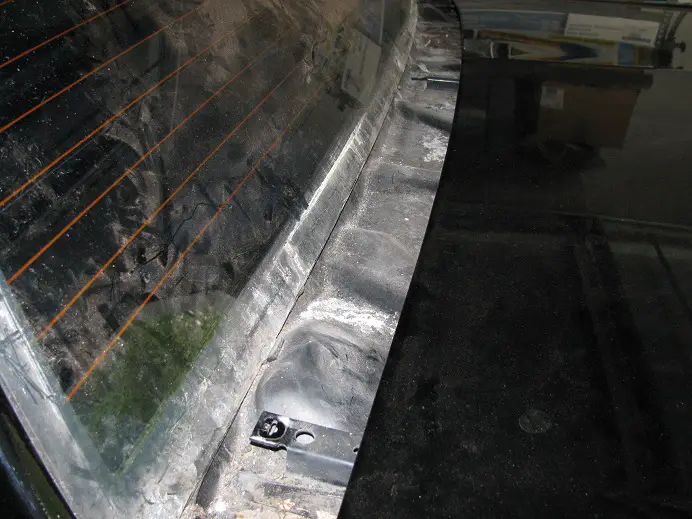
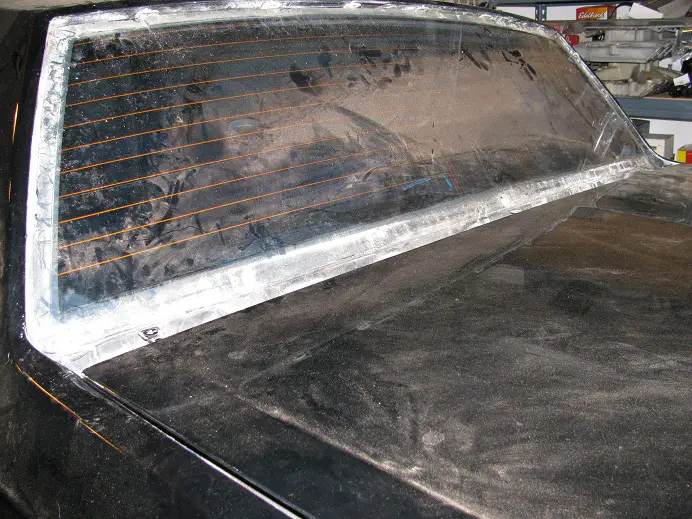
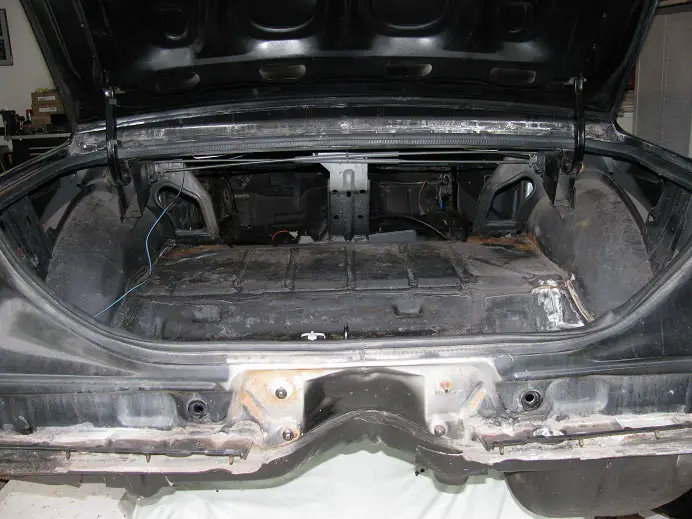
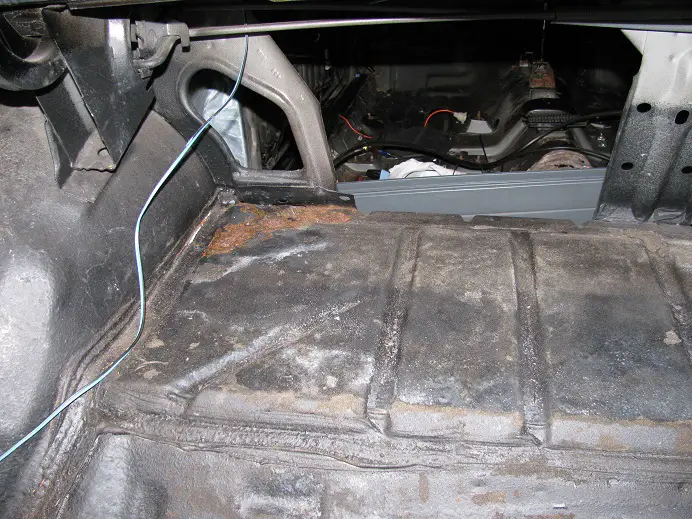
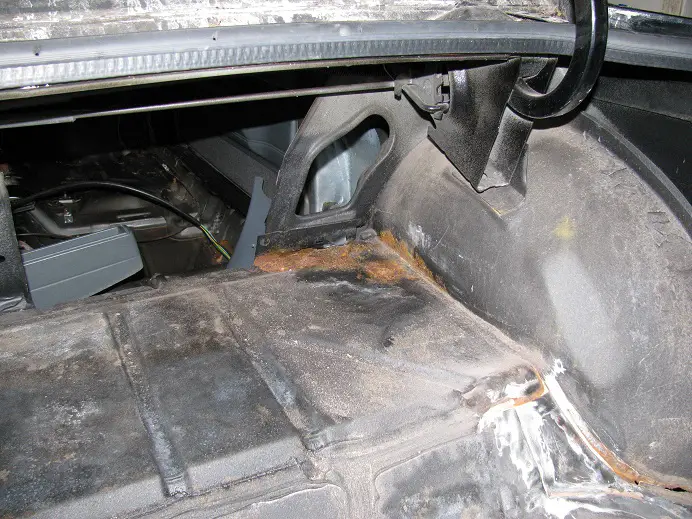
Come to grips with rear torque box body rot
442_16_Rusty_Body.JPG

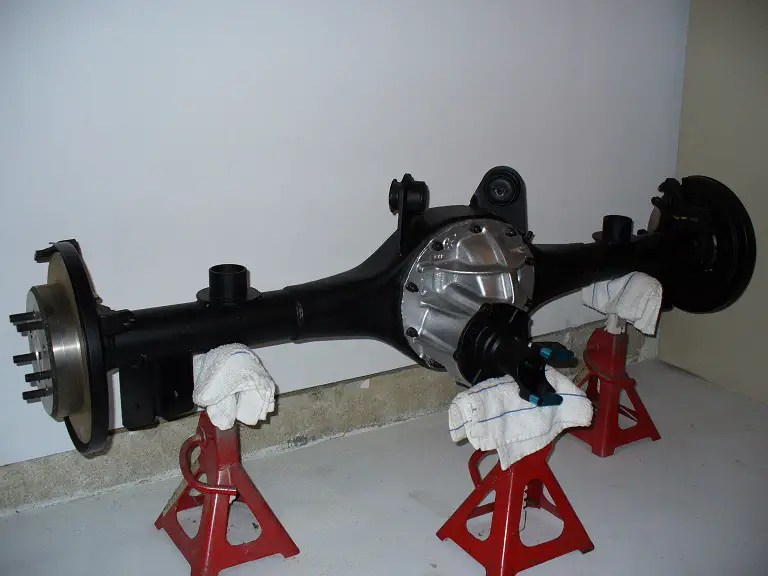
Put the F**D 9 inch with rear disc together
Rear_2.JPG

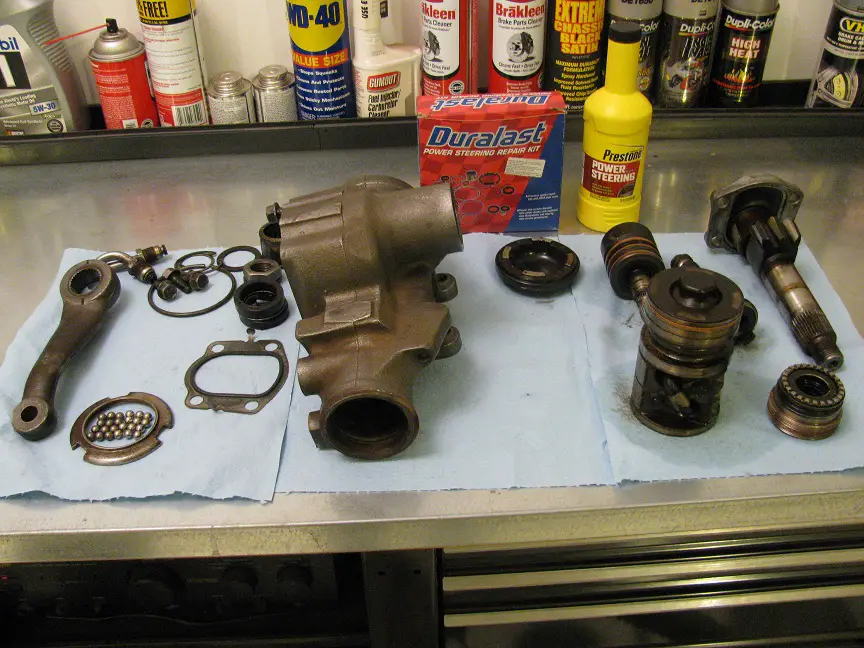
Rebuild a Monte SS 12.7:1 Constant Ratio Gear Box
Steering_Gear_2.JPG

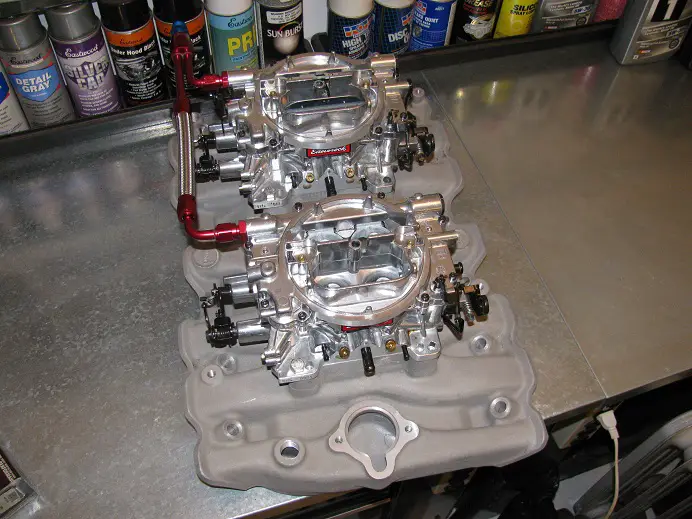
Show off the Dual Quad intake
Dual_Quad_1.JPG

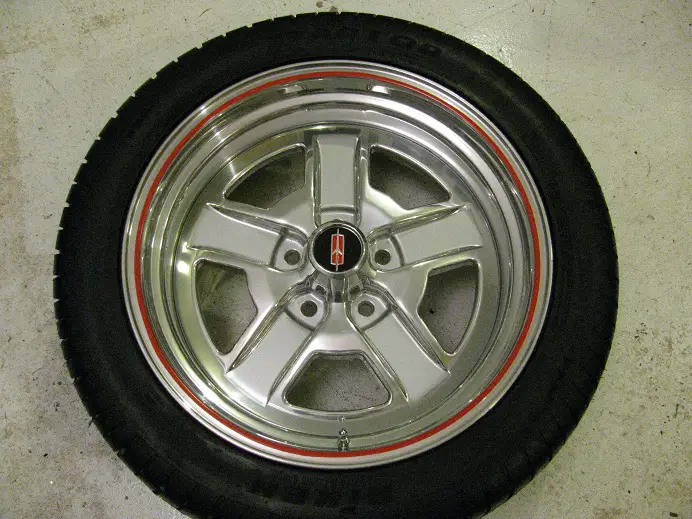
Test fit the prototype 18 Billet SSIII wheel with silver vinyl inserts and red pin stripe
IMG_3926.JPG


So that's where I am up till now.

Hutch
 

Tom Lambert

Not-quite-so-new-guy
Jan 25, 2018
39
44
18
Finally got a chance to do some more work to the old girl.

Stripped the cluster and trim out of the dash
Speedo_Removed.JPG

Pulled the driver side door glass out
Driver_Door_Glass.JPG

Pulled the rear glass trim and the rear valance panel (Holy Crap the flash shows the dirt)
Rear_Window_Trim.JPG

Rear_Window_Trim_2.JPG

Stripped the tail light wiring and trunk carpet. I found surface rust at both corners in the back of the trunk, but no sign of a leaky rear window??
Stripped_Trunk.JPG

Driver_Side_Trunk_Rust.JPG

Passenger_Side_Trunk_Rust.JPG


That's all for now.

Hutch
Those wheels looks very good, Where can I buy a set?
 

oldsofb

Royal Smart Person
Supporting Member
Dec 7, 2007
1,385
4,018
113
Maryland
Drilled the upper shock bolt holes out to 3/8 for the QA1 shock mounts. Installed the upper mounts.
IMG_4349.JPG


Put the UMI Rear Shock Tower Brace in at the same time.
IMG_4351.JPG


A Couple pics of it all together.
IMG_4346.JPG

IMG_4348.JPG

IMG_4352.JPG


Hutch
 
  • Like
Reactions: 6 users

oldsofb

Royal Smart Person
Supporting Member
Dec 7, 2007
1,385
4,018
113
Maryland
A shot of the 18 inch SSIII on the rear of the 442. Not on it's own weight, and not the final ride height, but I like it!
IMG_4354.JPG


And the mess that is my garage.
IMG_4355.JPG

IMG_4356.JPG


Hutch
 
  • Like
Reactions: 10 users

Canon_Mutant

Royal Smart Person
Aug 15, 2015
1,159
1,420
113
I am sincerely hoping that putting the upper control arms on is easier with them already attached to the rear end because, if not, I am committing suicide immediately. I had them on once with the rear end already attached and nearly committed suicide then of course finding out next that my rear end was toast.

Cautionary recommendation: Even if you are not experiencing rear end problems, pull the cover and make sure your rear end is completely good BEFORE you swap all the control arms, shocks, springs, etc.

So, I am getting close to reinstalling mine. Please Please Pretty Please tell me it is easier with the one side already attached?

Seriously, good job Hutch. Looking good. I still think you're going to beat me done with your complete ground up but I'm OK with that as long as we both get to ride in each other's cars before . . . well, death? See aforementioned suicide intervention request , , ,
fingerscrossed.gif
 
  • Like
  • Haha
Reactions: 1 users

TURNA

Rocket Powered Basset Hound
Jul 24, 2009
10,941
19,992
113
Socialist NY
Don't know who I missed this build but glaf I found it. Looks great!!
 
  • Like
Reactions: 1 user

GBodyForum is a participant in the Amazon Services LLC Associates Program, an affiliate advertising program designed to provide a means for sites to earn advertising fees by advertising and linking to amazon.com. Amazon, the Amazon logo, AmazonSupply, and the AmazonSupply logo are trademarks of Amazon.com, Inc. or its affiliates.

Please support GBodyForum Sponsors

Classic Truck Consoles Dixie Restoration Depot UMI Performance

Contact [email protected] for info on becoming a sponsor