2003 Cobra LS Swap (8/1/22 - Wiring Chassis)

Status
Not open for further replies.

Northernregal

Sloppy McRodbender
Oct 24, 2017
3,359
12,826
113
Red Deer, Northern Montana territory
Oh im ordering a *ss ton extra!

I did wonder if i should run pre and post intercooler air sensors. Would be a good comparison of how efficient the brick is.

For the MAP sensor, i think im going to use a block so that i can have everything branch off from it. Ill use a pressure transducer style MAP sensor more than likely.
I have the Lowdollar sensor block and would recommend it, but plumbing lines for everything is annoying. I went with the LS3 style 4 bar map and think a 5 bar in the sensor block would be a much better plan if I was to do it again. But I do like to spend $50 to save a nickle, because I have much to learn. Lol

Are you going to wire in knock sensors? I did because why not? They are already there.

I also did a pressure sensor pre-intercooler for efficiency reasons. Maybe an idea for you.

I have fuel pressure at the return side of the regulator and the outlet of my MF 4303, for data acquisition reasons.
 
  • Like
Reactions: 1 user

Burning

Greasemonkey
Jul 9, 2020
182
647
93
Bardstown, KY
I have the Lowdollar sensor block and would recommend it, but plumbing lines for everything is annoying. I went with the LS3 style 4 bar map and think a 5 bar in the sensor block would be a much better plan if I was to do it again. But I do like to spend $50 to save a nickle, because I have much to learn. Lol

Are you going to wire in knock sensors? I did because why not? They are already there.

I also did a pressure sensor pre-intercooler for efficiency reasons. Maybe an idea for you.

I have fuel pressure at the return side of the regulator and the outlet of my MF 4303, for data acquisition reasons.

Yup, thats the one i was looking at as well. I plan on buying most of my pressure traducers from Brandon at low dollar, good guy and always answers my annoying *ss questions. I'm still in the air on the knock sensors. More data is always better than no data. Especially when diagnosing issues.


Not much of an update on my car however i did finish up my buddies front end on his car and got everything aligned. Did a little bit better job at aligning everything prior to fully welding so his turned out a little better.
agulwk8h.jpg

pLLbXgqh.jpg

PZkPrBBh.jpg

04KEH7eh.jpg

Cpqu5K7h.jpg

YU0EJwTh.jpg


Got this nice new tool chest on sale for close to 75% off after talking to the manager about deeper discount than clearance.
08qgqQSh.jpg


Was tired of getting quotes of 150-200$ to bend a piece of 1" chromoly so i pulled the trigger on a tubing bender. Yeah i know not cheaper than paying someone, but i want to make my 8.50 into a 25.5E cert for 7.49 or slower so it made sense for me to bit the bullet on the expense. My buddy and i will share the cost of the dies to build him a cage on his car as well. Should be a nice little addition to the shop, now to hunt a quality notcher.

If anyone wants a link to this let me know, utilizes JD2 or JMR dies and is 3/4" laser cut steel. Hydraulic over air it was 780 USD shipped to my door with the ram.
Qle4b2fh.jpg


Picked up label maker capable of doing heat-shrink label printing, should be a nice little touch on the wiring.
7ZmCeneh.jpg


Then on to my next brainstorming activity on how to get the Pro 12.3 Holley Dash into the mustang dash and still have ability to level it out and bring it towards the stock bezel. This is a ROUGH sketch of something that is in my head, we will see if it pans out lol. Basically make a base plate to bolt into the cars existing area, then have a post on 4 corners that will be able to move the plate the dash is attached to around to make it sit flush against the cars stock bezel. I can use the stock guage mounting holes for the bottom of the base plate, and will have to weld a attatchment to the top and anchor off the existing dash bar.
PHqGSCsh.jpg


Hoping to start on my turbo kit this week, i was polling on a couple groups im in on the use of 2.25 over 2.5 diameter tubes for the hotside before building. General consensus is that 2.25 will support 1400+ RWHP, and will keep velocity up which will help spool this big bertha.
 
  • Like
Reactions: 4 users

Burning

Greasemonkey
Jul 9, 2020
182
647
93
Bardstown, KY
Well i have not gotten squat done on my own car.

Did make some changes to the garage to free up some space though. Bought these pallet racks on facebook, cut the depth down and put all my crap on them.
sUHO3Nuh.jpg

LfgPsthh.jpg


Trying to get my buddies car knocked out, and out of my garage so i can move my car over and get the turbo kit complete on mine.

SCF Merge
7O2qVq9h.jpg


Truck manifolds as always.
PeX8zsIh.jpg


Trying to get things lines up using minimal bends on the charge pipe.
TEu6ldzh.jpg

CqsVGpxh.jpg


Hot side is finshed minus the waste gate locations and a slip joint.
6fHWgJOh.jpg


Waiting on the wastegate pipe, 4" alumunim 45 tube, and flanges to push this thing out the door. Hes running a 66 mustang radiator and contour fan so we will get that all mocked up and everything else this weekend. I really need to start mine soon.
 
  • Like
Reactions: 1 users

Burning

Greasemonkey
Jul 9, 2020
182
647
93
Bardstown, KY
Alright, Little bi-weekly update lol.

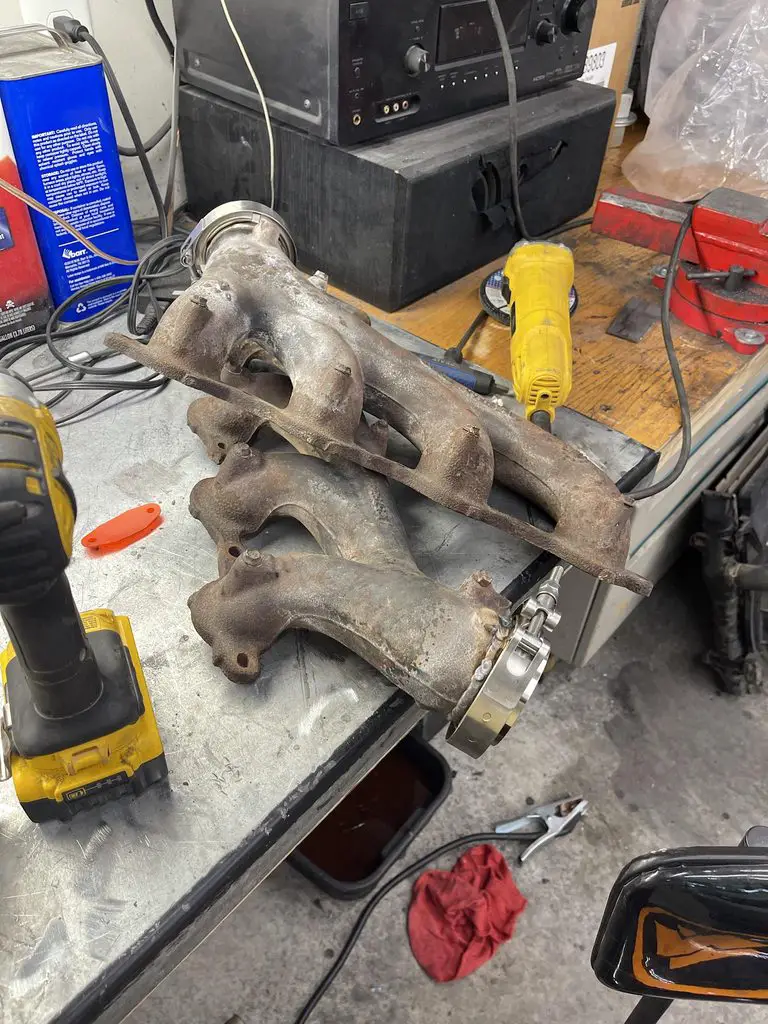
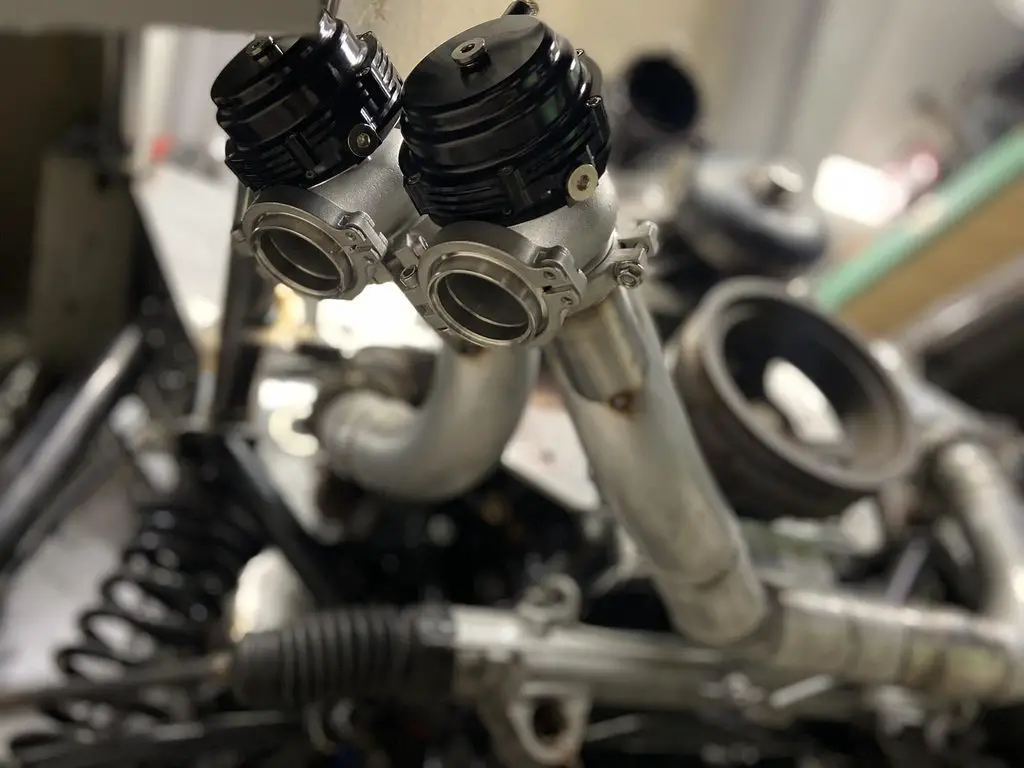
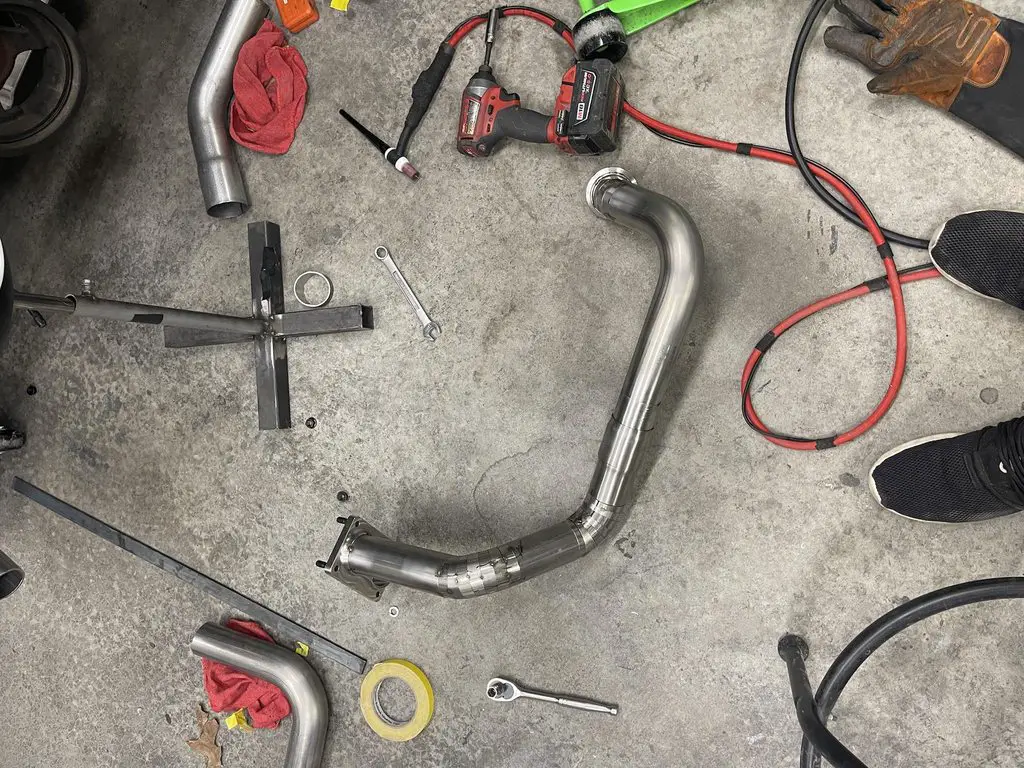
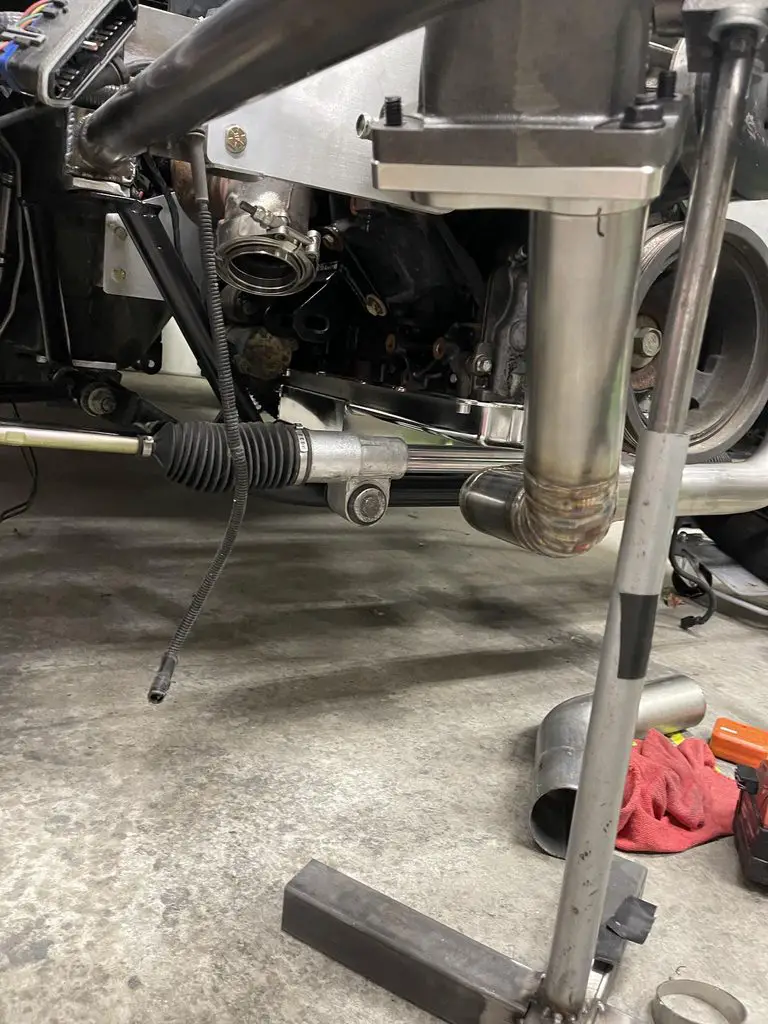
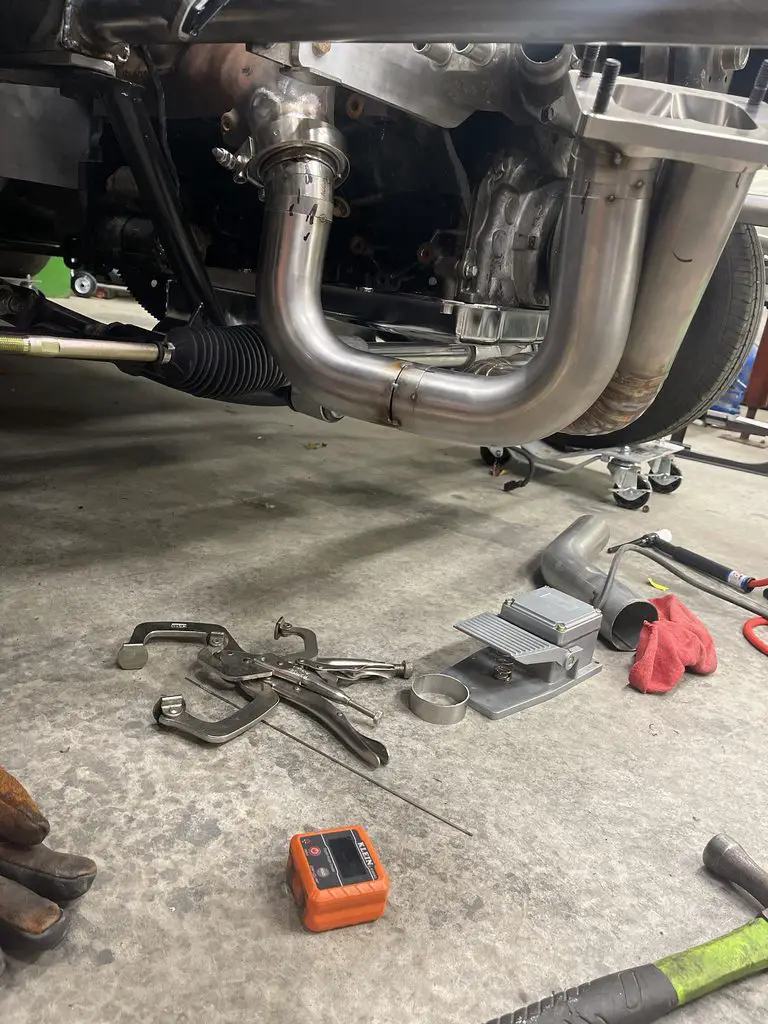
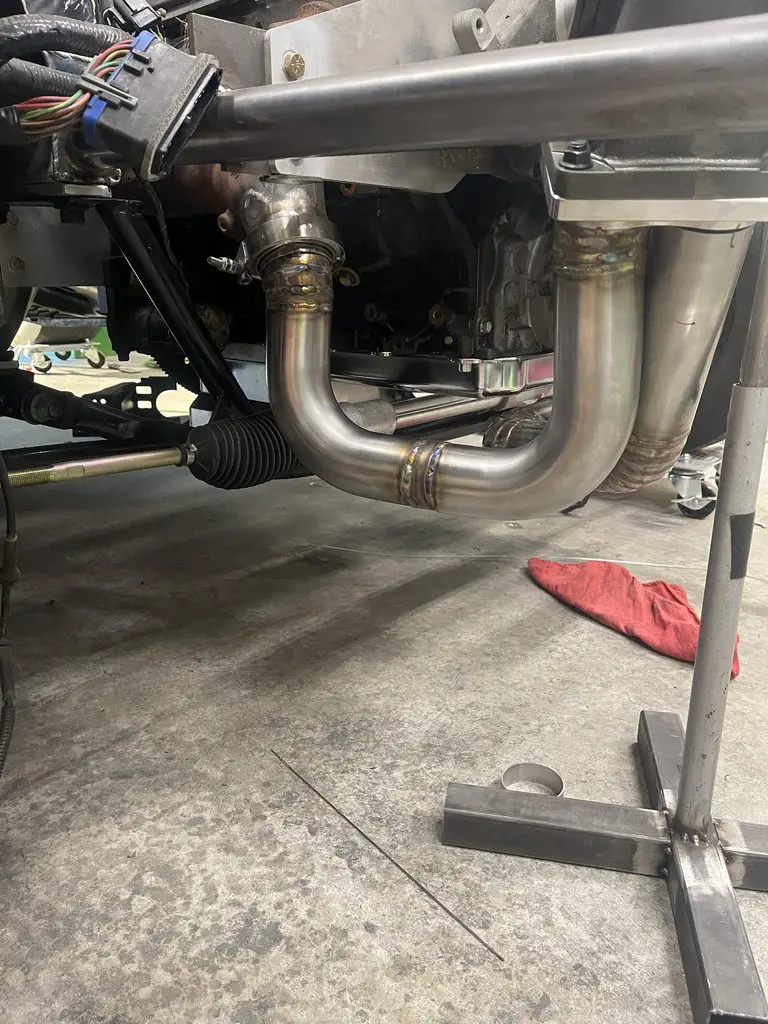
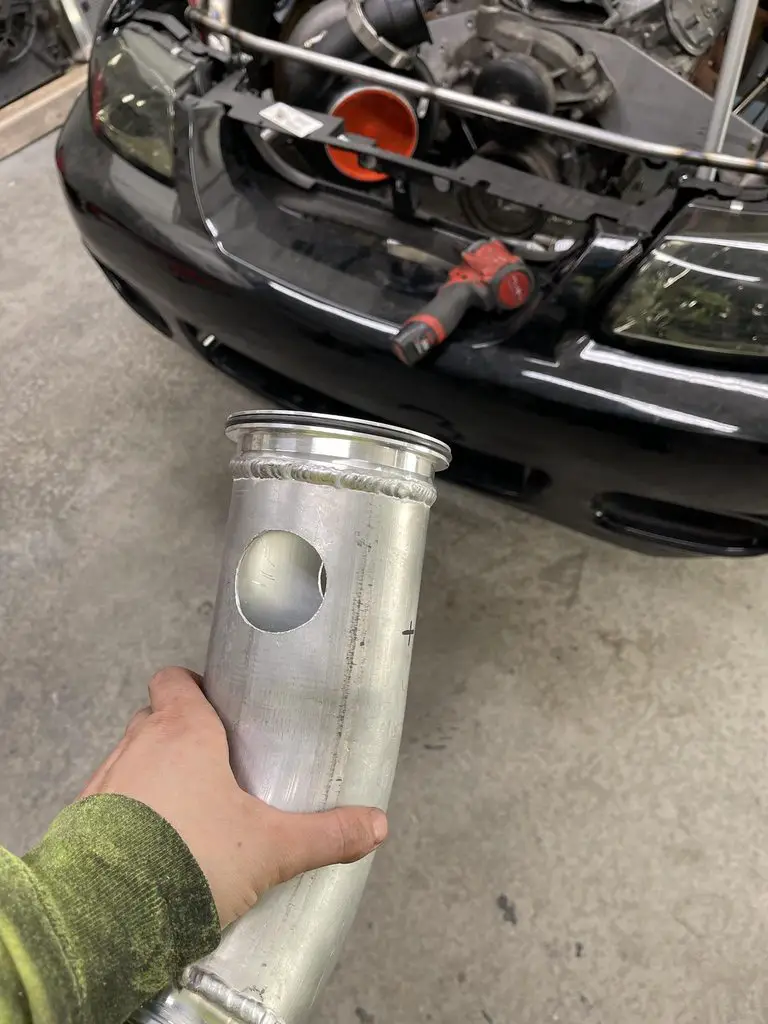
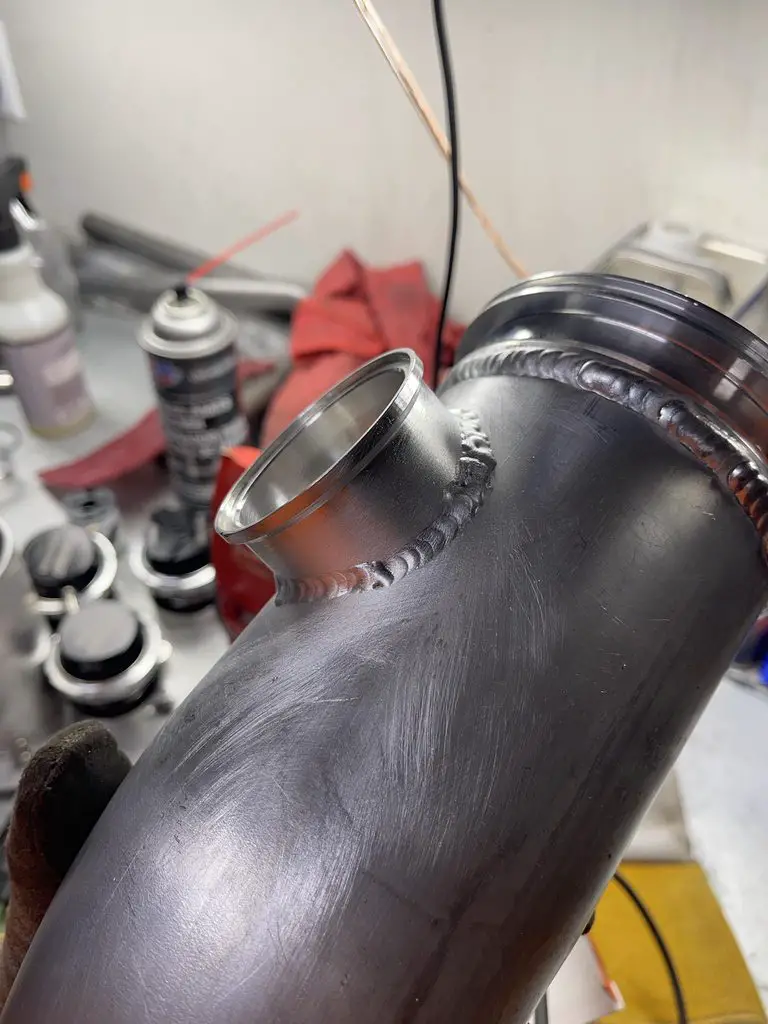
Buddy got his waste-gate pipe in, so we mocked them up cut the pipe to match the cope and then tacked them on for presentation. I'm worried a little bit about the passenger side placement priority, but at the end of the day i have twin 44MM waste-gates so it should cover any boost spikes.
Qxo8wioh.jpg

dpOZo51h.jpg


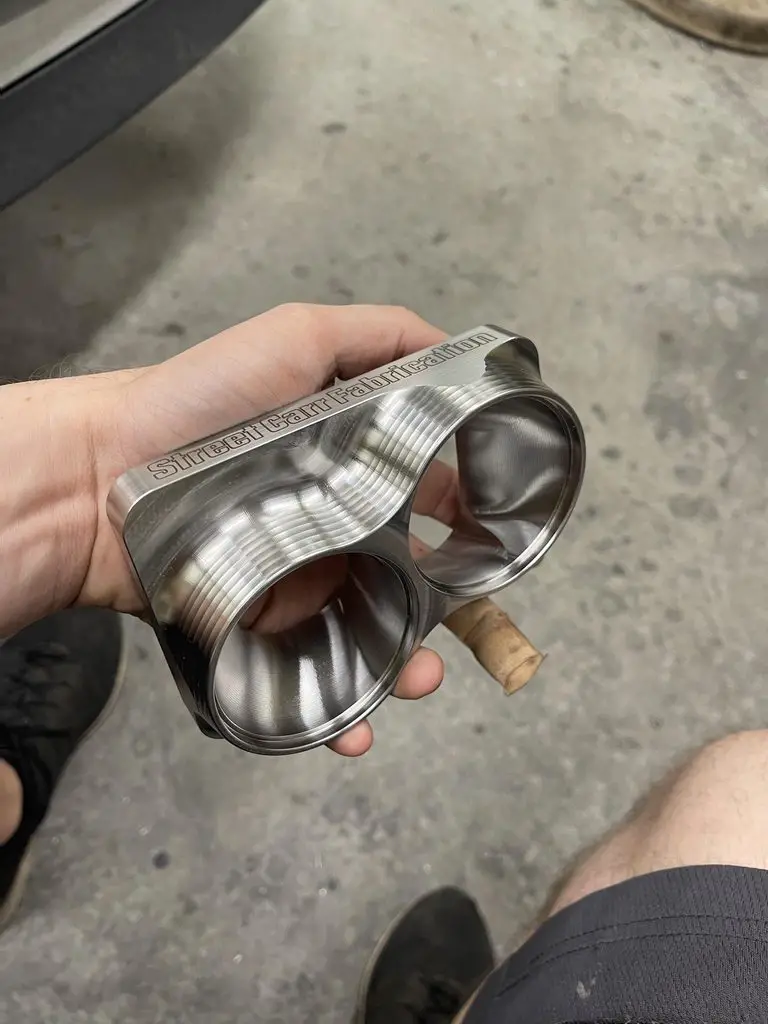
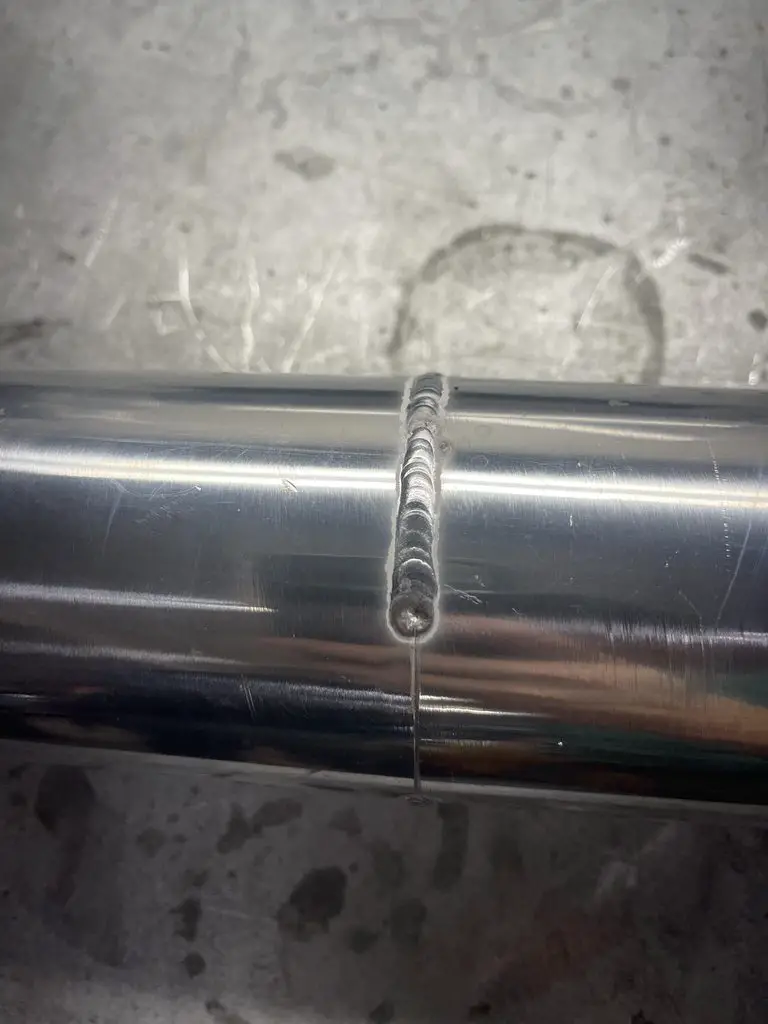
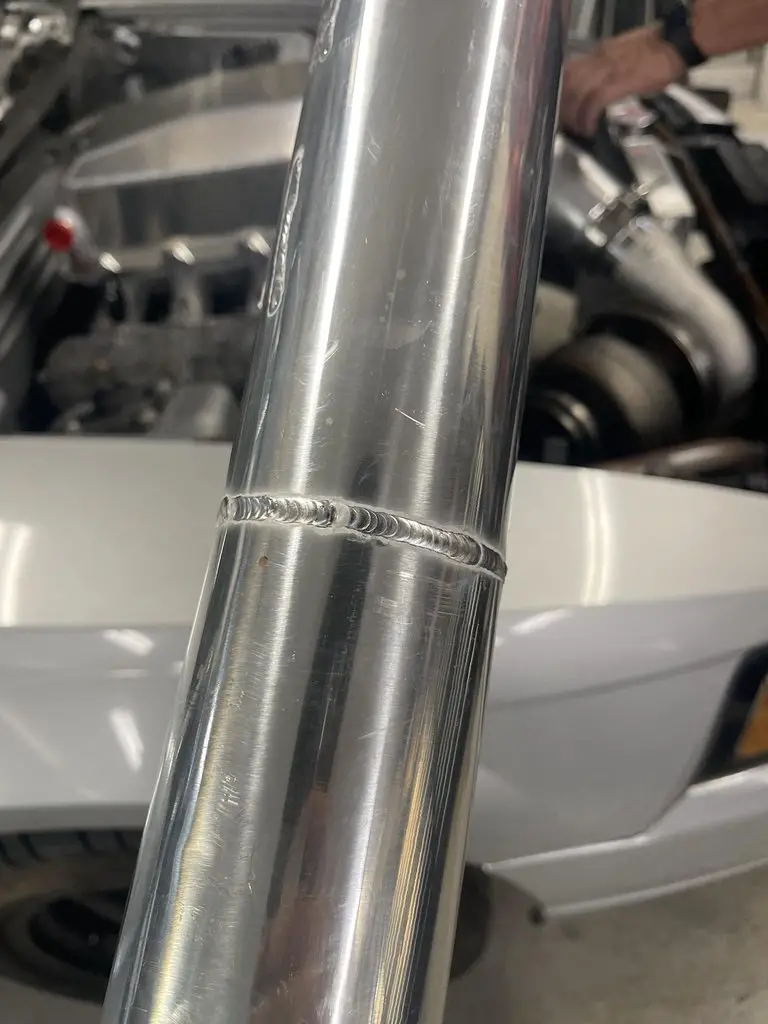
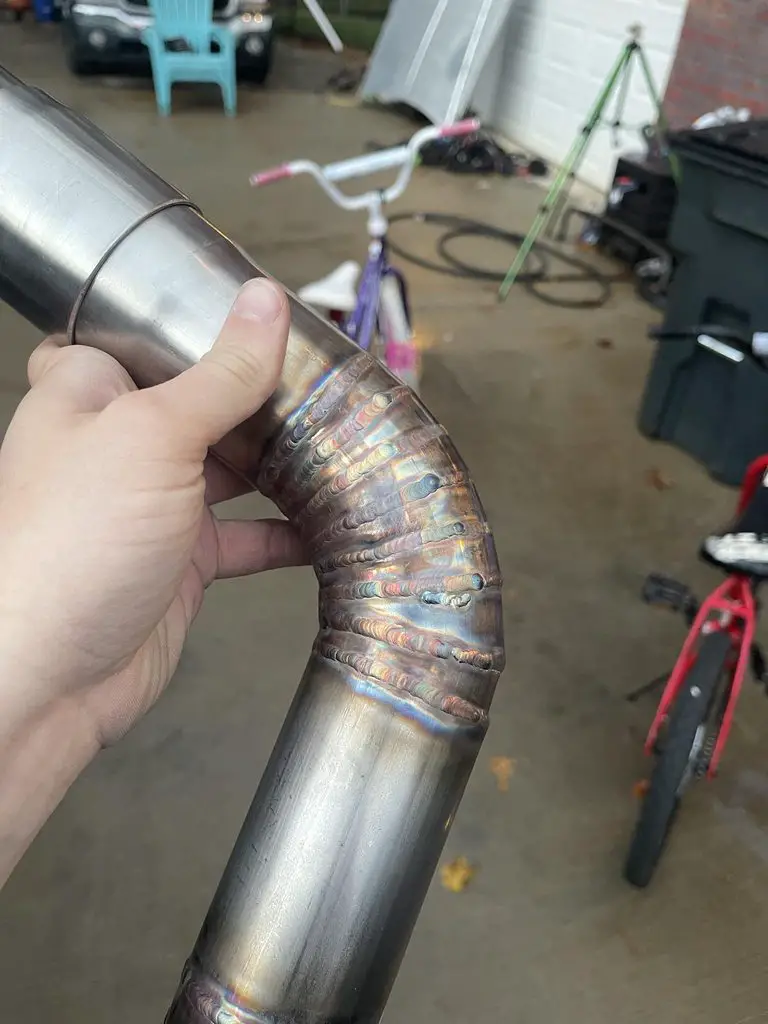
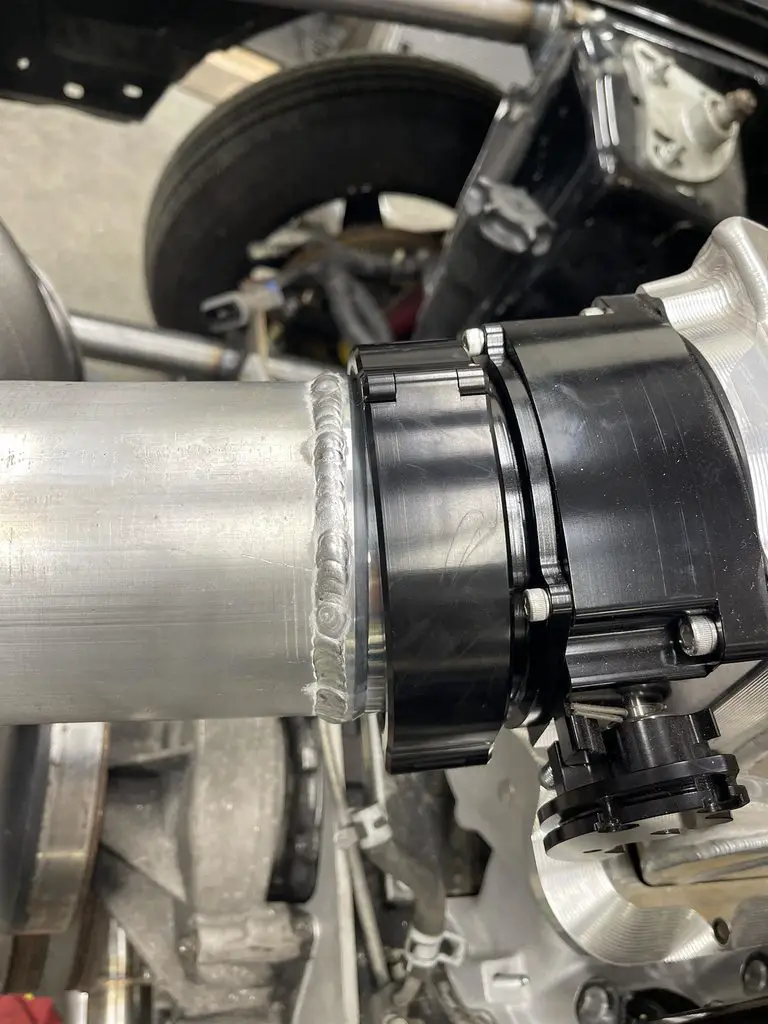
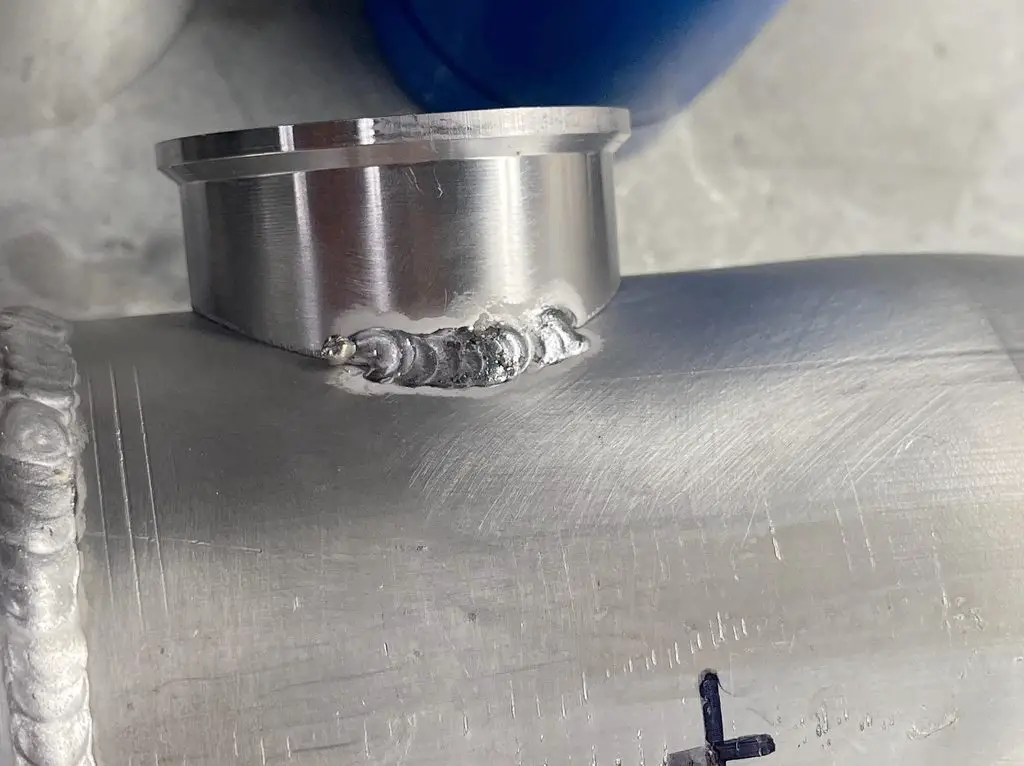
Never welding aluminum before i raided my stash of ebay inter-cooler pipe to practice on before committing to welding the v bands onto the charge pipe.
ZVmGjICh.jpg

pJhmFS1h.jpg


Not pretty but it works.
cVZOHruh.jpg


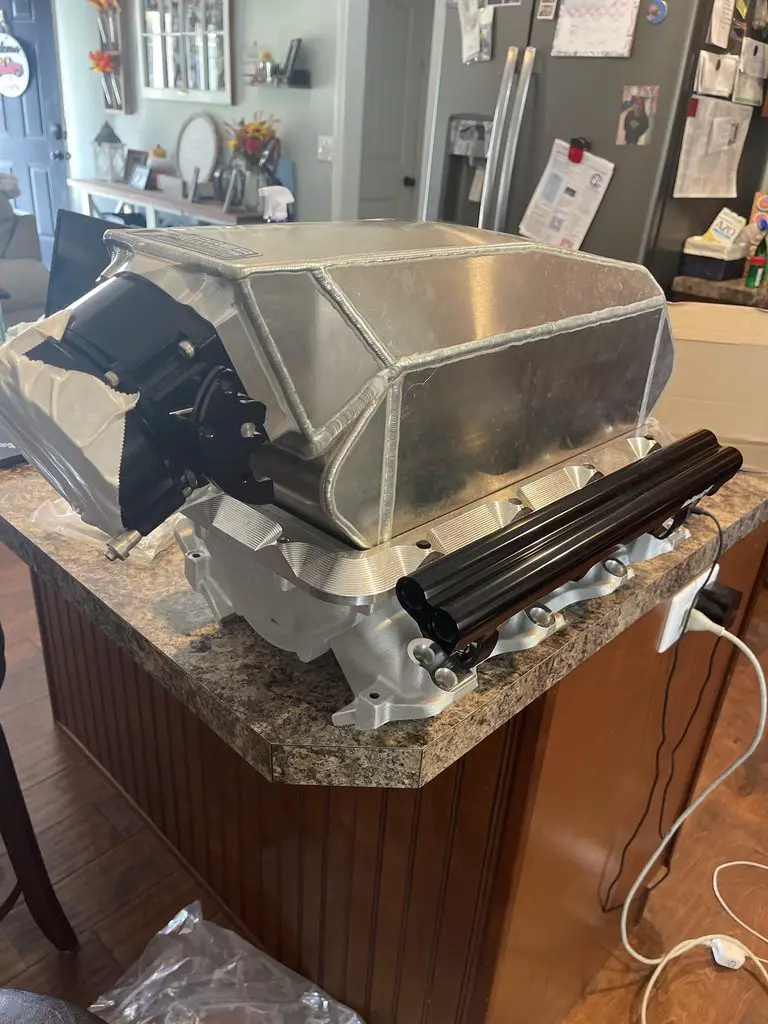
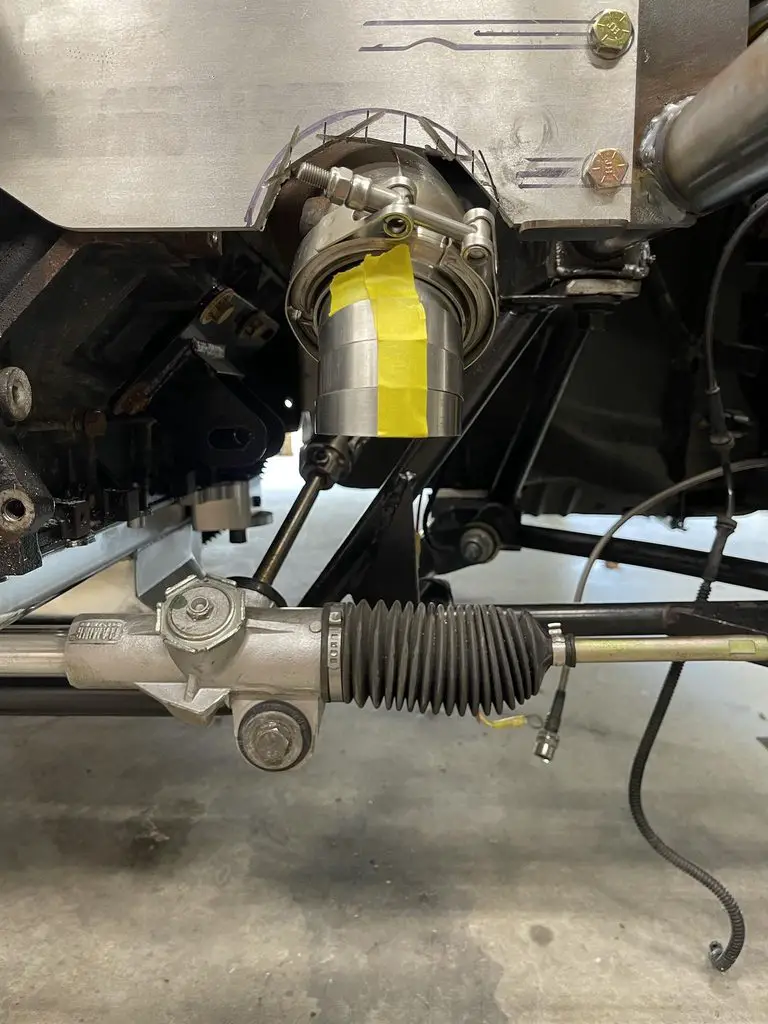
My new lower finally came in, hello dual fuel rails!
nCAMQxjh.jpg


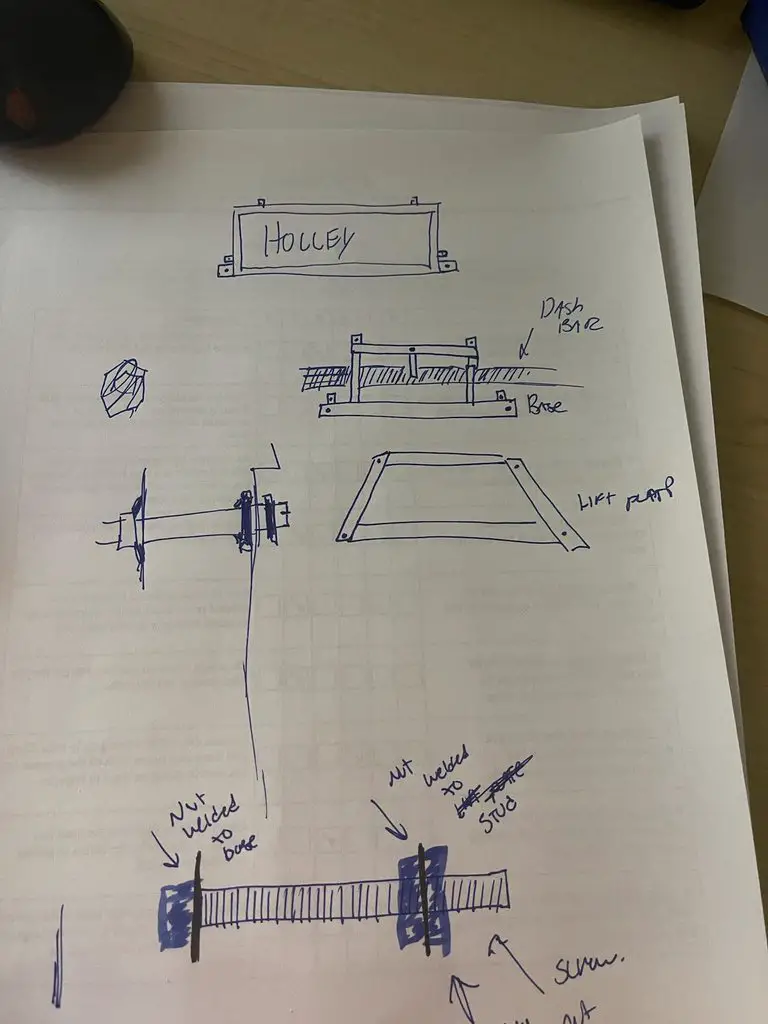
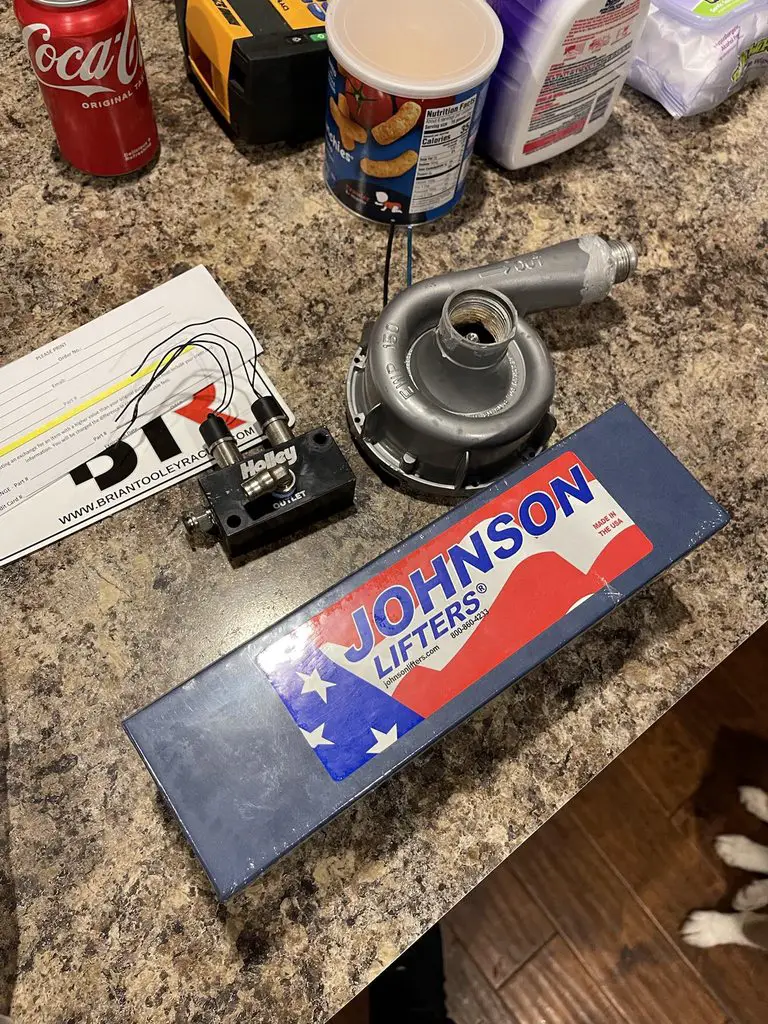
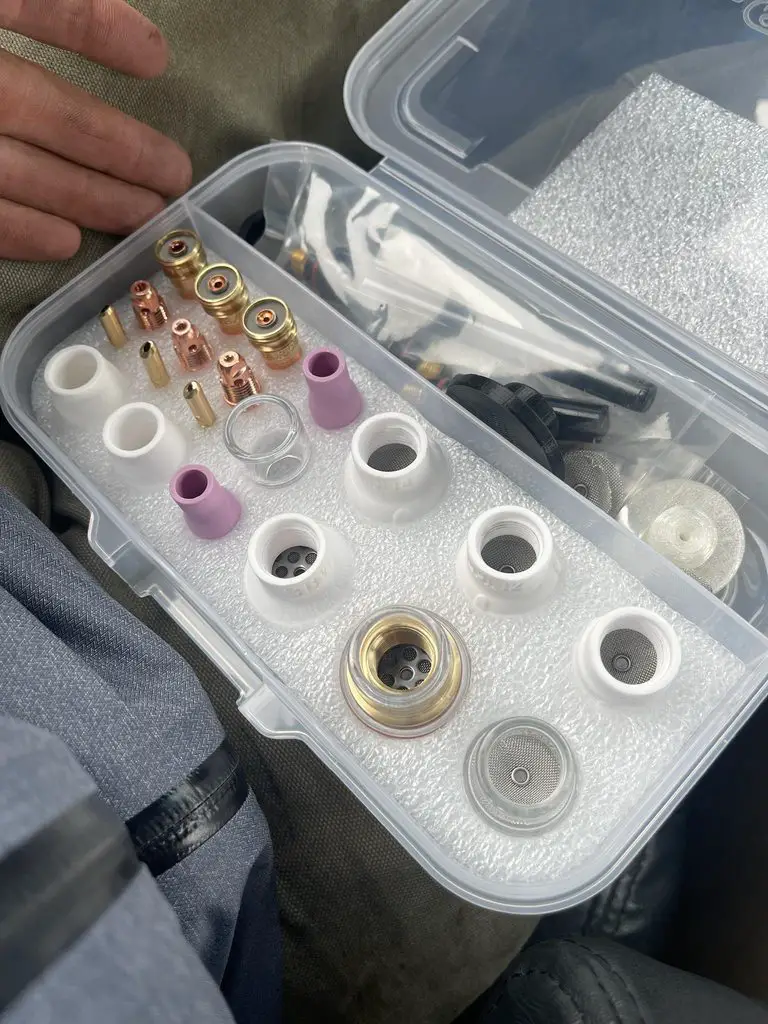
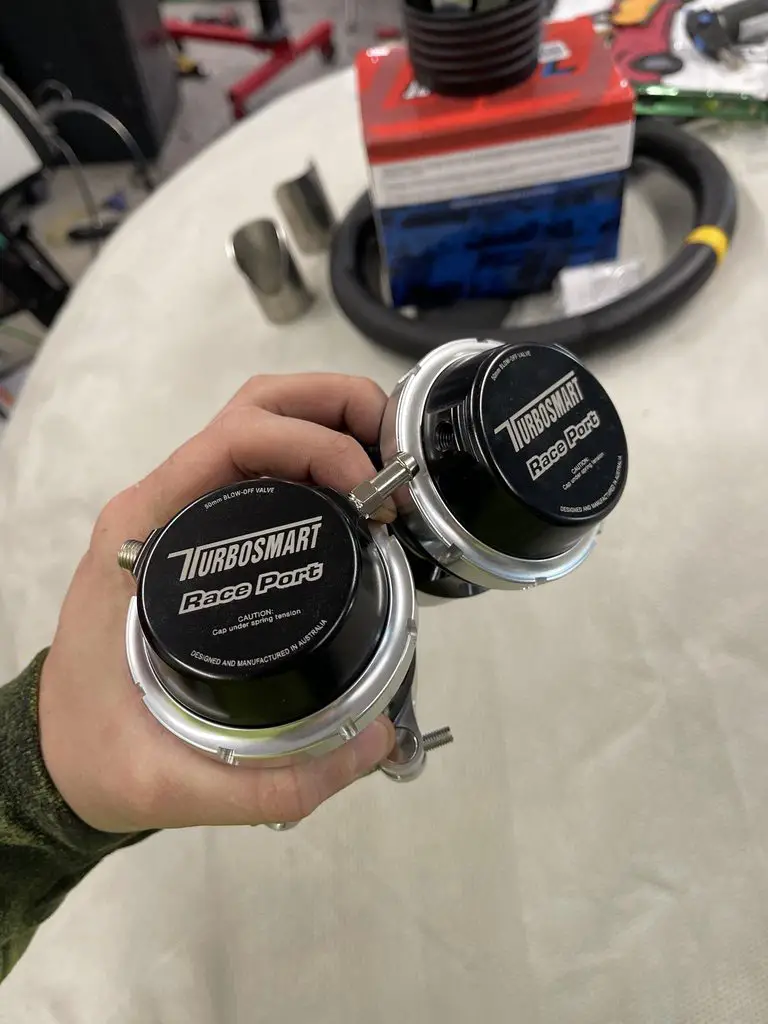
Some goodies came in the mail. Davis Craig EWP 150 - This will be used on the intercooler ice tank, its used but it wont get very much continuous use so it should be okay. Also got a Holley boost control solenoid for a deal with it. And finally got some Johnson short travel lifters prior to the price increases.
djk9VmJh.jpg

8AEqXJDh.jpg


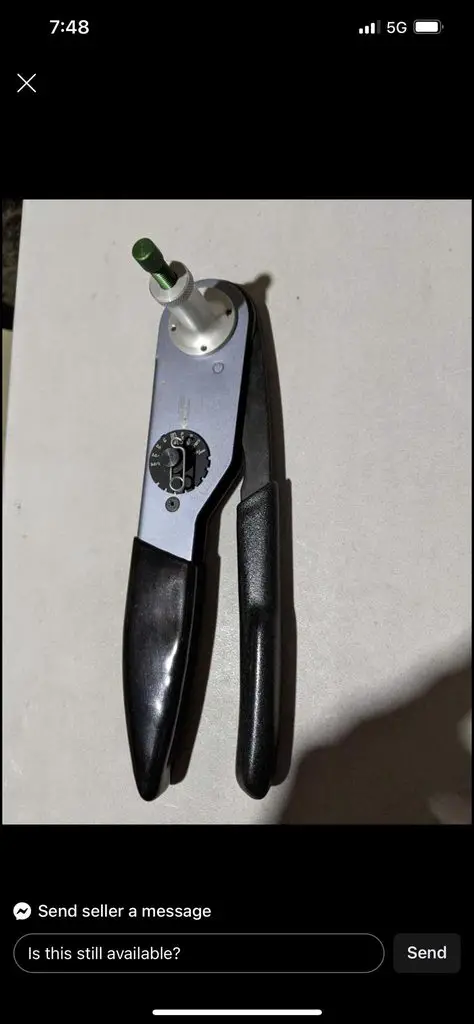
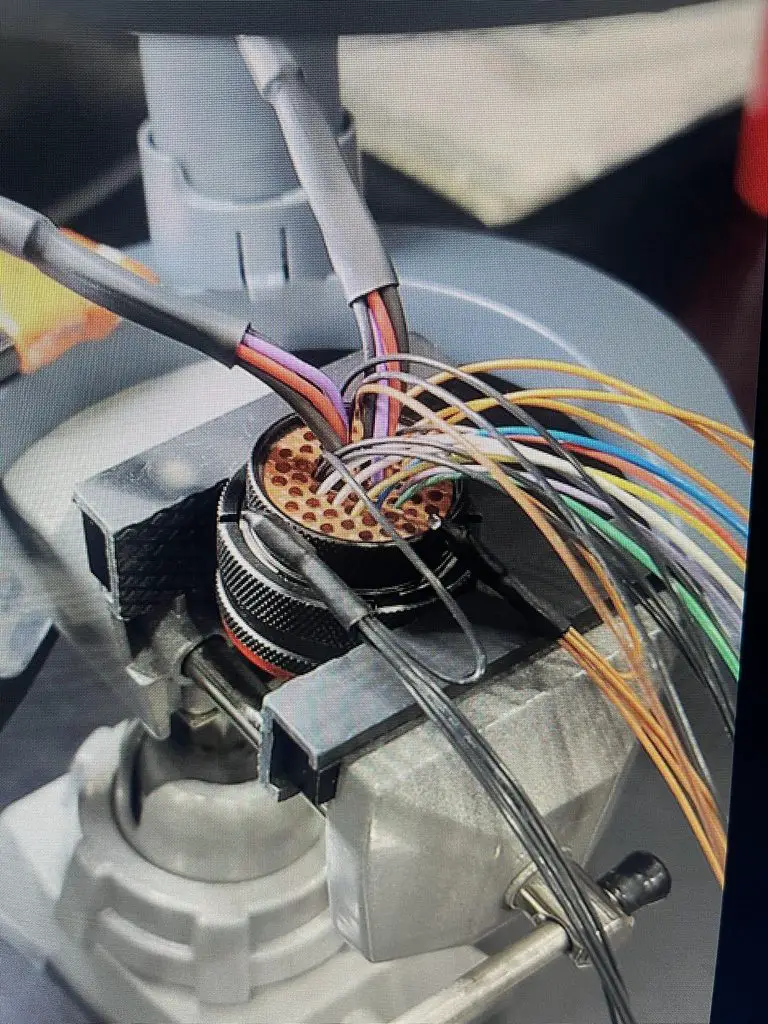
Scored some TE crimpers for pretty damn cheap, should make solid barrel contacts easy peasy.
kbA6ntUh.jpg


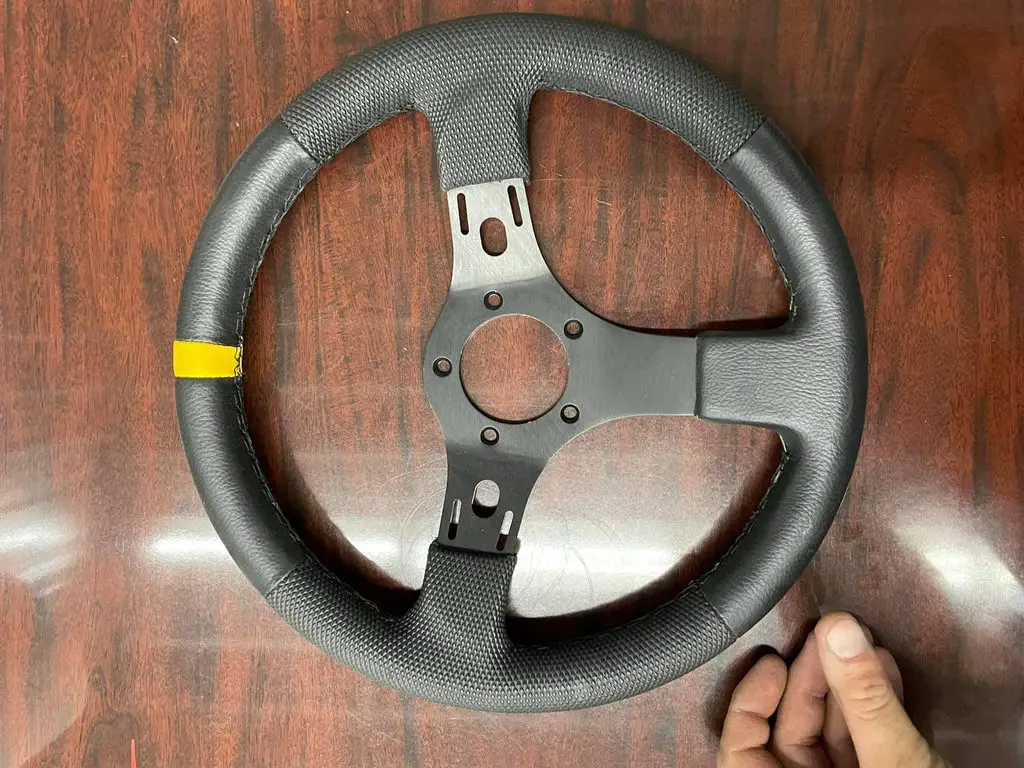
Didn't like my steering wheel, so thanks to Doug Cook at Motion Raceworks i got this nice steering wheel.
MoFTfAih.jpg


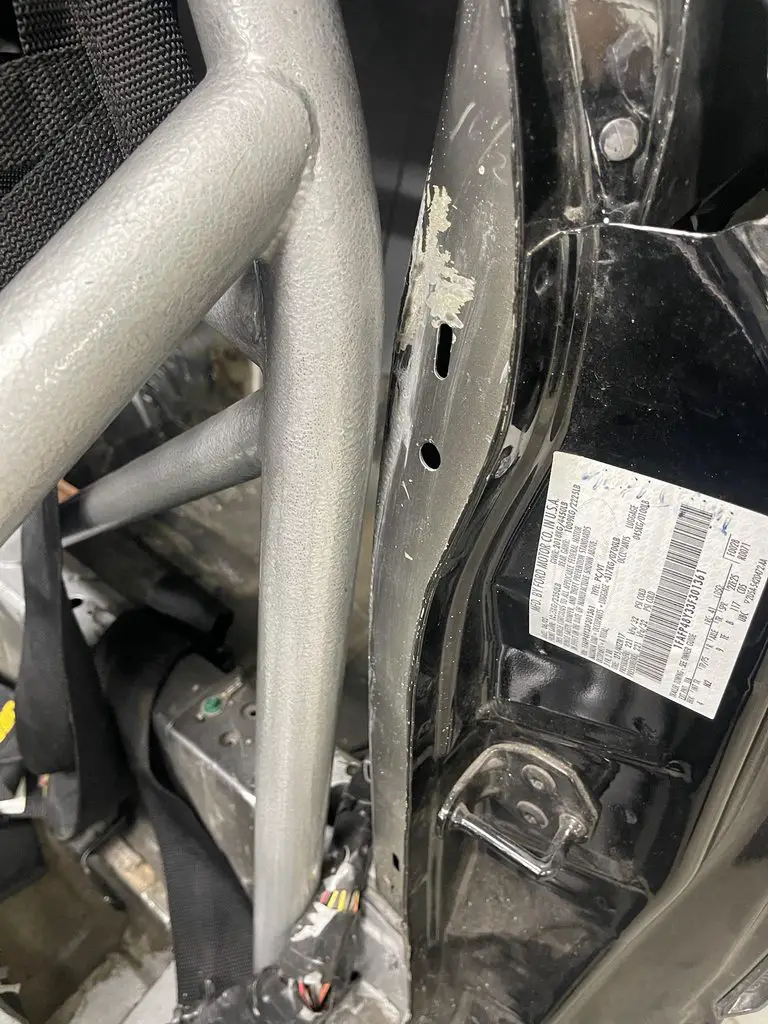
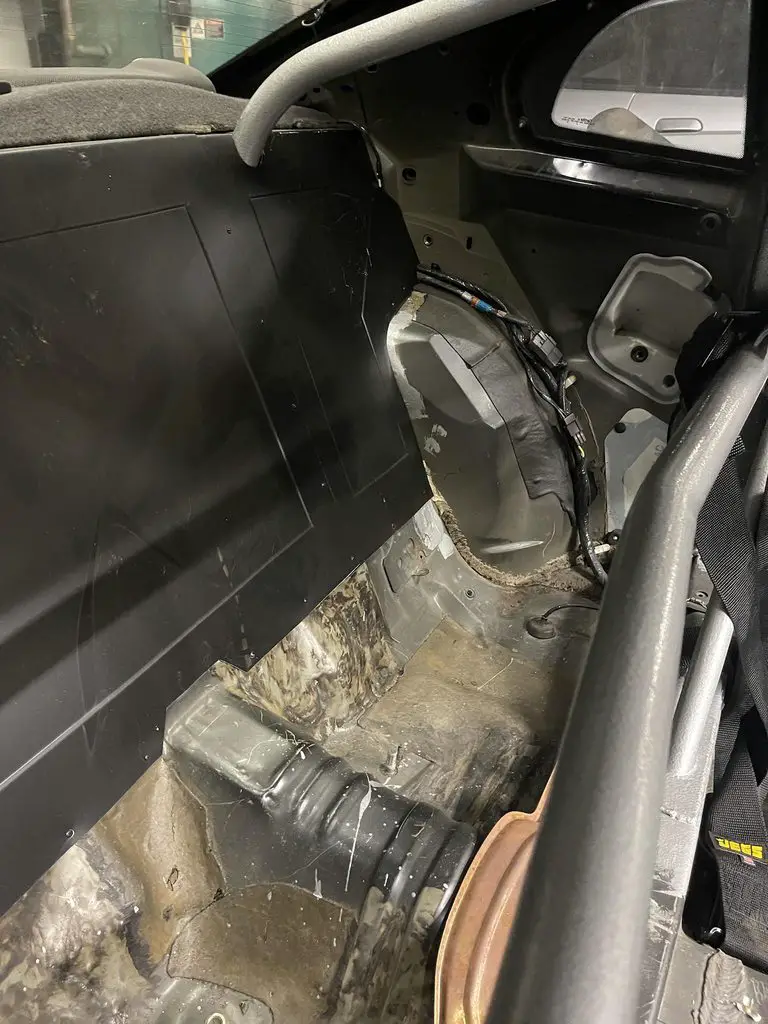
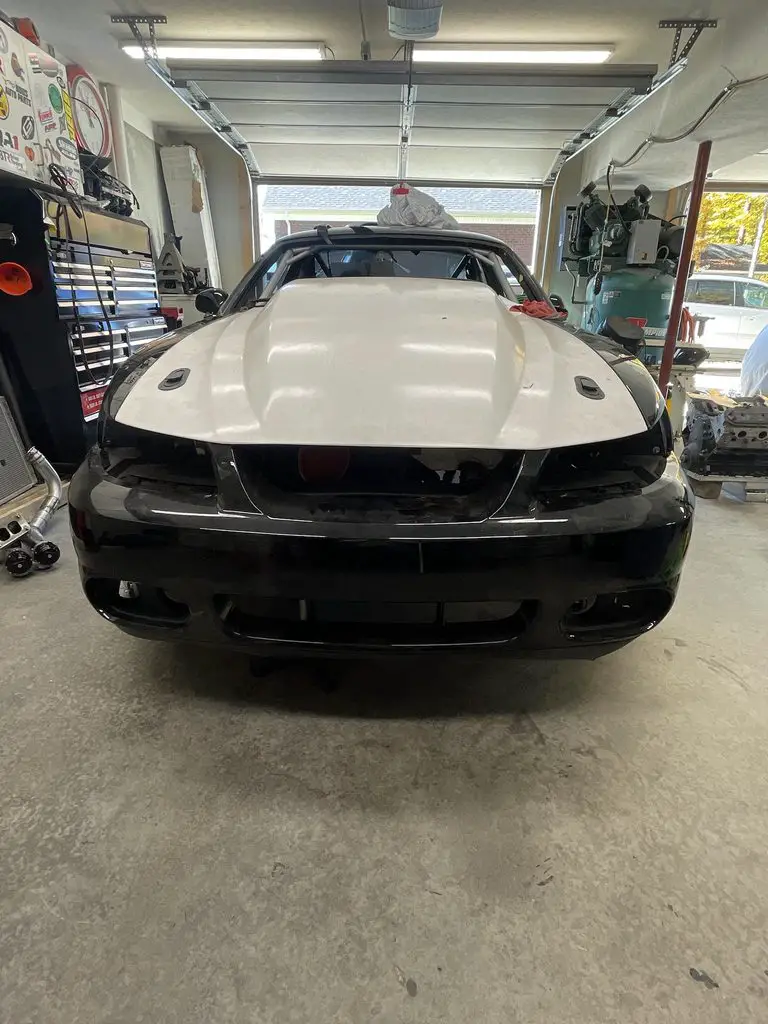
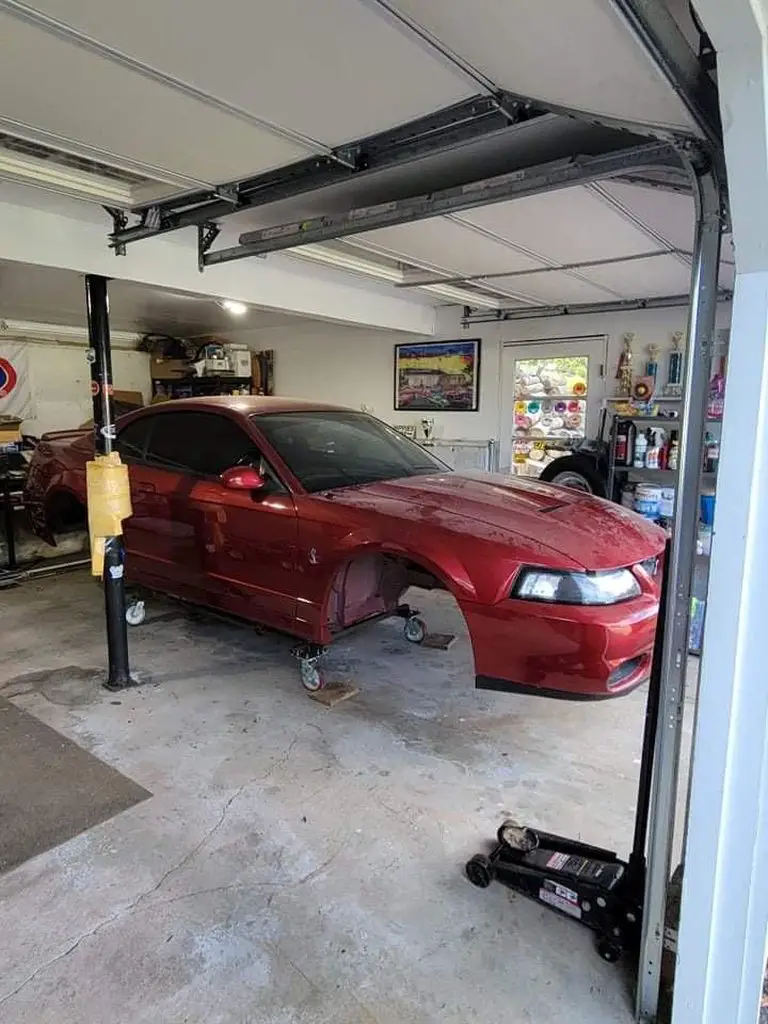
Then while waiting on my buddy to get her to help rip out his motor i started to look into how im going to sheet metal the rear quarters. The car came with some really nice Scott Rod pre-fabricated panels. But due to whoever made this cage, the door pillar to main hoop bar is way to close to squeeze it in. Talking to a few people, it looks like ill have to source a company that does tin work to drop it off too.
babkUhMh.jpg

zqySYdxh.jpg


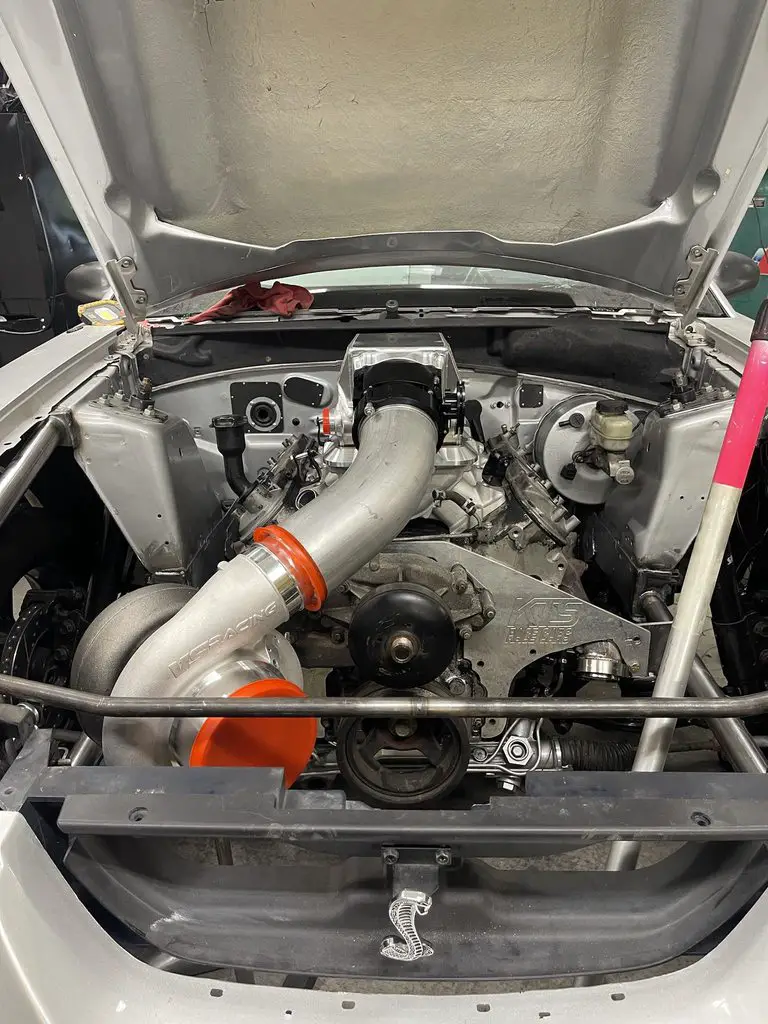
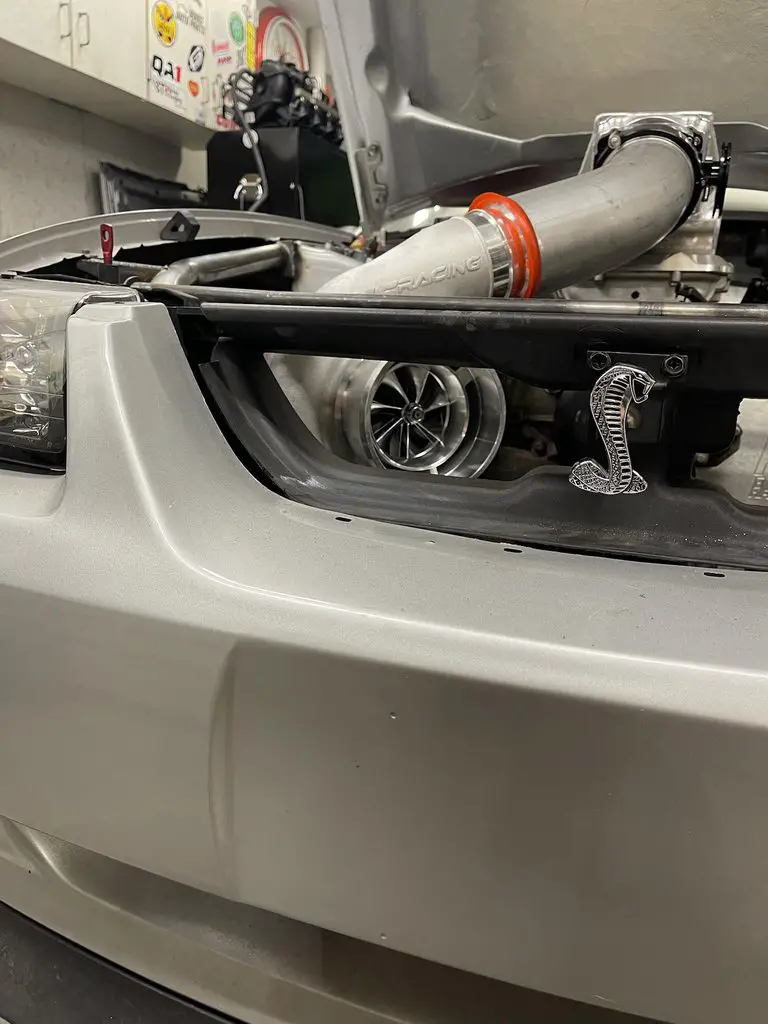
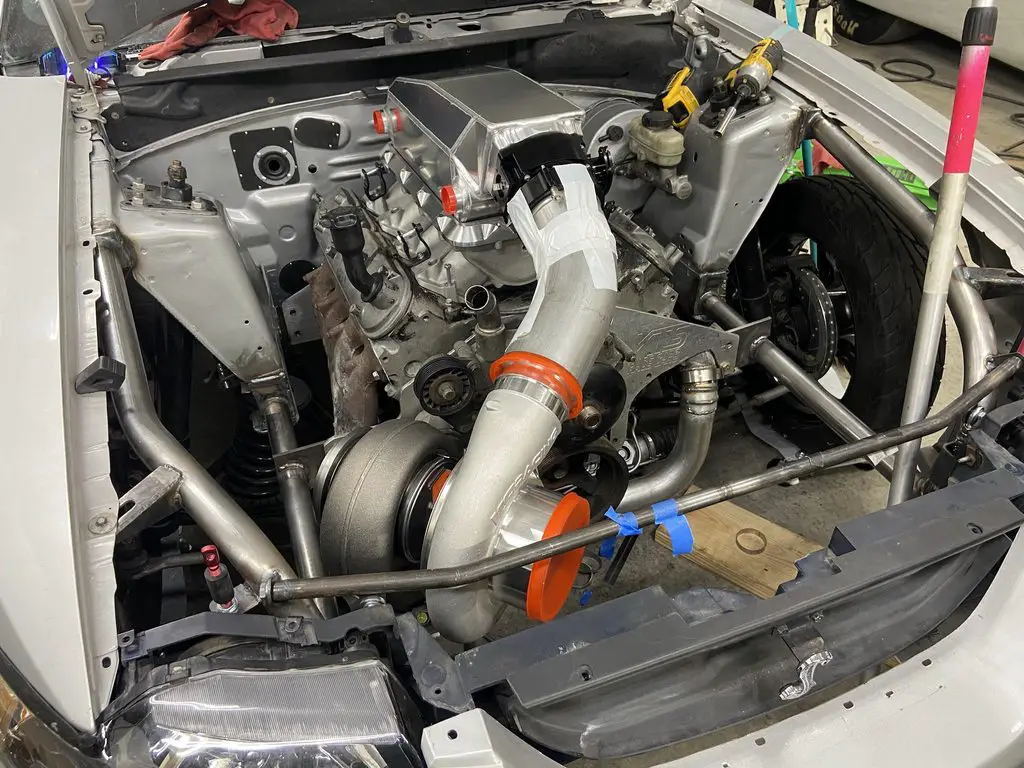
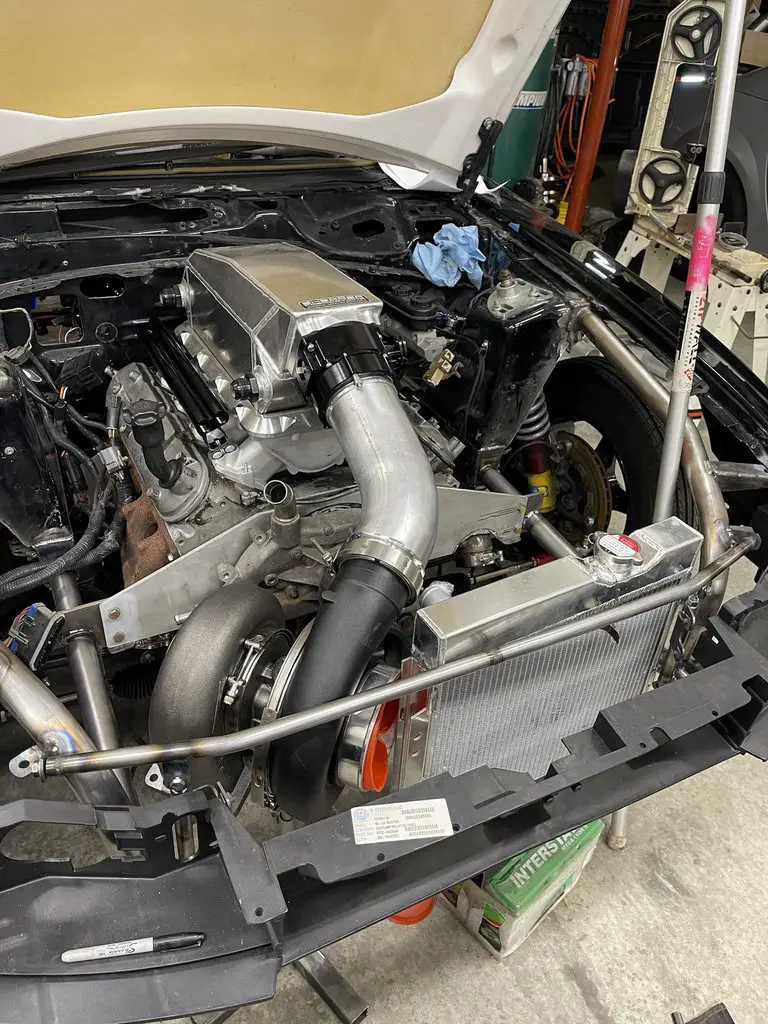
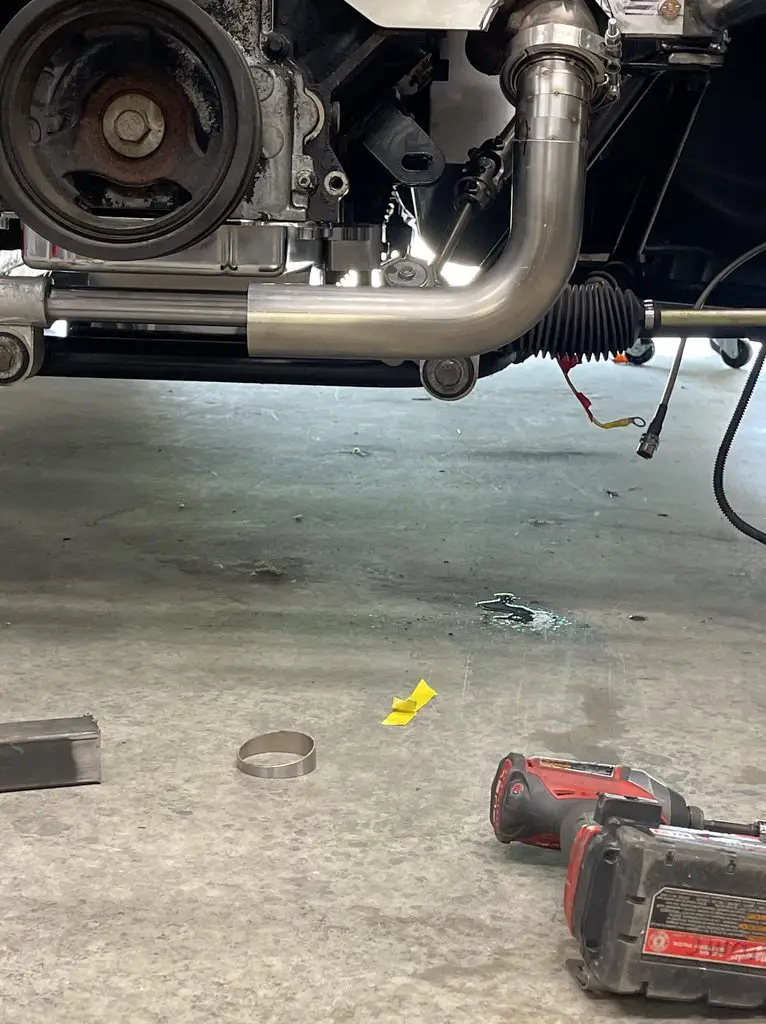
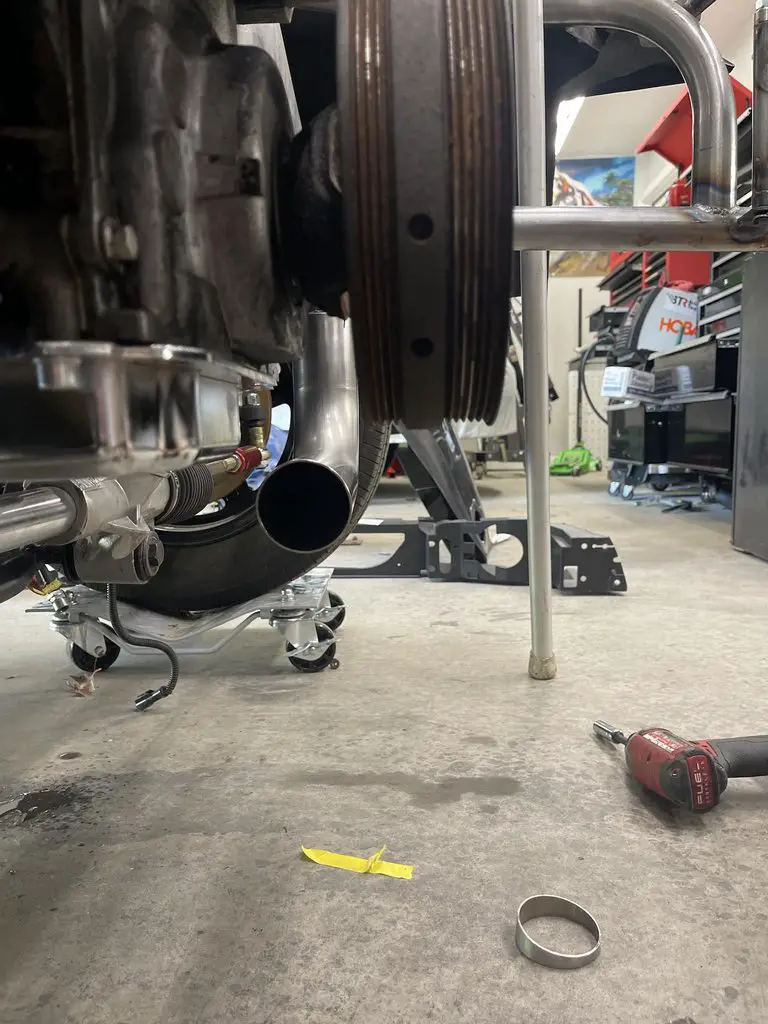
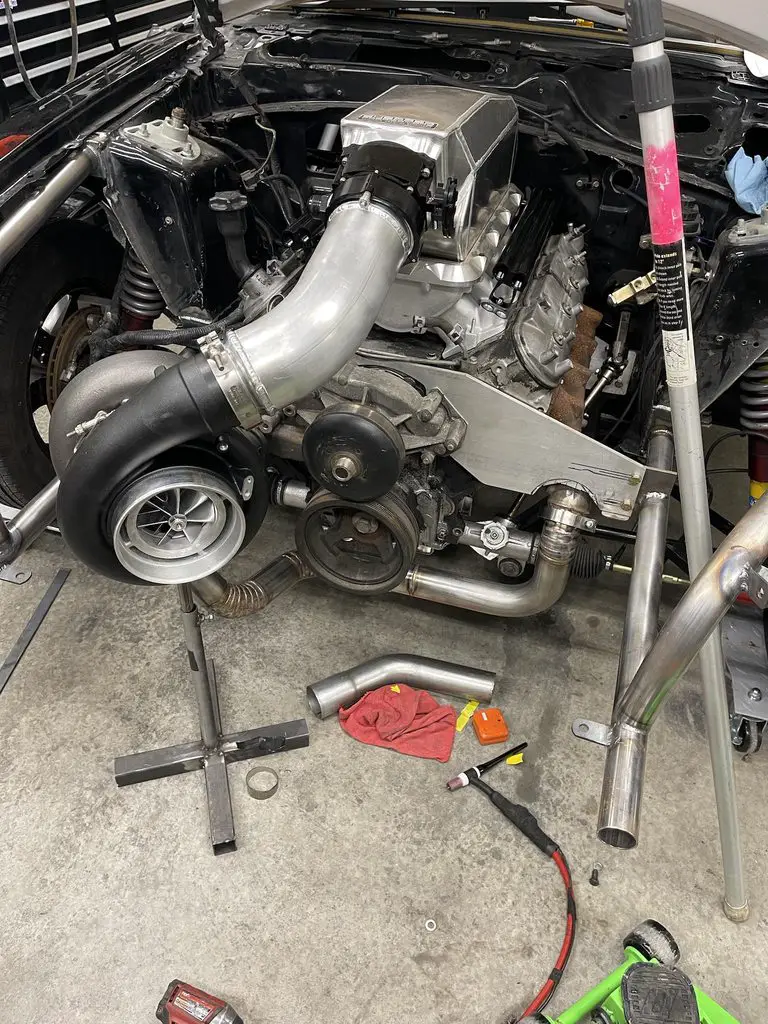
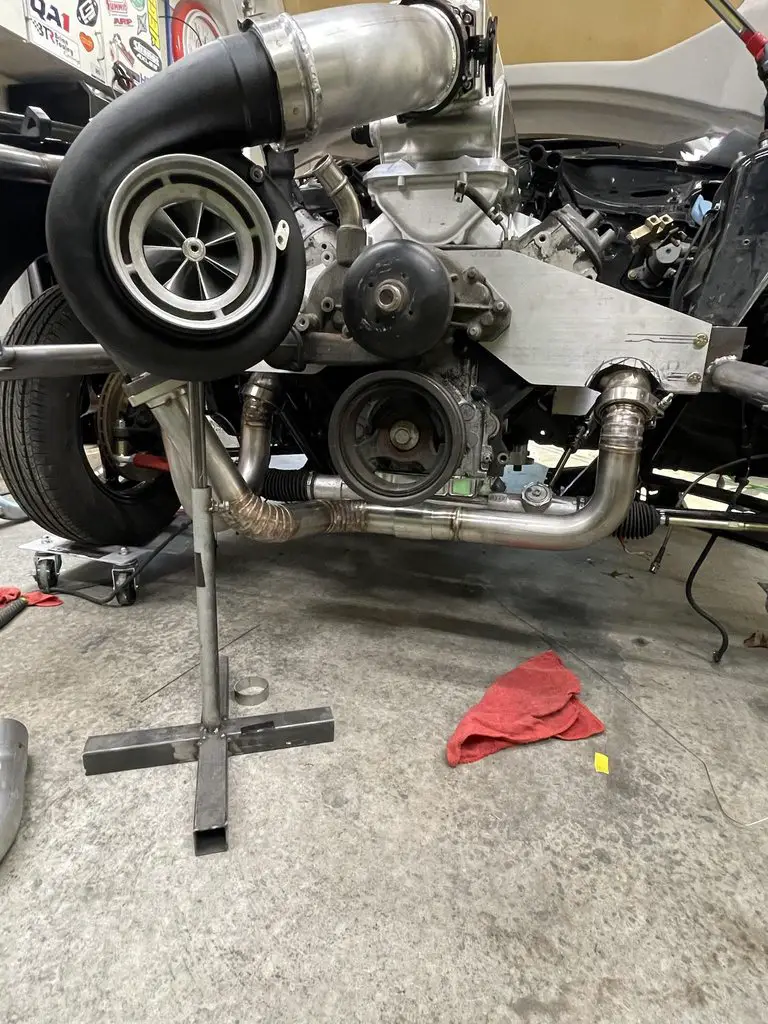
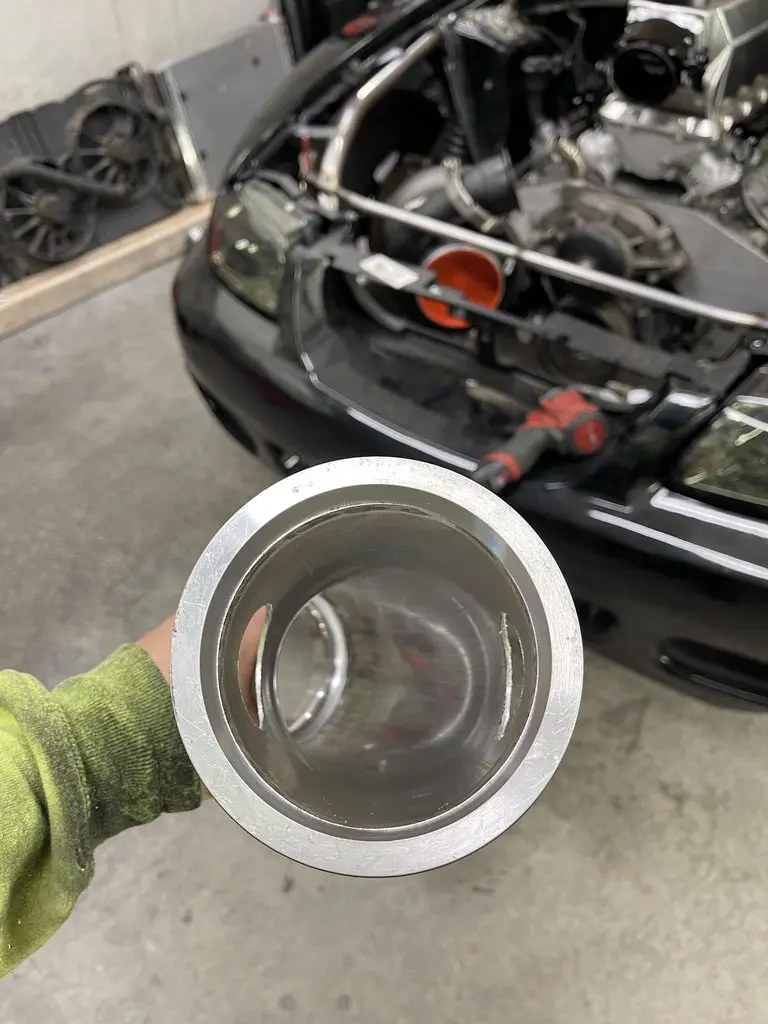
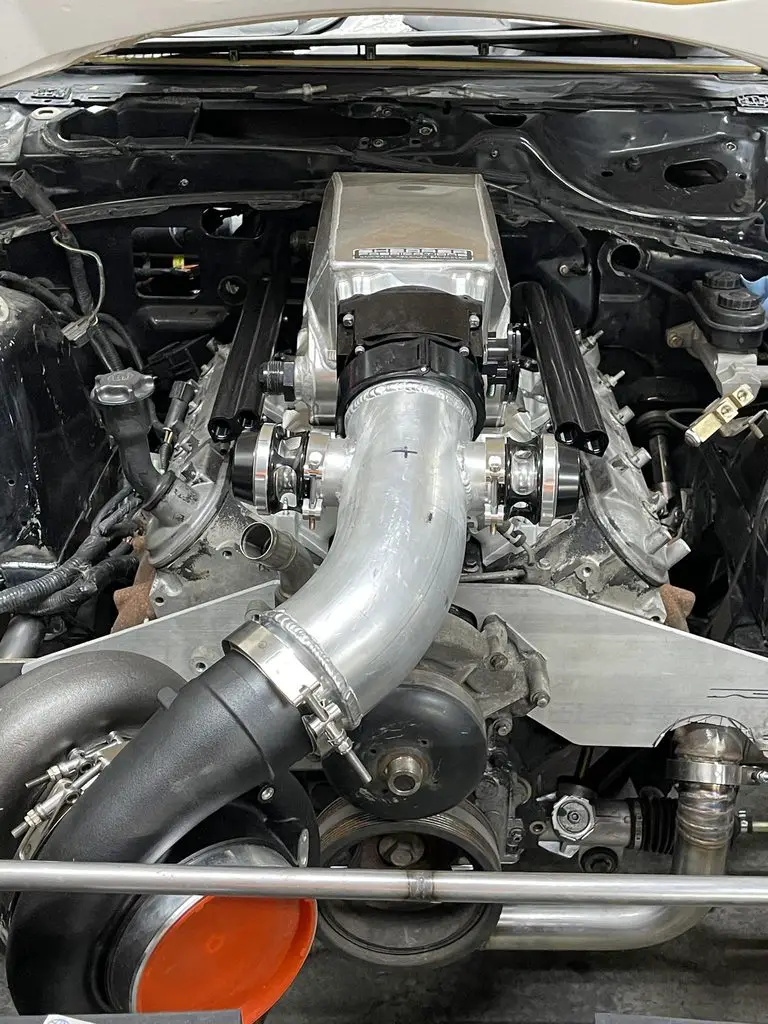
NOW i did skip some steps here, but in building my buddies car we wished we would have made the charge pipe first to somewhat anchor the position of the turbo. So that's what we started on first, its a little more forward than id like it to be but it had to be this way in order to clear the water-pump accessories. The radiator is sitting there for reference, it still needs to go over another 2" which i have the room for. I don't see any concern with the inlet being behind the radiator at all.
SUVkE20h.jpg


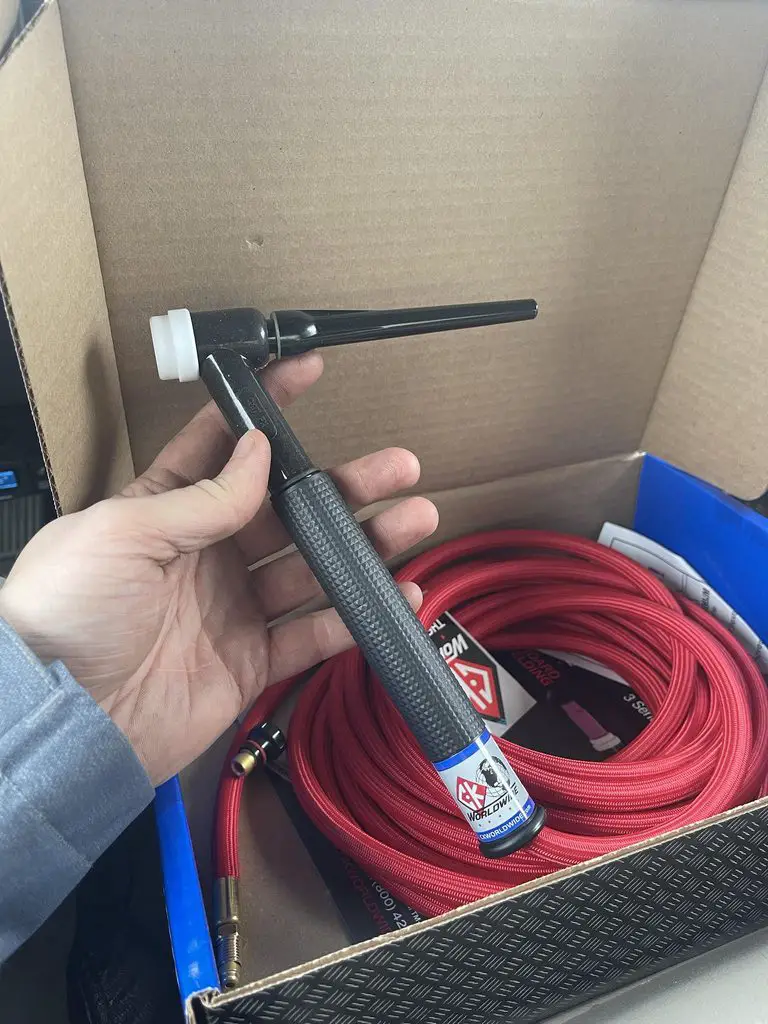
I'm going to start working on the hot side this weekend/next week. I have to order another regulator and fill another bottle so that i can back purge the stainless.

Thats all folks!
 
  • Like
Reactions: 4 users

Burning

Greasemonkey
Jul 9, 2020
182
647
93
Bardstown, KY
I just cant keep myself from buying these trucks LOL. My truck (the hauler) is a 2001 work truck, my plan with this 2004 is to take the entire wiring and interior and swap it all over to mine. It will allow me to have the DBW, split zone AC, BOSE stereo and a bunch of other small comfort features that my truck did not come with. Keeps me busy - Ill do the swap in the winter, i might make a thread on it IDK.
z4g5QCJh.jpg


Finally started to make some headway on my own car's hotside. I wish i would have bought some more 45's instead of the 90 degree mandrels but i made it work. Ill have to get creative on the pass side bank.
GJfOfNlh.jpg

n2Qecp1h.jpg

fyfpJ36h.jpg


All tacked together, double slip installed, and ready to be fully welded. Since stainless is more prone to cracking, and i dont trust myself im subbing this one out to my buddy so he can put his mastership to work. Should be done this week sometime, then ill mock up the pass side and have him weld it. I wanted to the longest bank first because there will be some slight movement from welding, and i don't want to pigeon hole my self by fitting both side and then it not fit.
xGatvUth.jpg


I need to reach out to my buddy John Bewley and see if he can spec me a new cam for the car since the last one i had spec'd was custom made for a FI 88/96, i really want to start getting my motor together for the car. Another thing i need to look at is possibly going to a aftermarket forged crankshaft. Im hoping this car pushes 1300-1400 at full tilt which is about the limits of the stock crankshaft.

Until next time.
 
  • Like
Reactions: 4 users

Burning

Greasemonkey
Jul 9, 2020
182
647
93
Bardstown, KY
Two updates one week?!! What kind of animal am i?

Went over to my buddies house and he forced me into welding up the hotside with his machine while watching over me. Not the pretiest of welds, but they have good penetration and that is all that matters, i did not weld the slip yet as i want to mock the pass side up and weld it then i can have some wiggle room if i need to in the slip.
JU3Cli1h.jpg

9Jx8ubSh.jpg


Thank god for double o ring connections, the material moved around alot more than i wanted, it will still fit up fine and seal the charge pipe. I will probably redo this at some point.
k52WVn1h.jpg


Here is the loop i need to make in order to get the passenger side. Im going to try and use 2 90's and some pie cuts to make it work. we will see.
RGGrgyEh.jpg


Found this sweet little swirl tank idea on someones for sale post, so ill be using some of my scrap 3" and 4" aluminum to make something similar for the rear mount setup.
hO5huelh.jpg


Then i was searching on ways to do an easier 5v(orange) and ground(black) breakout for the bulkhead connectors and ran across this, they did all of the splices in the back-housing shell for the quick disconnect. May implement his in mine for a cleaner install.
jd9Crjah.jpg


I ordered a new gas lense for my tig as well as a back purge capable regulator. Hopefully this weekend i can get the pass side tacked and started to be welded.
 
  • Like
Reactions: 2 users

Burning

Greasemonkey
Jul 9, 2020
182
647
93
Bardstown, KY
UPDATE:

Scored some Kirkeys, Brackets and Covers for the cost of one set all brand new.
bnnL6qFh.jpg


Also got my new CK torch and Furrick Kit in.
R1PWGI5h.jpg

BfM4O5Th.jpg


And last night i finally got time to sit down and make the pass side pipe. I dont like how i had to angle the merge but ill live with it, i wanted to keep the pipe on the bottom semi flat in order to utilize to 90 degree bends i already had without ordering new pipe. The bottom gap will be a interesting one in the middle, but i should be able to booger it on there and make it hold.
1Wh4jSdh.jpg


Got my back purge kit yesterday evening so ill probably weld it all up tonight.
 
  • Like
Reactions: 3 users

Burning

Greasemonkey
Jul 9, 2020
182
647
93
Bardstown, KY
Little weekend recap!

Got the hot side all wrapped up with the exception of the waste gates and fully welding the flanges. Also need to go ahead and weld up the slip fit now that i have all the movement done for the most part.
7pWKnIch.jpg

6nkfD1Dh.jpg


Decided to tackle the charge pipe, i wanted to have matching BOVs so i finally found another one on marketplace close by that matched. Went ahead and drilled them and then welded them up. Not the best aluminum welding but it'll hold.
p1sBTBkh.jpg

zmE0wFDh.jpg

3ECrpKkh.jpg

sWe9Egzh.jpg

OmKCmZWh.jpg


MONEY SHOT! The left side is a little higher angle than the right, but itll be fine lol.
cAro0Pfh.jpg


Then i decided clean up some space in the garage and assemble the car somewhat. Glad to see everything somewhat lines up.
UDxrY04h.jpg


Also got my tubing bender in and decided to go ahead and make a mount. The mount will allow it to flip and bend vertical. Im still waiting on my dies and hydraulic ram to show up.
EYKJjr2h.jpg


And finally, i am possibly picking this car up from Connecticut, My car will not be able to run street car classes due to the front end being chopped off as well as the factory interior panels not being there anymore so this new car will be the street car potentially.
asP1cy4h.jpg


Thats all folks! Also how come nobody comments on here? Feel like im talking to myself haha
 
  • Like
Reactions: 5 users

Rktpwrd

Builder of Cool Shjt
Supporting Member
Feb 2, 2015
4,151
23,827
113
Calgary, Alberta, Canada
Thats all folks! Also how come nobody comments on here? Feel like im talking to myself haha

Because Mustang on a G body forum would be my guess…..
😅
Regardless, nice work!
 
  • Like
  • Haha
Reactions: 2 users
Status
Not open for further replies.

GBodyForum is a participant in the Amazon Services LLC Associates Program, an affiliate advertising program designed to provide a means for sites to earn advertising fees by advertising and linking to amazon.com. Amazon, the Amazon logo, AmazonSupply, and the AmazonSupply logo are trademarks of Amazon.com, Inc. or its affiliates.

Please support GBodyForum Sponsors

Classic Truck Consoles Dixie Restoration Depot UMI Performance

Contact [email protected] for info on becoming a sponsor