Well I haven't been on in awhile so I just seen this thread. Your kicking *ss. All that rust you don't see like body mounts, wheelhouse, trunk and floors , practice on. .023 wire us a must. I use lincoln. When you go to weld the body panels, measure and make sure everything is straight before you start tacking. Then continue to check/ adjust as you go. Or you'll end up like me 😆. Keep up the good work. I look forward to seeing your updates
BUILD THREAD 87 Regal Build
- Thread starter RegalRegal
- Start date
You are using an out of date browser. It may not display this or other websites correctly.
You should upgrade or use an alternative browser.
You should upgrade or use an alternative browser.
A little grinding.
After getting a few outrageous quotes for blasting, I decided to strip as much as I could myself first. From there we will see, it would be helpful getting the hard to reach and rusted areas though. I started grinding on the bottom side of body. (Kudos to anyone that has done this on their back) The black coating was horrible to remove, I decided on a chemical stripper to help break it down. I brushed it on , let it work for about 18 hrs. Scraped with scraper then used wire wheel on big grinder. It worked well but still a mess. (No dust)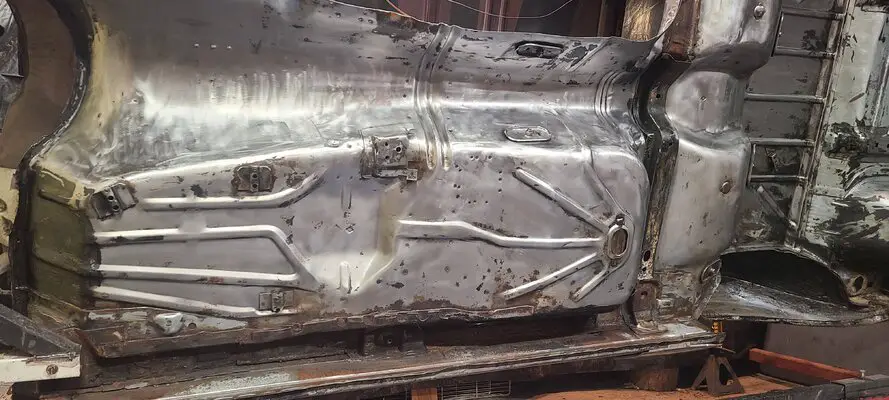
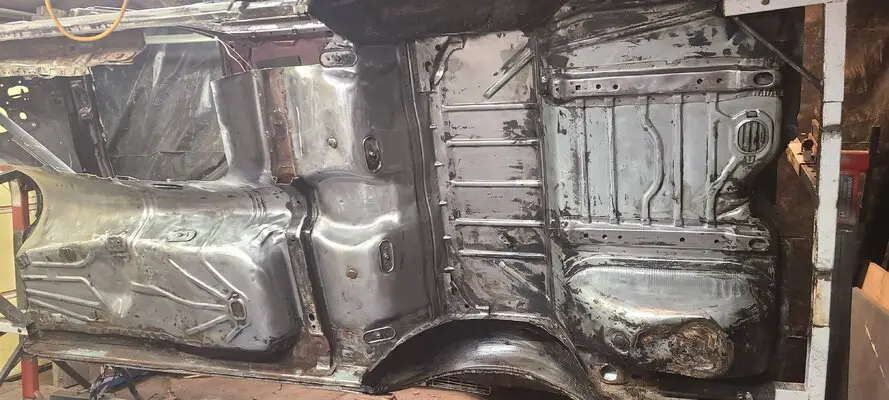
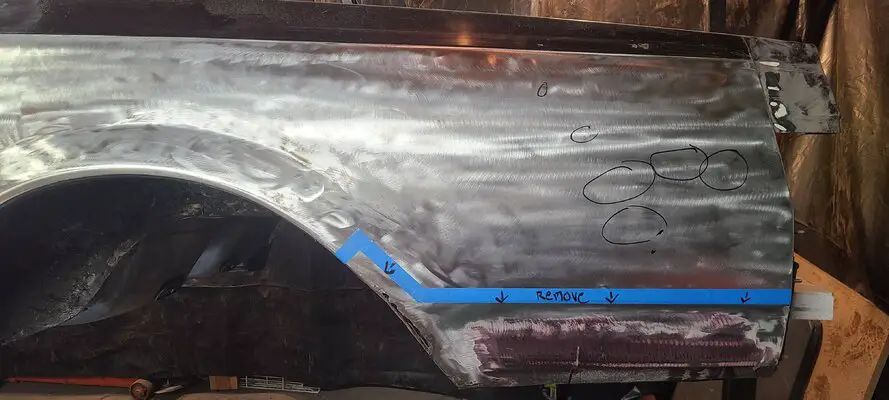
I also did a test area with stripper on rear quarter. It did strip the paint but left the primer. So I used a stripping wheel for the rest.
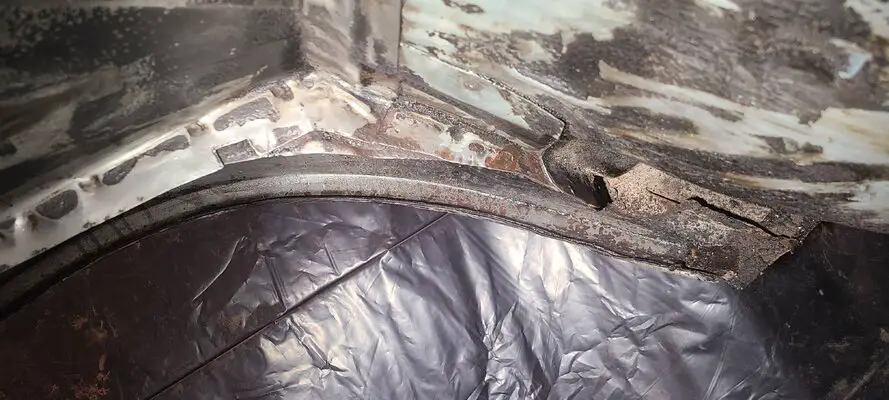
Rh Inner fender looks good, just a little surface rust. Outer is very similar to the D.S.
After getting a few outrageous quotes for blasting, I decided to strip as much as I could myself first. From there we will see, it would be helpful getting the hard to reach and rusted areas though. I started grinding on the bottom side of body. (Kudos to anyone that has done this on their back) The black coating was horrible to remove, I decided on a chemical stripper to help break it down. I brushed it on , let it work for about 18 hrs. Scraped with scraper then used wire wheel on big grinder. It worked well but still a mess. (No dust)


I also did a test area with stripper on rear quarter. It did strip the paint but left the primer. So I used a stripping wheel for the rest.

Rh Inner fender looks good, just a little surface rust. Outer is very similar to the D.S.
Last edited:
So I've been picking away at the bottom side of body. I removed the rest of the rear floor pan brace because of rust, mainly at the ends. Also allows access to other areas that need attention.
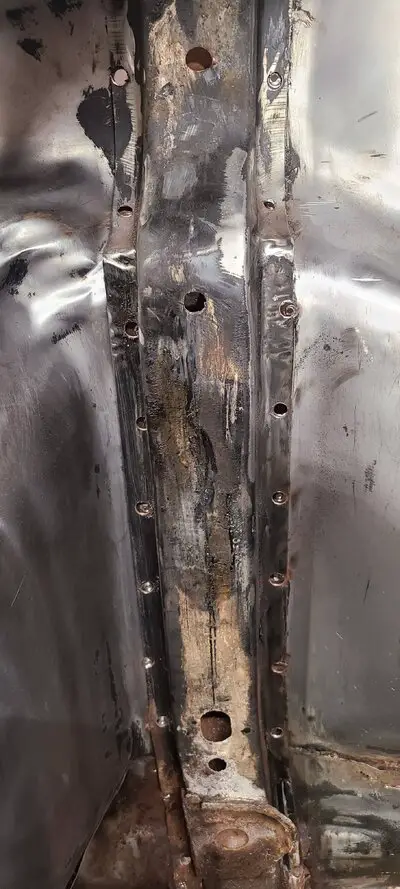 Floorpan brace
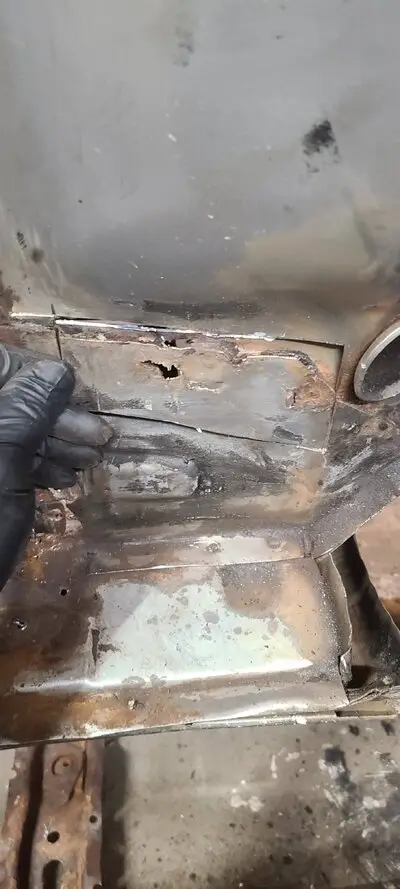 More rust on rear seat pan
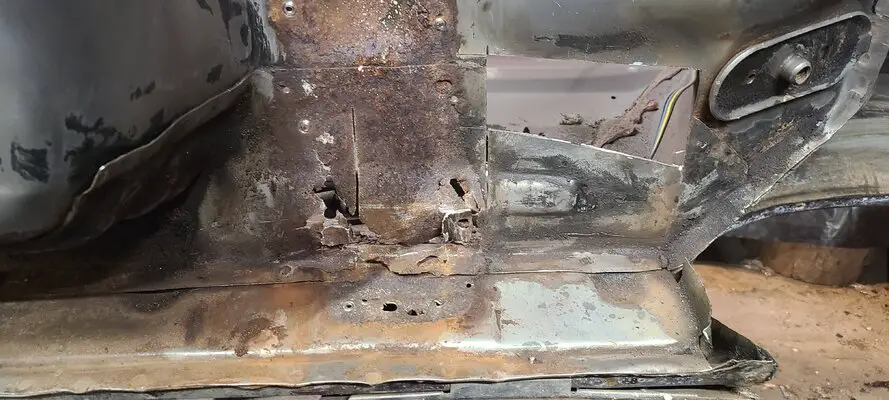 Under brace and rusted inner rocker
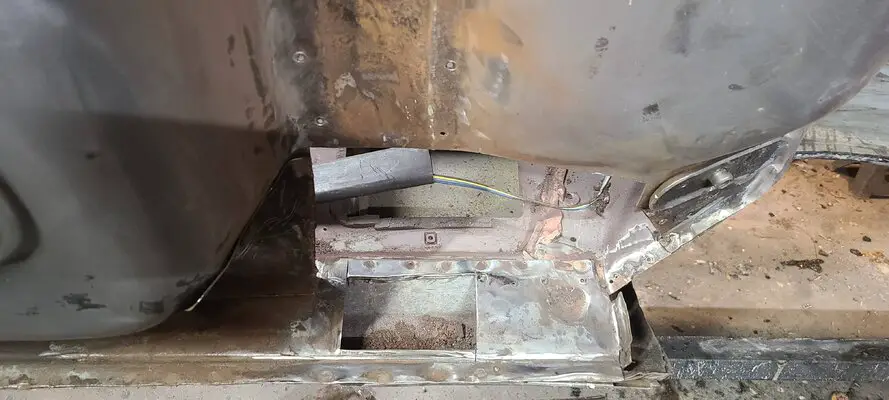
Rust removed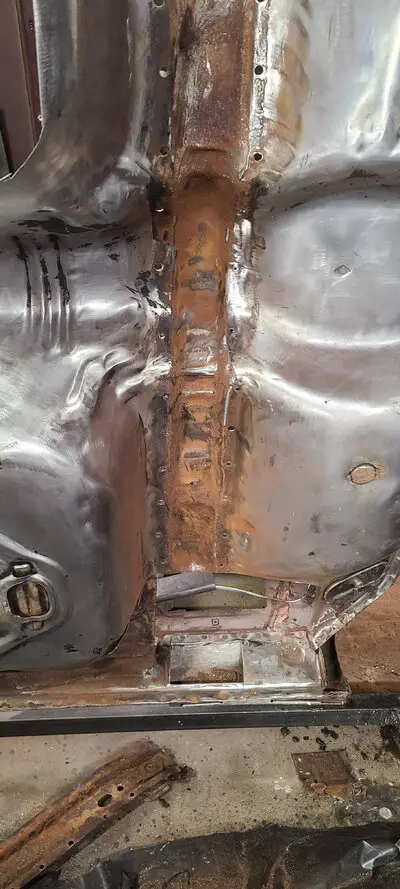 This hole cut out will also allow me to treat inside of outer rockers. Only surface rust but needs attention.
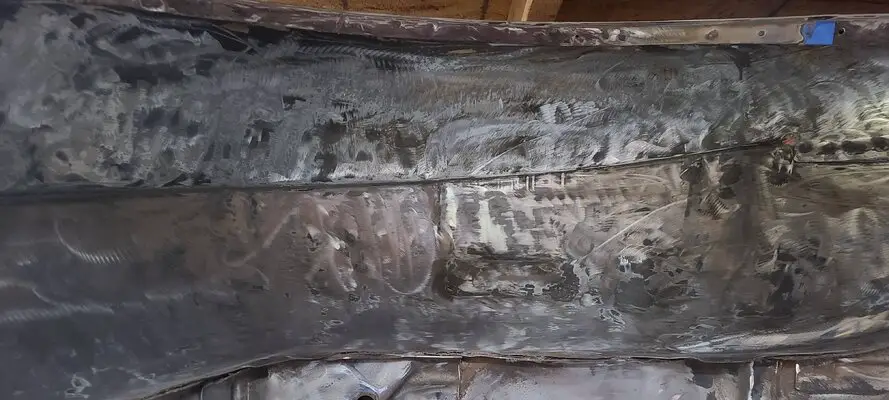
Inside wheel well. Damn there a lot of undercoating.
Well my compressor failed and I failed to get 220 to my garage. So now I'm in the process of looking for a replacement and getting adequate power to garage to allow for a bigger compressor.
 Floorpan brace
 More rust on rear seat pan
 Under brace and rusted inner rocker

Rust removed
 This hole cut out will also allow me to treat inside of outer rockers. Only surface rust but needs attention.

Inside wheel well. Damn there a lot of undercoating.
Well my compressor failed and I failed to get 220 to my garage. So now I'm in the process of looking for a replacement and getting adequate power to garage to allow for a bigger compressor.
Well it's been difficult to keep the project moving along as fast as I hoped. Seems like baby steps as many parts/panels are on backorder. I am not setup to fab anything to fancy. I managed to get a outer floorpan brace, many places said out of stock until August. I ended up calling a few different distributors found one and got it shipped.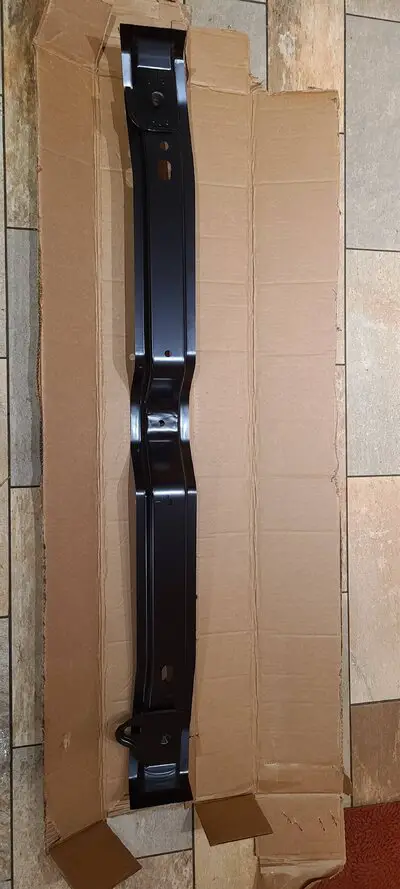
Looks nice and saved me a week of fab time.
I've been working on the bottom side. Wouldn't you know I found some more.... Kinda seems never ending.So between the upper trunk pan and inner wheel well seam had rusted out and there is a brace in the way that needed to be removed. This pic is after removing.
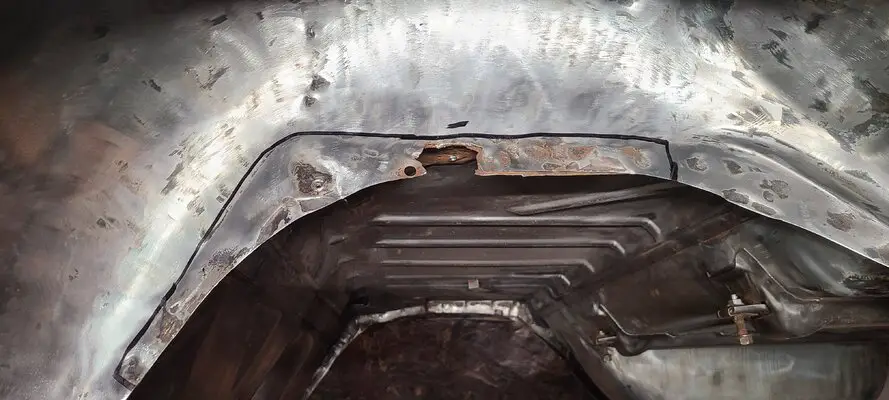
I drew some lines and started more cutting.
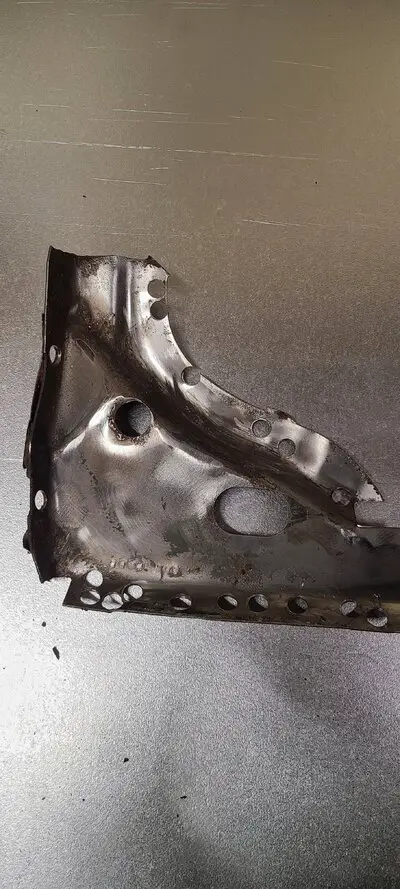
This is the brace removed, I will have it blasted before reinstalling. Not sure how I will primer but probably primer then weld back on.
This is the first piece I removed. I have 1 more piece to cut out of trunk pan.
Made this piece to butt to pan and spot weld to inner wheel well.
Inner wheel well.
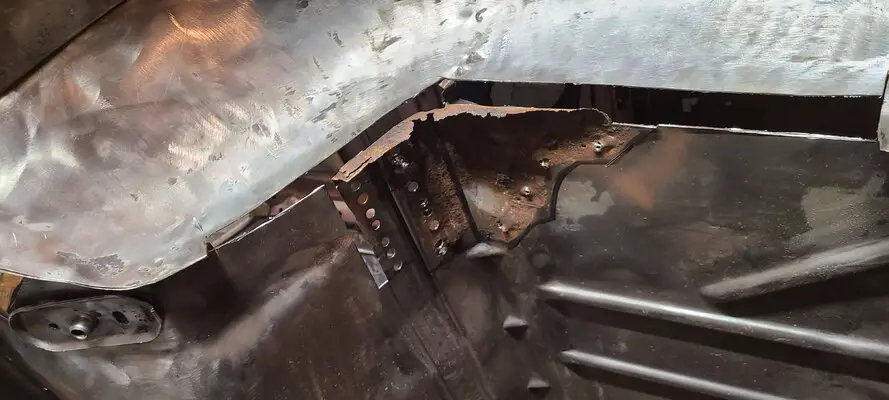
This is close to done. As close as i can get it anyways. I have to get inside welds dressed before I post. lol
Last edited:
So I got another part yesterday. Cheapo ebay Ls gbody headers.
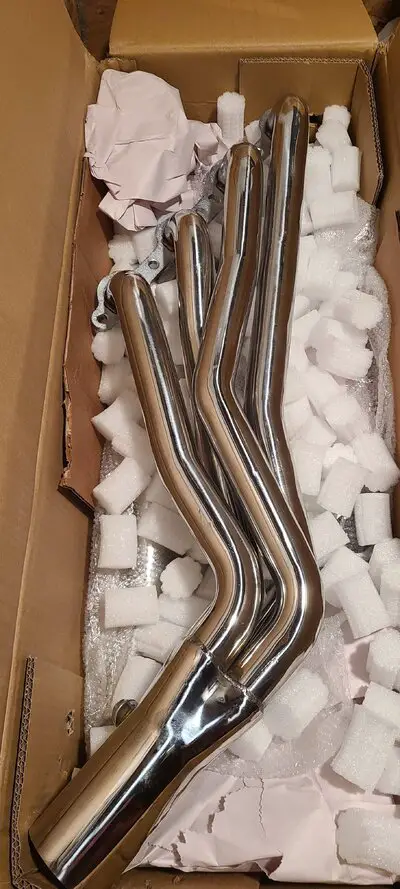 They look good and the price was even better. Probably not as nice as some but should work.
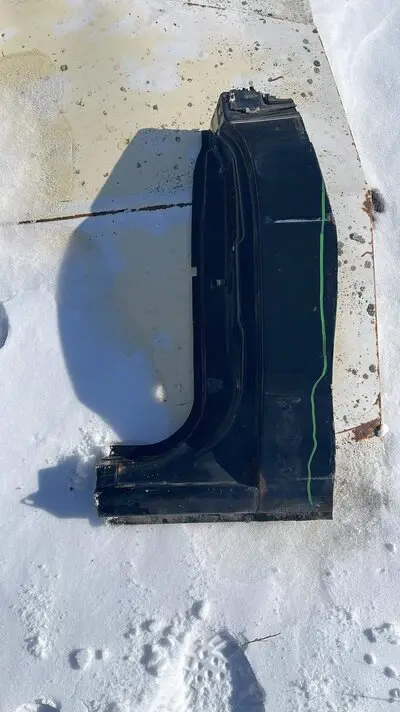 I also secured a b pillar to replace the damage one I have. This will be my last update until I get back from a much needed vacation. Wife says no more buying car parts until after we get back.
I have also been reluctant to address my compressor issue for the same reason. I'm about 80% done with rust removal.
 They look good and the price was even better. Probably not as nice as some but should work.
 I also secured a b pillar to replace the damage one I have. This will be my last update until I get back from a much needed vacation. Wife says no more buying car parts until after we get back.
I have also been reluctant to address my compressor issue for the same reason. I'm about 80% done with rust removal.
Well it's been awhile, I wish I had updates on progress but I do not ☹️. I am licking my wounds from a family vacation to the Keys. (3kids+wife = no $$$) It was fun but now its my turn for some fun. I have a picture of what my wife will be coming home to see. I saved just about evert box from my build and placed them on my stoop.
My line will be " I must have accidentally bought everything in my cart. oops"
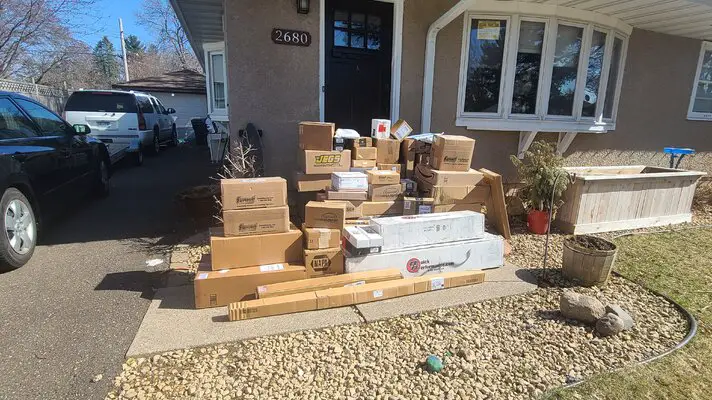
April Fools!
My line will be " I must have accidentally bought everything in my cart. oops"

April Fools!
Im tired/bored of metal work and with the warmer weather I decided to pull my car on the rotisserie out of the Garage and do a little cleaning. Then switched focus to driveline.
I pulled the trans out out of storage to mate with the engine.
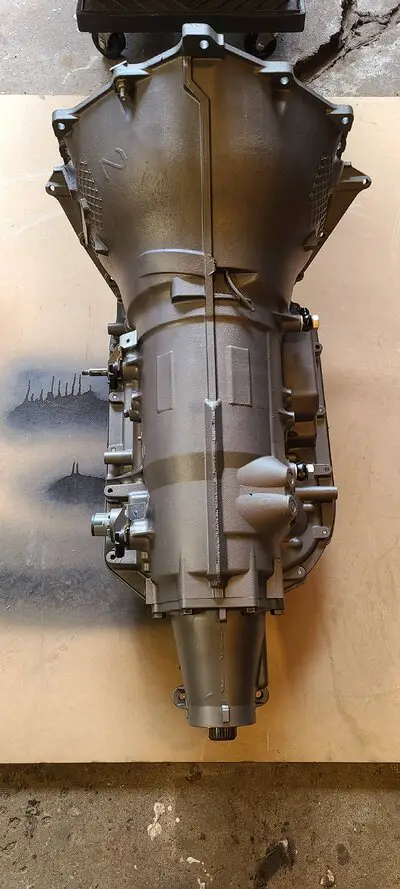
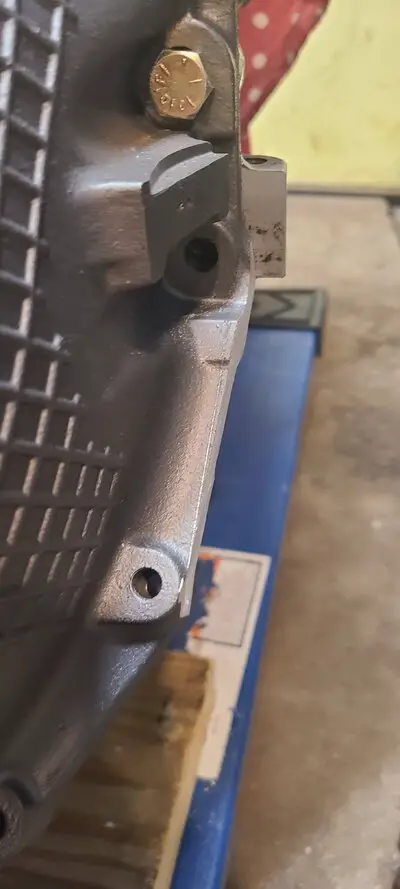
First I cut the both ears off the 4l80.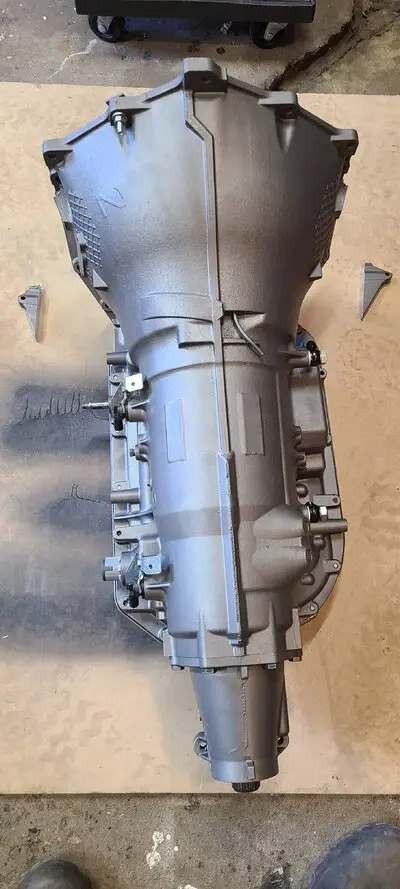
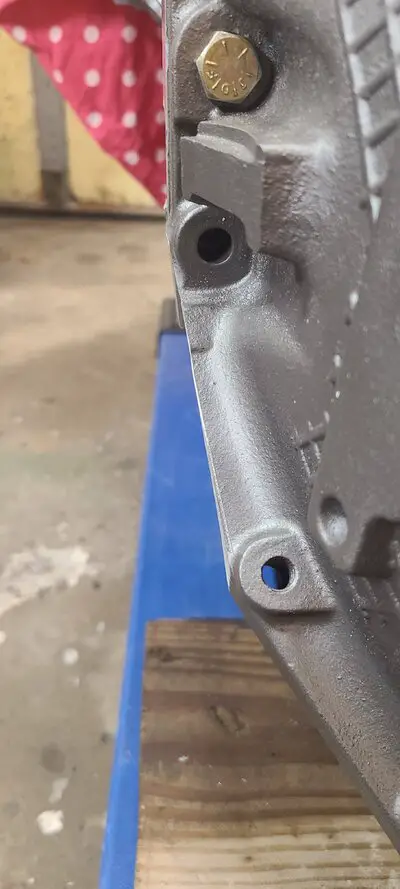
Then I bolted the bell to the block and checked the clearance between the converter pads and the flex plate. Goal is .125"- .1875" (1/8" - 3/16"). I have .234" gap, if i add a .08" shim that will get me to .154" gap.
Need to go to trans shop tomorrow and pick up shims. I think I did this correctly.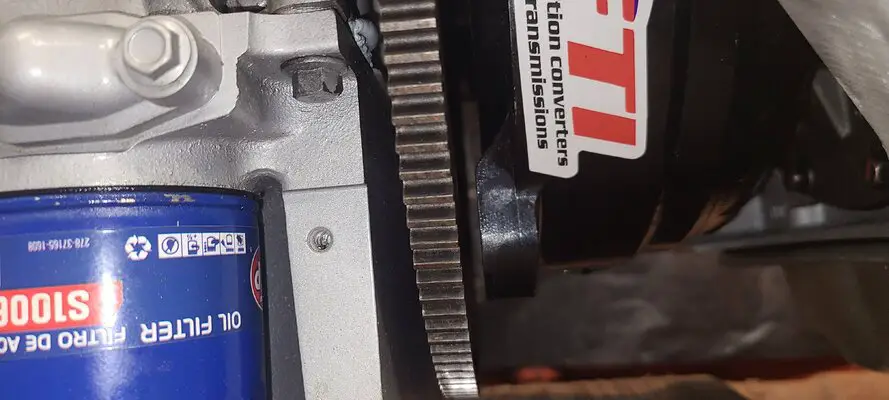
I'm now waiting on dowel pins and new bell housing bolts. With any luck I can get it installed this weekend.
I pulled the trans out out of storage to mate with the engine.

First I cut the both ears off the 4l80.


Then I bolted the bell to the block and checked the clearance between the converter pads and the flex plate. Goal is .125"- .1875" (1/8" - 3/16"). I have .234" gap, if i add a .08" shim that will get me to .154" gap.
Need to go to trans shop tomorrow and pick up shims. I think I did this correctly.

I'm now waiting on dowel pins and new bell housing bolts. With any luck I can get it installed this weekend.
Much cleaner ear trim than I did.Im tired/bored of metal work and with the warmer weather I decided to pull my car on the rotisserie out of the Garage and do a little cleaning. Then switched focus to driveline.
I pulled the trans out out of storage to mate with the engine.
View attachment 196490
First I cut the both ears off the 4l80. View attachment 196491 View attachment 196494 View attachment 196495
Then I bolted the bell to the block and checked the clearance between the converter pads and the flex plate. Goal is .125"- .1875" (1/8" - 3/16"). I have .234" gap, if i add a .08" shim that will get me to .154" gap.
Need to go to trans shop tomorrow and pick up shims. I think I did this correctly. View attachment 196496
I'm now waiting on dowel pins and new bell housing bolts. With any luck I can get it installed this weekend.
You are correct, 1/8" is about right. You might get lucky with some regular washers as shims.
Similar threads
BUILD THREAD
84 Regal back half/caged/mini tubbed lq4/4l80e build
- Replies
- 70
- Views
- 7K
- Replies
- 3
- Views
- 275
- Replies
- 0
- Views
- 175
GBodyForum is a participant in the Amazon Services LLC Associates Program, an affiliate advertising program designed to provide a means for sites to earn advertising fees by advertising and linking to amazon.com. Amazon, the Amazon logo, AmazonSupply, and the AmazonSupply logo are trademarks of Amazon.com, Inc. or its affiliates.


