First off, let me begin by saying I had no intention of doing this until I was virtually screwed. But I wouldn't do it any other way if I had to go back.
I had purchased a Hotchkis TVS kit. Upon installation, I realized that the bolts they provided were 3/8 and not metric after it was too late. They go in somewhat fine, then when I go to torque them down, they start to spin. No worries, helicoil to the rescue. I drilled/tapped and then inserted the helicoil. All was well until you went to torque the bolts down. The helicoil starts turning with the bolt. Lost cause there when all was said and done. I've read about nutserts, etc. By that time I finally decided to come up with something better(better in my own opinion). So I drilled out each hole to 9/16" and designed this:

Now my sister in law is a CAD designer, so she had put this in a drawing for me. After searching for someone to make one, I came across Mike E a member on Turbobuick.com. Before I go any further, I'd like to give a huge shoutout to Mike as he obviously helped create my vision. It's fellow TurboBuick members like him that are worth their weight in gold to the community.
Anyhow, past the mushy stuff.
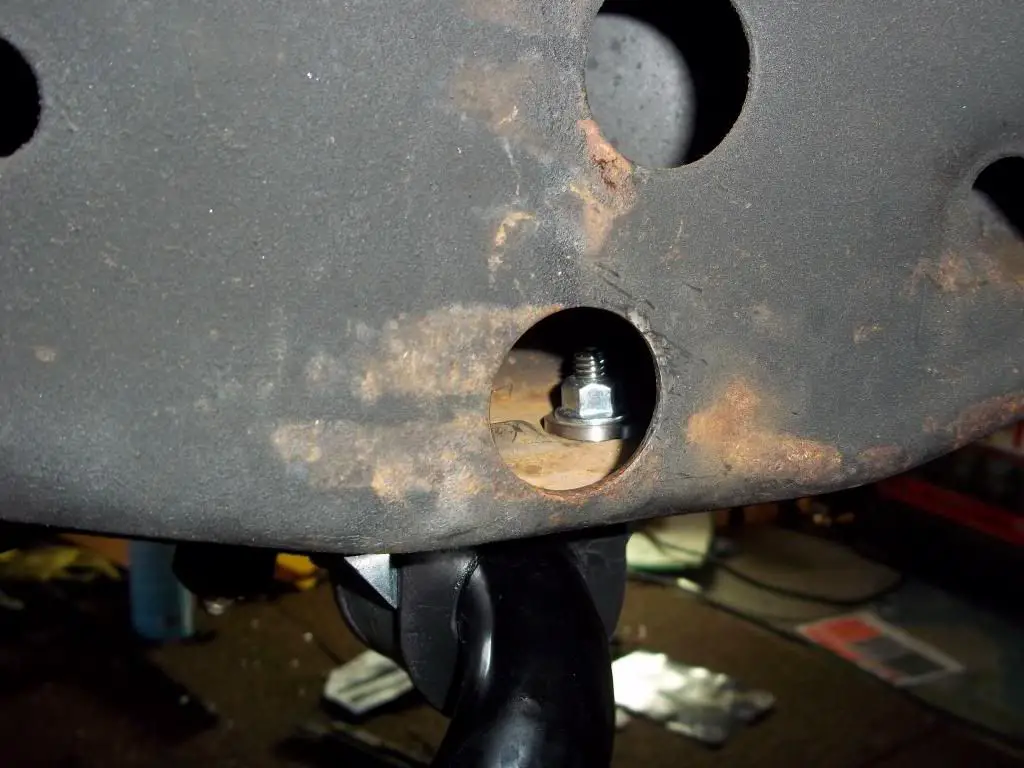
Mike got the parts done and sent them on their way. The plan was to set these inserts in the hole, and then use a 3/8 self-locking flange nut on the other end of the bolts. As you can see by the photo, the inserts sit flush across the bottom and give WAY more support than the stock bolts alone had. I know some are thinking "why not just use a washer" The reason for this is that I did not want any play at all in the bracket.


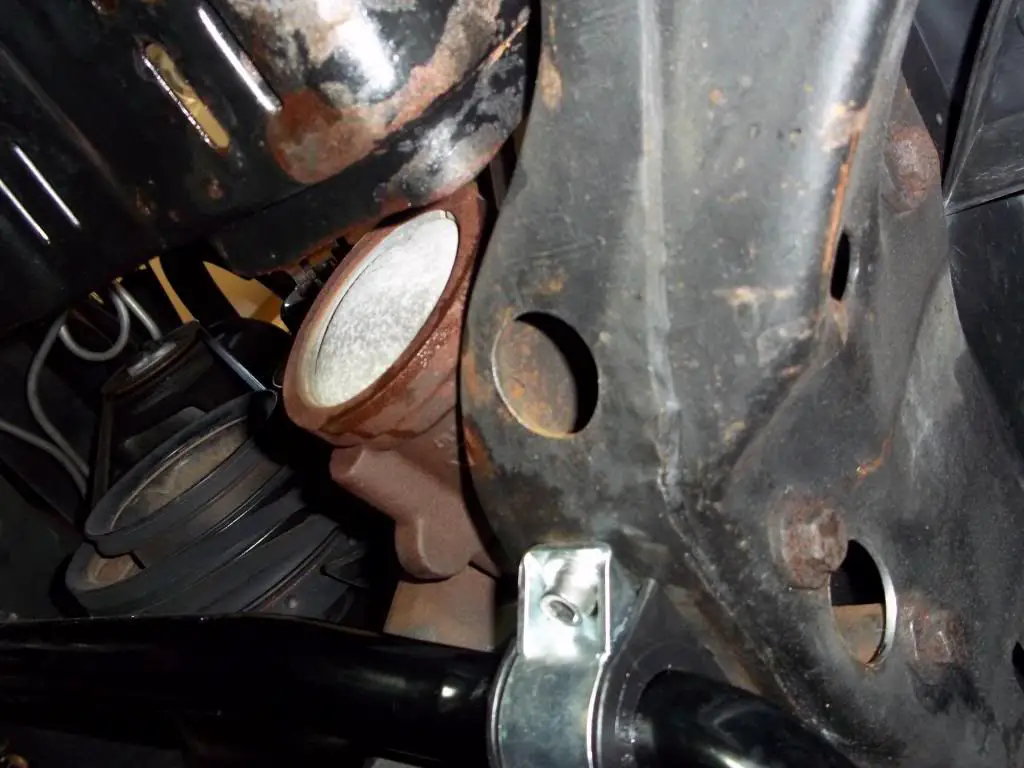
Now, to go back to why I went 9/16 with the hole size. I had to go to 9/16 to completely remove any metal that is protruding upwards from the old threads and make the inside of the frame smooth. Here is a photo of it mounted on the passenger side. FYI, I did this by myself although having another hand to hold the bar is always a help:

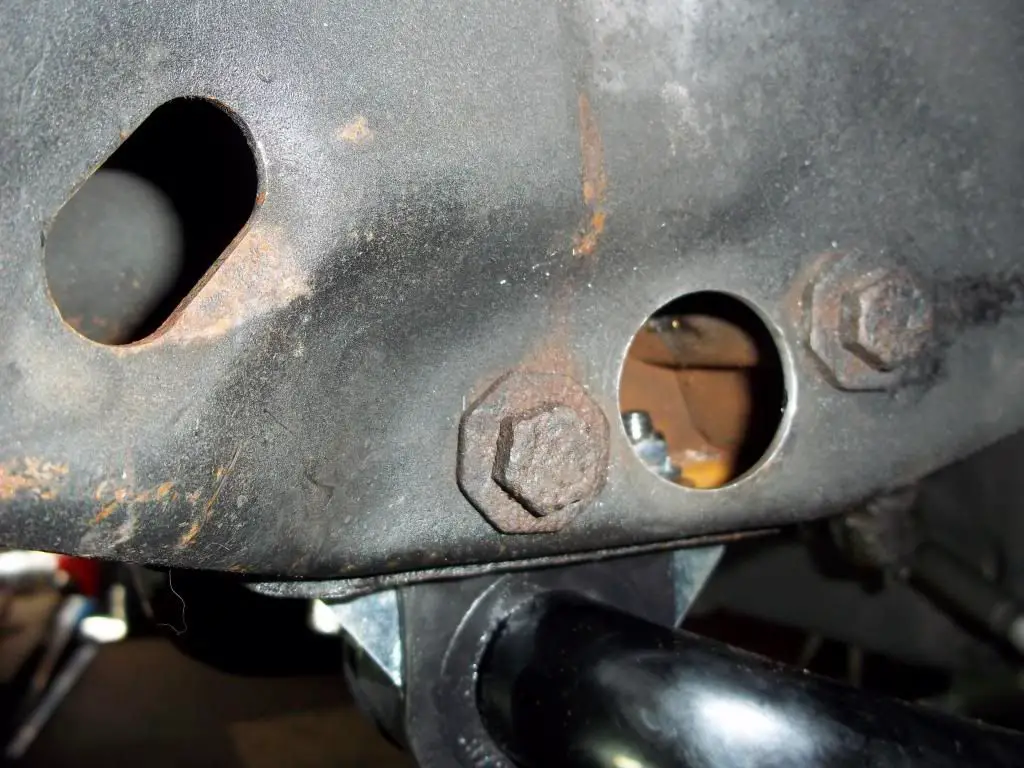
By now, I am sure you are thinking, "how is he going to get at the passenger side?" This next part is trivial, but after measuring and eyeballing about 10 times, I decided to go for it. No turning back now. First thing that was determined was that wherever I drilled, I would need to get a wrench there. That factored big into my decision on where to drill. Remember, measure twice, cut once. I measured in the center between the two lower power steering mounting bolts. I drilled a pilot hole with a smaller bit, and then went to a unibit (also called a step bit) and worked my way step by step until I had a 1 3/8" hole. There I had perfect access to the rear bolt. I wasn't worried about stability as you can see on the inside that there are welded tubes for reinforcement for the bolts, not to mention the frame is boxed in that area. Besides, there are holes all around the front of the frame. This little bit isn't going to hurt anything. The front one was a little trickier. I wanted to go as far up front to keep the holes as far apart as possible, yet close enough to where the wrench can hold the nut. I drilled a similar 1 3/8" hole in that spot as well. At that point, I had full access to where I needed to install the nut. And frankly, it almost looks like those holes came from the factory. See photos:

I
Yes this is probably overkill, but I will never have to worry about these bolts stripping again, and it's as solid as a rock.
I had purchased a Hotchkis TVS kit. Upon installation, I realized that the bolts they provided were 3/8 and not metric after it was too late. They go in somewhat fine, then when I go to torque them down, they start to spin. No worries, helicoil to the rescue. I drilled/tapped and then inserted the helicoil. All was well until you went to torque the bolts down. The helicoil starts turning with the bolt. Lost cause there when all was said and done. I've read about nutserts, etc. By that time I finally decided to come up with something better(better in my own opinion). So I drilled out each hole to 9/16" and designed this:

Now my sister in law is a CAD designer, so she had put this in a drawing for me. After searching for someone to make one, I came across Mike E a member on Turbobuick.com. Before I go any further, I'd like to give a huge shoutout to Mike as he obviously helped create my vision. It's fellow TurboBuick members like him that are worth their weight in gold to the community.
Anyhow, past the mushy stuff.
Mike got the parts done and sent them on their way. The plan was to set these inserts in the hole, and then use a 3/8 self-locking flange nut on the other end of the bolts. As you can see by the photo, the inserts sit flush across the bottom and give WAY more support than the stock bolts alone had. I know some are thinking "why not just use a washer" The reason for this is that I did not want any play at all in the bracket.


Now, to go back to why I went 9/16 with the hole size. I had to go to 9/16 to completely remove any metal that is protruding upwards from the old threads and make the inside of the frame smooth. Here is a photo of it mounted on the passenger side. FYI, I did this by myself although having another hand to hold the bar is always a help:


By now, I am sure you are thinking, "how is he going to get at the passenger side?" This next part is trivial, but after measuring and eyeballing about 10 times, I decided to go for it. No turning back now. First thing that was determined was that wherever I drilled, I would need to get a wrench there. That factored big into my decision on where to drill. Remember, measure twice, cut once. I measured in the center between the two lower power steering mounting bolts. I drilled a pilot hole with a smaller bit, and then went to a unibit (also called a step bit) and worked my way step by step until I had a 1 3/8" hole. There I had perfect access to the rear bolt. I wasn't worried about stability as you can see on the inside that there are welded tubes for reinforcement for the bolts, not to mention the frame is boxed in that area. Besides, there are holes all around the front of the frame. This little bit isn't going to hurt anything. The front one was a little trickier. I wanted to go as far up front to keep the holes as far apart as possible, yet close enough to where the wrench can hold the nut. I drilled a similar 1 3/8" hole in that spot as well. At that point, I had full access to where I needed to install the nut. And frankly, it almost looks like those holes came from the factory. See photos:


I

Yes this is probably overkill, but I will never have to worry about these bolts stripping again, and it's as solid as a rock.