

Nice work. Can't wait to see how it runs. I used a similar recipe on my 403. Gobs of torque! Get ready to buy new tires.
442 Project: Looks can be deceiving
- Thread starter rogue_ryder
- Start date
You are using an out of date browser. It may not display this or other websites correctly.
You should upgrade or use an alternative browser.
You should upgrade or use an alternative browser.
- Status
- Not open for further replies.
I just saw on IG that Rocket Racing has I-beam SBO rods.....
I knew there were some being developed, but when I started the engine build (March 2018) there was nothing available other than some H-Beam rods that were made by Procomp and as olds307 and 403 mentioned they are/were junk. Mondello and his disgruntled former employee that now runs oldsrocketparts on eBay market them as well but don't disclose they are procomp. Procomp doesn't list an Olds application and I feel that there most be some reworking done at Mondellos to turn those Procomp chevy rods into olds rods. And the reworking must be crappy, hence the reason why the dimensions were all over the place.
If they had them 18 months ago I would've bought them!
The factory connecting rods are all soft but the 403 rods are beefier, hopefully those pistons are lighter than stock
The Autotec forged pistons are definitely lighter than the stock units and have much better rings as well.
They were the only out of the box 403 flat top available when it was time to buy the pistons. Arias at one time had 0.030 over 403 pistons but they were either unavailable or discontinued when I need to order them. When these parts were at the Machine Shop even the machine shop owner looked high and low for a better aftermarket rod than the stock Olds rods but there was nothing available. IF I had found a virgin standard 330 crank I definitely would have gone the offset grinding route. BUT unfortunately when I bought the crank it had already been ground .030 on the Rod Journals. That way I could've used any number of Chevy Rods out there.
Even though the 403 Rods aren't as good as an aftermarket Eagle I beam unit, they should be more than adequate for this build. CutlassEFI was in the process of getting those I-beams to market first (looks like RR beat him to the punch) and when I inquired with him, his advice was the 403 rods were "Good Rods" and I wouldn't have a problem. In his C head build on ROP he built a very similar build just utilizing the cheaper KB Hyper pistons. That setup would have me .020 in the hole instead of the .002 with the Autotec pistons.
I think the aftermarket rods would have been preferable but in the end I saved some money and considering this is not a race engine, just a hot rod/street build everything should be more than adequate. If I were doing a max effort small block, I wouldn't have chosen the 403; but I've always wanted a 400ci+ small block engine in a car. There's a local Junkyard here that had 3 350 Diesels that I could've used and built a much more powerful engine but I'd probably have spent double if not triple on the build. Even shopping deals, and used parts I still blew my original budget for the engine build.
The old Computer Controlled Quadrajet even with the Everyday Performance rebuild wasn't going to cut it for this engine. I went back and forth MANY times on what exactly I was going to do to fuel this power plant. Do I go with the Quickfuel or Brawler 750 carb? the new AVS2 with annual boosters? Get a modified Quadrajet? Use the Cliff Ruggles book and try to build my own Quadrajet? or go EFI?
Ultimately I bit the bullet and went EFI:
It was definitely more expensive than a Carb, but living at altitude I'd only have the Holley optimally tuned once and in my Garage. Driving around here we can see temp swings of 50*F in day and elevation changes of +/- 5,000'. So within any given day you could be pig rich at one moment and lean the next.
The Holley Sniper EFI set up wasn't terribly expensive as Holley offers some Reman units either $800 for the basic kit and $1000 for the master kit with a fuel pump. I went with the master kit because it came with way more than $200 worth of extra parts. I elected to not use their in line fuel pump because the G-body doesn't have an optimal location for the fuel pump. So I got the in tank pump that was super simple to install, PART# 12-306 is a direct fit for G bodies, no need to cut up your stock tank or buy and expensive aftermarket tank. The likelihood of the in tank pump burning up is also far less than one mounted 3 feet away on the frame that has to pull the fuel.
Looks like it's supposed to be in there:
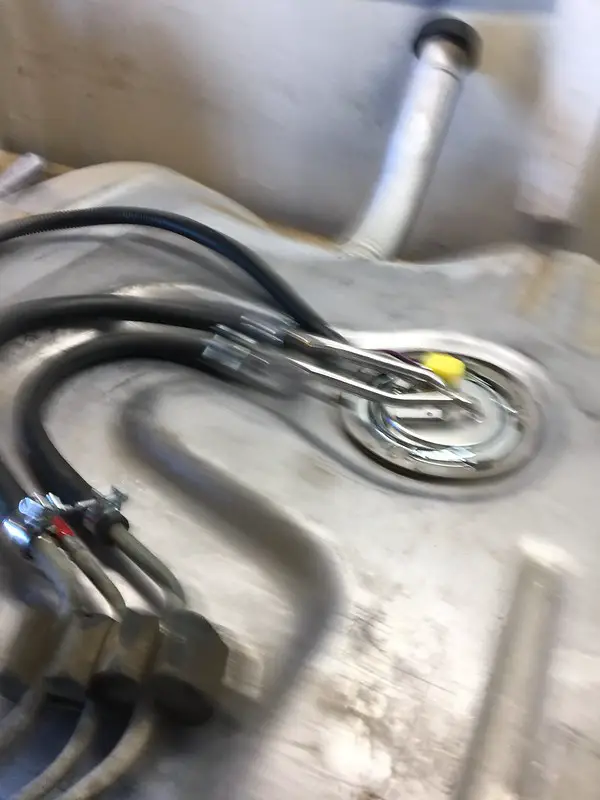
I replaced all the rubber lines with the EFI Rate fuel hose and utilized the existing hard lines in the car. The stock return line is too small for EFI so I thoroughly cleaned the Vent Hard line and used it as my return. Holley explicitly says not to use the vent line, but that hard line is the same wall thickness as the Fuel lines and I had read of other success stories using the hard vent line as a return. Obviously don't ever EVER use the rubber vent line for fuel in any application EFI or carb.
Getting the engine stabbed back in was way easier than I anticipated. It was getting everything hooked back up that was a huge time suck.

Exhaust, hoses and WIRING! I'm not even done dressing in and securing all the wiring. I purposely have left off the loom for now just in case I need to do any trouble shooting.
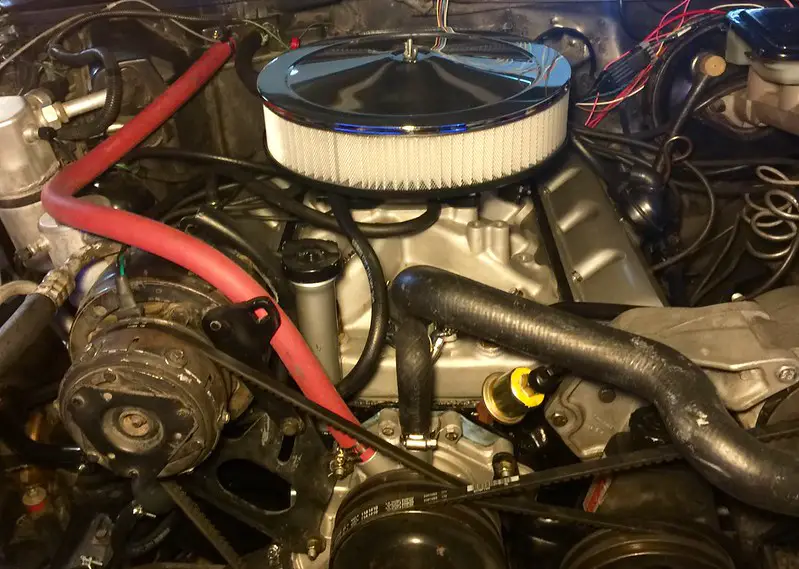
So far I'm pretty happy with how it's looking under there so far. The Performer RPM intake and the air cleaner kind of are a give away that it's not stock, but I'm still rocking the stock 307 Valve Covers. Thanks again to CutlassEFI for letting me know that there are some Crower Polylocks that combined with a thick Valve cover gasket will allow stock valve covers! The sniper drop base combined with a 3" air cleaner and a cheap summit cover allow enough clearance to close the hood! I was a little nervous about hood clearance, I'm not gonna lie. I thought I might have to spend a couple hundred bucks on a Spectre intake system and fab up brackets, or even worse have to get a cowl hood; but this set up worked out. Yeah Yeah, I know the paper filter is too restrictive BUT I was unsure if a 3" filter would have the hood clearance so I bought that and a 2" for a just few bucks before shelling out $50+ on the K&N. I'll probably eventually swap to a flow through lid as well. To the unsuspecting eye it looks pretty close to stock, which is what I was going for. I really would have like to reuse the OE air cleaner assembly but it just wouldn't fit with the RPM intake.
With the Sniper EFI it's definitely not as easy to install as they market it as being. The Master Kit also isn't all inclusive. I had to buy an additional installation kit that had gaskets and the throttle and TV cable studs for $30 as well as the throttle and TV cable brackets for another $25. It was definitely annoying that the master kit didn't include everything I needed. The other item you need to buy if you use either of the 2 front fuel inlet options (the sniper offers 3 locations for fuel inlet) you need to buy a 45* fuel fitting for another $10, because the straight barbs won't allow usage of the drop base air cleaner.
I might have missed out on the Rocket Racing Rods coming to market, but while I was slowly building this thing Holley released an Olds specific Hyperpark distributor! And Jegs was offering a package deal on all 3 parts of the Hyperspark ignition (distributor, HEI & Coil)! I initially was going to just use the proform HEI, or try to use the MSD Probillet and a Intellitronix CDI, but luckily for me this came to market and integrates easily with the Sniper EFI.
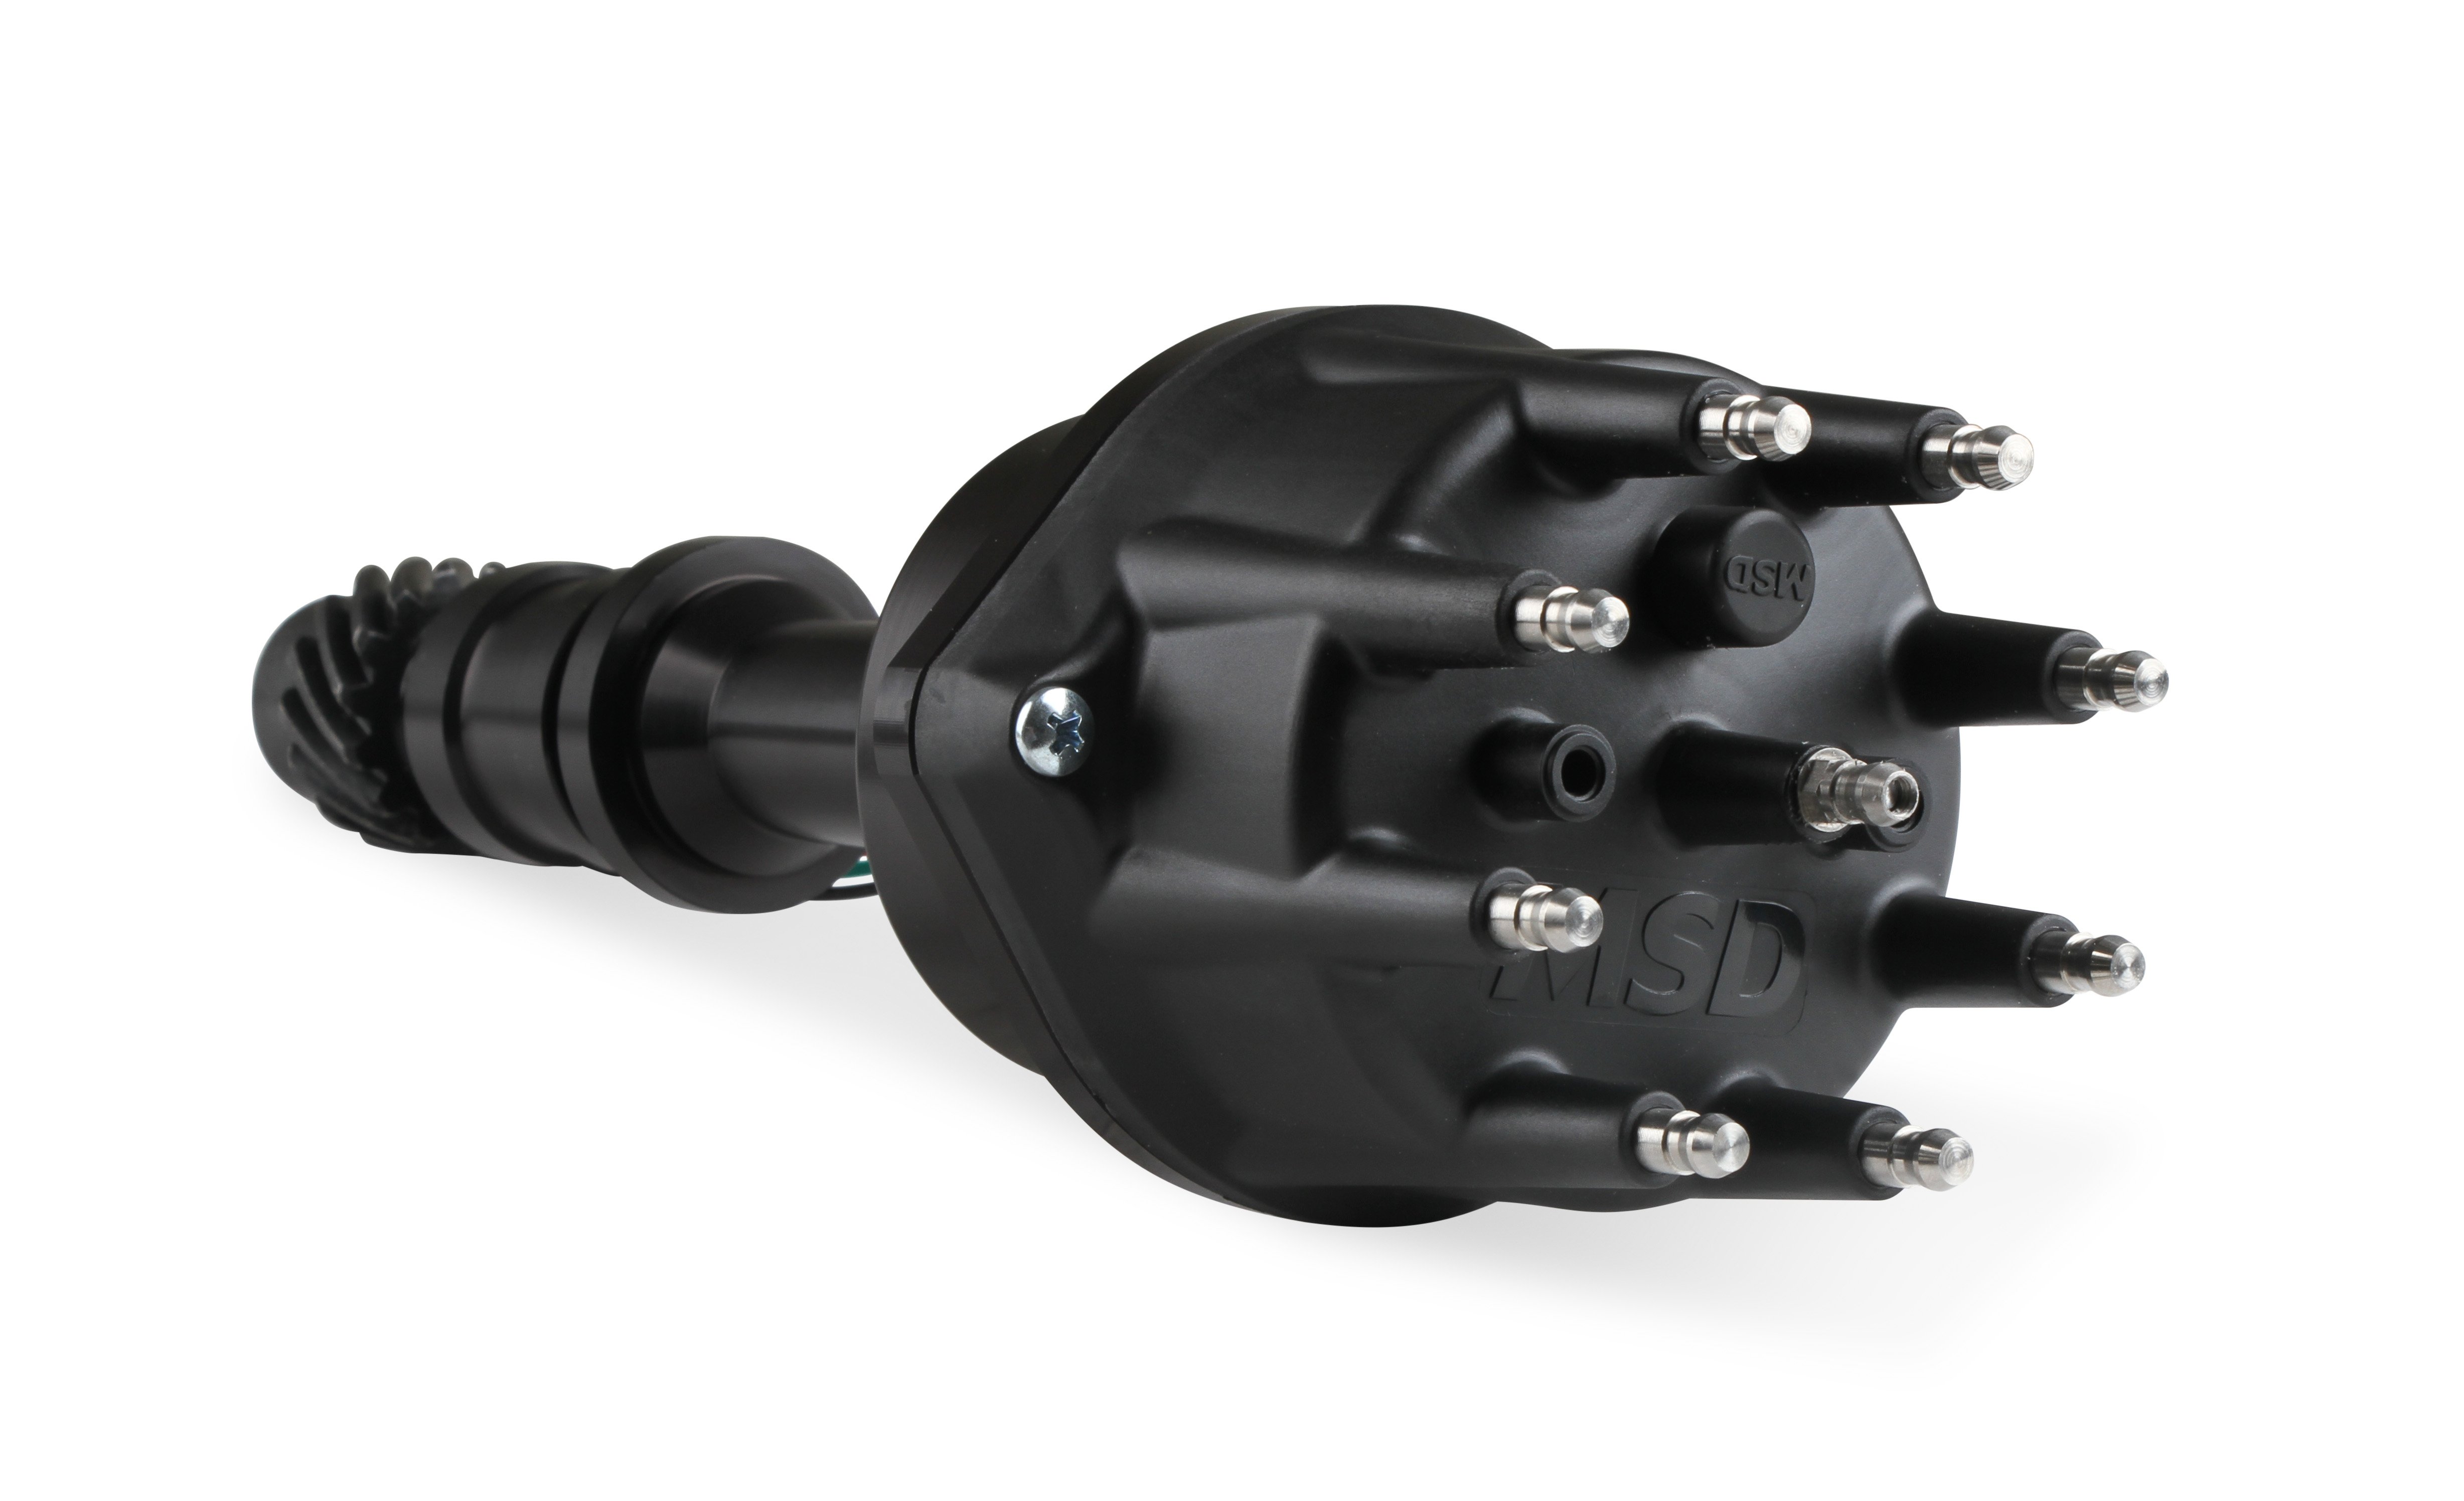
Right through the handheld touch screen you can set your timing! Cranking timing, Idle, Cruise and WOT! I have the CDI hidden between the battery and headlight. There's a bracket that connects the headlight buckets to the core support that has 2 threaded holes in it; the CDI box almost lined up perfectly where it could be bolted to it; but not quite. So I cut the bracket with a cut off wheel and spread the 2 holes apart where the cdi would bolt up to the bracket. Once I had everything located I ran a bead of weld through the bracket and then had a perfect mounting spot to get the CDI tucked away nicely and away from any heat sources. The Coil is mounted to Drivers plastic fender liner, it's not really hidden but blends in very nicely.
There was also another large purchase and that was a Radiator!

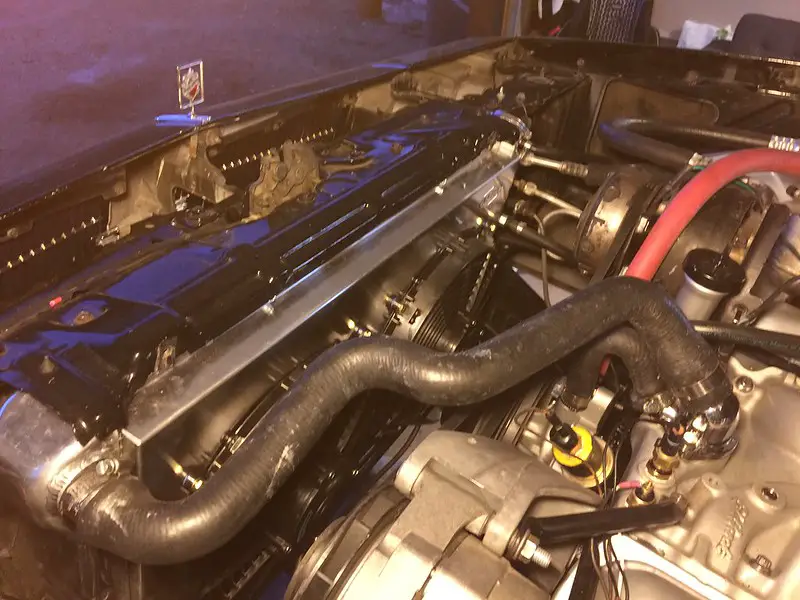
I made the decision to go with Cold Case, the rad, the fans and wiring all are from Cold Case. They're a forum sponsor and the only people out there making a pretty direct replacement for a G body. It's not exactly a 1 for 1 swap, the over flow barb was too small for the recovery tank hose and the stock rubber isolators don't align with the tanks on this radiator. BUT that's all okay because the Radiator has far more coolant capacity and it still fits it's just not a factory 1:1. When I filled to coolant I used 4 gallons! Between the large cooling capacity, dual electric fans and awesome forged pistons this 403 shouldn't have any cooling issues. The plan for the last 2 years was always to switch over to Electric Fans hence the reason for the alternator upgrade.
Vrooom Vroooooom

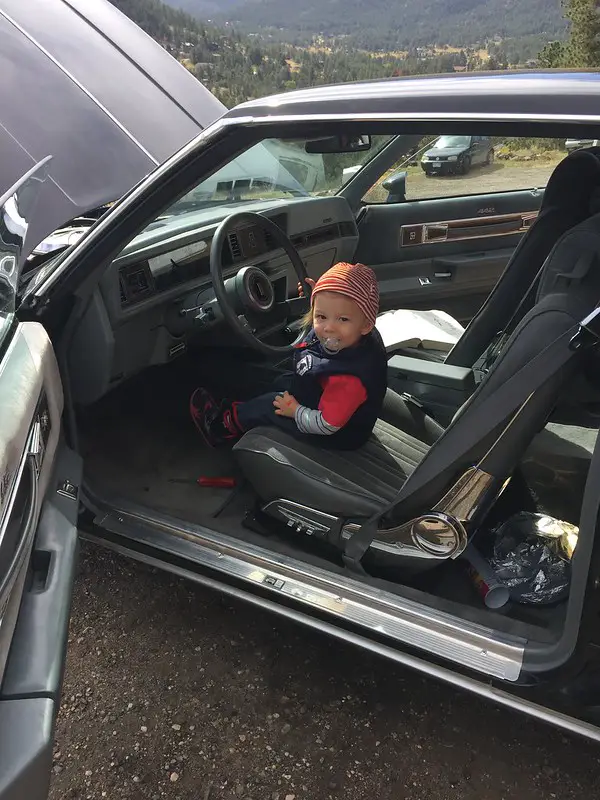
"Dad get this pile finished!"

I'm getting real close to the point where I can drive the car again. I was able to get her fired up and have done a few heat cycles and cut open the oil filter. Thankfully no metal shavings/chunks in their so far. I have to install some bigger gauge ground wires and get everything dressed in. I'm pretty certain I'm going to bring the car to a tuner and have them tune the sniper with a laptop and a dyno to get everything just right.
Ultimately I bit the bullet and went EFI:
It was definitely more expensive than a Carb, but living at altitude I'd only have the Holley optimally tuned once and in my Garage. Driving around here we can see temp swings of 50*F in day and elevation changes of +/- 5,000'. So within any given day you could be pig rich at one moment and lean the next.
The Holley Sniper EFI set up wasn't terribly expensive as Holley offers some Reman units either $800 for the basic kit and $1000 for the master kit with a fuel pump. I went with the master kit because it came with way more than $200 worth of extra parts. I elected to not use their in line fuel pump because the G-body doesn't have an optimal location for the fuel pump. So I got the in tank pump that was super simple to install, PART# 12-306 is a direct fit for G bodies, no need to cut up your stock tank or buy and expensive aftermarket tank. The likelihood of the in tank pump burning up is also far less than one mounted 3 feet away on the frame that has to pull the fuel.
Looks like it's supposed to be in there:
I replaced all the rubber lines with the EFI Rate fuel hose and utilized the existing hard lines in the car. The stock return line is too small for EFI so I thoroughly cleaned the Vent Hard line and used it as my return. Holley explicitly says not to use the vent line, but that hard line is the same wall thickness as the Fuel lines and I had read of other success stories using the hard vent line as a return. Obviously don't ever EVER use the rubber vent line for fuel in any application EFI or carb.
Getting the engine stabbed back in was way easier than I anticipated. It was getting everything hooked back up that was a huge time suck.
Exhaust, hoses and WIRING! I'm not even done dressing in and securing all the wiring. I purposely have left off the loom for now just in case I need to do any trouble shooting.
So far I'm pretty happy with how it's looking under there so far. The Performer RPM intake and the air cleaner kind of are a give away that it's not stock, but I'm still rocking the stock 307 Valve Covers. Thanks again to CutlassEFI for letting me know that there are some Crower Polylocks that combined with a thick Valve cover gasket will allow stock valve covers! The sniper drop base combined with a 3" air cleaner and a cheap summit cover allow enough clearance to close the hood! I was a little nervous about hood clearance, I'm not gonna lie. I thought I might have to spend a couple hundred bucks on a Spectre intake system and fab up brackets, or even worse have to get a cowl hood; but this set up worked out. Yeah Yeah, I know the paper filter is too restrictive BUT I was unsure if a 3" filter would have the hood clearance so I bought that and a 2" for a just few bucks before shelling out $50+ on the K&N. I'll probably eventually swap to a flow through lid as well. To the unsuspecting eye it looks pretty close to stock, which is what I was going for. I really would have like to reuse the OE air cleaner assembly but it just wouldn't fit with the RPM intake.
With the Sniper EFI it's definitely not as easy to install as they market it as being. The Master Kit also isn't all inclusive. I had to buy an additional installation kit that had gaskets and the throttle and TV cable studs for $30 as well as the throttle and TV cable brackets for another $25. It was definitely annoying that the master kit didn't include everything I needed. The other item you need to buy if you use either of the 2 front fuel inlet options (the sniper offers 3 locations for fuel inlet) you need to buy a 45* fuel fitting for another $10, because the straight barbs won't allow usage of the drop base air cleaner.
I might have missed out on the Rocket Racing Rods coming to market, but while I was slowly building this thing Holley released an Olds specific Hyperpark distributor! And Jegs was offering a package deal on all 3 parts of the Hyperspark ignition (distributor, HEI & Coil)! I initially was going to just use the proform HEI, or try to use the MSD Probillet and a Intellitronix CDI, but luckily for me this came to market and integrates easily with the Sniper EFI.
Right through the handheld touch screen you can set your timing! Cranking timing, Idle, Cruise and WOT! I have the CDI hidden between the battery and headlight. There's a bracket that connects the headlight buckets to the core support that has 2 threaded holes in it; the CDI box almost lined up perfectly where it could be bolted to it; but not quite. So I cut the bracket with a cut off wheel and spread the 2 holes apart where the cdi would bolt up to the bracket. Once I had everything located I ran a bead of weld through the bracket and then had a perfect mounting spot to get the CDI tucked away nicely and away from any heat sources. The Coil is mounted to Drivers plastic fender liner, it's not really hidden but blends in very nicely.
There was also another large purchase and that was a Radiator!
I made the decision to go with Cold Case, the rad, the fans and wiring all are from Cold Case. They're a forum sponsor and the only people out there making a pretty direct replacement for a G body. It's not exactly a 1 for 1 swap, the over flow barb was too small for the recovery tank hose and the stock rubber isolators don't align with the tanks on this radiator. BUT that's all okay because the Radiator has far more coolant capacity and it still fits it's just not a factory 1:1. When I filled to coolant I used 4 gallons! Between the large cooling capacity, dual electric fans and awesome forged pistons this 403 shouldn't have any cooling issues. The plan for the last 2 years was always to switch over to Electric Fans hence the reason for the alternator upgrade.
Vrooom Vroooooom
"Dad get this pile finished!"
I'm getting real close to the point where I can drive the car again. I was able to get her fired up and have done a few heat cycles and cut open the oil filter. Thankfully no metal shavings/chunks in their so far. I have to install some bigger gauge ground wires and get everything dressed in. I'm pretty certain I'm going to bring the car to a tuner and have them tune the sniper with a laptop and a dyno to get everything just right.
Last edited:

I had posted about my adventures with my Cold Case install with the stock shroud. I picked up a set of poly saddle mounts, shaped them to fit, trimmed the shroud sides. Then trying to change out the overflow nipple I snapped it at the threads, drilled it out, had to find the small tap to rethread, found a brass adaptor to use the correct size nipple with the small size hole the original used. I even openned up the brass nipple to allow better flow to the overflow tank.I made the decision to go with Cold Case, the rad, the fans and wiring all are from Cold Case. They're a forum sponsor and the only people out there making a pretty direct replacement for a G body. It's not exactly a 1 for 1 swap, the over flow barb was too small for the recovery tank hose and the stock rubber isolators don't align with the tanks on this radiator.
Looks like your losing ownership LOLThe old Computer Controlled Quadrajet even with the Everyday Performance rebuild wasn't going to cut it for this engine. I went back and forth MANY times on what exactly I was going to do to fuel this power plant. Do I go with the Quickfuel or Brawler 750 carb? the new AVS2 with annual boosters? Get a modified Quadrajet? Use the Cliff Ruggles book and try to build my own Quadrajet? or go EFI?
Ultimately I bit the bullet and went EFI:
It was definitely more expensive than a Carb, but living at altitude I'd only have the Holley optimally tuned once and in my Garage. Driving around here we can see temp swings of 50*F in day and elevation changes of +/- 5,000'. So within any given day you could be pig rich at one moment and lean the next.
The Holley Sniper EFI set up wasn't terribly expensive as Holley offers some Reman units either $800 for the basic kit and $1000 for the master kit with a fuel pump. I went with the master kit because it came with way more than $200 worth of extra parts. I elected to not use their in line fuel pump because the G-body doesn't have an optimal location for the fuel pump. So I got the in tank pump that was super simple to install, PART# 12-306 is a direct fit for G bodies, no need to cut up your stock tank or buy and expensive aftermarket tank. The likelihood of the in tank pump burning up is also far less than one mounted 3 feet away on the frame that has to pull the fuel.
Looks like it's supposed to be in there:
I replaced all the rubber lines with the EFI Rate fuel hose and utilized the existing hard lines in the car. The stock return line is too small for EFI so I thoroughly cleaned the Vent Hard line and used it as my return. Holley explicitly says not to use the vent line, but that hard line is the same wall thickness as the Fuel lines and I had read of other success stories using the hard vent line as a return. Obviously don't ever EVER use the rubber vent line for fuel in any application EFI or carb.
Getting the engine stabbed back in was way easier than I anticipated. It was getting everything hooked back up that was a huge time suck.
Exhaust, hoses and WIRING! I'm not even done dressing in and securing all the wiring. I purposely have left off the loom for now just in case I need to do any trouble shooting.
So far I'm pretty happy with how it's looking under there so far. The Performer RPM intake and the air cleaner kind of are a give away that it's not stock, but I'm still rocking the stock 307 Valve Covers. Thanks again to CutlassEFI for letting me know that there are some Crower Polylocks that combined with a thick Valve cover gasket will allow stock valve covers! The sniper drop base combined with a 3" air cleaner and a cheap summit cover allow enough clearance to close the hood! I was a little nervous about hood clearance, I'm not gonna lie. I thought I might have to spend a couple hundred bucks on a Spectre intake system and fab up brackets, or even worse have to get a cowl hood; but this set up worked out. Yeah Yeah, I know the paper filter is too restrictive BUT I was unsure if a 3" filter would have the hood clearance so I bought that and a 2" for a just few bucks before shelling out $50+ on the K&N. I'll probably eventually swap to a flow through lid as well. To the unsuspecting eye it looks pretty close to stock, which is what I was going for. I really would have like to reuse the OE air cleaner assembly but it just wouldn't fit with the RPM intake.
With the Sniper EFI it's definitely not as easy to install as they market it as being. The Master Kit also isn't all inclusive. I had to buy an additional installation kit that had gaskets and the throttle and TV cable studs for $30 as well as the throttle and TV cable brackets for another $25. It was definitely annoying that the master kit didn't include everything I needed. The other item you need to buy if you use either of the 2 front fuel inlet options (the sniper offers 3 locations for fuel inlet) you need to buy a 45* fuel fitting for another $10, because the straight barbs won't allow usage of the drop base air cleaner.
I might have missed out on the Rocket Racing Rods coming to market, but while I was slowly building this thing Holley released an Olds specific Hyperpark distributor! And Jegs was offering a package deal on all 3 parts of the Hyperspark ignition (distributor, HEI & Coil)! I initially was going to just use the proform HEI, or try to use the MSD Probillet and a Intellitronix CDI, but luckily for me this came to market and integrates easily with the Sniper EFI.
Right through the handheld touch screen you can set your timing! Cranking timing, Idle, Cruise and WOT! I have the CDI hidden between the battery and headlight. There's a bracket that connects the headlight buckets to the core support that has 2 threaded holes in it; the CDI box almost lined up perfectly where it could be bolted to it; but not quite. So I cut the bracket with a cut off wheel and spread the 2 holes apart where the cdi would bolt up to the bracket. Once I had everything located I ran a bead of weld through the bracket and then had a perfect mounting spot to get the CDI tucked away nicely and away from any heat sources. The Coil is mounted to Drivers plastic fender liner, it's not really hidden but blends in very nicely.
There was also another large purchase and that was a Radiator!
I made the decision to go with Cold Case, the rad, the fans and wiring all are from Cold Case. They're a forum sponsor and the only people out there making a pretty direct replacement for a G body. It's not exactly a 1 for 1 swap, the over flow barb was too small for the recovery tank hose and the stock rubber isolators don't align with the tanks on this radiator. BUT that's all okay because the Radiator has far more coolant capacity and it still fits it's just not a factory 1:1. When I filled to coolant I used 4 gallons! Between the large cooling capacity, dual electric fans and awesome forged pistons this 403 shouldn't have any cooling issues. The plan for the last 2 years was always to switch over to Electric Fans hence the reason for the alternator upgrade.
Vrooom Vroooooom
"Dad get this pile finished!"
I'm getting real close to the point where I can drive the car again. I was able to get her fired up and have done a few heat cycles and cut open the oil filter. Thankfully no metal shavings/chunks in their so far. I have to install some bigger gauge ground wires and get everything dressed in. I'm pretty certain I'm going to bring the car to a tuner and have them tune the sniper with a laptop and a dyno to get everything just right.
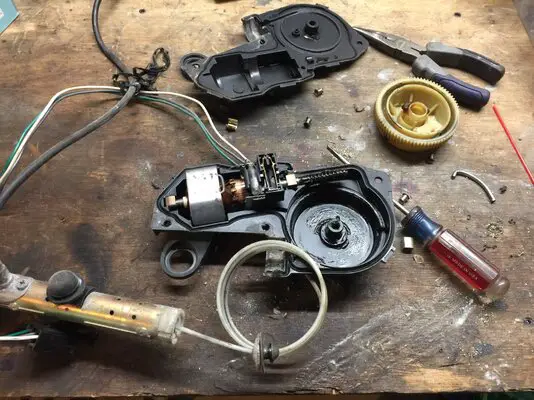
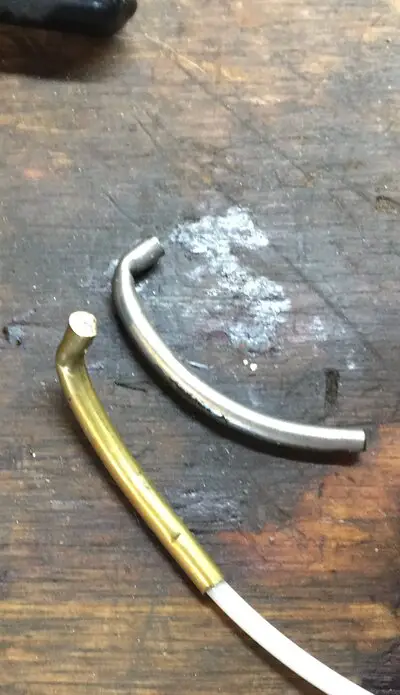
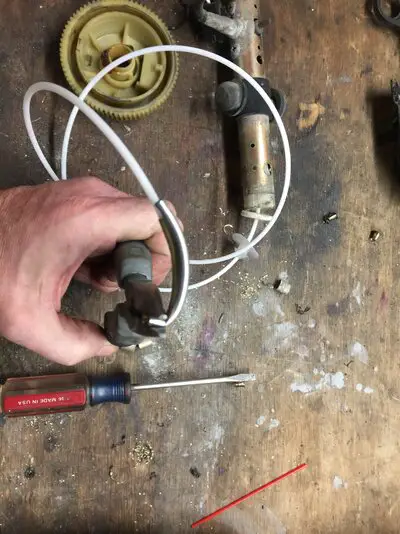
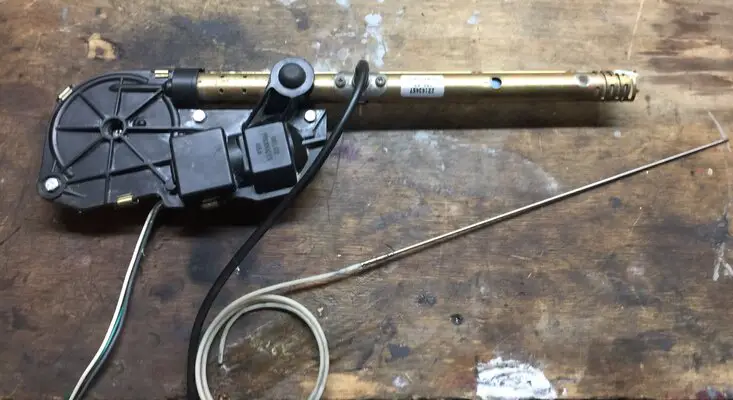
More progress made today! Not as exciting as engine work, but my antenna broke 2 years ago and I finally got around to repairing it today.
Another aftermarket part that needed tweaking to get right. Definitely a PITA job, but with a little patience and 2 hours anyone can do it. Gbody parts definitely could have included the bolts to replace the rivets that needed to be drilled out. Pretty pricey for what it is, but beats buying a whole new assembly.
Another aftermarket part that needed tweaking to get right. Definitely a PITA job, but with a little patience and 2 hours anyone can do it. Gbody parts definitely could have included the bolts to replace the rivets that needed to be drilled out. Pretty pricey for what it is, but beats buying a whole new assembly.
Attachments
-
 F2188254-A958-4FEA-9114-A8139F1CE615.jpeg873.4 KB · Views: 189
 -
 AAAF4350-A1FC-4732-B7D1-A811AE0C6A57.jpeg563 KB · Views: 187
 -
 E75E00B6-3412-4285-A415-8ECEC34123EF.jpeg1.2 MB · Views: 194
 -
 AD7BA52B-AA4D-4FE2-B05A-7BB87192D119.jpeg806.7 KB · Views: 205
 -
 C325BD27-3EC9-4335-B3AC-70D018E8CAA2.jpeg607.4 KB · Views: 193
Last edited:
Awesome you this in and running. How wide is that rad? It looks nearly as wide as the A body that I had to slightly cut the bottom of the support to fit. Either way, a big rad is a good choice for a 403, getting their A body version for my 70S for my 403 stroker.
The car has come together nicely. Good job! I have a couple questions. How did you hide the Holley Sniper wiring and plugs? Have you had any trouble with the tuch screen going nutty and flashing between screens?
Awesome you this in and running. How wide is that rad? It looks nearly as wide as the A body that I had to slightly cut the bottom of the support to fit. Either way, a big rad is a good choice for a 403, getting their A body version for my 70S for my 403 stroker.
Thanks!
The radiator measured 32" wide. I’m fairly certain the width is the same as stock or close to it. It’s much thicker though I put 4 gallons of coolant in this thing!
The car has come together nicely. Good job! I have a couple questions. How did you hide the Holley Sniper wiring and plugs? Have you had any trouble with the tuch screen going nutty and flashing between screens?
Thanks! I’ve not had any touch screen issues yet. I’ve only got about an hour of run time on the engine and haven’t had the car back on the street yet (this was the first weekend with no snow! So even if it was ready I couldn’t have driven the car until this weekend)
I’m still in the process of dressing in the wiring. I’m planning on securing the wire harness from the sniper itself behind the block on the firewall with adel clamps. Most of the sniper harnesses will tuck away nicely. I’ve got some loom with wires for the coil, cdi and fans run along the edge of the drivers fender with an oe loom for lights and the horn. I decided to hide the cdi box behind the headlights in between them and the battery. I removed all the unused wires with the Delphi tool and plugged all the unused connections. Removing unused wires can help eliminate RFI/EMI which is usually the cause of flickering handheld screens.
Once I get the wiring pretty well dressed up and secured wires, I’ll post some more photos. I’m having issues with my alternator feeding power back and causing the car to not shut off. I need to either swap to a more modern alternator or add a diode some where. I didn’t have the issue with the old HEI. And swore I had a bad ground, several ground straps, lots of sanding surfaces to bare metal and a 0/1 neg battery cable later, still the issue persisted, next I thought fans. Nope, disconnected the alternator and car immediately shut down turning the key off. So I’m close but not quite finished yet.
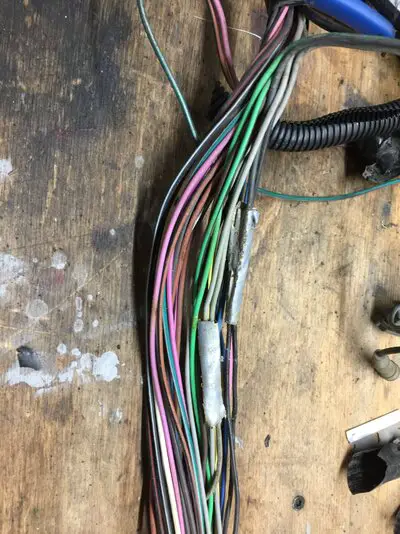
Here’s a harness from the car that I’m going clean up so I can hopefully have lock up and AC.
It’s the 3rd harness I’ve found with duct taped wires!
Attachments
Last edited:
Electrical the right way! So nothing peeves me more than electrical Hackery and I found even more working on this harness. There’s really no need to hack up a harness with the right tool you can remove unwanted wires and save them for later Incase anyone ever wants to go back to stock.
I’ve got my fingers crossed that retaining the computer with just the emissions stuff removed I can have torque converter lock up. We’ll see what happens when it’s all back together.


I’ve got my fingers crossed that retaining the computer with just the emissions stuff removed I can have torque converter lock up. We’ll see what happens when it’s all back together.
- Status
- Not open for further replies.
Similar threads
- Replies
- 10
- Views
- 419
- Replies
- 277
- Views
- 15K
- Replies
- 13
- Views
- 584
GBodyForum is a participant in the Amazon Services LLC Associates Program, an affiliate advertising program designed to provide a means for sites to earn advertising fees by advertising and linking to amazon.com. Amazon, the Amazon logo, AmazonSupply, and the AmazonSupply logo are trademarks of Amazon.com, Inc. or its affiliates.