

60/40So your car came with a bench seat and had the bucket seat mounts already?
Space City 1982 GP Build
- Thread starter Texas82GP
- Start date
You are using an out of date browser. It may not display this or other websites correctly.
You should upgrade or use an alternative browser.
You should upgrade or use an alternative browser.
- Status
- Not open for further replies.

Thanks for the feedback Steve. I'll have to put the gauge on the carb flange on my intake to see how it is sitting. Sean and I measured for the driveshaft today so we'll know before too long if that mount will work or not.My T5 WC shifter "tower" is very tight on the tunnel too bu it doesn't poke up through the tunnel like yours, mine is about flush with the tunnel. I have my engine sitting at 3° to keep my carb level.
Thanks Kevin. It's always good to have you looking in on the build. Thanks again for the recent help with the shipping advice.Looking good Jared...nice progress!
Thanks Jack. I've become pretty fond of the stuff. It is so forgiving of imperfections (dirt, imperfect prep) and sticks so well.Jared,
Nice to see you making good progress.
The Rustoleum rusty metal primer is a good product. I have used it over the years myself.
Thanks for the recommendation. I bought a tube of 3M urethane seam sealer that they sell at the local NAPA. Sean was chomping at the bit to seam seal the driver's side that I primed yesterday and I don't want to pass on any help. I used the same stuff to fix the rust damage to the firewall so I was fairly comfortable with using it. It's about all you can buy on a Sunday. I'll keep your recommendation in mind moving forward. Thanks again for posting it.Excellent work!
For seam sealer I'm a big fan of the Transtar 4167 if you don't use a 2 part epoxy, I used it for the inside of my Malbu and you can get it next day at O Reilly's or Amazon.
So your car came with a bench seat and had the bucket seat mounts already?
That's a fortunate discovery. 😉
Split bench seat utilizes the same mounts as bucket seats. Winner!
Wraith has it right. The split bench is actually two seats. They are basically bucket seats that need to be put on a diet like me.
This morning we had to do chores around the house here but Sean and I went over to the storage around lunch time. I pushed forward with priming the passenger side of the floorboards and Sean worked on some seam sealing work on the driver's side. We weren't over there for more than a few hours but we made good progress......


Sean was a little mad. He cleaned up the tip for the tube of seam sealer and sealed up the tube and then realized he didn't address the pinholes on the driver's side and he didn't seal the body plugs in the front or rear floor pans. He's off tomorrow. I'm not. We plan on going back over there tomorrow evening and he'll finish up the seam sealing while I hold the light. I'm hoping to have two coats of satin black on the floorpans before the end of the week. That's it for now friends. As always, thanks for looking in. It was a good weekend.
Sean was a little mad. He cleaned up the tip for the tube of seam sealer and sealed up the tube and then realized he didn't address the pinholes on the driver's side and he didn't seal the body plugs in the front or rear floor pans. He's off tomorrow. I'm not. We plan on going back over there tomorrow evening and he'll finish up the seam sealing while I hold the light. I'm hoping to have two coats of satin black on the floorpans before the end of the week. That's it for now friends. As always, thanks for looking in. It was a good weekend.
Any thoughts on just using a panel bonding adhesive for the patch over the old shifter hole?
When your doing the pin holes put a light under the car so you can find them easierThis morning we had to do chores around the house here but Sean and I went over to the storage around lunch time. I pushed forward with priming the passenger side of the floorboards and Sean worked on some seam sealing work on the driver's side. We weren't over there for more than a few hours but we made good progress......
View attachment 80533
View attachment 80534
View attachment 80535
Sean was a little mad. He cleaned up the tip for the tube of seam sealer and sealed up the tube and then realized he didn't address the pinholes on the driver's side and he didn't seal the body plugs in the front or rear floor pans. He's off tomorrow. I'm not. We plan on going back over there tomorrow evening and he'll finish up the seam sealing while I hold the light. I'm hoping to have two coats of satin black on the floorpans before the end of the week. That's it for now friends. As always, thanks for looking in. It was a good weekend.
When I was putting the 4L60E in the wagon - between the 1" setback, solid motor mounts, shifter mount brackets, driveline angles, saggy body mounts, and the tall ES polyurethane mount on the trans - I had to significantly rework the G-Force crossmember to get it all into spec. IIRC it was about a 3/8" drop when I was done.
Some how I figure G-Force assumes a bunch of saggy rubber parts when they designed this are going to be reused.
I am building my next crossmember from scratch.
Some how I figure G-Force assumes a bunch of saggy rubber parts when they designed this are going to be reused.
I am building my next crossmember from scratch.
Last edited:
Jared,
Another thing that you might consider on the floor pans is Dynamat (or other similar products). I covered my car with it. Because it's something like tar, I'll nicely seal the floor and will eliminate any water ingress. Also, it cuts down noise and provides some heat shielding.
Just a thought since you've got everything cleaned up and accessible.
That's not a bad idea but I don't have any material and I'm not sure I would be able to clamp the patch adequately enough. I'm leaning towards shallow rivets for simplicity and so I don't have little sharp screws projecting through to the bottom side of the tunnel.Any thoughts on just using a panel bonding adhesive for the patch over the old shifter hole?
That's a great idea Eric. Thanks!When your doing the pin holes put a light under the car so you can find them easier
Yeah, I'm not sure what the source of the difficulty is. To be fair, they sell this crossmember for installing a 700R4. It says on G-Force's website "in some cases an rcg-700 installed with a t5 may require a custom transmission mount to maintain proper drive line angle." Once I get my driveshaft I'll check the driveline angle and if it is not satisfactory, I'll modify the crossmember.When I was putting the 4L60E in the wagon - between the 1" setback, solid motor mounts, shifter mount brackets, driveline angles, saggy body mounts, and the tall ES polyurethane mount on the trans - I had to significantly rework the G-Force crossmember to get it all into spec. IIRC it was about a 3/8" drop when I was done.
Some how I figure G-Force assumes a bunch of saggy rubber parts when they designed this are going to be reused.
I am building my next crossmember from scratch.
Andry,Jared,
Another thing that you might consider on the floor pans is Dynamat (or other similar products). I covered my car with it. Because it's something like tar, I'll nicely seal the floor and will eliminate any water ingress. Also, it cuts down noise and provides some heat shielding.
Just a thought since you've got everything cleaned up and accessible.
Thanks for the suggestion. I actually bought two boxes of the Eastwood Xmat. It's a little more affordable than Dynamat but performs about as well. Sean used it in his Camaro and Dad used it in his Galaxie. I'm looking forward to Sean helping me install it. My GP was a well insulated car from the factory. I was impressed with the quality of the carpet and the amount of sound deadening from the factory. It was obviously a higher end car for its time.
I just read you're hole post. Nice build. Lots of good info and lots of good pictures . Thanks for sharing.
Thanks. I'm glad you enjoyed the thread and I hope some of my posts help someone along the way.
That's not a bad idea but I don't have any material and I'm not sure I would be able to clamp the patch adequately enough. I'm leaning towards shallow rivets for simplicity and so I don't have little sharp screws projecting through to the bottom side of the tunnel.
what about using a few 3/32 cleco to hold the patch in place while the bonding material cures and then just fill the 3/32 holes. Most circle track stores sell them and they are not that expensive....
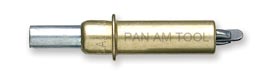
http://www.panamericantool.com/cleco-fasteners/cleco-fasteners-p-series.html
- Status
- Not open for further replies.
Similar threads
- Replies
- 4
- Views
- 151
- Replies
- 9
- Views
- 585
- Replies
- 15
- Views
- 3K
GBodyForum is a participant in the Amazon Services LLC Associates Program, an affiliate advertising program designed to provide a means for sites to earn advertising fees by advertising and linking to amazon.com. Amazon, the Amazon logo, AmazonSupply, and the AmazonSupply logo are trademarks of Amazon.com, Inc. or its affiliates.