What did you do to your G-Body today? [2011-2018]
- Thread starter dlo253
- Start date
You are using an out of date browser. It may not display this or other websites correctly.
You should upgrade or use an alternative browser.
You should upgrade or use an alternative browser.
- Status
- Not open for further replies.
I have a clutch pedal too, I find it easier just to do it blind, I stick my left arm up and use my right hand to hold the pedal in place, I find the pin, slide the rod on it and then play with the R clip till it slides into place.
try loosening the 4 booster nuts so you can get some lateral movement of the rod.
Thanks! I had it partially mounted on the pedal and was having difficulty getting to the booster nuts so I initially tightened them and that made it impossible to move the booster rod over anymore. So in frustration I got out my cordless impact and 2 6” extensions and deep socket. Was able to zip the nuts back off, manipulate the booster and pedal assembly till the rods lined up, got it onto the pedal initially, then gave it a tap with a pry bar and it slid right on. Started the nuts by hand and used the low torque setting on the impact to get them tightened up till I could see the threads from the stud poking out of the nut and sent it home.
Moral of the story, plenty of light, probably 12-18” or extension, hooking the brake pedal first, and patience will help you get a new brake booster installed.
Removing the steering wheel on a non tilt column would probably make things much more convenient as well. Oh well, live and learn.
Today I will be bleeding the brakes and figuring out what to do with the brake light switch since now my brake pedal doesn’t come down the same distance with the new booster... is there an adjustment on the rod out of the booster to correct this?
The brake light switch is adjustable. It has threads and it will push downward in its metal 'clip' on the pedal support bracket. It will push in but will not pull out. Otherwise, unhook the wiring connector and thread it in.Thanks! I had it partially mounted on the pedal and was having difficulty getting to the booster nuts so I initially tightened them and that made it impossible to move the booster rod over anymore. So in frustration I got out my cordless impact and 2 6” extensions and deep socket. Was able to zip the nuts back off, manipulate the booster and pedal assembly till the rods lined up, got it onto the pedal initially, then gave it a tap with a pry bar and it slid right on. Started the nuts by hand and used the low torque setting on the impact to get them tightened up till I could see the threads from the stud poking out of the nut and sent it home.
Moral of the story, plenty of light, probably 12-18” or extension, hooking the brake pedal first, and patience will help you get a new brake booster installed.
Removing the steering wheel on a non tilt column would probably make things much more convenient as well. Oh well, live and learn.
Today I will be bleeding the brakes and figuring out what to do with the brake light switch since now my brake pedal doesn’t come down the same distance with the new booster... is there an adjustment on the rod out of the booster to correct this?
I noticed that but even bottomed out i don’t think I’m going to have enough. There are two holes on the switch mount, is it possible to use the top?The brake light switch is adjustable. It has threads and it will push downward in its metal 'clip' on the pedal support bracket. It will push in but will not pull out. Otherwise, unhook the wiring connector and thread it in.
Without looking at it I'm not sure but I don't see why not. You could fasten a 'bumper' to the pedal to make up the distance between it and the switch. Just make sure it is a solid solution. You don't want to run around thinking the brake lights are working fine and they are on all the time.
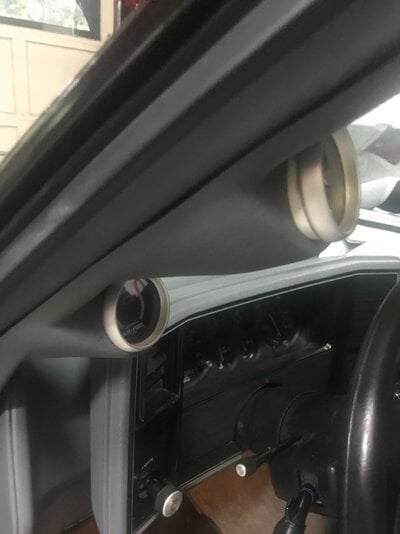
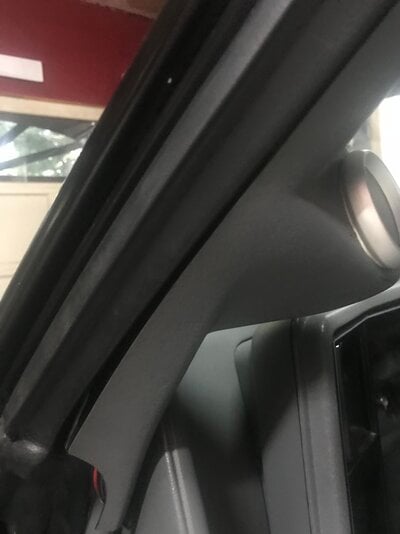
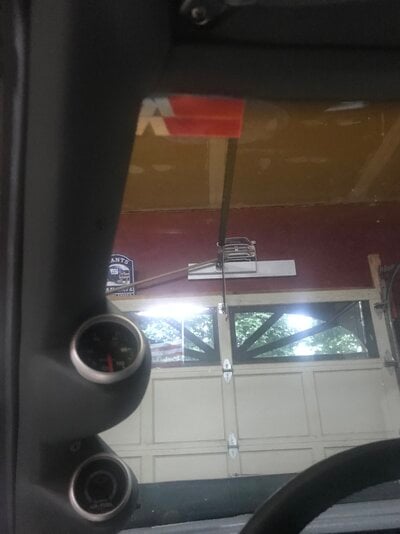
Spent about 3 hours trying to get my GBodyparts triple gauge pod to fit.
Heat gun, sanding, shaving not even close.
Went to put the gauges into it just to see what it would look like and they didnt even fit.
No drum sander .........no problem zip tie vise disconnect batt to turn off.
Ghetto sander.........

TURNA i'm currently having the same issue on my monte with the two gauge pillar. At this point I’m not sure if I’m on the right track, or I’ve hacked it up beyond saving. Gauges still don’t fit perfect and I have a noticeable seem along the pillar. Suggestions welcome.


TURNA thats where I’m at after numerous times of fitting it on the car and going back to the dremel. I also got mine from gbodyparts but purchased mine long ago while I was piling up parts so I haven’t bothered to reach out. Even paid the extra for it to be painted but it’s starting to chip in spots from the constant on/off.
Ding How, why you parts no fit?!?! <polishes off leftover scrimp chow mein>
- Status
- Not open for further replies.
Similar threads
- Replies
- 229
- Views
- 10K
- Replies
- 310
- Views
- 16K
- Replies
- 99
- Views
- 4K
GBodyForum is a participant in the Amazon Services LLC Associates Program, an affiliate advertising program designed to provide a means for sites to earn advertising fees by advertising and linking to amazon.com. Amazon, the Amazon logo, AmazonSupply, and the AmazonSupply logo are trademarks of Amazon.com, Inc. or its affiliates.


