What Did You Do To Your G-Body Today? [2020]

Status
Not open for further replies.
I fabricated a plate to mount my gauges, I have 2 2/58 mechanical, oil and temp on the top row and 2 1/8 guages for the non critical gas and volts on the bottom row. I put slots in the plates so I could slide the SS oil tube and wire for the temp through to make it easy on my. I had been using the stock gauge pod adapted to install the gauges but that was just supposed to be temporary and it broke with working on the car to do some wiring in the dash. I'm still using the stock fascia with the lips for the stock gauges removed. The trick to put the guages in with the panel the guages have to match the holes in the fascia and need to be tight against the fascia when it installed. I installed some blocks to fasten the panel in and the blocks give me side to side adjustment, I have slotted holes in the panel to give me up and down adjustment and I have allowed a bit of room so I can shim the panel so the gauges are tight against the fascia...I ran the GP for a while and it is begging me to get it on the road.... :popcorn:
 
I need some more pics of this. You going to tuck them too?
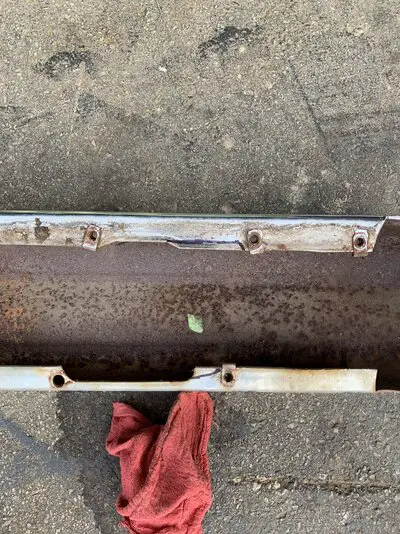
Yeah front I narrowed The front 4 1/2 inches and tucked it back as far as I could was going to bring it up to the grill so I did not have to run the spacer between the bumper and grill but did not like the way it looked that high so I kept the gap spacer in front I will delete it completely in the rear,
23D452FF-3D1B-43C2-903D-1A65F571FDC5.jpeg
79FB20E1-9E66-4802-8054-07CC4785ED27.jpeg
had to trim rear side of bumper just a little to slide the bracket over and the self tappers were just temporary to test fit it then I drilled and bolted it back like factory.
70DA9FAF-77DE-42D1-A4CF-B95B1211EEEC.jpeg
 

Attachments

  • EC1FE2C3-D97D-482C-A884-E439417DA348.jpeg
    EC1FE2C3-D97D-482C-A884-E439417DA348.jpeg
    3.4 MB · Views: 153
Yeah front I narrowed The front 4 1/2 inches and tucked it back as far as I could was going to bring it up to the grill so I did not have to run the spacer between the bumper and grill but did not like the way it looked that high so I kept the gap spacer in front I will delete it completely in the rear,View attachment 141482View attachment 141483 had to trim rear side of bumper just a little to slide the bracket over and the self tappers were just temporary to test fit it then I drilled and bolted it back like factory.View attachment 141481
Looks good. I like the look a lot better than the fiberglass ones that blend into the fender.
 
  • Like
Reactions: Rktpwrd
Having wait nearly a week with all High winds and a final dump of snow I finally was able to get to the Passenger Side (Right) Rocker Arm Cover.

View attachment 141358View attachment 141359View attachment 141360

The Gasket one the passenger side was still very brittle but in better shape than the Drivers side. The rust on the cover was much worse than on the driver side, Poured on some Vinegar and Sanded it off, gave the cover a respray You can still see the snow melting around the car (Pic: 2) Here's a shot of the Drivers side cover I put on a while back (Pic: 3). Once I can get the passenger side cover on, I am going to give the car a few more quarts of oil, then drive it carefully to a shop near by my home to get the brakes bled out, The shop in question will allow me to make use of the lift to get the tires off and start the brake bleeding process. . . I've only got emergency brake 🤣 , so this should be interesting.
Many auto part stores have one-man brake bleeder kits at reasonable prices. It might be best to check one out before driving on E-brakes only.
 
Dug back into the wire harness's to see what is still needed, ordered, & is done. In the dash I saw I already pulled & swapped the temp wire for the conversion from warning light to gauge, made sure the delay wiper wire was added to the harness, the lighter plug was fixed correctly this time around (still might make one change to it for servicing), the radio power & memory plugs were done, dome delay plug housing replaced with a better one. Then I switched out the spliced speaker harness out of the "being used" bin with some perfect ones I pulled at the one yard last year. Looked over the original engine harness to see how bad I had it spliced up just to notice a shop replacement of the fusible links from about 28 years ago was a fire waiting to happen-12 gauge links on same gauge wire! :wtf: Then just organizing the other smaller harness's & components so I know what was what again. Need to figure out a good juncture box for all the main wires (alternator, blower motor, main lead to dash harnes) or what maxi fuses to use to dump the links.
Good catch on the fusible link!!
 
  • Like
Reactions: MalibuDavyou5
Good catch on the fusible link!!
That harness will be sacrificed for the greater good of redoing the '78-'79 V6 harness to my needs. I have the correct 16 gauge links that will be used if I can't find the correct rating for Maxi fuses to replace those two & to add one in for the blower high speed relay (which will get a link that GM should of put in.)
 
Yeah front I narrowed The front 4 1/2 inches and tucked it back as far as I could was going to bring it up to the grill so I did not have to run the spacer between the bumper and grill but did not like the way it looked that high so I kept the gap spacer in front I will delete it completely in the rear, had to trim rear side of bumper just a little to slide the bracket over and the self tappers were just temporary to test fit it then I drilled and bolted it back like factor

Holy shicoww, that looks great. Please send the finished product pics and put them in a thread. This a great idea for losing some weight and more of a unique look.
 
Status
Not open for further replies.

GBodyForum is a participant in the Amazon Services LLC Associates Program, an affiliate advertising program designed to provide a means for sites to earn advertising fees by advertising and linking to amazon.com. Amazon, the Amazon logo, AmazonSupply, and the AmazonSupply logo are trademarks of Amazon.com, Inc. or its affiliates.

Please support GBodyForum Sponsors

Classic Truck Consoles Dixie Restoration Depot UMI Performance

Contact [email protected] for info on becoming a sponsor