What did you do to your G-Body today 2024

Took the car out to Mineral Beach Friday night since I got off work early, ended up being pretty bare early on but picked up as it cooled off some. On the way home the o2 sensor we just put it took a dump after some testing once I got home so at midnight was swapping that out so I could take it in the morning to the ChevyFest up in Zelie which had a pretty good turnout for the weather being so hot
20240621_175022.jpg
20240621_194456.jpg
20240621_235603.jpg
20240621_235750.jpg
20240622_000309.jpg
20240622_001345.jpg
20240622_094005.jpg
20240622_111533.jpg
 
With some thrashing as soon as I got home, the nose should be ready for primer Friday.
2CE10FC1-364F-4BC9-829A-9D1E14B6754D.jpeg


Shed’s a mess, I’m a mess and there’s a TON of stuff to organize and possibly attempt to sell. I’ll try to have an ad up on site for the stuff I can ship, it’s not strictly G-body specific but there’s some there. After I finished, I noticed a peculiar email waiting in my inbox:

85B58595-34FD-4DC8-BF6F-5FDB28FE1982.jpeg

2nd Day Air as standard! I swear I didn’t have the option to select it when I placed the order in May. Now I’ve got a few dozen things that need ordered because I wasn’t expecting this until next month at the earliest!
:wax:
 
DSCN4220.JPG


DSCN4221.JPG


DSCN4223.JPG


The story so far....................these first three pictures are of My 85 SS's front radiator air intake duct. The exterior color shot has been finished and clear coated as this side of the duct is exposed to road crud that can bounce up and in.


DSCN4224.JPG


It is still minus the other side. That is on the work bench as some primer disclosed the fact that it had more dings and dimples than it was confessing to. It also needed to be recoated with Rust Mort as the first coat did not set correctly when it was done some time back. For that it had to be sanded down to bare metal as much as could be accomplished and then a fresh layer of the Mort applied. it spent its afternoon out in the sun baking away and just got its first coat of anti-rust primer at the very end of the day. Most of that will end up being sanded off by way of exposing whatever dimples I may decided have to be beaten on; just because I can.


DSCN4225.JPG


And this is the top cover or panel or ???? the factory called it that caps off the air duct to complete the enclosure. It has a combination of tabs that fit into slots in the upper face of the rad cradle and gets held the by a couple of bolts. It also acts the mounting surface for that overstuffed poly-urethane bumper cover, like the one in the pictures above that is being stripped for repaint. Mine will have to go that route has well but not tomorrow.
DSCN4228.JPG


DSCN4230.JPG


My new trusty portable floor vise gets converted to a combination of sanding bench and jig for holding the duct cover while I apply multiple coats of the primer to both sides. Temps today hit 82 or better with the humidity low enough that I could shoot multiple coats of primer, get a very fast flash time, and reshoot again. i did end up having to reshoot the cover because the first coats of primer betrayed a crease in the surface that had escaped the touch of my fingers. Not sure how/why except the nitrile gloves I was using may have acted as a barrier to getting a proper feel for the metal surface. Not going to get into the hows and wherefores of using bare hands versus being gloved when handling bare metal. One school says gloves to avoid skin oils causing rust or contamination. The other blithely goes about handing the metal with filthy paws and seems to get smooth panels and no misery so ........................🙄.

Tomorrow may be a day off the paint bench; clinic in the morning and a t-box pan swap in the PM. Supposed to rain so paint and sanding may get deferred for the day.


Nick
 
Post Script

Shut the shop down and had supper. The temps had cooled down to around 80-82 from about 85 so elected to go for a walk so I can tell the sawbones that, yes, I am walking if the question happens to come up. Got back and went back into the shop for another round of sanding! Popped the main door open and got to listen to a free concert from somewhere over the river due to the acoustics of the warehouse wall across the back lane. Not bad and the tunes were my generation. Took the cover almost all the way down to the rust mort layer to make sure that I had sanded it out as flat as possible. Black is not the color to use if you are trying to hide imperfections, but great if you want them to stick out like a Toyota at a cruise night.

Also made a sanding pass on the remaining end plate and got that closer to acceptable. As noted above, did uncover more dings and tweaks than the cover had originally 'fessed up to, so the cover will be going back to my I-beam anvil for some calculated tapping and whacking just to see if I can get some of the damage to succumb to the lure of being flat again. The last tweak in the cover ended up getting the Mapp gas torch treatment followed by some tapping and then a shot of cold water to shrink and set the metal. Only so much can be done with metal that has been tortured the way the panels on the this duct have been but with nothing to pick from in the local yards, getting another would be difficult but not totally impossible provided I had a budget for it. Once metal is formed by design or intent, and then suddenly deformed by accident or stupidity or both, it becomes challenging to get the stamping to remember how it used to be shaped. They almost never come back to be completely the way they used to be, even with the best of tools and fixtures and the cumulative experience of Methusala; and I am no where near that experienced.😀


Nick
 
Last edited:
They almost look like the heavy plastic caps that the hydraulic shops use to cap off new hoses to protect the threads during shipping or for shelf stock.


Nick
 
  • Agree
Reactions: Sweet_Johnny
Took the day off to deal with other problems that ought properly to be related over in the non G-body threads so off i go....................................


Nick
 
With some thrashing as soon as I got home, the nose should be ready for primer Friday.
View attachment 241341

Shed’s a mess, I’m a mess and there’s a TON of stuff to organize and possibly attempt to sell. I’ll try to have an ad up on site for the stuff I can ship, it’s not strictly G-body specific but there’s some there. After I finished, I noticed a peculiar email waiting in my inbox:

View attachment 241342
2nd Day Air as standard! I swear I didn’t have the option to select it when I placed the order in May. Now I’ve got a few dozen things that need ordered because I wasn’t expecting this until next month at the earliest!
:wax:
B7A1F89B-9013-4B7F-B50A-B44A0F78D1FF.jpeg

BB84CED1-601C-43F3-AD99-19541F6330FD.jpeg


CD2931FC-DB36-4C81-9897-746CC3B3D335.gif


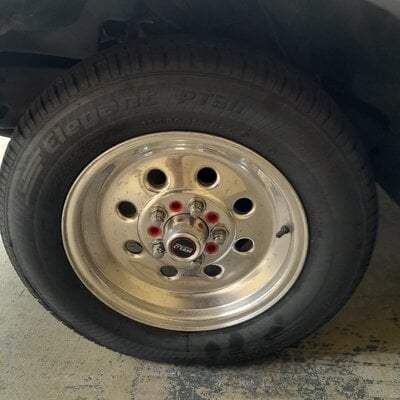
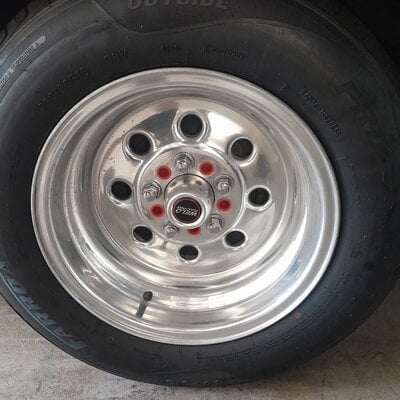
Now for the bad, I received the axles yesterday and realized I made a huge mistake: I ordered 5/8 wheel studs on them. Street wheels don’t fit 5/8 studs, only 14mm at best. Doh!
Thankfully after talking to QP this morning, they say they can fit a second pattern on a 5/8 setup with an access hole, so I’m sending those back to be drilled for a set of knurled/splined 12mm GM studs tomorrow. Best part is the 5/8 studs cover the re-drill cost if I return them, so ill I have to cover is shipping and the 12mm studs that I can actually use! Call it a fail-win
 

GBodyForum is a participant in the Amazon Services LLC Associates Program, an affiliate advertising program designed to provide a means for sites to earn advertising fees by advertising and linking to amazon.com. Amazon, the Amazon logo, AmazonSupply, and the AmazonSupply logo are trademarks of Amazon.com, Inc. or its affiliates.

Please support GBodyForum Sponsors

Classic Truck Consoles Dixie Restoration Depot UMI Performance

Contact [email protected] for info on becoming a sponsor